Creating a Custom Menu
To create a custom menu:
1At the top of the Menu Maintenance page, click Create Custom Menu.
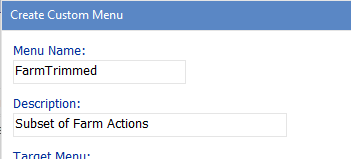
2Complete the Menu Details with a Menu Name and Description.
Note that the Menu Name cannot contain spaces or special characters.
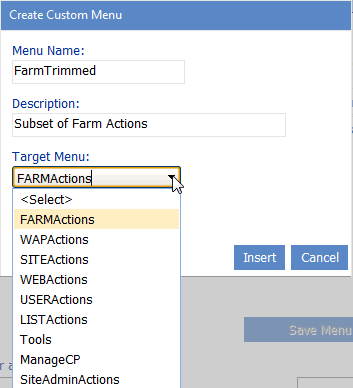
3Select a Target Menu (that is the area of the ControlPoint left navigation pane that you want to customize). Use the information in the following table for guidance.
NOTE: The choice of target menu will determine which ControlPoint operations are available for selection and where they will display in the ControlPoint application interface.
|
If you want to customize the .... |
Select .... |
|---|---|
|
farm level right-click menu |
FARMActions. |
|
Web application level right-click menu |
WAPActions. |
|
site collection level right-click menu |
SITEActions. |
|
site or subsite level right-click menu |
WEBActions. |
|
list level right-click menu |
ListActions. |
|
Actions and Analysis menu items (if used as an alternative to the Manage ControlPoint panel) |
Tools. |
|
site admin menu (primarily for use by business administrators who are accessing ControlPoint from within a SharePoint site) |
SiteAdminActions. |
|
user-level right-click menu |
USERActions. |
|
Manage ControlPoint menu items |
ManageCP. |
IMPORTANT: Once you have saved a new menu, the Target Menu cannot be changed.
4Click [Update].
To add ControlPoint menu items to a custom menu:
NOTE: If you want to add links to SharePoint pages or custom items that do not currently exist in a ControlPoint menu (such as internal or external web sites or web-based applications), follow the procedure for Adding and Updating Custom Items in a Menu.
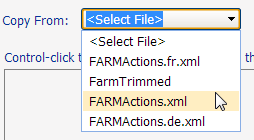
1From the Copy From drop-down, select the menu from which you want to copy items.
Note that this drop-down includes both the "original" menu provided by Quest and any custom menus that have been created for that target.
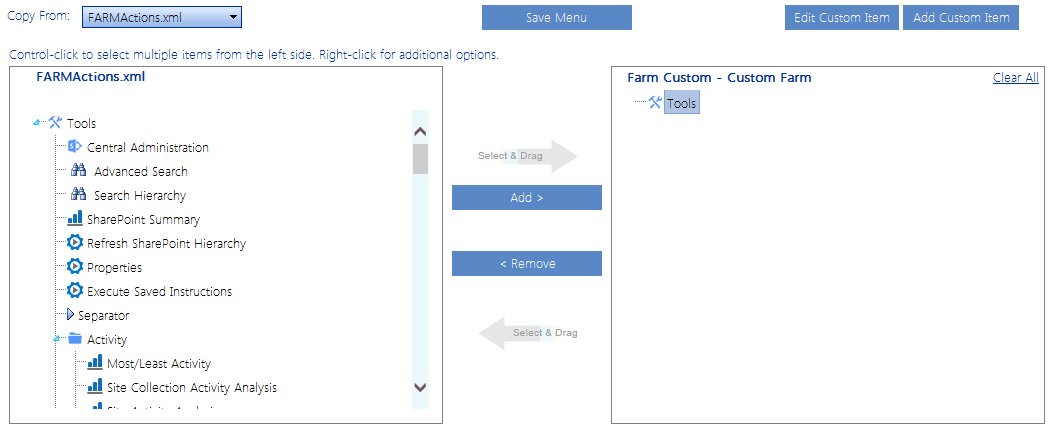
2In the list that displays in the left column, select each item that you want to add. Use the information in the following table for guidance.
|
If you want to ... |
Then ... |
|---|---|
|
select multiple items individually |
hold down the [Ctrl] or [Shift] key and highlight each item you want to add. |
|
immediately add an item and all of its children to the Selected Items column |
highlight the item, then right-click and choose Add Item and All Children. |
|
select an item and its immediate children (for example, a site collection and its root site only) |
highlight the item, then right-click and choose Highlight Immediate Children. (If objects are grouped into a folder, you must first expand the folder.) TIP: You can use this option as a time-saver if you want to add most, but not all of the selected child items. After highlighting the item you can then individually de-select those that you want to exclude. |
3To add the highlighted item(s) to the selection list, either:
§drag and drop the item(s) onto the item below which you want to nest it.
OR
§highlight the item below which you want to nest the new item(s) then click the [Add] button.
To change the placement of items:
1If you want to move multiple items at once, hold down the [Ctrl] or [Shift] key and highlight each item you want to move.
2Drag and drop the item(s) onto the item below which you want to nest it.
To remove items:
1In the right pane, highlight the item(s) you want to remove. (To select multiple items, hold down the [Ctrl] or [Shift] key.
2Do one of the following:
3drag and drop the item(s) to the left pane.
OR
§click the [Remove] button.
§To remove all items in the right pane, click the Clear All link.
To save the custom menu:
When you have finished adding items to the menu, click [Save Menu].
IMPORTANT: If you do not click [Save Menu] and receive a confirmation dialog, any changes you made will be lost when you navigate away from the page.
Now you can manage access to the customized menu.
Adding and Editing Custom Items in a Menu
From the ControlPoint Menu Maintenance or Favorites Maintenance page you can add and update custom items, such as frequently-accessed SharePoint pages, internal or external Web sites, or web-based applications, to a menu.
The procedure for adding an item to a ControlPoint menu is used by:
·ControlPoint Application Administrators who want to add custom items to a custom menuvia the Menu Maintenance page, and
·any administrator who wants to add custom items to his/her Favorites listvia the Favorites Maintenance page.
NOTE: The procedure below uses Favorites menu maintenance for illustration purposes. However, the procedural steps for ControlPoint application menu maintenance are identical.
To add custom item to a menu:
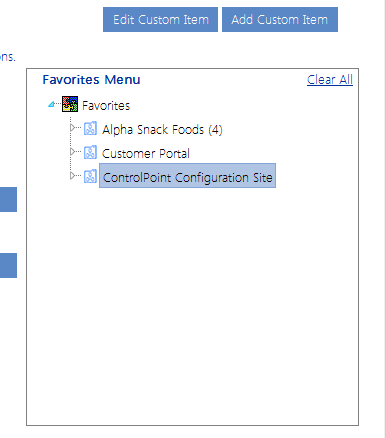
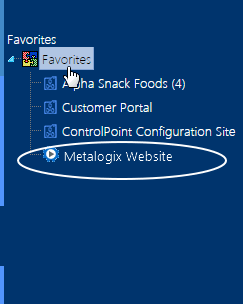
1Highlight the item below which you want to place the new item.
NOTE: Custom actions can be placed below the top node of the menu or below a folder. Custom folders can be placed below the top node of the menu only.
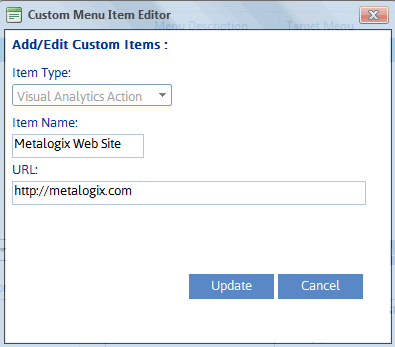
2Click [Add Custom Item]..
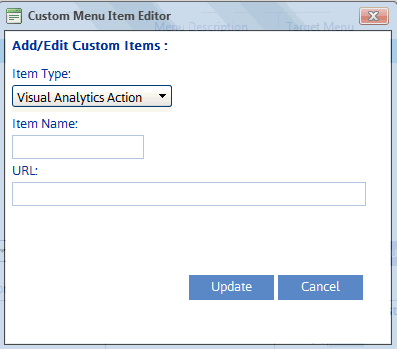
3From the Item Type drop-down, select the option that best characterizes your custom item.
CAUTION: Once a custom item has been saved the Item Type cannot be changed.
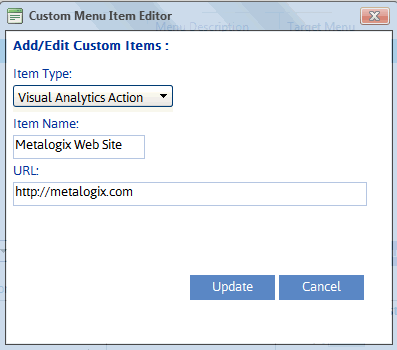
4Enter the Item Name and, unless the item is a folder, the URL.
5Click [Update].
To edit an existing custom item:
1Highlight the item you want to edit.
2Click [Edit Custom Item].
3Modify the Item Name and/or URL as appropriate.
NOTE: For existing items, the Item Type drop-down is disabled.
4Click [Update]
Managing Access to ControlPoint Menus
From the ControlPoint Configuration Site, ControlPoint Application Administrators can manage access to ControlPoint menus (that is, determine which menus will be visible to specific administrators or groups of administrators).
To access the ControlPoint Configuration Site Menus list:
Use the information in the following table to determine the appropriate action to take.
|
If you are starting from ... |
Then ... |
|---|---|
|
the left navigation pane |
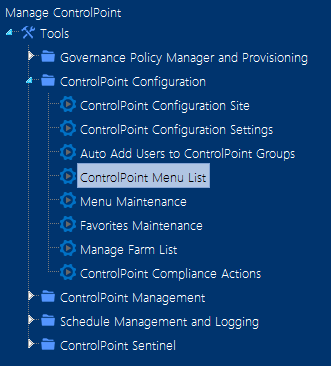
from the Manage ControlPoint panel, choose ControlPoint Configuration > ControlPoint Menu List. |
|
within the ControlPoint Configuration site |
navigate to the Axceler Menus document library. |
|
the ControlPoint Menu Maintenance page |
click the Go to the ControlPoint Menu List link |
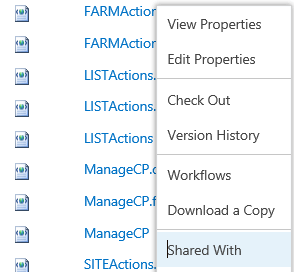
Remember that, by default, all menus inherit users and permissions from the menu document library, which in turn inherits from the ControlPoint Configuration site collection. However, you can assign unique permissions to individual menus. Consult your SharePoint documentation for details on managing user permissions.
REMINDER: If an administrator has permissions for more than one menu with the same target location (for example SharePoint Hierarchy menu - farm level), the menus are "merged" for display in the left navigation pane, with items unique to each menu preserved and duplicate items eliminated. Remember to restrict access to any menus (including Quest-provided original menus) that contain items that you do not want certain users/groups to see.
Editing and Deleting Custom Menus
Once a custom menu has been created you can:
·change the menu's Name and/or Description
·modify the contents of the menu
·edit custom items
·delete the menu from ControlPoint.
To change a menu's Name and or Description:
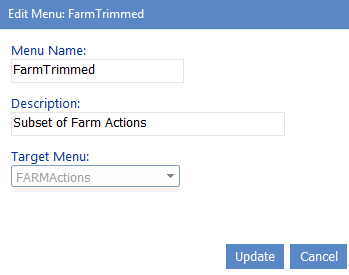
1In the grid at the top of the Menu Maintenance page, click the Edit link (
2Update the Menu Name and/or Description, as necessary.
REMINDERS:
§The Menu Name cannot contain spaces or special characters.
§The Target Menu cannot be changed.
3Click [Update].
To modify the contents of a custom menu:
1In the grid at the top of the Menu Maintenance page, highlight the menu whose contents you want to modify.
2Add and remove items as needed, as described in the topic Creating a Custom Menu.
To edit a custom item in a menu:
1From the selected items list, highlight the custom item that you want to edit.
2Click [Edit Custom Item].
3Update the Item Name and/or URL as described in the topic Adding Custom Items in a Menu.
NOTE: The Item Type cannot be changed.


