This section describes the installation steps for the Content Matrix Consoles.
NOTE: Consoles for all editions of Content Matrix will automatically be installed. However, you will only be able to use the Consoles that are covered by your license.
Content Matrix Consoles can be installed on any computer that meets the minimum hardware and software requirements for each component that is installed, provided that the computer also has access to the source and target environments (for connection purposes). For an on premises installation, the machine must have access to the SharePoint environments but does not require that SharePoint is installed on it directly, and it does not have to be a WFE.
Before running an installation of the Content Matrix Consoles, please see Basic Installation Scenarios to better determine what installation scenario works best for you. This will help you determine the best location for you to install the Content Matrix Console(s).
NOTE: You can also install the Content Matrix Consoles silently, using Command Prompt.
To install the Content Matrix Consoles:
1.Copy the Quest Content Matrix Consoles.exe file to the machine on which you want to install.
2.Close all open applications, including your browser.
3.Double-click Quest Content Matrix Consoles.exe to start the installation process.
NOTE: Because this installer requires an elevated set of permissions to run, if you do not have the required permissions a message will open informing you that elevated permissions are required. To run the installer with these elevated permissions, select the installer file, right-click and select the Run as administrator option.
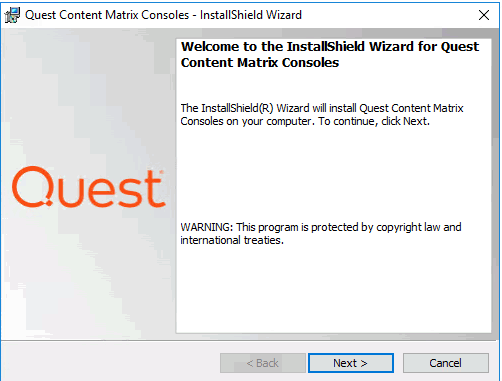
4.Click [Next].
5.Read and accept the License Agreement terms then click [Next].
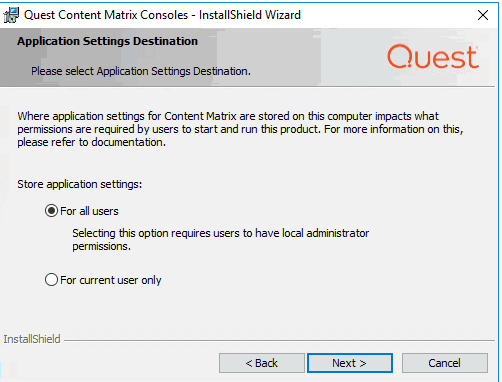
6.Use the information in the following table to determine the appropriate Application Settings Destination option to select.
|
If you want to ... |
Select ... |
|---|---|
|
require all users of the machine to be a local administrator in order to run Content Matrix Console |
For All Users. NOTE: If you select this option: ·program data will be stored in AND ·only the first user who launches Content Matrix for the first time will be required to enter a license key. |
|
allow all users of the machine to run Content Matrix Console without being a local administrator |
For current user only. NOTE: If you select this option, when each user launches Content Matrix for the first time: ·program data will be stored in AND ·each user be required to enter and activate a license key. * If you are upgrading from a version earlier than 9.3 and select this option, program data will automatically be copied from C:\ProgramData\Metalogix to the new file location. |
7.Click [Next].
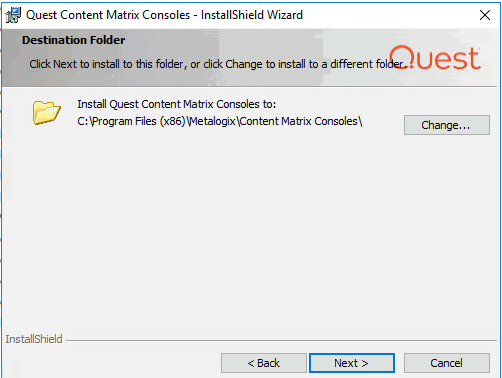
By default the installation Wizard will install all of the selected Content Matrix client applications under C:\Program Files (x86)\Metalogix.
You can, however, click [Change] and select a different directory.
8.Click [Next].
9.Click [Install].
The installation process will run, and Editions of Content Matrix Console will be installed.
10.Click Quit to exit the Installation Wizard.
If you want to use a SharePoint database connection on a machine that does not have SharePoint installed:
The machine must have dependencies for the version of SharePoint you want connect to installed on the machine. After installing Content Matrix, open the Console from the ribbon toolbar, choose Connections > Connect to SharePoint Database. A pop-up will display with a link to a Support Knowledge Base article with instructions for installing the dependencies.
As an alternative to installing Content Matrix Consoles via the UI, you can use Command Prompt to install them silently.
To install Content Matrix Consoles silently using default options:
1.Open a Command Prompt as an Administrator.
2.Switch to the directory where the file Content Matrix Consoles.exe is located.
3.Use the information in the table below to determine the appropriate action to take.
|
If you want to ... |
Then type... |
|---|---|
|
use the default user setting For all users (meaning that the user must be a local administrator for the machine where the Consoles are installed) |
"Content Matrix Consoles.exe" /S /v/qn |
|
change the user setting to For current user only (meaning all users of the machine to run Content Matrix Consoles without being a local administrator) |
Type "Content Matrix Consoles.exe" /S /v/qn /v |
4.Press <Enter>.
This section will walk you through the process of installing the server components (Content Matrix SharePoint WSPs) on a target on premises SharePoint farm.
When installing the Content Matrix WSPs you should note that an IIS Reset will need to be performed when the solution (WSP) file is deployed through the SharePoint farm. This is a requirement of SharePoint, and not of Quest. In most cases this IIS Reset is automatically done as part of the solution deployment. For more general information on this issue, please see the following MicrosoftTechNet article: http://technet.microsoft.com/en-ca/library/cc2v=office.14).aspx#DeployFarmSolutions.
There are a number of methods that can be used to try and mitigate any downtime when deploying a SharePoint farm solution. One of these methods is to schedule the solution deployment for a time period that will have low impact to the environment's users.
Special Note About Content Matrix License Check
Prior to version 8.8, it was a licensing requirement that you install Content Matrix Organizer or License Check to support writing content to an on premises SharePoint farm. As of version 9.0, the Organizer option is no longer available, and you will be required to install License Check only if you have a Content Under Management (CUM)-type license (beginning with the digits 823) that was issued prior to version 8.8. The License Check installer (Quest Content Matrix License Check.exe) is available in the installation zip file.
NOTE: A license beginning with 823 cannot be used for File Share Edition since its reintroduction in version 9.9. If you have this license type and want to use File Share Edition, contact Quest Support to obtain a new license that covers all licensed Editions or a separate license for File Share Edition.
The Metalogix SharePoint Extensions Web Service enables both Read and Write access to remote SharePoint instances. This remote connection accesses the content through the remote SharePoint installations Object Model (OM). The Extensions Web Service can be installed using the Metalogix SharePoint Extensions Web Service Setup.exe file that is included in the installation zip file.
Once the Extensions Web Service is installed on one SharePoint Web Front End (WFE) it will automatically be pushed to any other SharePoint WFEs on the farm as a SharePoint solution file (WSP). When the Web Service has been deployed it can be managed as a SharePoint web solution, and can be accessed through the farms Central Administration page, to administer, disable, or uninstall the Web Service.
The Extensions Web Service component can be installed in any SharePoint on premises environment, and is supported on both 32-bit and 64-bit servers.
The Extensions Web Service helps to enable some migrations features through the remote access to the SharePoint OM, so it is recommended to have them deployed if possible.
After installation, the Web Service will run under the app pool user account. This means that any user running a migration with Content Matrix will only need to have general access to the content that is being migrated, in the SharePoint UI.