The File Manager has the following columns in its view:
A small icon indicating the file type
File name and extension
File size
Last modification time
When hovering over a file or folder in the currently selected drive, a tooltip will be displayed containing the following information:
File name and extension
File size
File attributes (i.e. read-only, system, etc.)
File creation time
Last modification time
Last time the file/folder was accessed
Indicates what actions the user can perform on the object (i.e. read, write, change, etc.)
The owner of the file/folder
The Go field accepts a path name.
Enter a directory (for example C:\Windows\System32\Drivers) and click on the Go button. This will immediately take you to the requested location, without having to click your way there. This can be especially helpful over slow connections.
Clicking on the header fields will change the sorting order of the file list to the relevant column.
For example, to sort files by modification time rather than name, simply click on the header field for that column. To sort in descending order, click the header field of the currently active sorting field again.
When you click on User Manager under the Computer Management object you will be able to access ExpertAssist’s full-blown User Manager. User Manager supports all the features of Windows' built-in User Manager including user and group maintenance.
Figure 9: The User Manager window.

Click Add user on the Users tab to add a new local user to the computer.
Click on an existing User name to modify the account settings.
On the Groups tab, click Add group to add a new local group or click on an existing group to manage the group settings.
Figure 10: The Add User window.
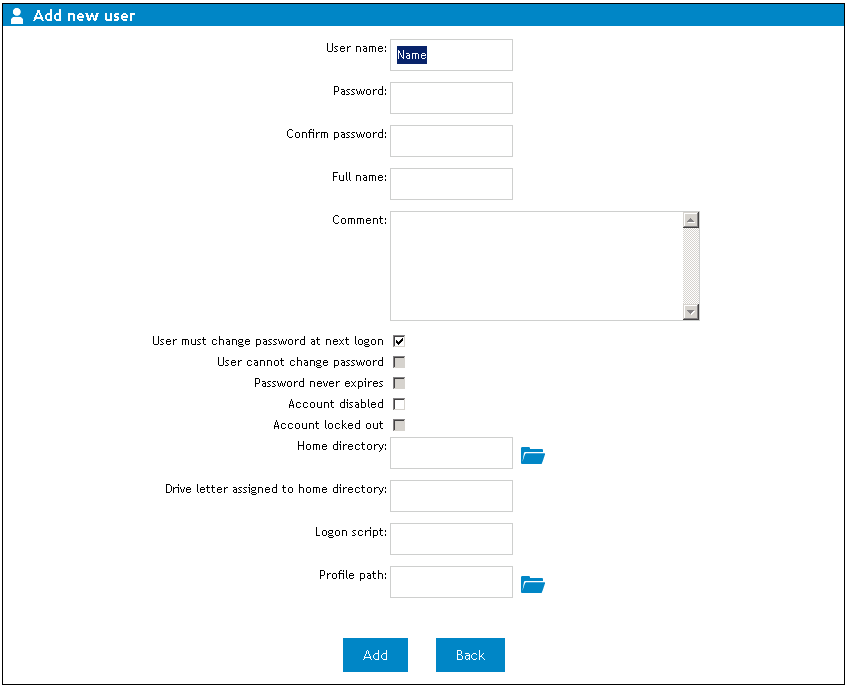
Enter the new user account name.
Enter the user account password.
Type the password again to confirm it.
Enter the user's display name.
Enter any text to describe the user account.
Select this box to force the user to reset the password at the next logon.
Select this box to disallow the password to be changed.
Select this box to enable the password to never expire.
Select this box to disable the selected user account.
Read-only setting that specifies the user account is locked out. This user may not log on to the network.
Specify a shared network folder as the home directory.
Specify the network drive letter to which the home directory will be mapped to.
Enter the name of the logon script.
Enter the path to the mandatory or roaming user profile.
The Manage User dialog presents the same configuration settings as the Add User dialog. The Manage User dialog also presents several different user account statuses—Last logon, Last logoff, Account expires, Password last changed, Bad password count and Number of successful logons.
Figure 11: The Manage User dialog.
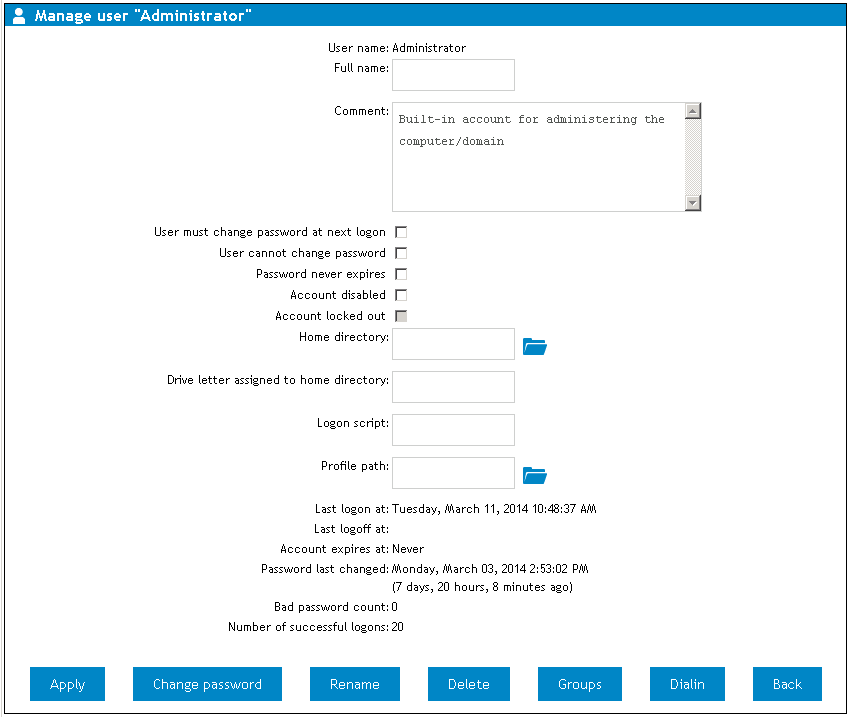
The date and time of the last time the user logged on to the computer.
The date and time of the last time the user logged off to the computer.
The date and time the user account is set to expire.
The date and time of the last time the user password was changed.
A count representing the number of times a bad password was entered during logon.
A count representing the number of times a successful logon has occurred.
Save all changes made to the user account.
Modify the current password.
Change the current user name.
Delete the user account.
View the local groups the user is a member of.
Go back to the User Manager page.
Figure 12: The Add New Global Group dialog.

Enter the name of the new group.
Enter a group description.
The Manage local group dialog displays Group Members and Non-Group Members.
A group can also be renamed or deleted here.
If you select Event Viewer under the Computer Management object, you can view the NT logs of the remote machine. This feature is very much like Windows Event Viewer snap-in.
(For Windows 7 and above operating systems) The Application and Services Logs are also available on the page. You will see a listing of log entries on your screen.
Click on an entry in the list to display its details.
Click the Export button to download a CSV file containing a table of the currently shown events.
You can choose to clear the contents of the log file by pressing the Delete button in the toolbar.
If you specify a filename, the event log will be backed up before being erased.
You can also have the ExpertAssist send email alerts to a specified email address when log entries matching a given criteria are entered into any of the event logs. For more information on this feature and its uses, select the Scheduling & Alerts object in the navigation pane. See Email Alerts.
When you click on Services under the Computer Management object you will see a list of services running on the remote machine. The Services page displays the names and statuses of all the services installed on the remote machine.
In the list of objects, the status field shows Started, Stopped, etc. ExpertAssist looks through the list of services, and if it finds one that is set to start automatically but is not running, current service status is colored in red. This alerts you to the fact that the service should be running, but isn't.
Click the Export button to download a CSV file containing the list of all the services available on the remote computer containing services names, statuses, startup types and description.
To view and/or configure a service:
