Several ExpertAssist functionalities, such as Remote Control, File Transfer, and Performance Viewer, require that you have Java Runtime Environment (JRE) installed on the client computer where you are managing the remote computer from. If you have logged into ExpertAssist using one of the three available authentication options, and you do not have JRE installed on your local computer, you will be prompted by your browser right before you will see the ExpertAssist user interface.
ExpertAssist requires that you have at least JRE version 1.5.0_5 installed on the local computer to work with applets.
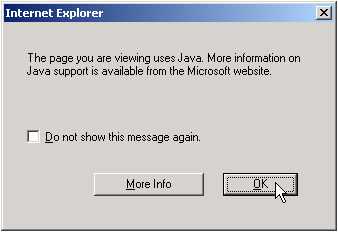
Figure 2: The browser prompts for Java update before launching EA.

Click OK to close the message box and let the browser to show you the ExpertAssist user interface.
In the topmost frame on the user interface you will see that the Performance Viewer applet is not working and ExpertAssist shows the “Java is not installed” message.
Click on the download link within the frame and ExpertAssist will automatically open the new browser window or tab and redirect you to the JRE download page.
If you are running your browser on a server with Windows Server 2003 or above with Internet Explorer Enhanced Security Configuration (IEESC) mode enabled, please make sure to add the web sites to the Trusted Sites zone when prompted by browser. This behavior is by browser’s design.
You can eliminate these browser web site blocking prompts and difficulties with downloading the JRE by disabling the IEESC on your local operating system.
Download and install the JRE on your local computer. Once installed, Java runtime will enable ExpertAssist to allow you use its applets.
If the automatic installation provided by site does not work for you, either use relaxed browser security settings for the JRE download site, or choose the manual download option.
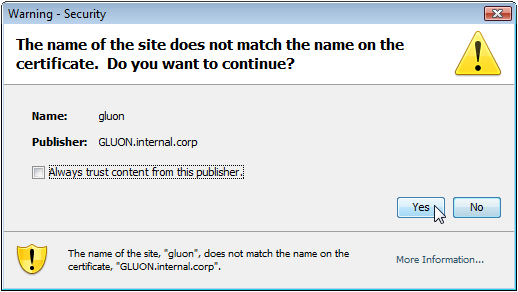
If prompted by a Java security warning, accept the warning by clicking Yes.
Figure 3: Java security warning.

This warning is normal since ExpertAssist is using a self-signed security certificate, which typically gets automatically issued to the DNS name of the remote computer. Thus, if you are connecting to the remote computer by using the IP address or the NetBIOS name in the URL, JRE will locate the mismatch between the “issued to” string in the client certificate and the computer name in the URL and a warn you about this. In the figure above you may see that the JRE warns the user accessing ExpertAssist by using the https://gluon:port/ntlm URL in the browser since the certificate has been issued to gluon.internal.corp. In the example above, you could avoid having the JRE warning message by accessing ExpertAssist using the DNS name of the remote computer in the URL https://gluon.internal.corp:port/ntlm.
You can bypass the login screen entirely when logging into EA by using one of the following methods.
To force an NTLM login:
Append /ntlm/ to the URL with which you access the ExpertAssist.
Example,
The URL http://MAILSERVER:2000 would become http://MAILSERVER:2000/ntlm/.
|
|
Note: Be careful not to forget the trailing slash! |
To bypass the menu system and access certain parts of ExpertAssist with NTLM login:
Use the following URL examples for guidance:
To force a normal login (with user name and password credentials):
Specify a username and password with which you access the Remote Control host right in the URL.
Example,
The URL http://MAILSERVER:2000 would become http://MAILSERVER:2000/login:username:password:domain/.
|
|
Note: Be careful not to forget the trailing slash! |
The domain is optional. If omitted, an attempt will be made to authenticate on the computer on which it’s running and the domain to which it belongs.
Here are some URLs as an example:
Most corporations today employ certain security measures to protect their computer networks from hostile intrusion. One of the common measures includes creating a firewall. A firewall is a system designed to prevent unauthorized access to a private (internal) network. Firewalls can be implemented either as hardware or software, or a combination of the two.
The most common use of a firewall is to prevent unauthorized intrusion from Internet users attempting to access a private network or Intranet. A firewall examines all traffic entering or leaving the internal network/Intranet, ensuring that traffic meets security criteria established by the Network Administrator.
ExpertAssist can be configured to work with a computer protected by a firewall. This requires mapping an external, incoming port on the firewall to the internal IP and port on the computer running the ExpertAssist host.
From outside the LAN, gain access to the computer running the ExpertAssist host by entering the router’s IP address and the port to which the desired machine is mapped.
Example:
Router:
External IP address: 111.111.111.111
ExpertAssist host:
IP address: 192.168.0.10, Port: 2000
(port 2000 is the default but this can also be changed)
Map a firewall port to the Computer. In this case, pick a port on the router (say, 5200) and map it to 192.168.0.10:2000.
The procedure for mapping ports from routers to computers is router-specific. Usually the router will have a web-based interface that allows configuration and maintenance. Sometimes router companies refer to this action as Port Forwarding or Port Mapping.
Access the ExpertAssist Host through the firewall
Having done the above, fully access the ExpertAssist host with the URL http://111.111.111.111:5200 - that is the firewall’s external IP, followed by the port mapped to the ExpertAssist host.
The user interface is designed to make using the ExpertAssist quick and easy to use. For details on each section follow the links below.