The uploading files into SharePoint using a CSV spreadsheet option is designed to enhance and expand SharePoints ability to import files located in Windows or other operating systems, by utilizing a spreadsheet that contains accompanying metadata. The files will be imported into SharePoint and tagged with the metadata associated to it from this spreadsheet. Here are the basic guidelines for using the Upload Content Using CSV feature inside Essentials products.
1.Start by identifying the files and folders that you want to import into SharePoint. There are two ways to do this:
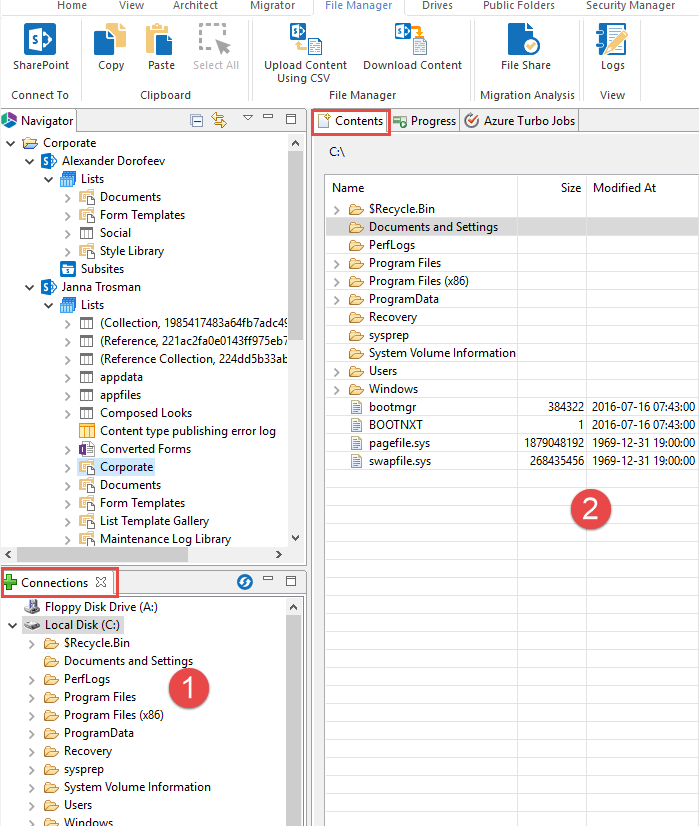
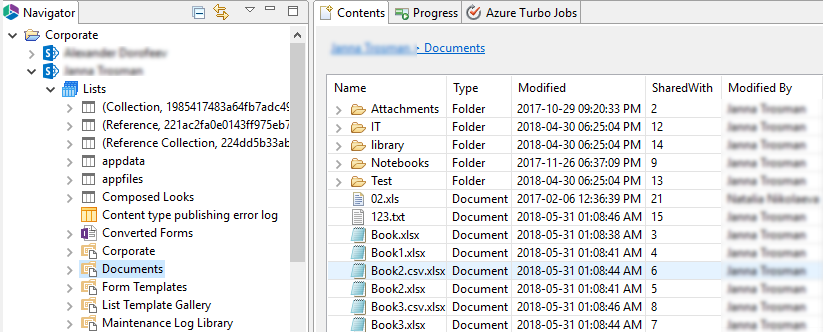
·You can expand and navigate through the Connections (1) area in the product. If you double click on a folder or drive, the contents will be displayed in the Contents (2) area. You may drag-and-drop or copy/paste from Connections or Contents areas directly to the destination.
·Alternatively, Essentials provides the same capabilities directly from Windows Explorer.
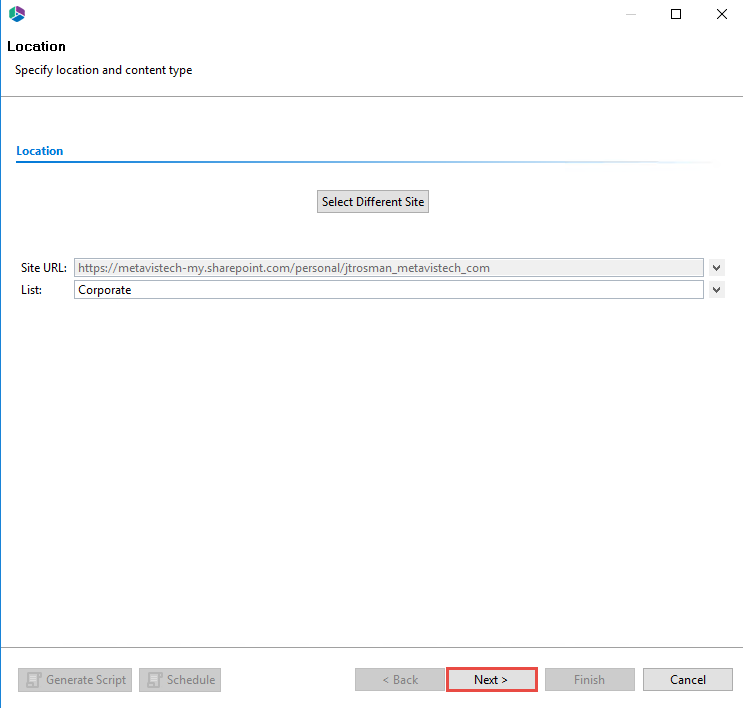
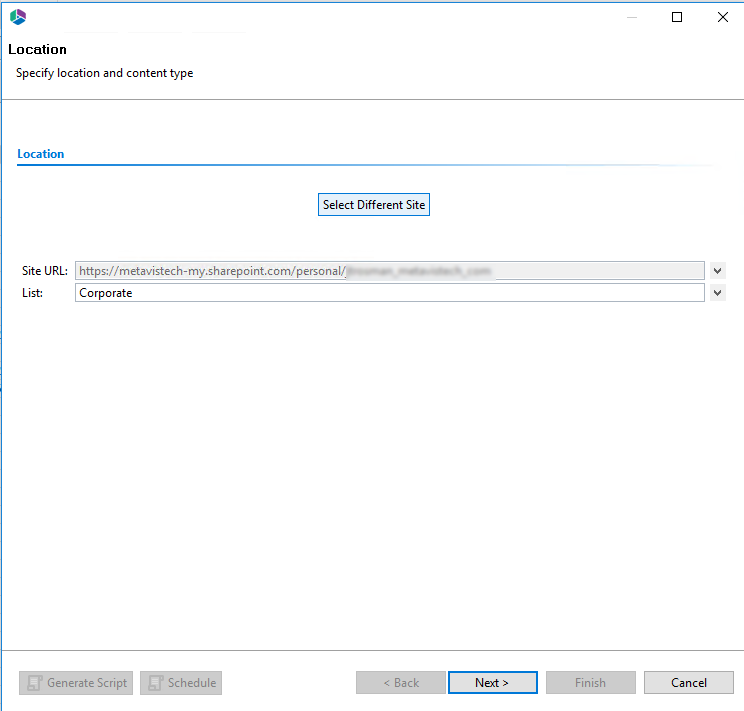
2.After you have selected the content and dragged/copied it to your SharePoint destination, a familiar wizard will be displayed. This is the same wizard that is used to copy SharePoint content from one place to another. The first window will confirm the destination you drag and dropped the content to. Click Next.
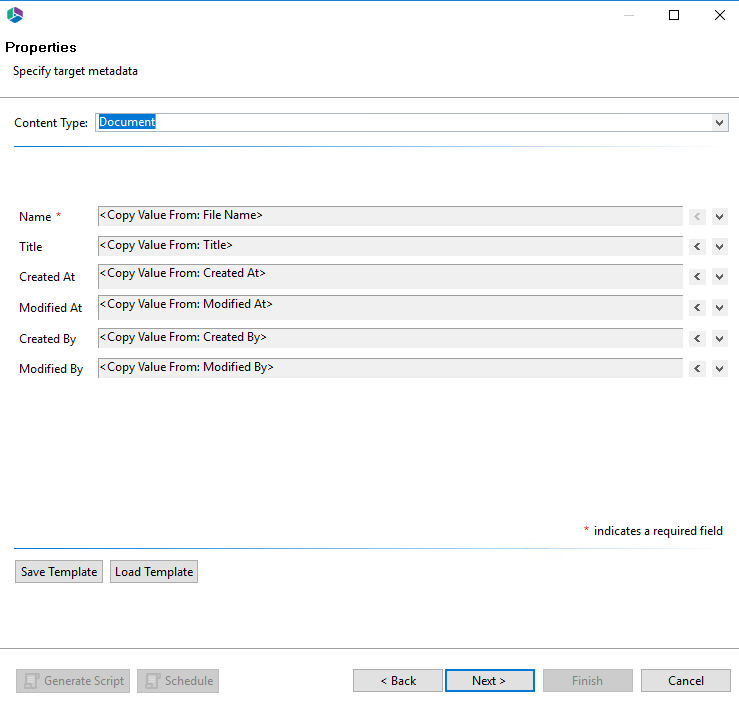
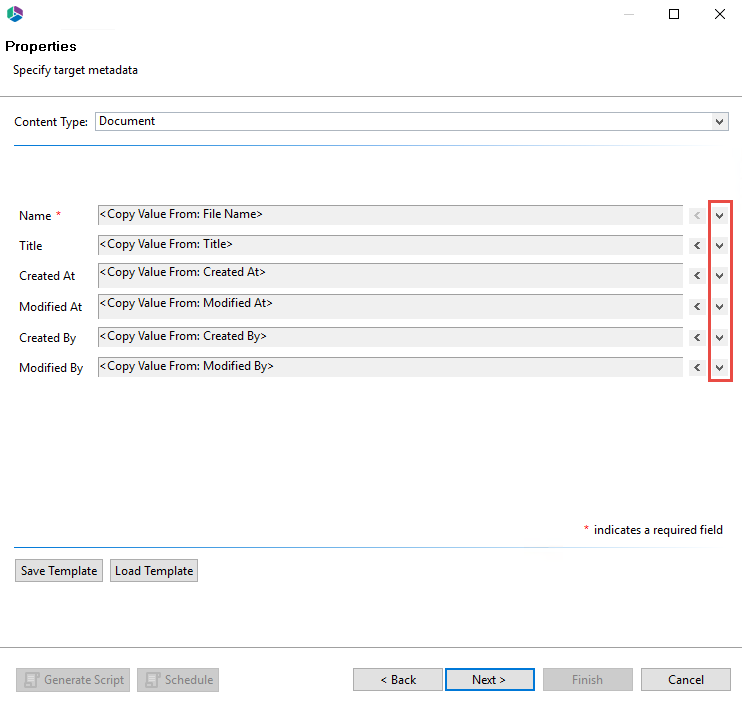
3.The second window will give you the ability to apply metadata values. It is a good idea to take advantage of this feature and apply as many metadata values as possible since all the data is validated against SharePoint. There are many capabilities for intelligent and auto tagging available including mapping to NTFS values such as folder names, file names, owners, etc.; or to select values directly from SharePoint managed metadata, choice and lookup lists. Once you have set all your metadata preferences, click Next.
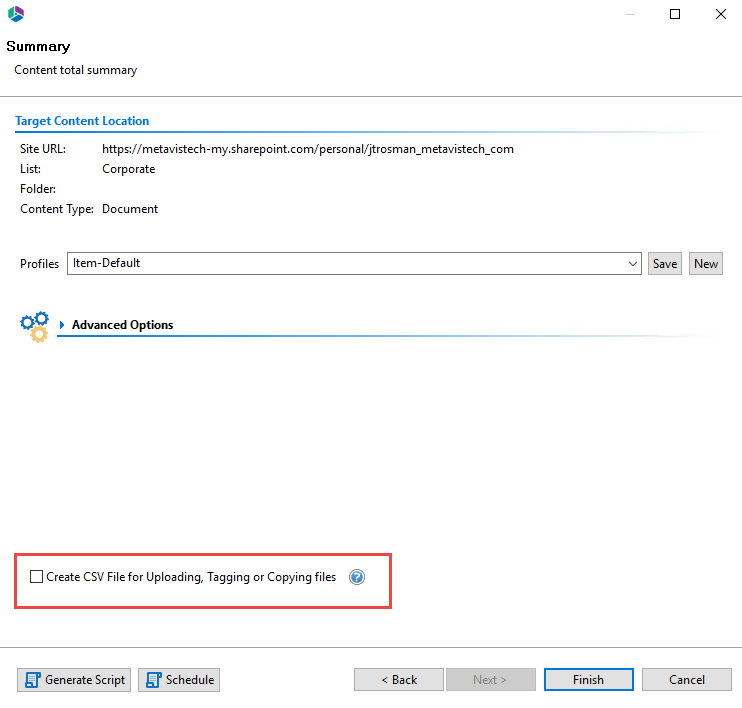
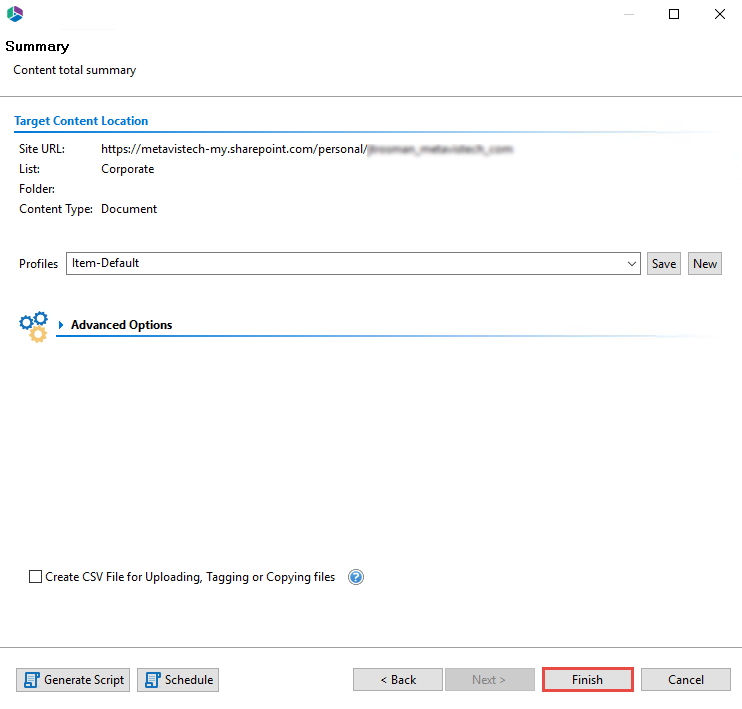
4.The final screen of the wizard has a check box towards the bottom of the page. Selecting the Create CSV File for uploading files option will generate a comma separated values file compatible with Excel or any text editing software.
5.Although the file content may vary based on the selected metadata, the structure of the CSV spreadsheet will remain consistent. The CSV file will consist of the following columns:
|
Column Name |
Description |
|---|---|
|
Source File |
Identifies the physical path to the file that will be uploaded |
|
Target SharePoint Site |
Identifies the target site for the file listed in the source file column. The field is left blank by default but may be specified to upload content into different sites and lists using the same CSV file. In order to take advantage of this feature the CSV file must be uploaded on a site not a list level. |
|
Target SharePoint List |
Identifies the target list for the import |
|
SharePoint File Name |
Identifies the SharePoint item name that will be used for the import ( "/" is used to identify folders) |
|
Content Type |
Identifies the SharePoint content type that will be used for the import. This content type should already exist within the target SharePoint list and must be spelled exactly the same way to avoid errors |
|
Custom Fields |
Any custom fields would be listed following the content type. These fields must already exist within the target SharePoint list (and content Type). The values entered here must also pass any SharePoint validation or restrictions for the corresponding field. |
|
Created At |
Identifies the content creation date which is extracted from the file system. If left blank the value will be set to the current date and time. |
|
CSV ID Col |
This is a reserved field utilized for incremental copy functionality. Do not enter anything into this field. |
|
Modified At |
Identifies the last content modification date which is extracted from the file system. If left blank the value will be set to the current date and time |
|
Created By |
Identifies the user who created the content. If left blank the value will be set to the user currently logged into SharePoint |
|
Modified By |
Identifies the user who last modified the content. If left blank the value will be set to the user currently logged into SharePoint. |
|
Mark Version |
For versioned libraries, identifies the version level for the item being imported ("Major" or "Minor"). If a quasi-versioning system was used in the file system, this field along with the SharePoint File Name can be used to recreate the versions in SharePoint. In order to implement this functionality, use the same file name in the SharePoint File Name field and then specify the appropriate version level in this field. If left blank, the default version level will be used during import. |
|
Version Comment |
Specifies the comment that will be used when importing items |
|
|
NOTE: The layout must not be changed, otherwise the imported file will not be recognized. However, the content may be edited to your preferences. Please remember that any values that are modified or edited must be valid to SharePoint, otherwise they will be ignored or an error will be generated. |
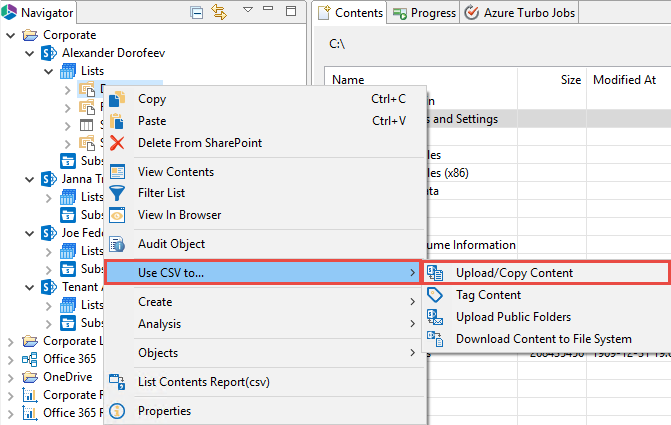
6. Identify the library or folder destination for your files, and upload content using CSV by doing one of the following:
·Select Upload Content Using CSV from the ribbon in the File Manager section.
·right-click and select "Use CSV to..." and then select "Upload/Copy Content".
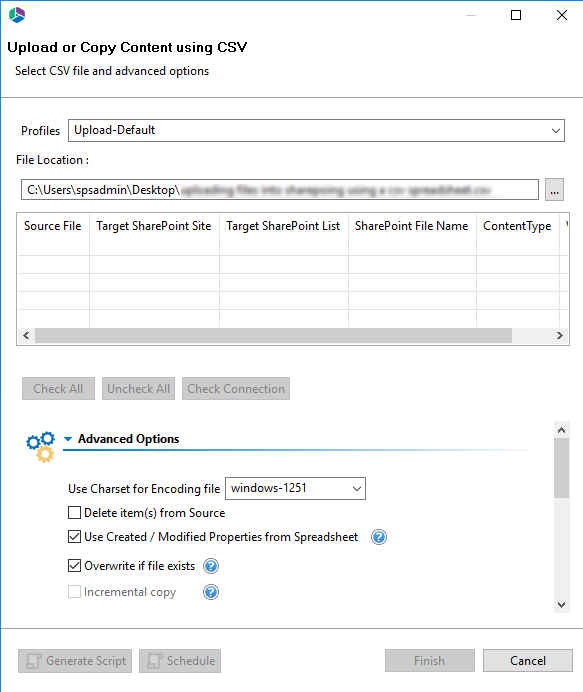
7.Next the Upload or Copy Content using CSV screen will be generated. Enter the location of your .csv file or .bck file.
|
|
NOTE: The .bck files are automatically created by the application when downloading the entire site and sub-sites (see Downloading Content from SharePoint for more information). |
8.You may check individual items or the Check All button at the bottom to select everything. In addition if you are using a custom character set select it in the provided field.
9.To start the import, just press the Finish button.
The option is designed to enhance and expand SharePoints ability to import files located in Windows or other operating systems. There are several advantages to using Essentials to do this operation.
·You can upload, tag and check-in content in one step and for multiple items
·You may reuse existing file system (NTFS) attributes to tag the content.
·Users often implement a folder based hierarchy inside the file system to categorize content. These folder names can be automatically extracted during upload and used as metadata in SharePoint.
·There are no limitations to how many files you can upload at one time.
·NTFS file permissions are also supported during the copy process (see Copying NTFS Permissions section for more information).
|
|
NOTE: NTFS Permission copy is not available to Power User products. |
The process of importing files is very similar to the process of copying items within SharePoint, with one major exception. Rather than selecting the source content from a SharePoint list, it is selected from within the Connections pane or from Windows Explorer. The remainder of the process is described in the Copy/Move (and Tag) SharePoint Content section. Please refer to these sections for additional information.
|
|
NOTE: When importing content from the file system, File Manager can use file system attributes such as created and modified dates and file owner to tag the imported content. These attributes are shown under the Available Columns list in the Field Value Selection Screen and include relative folder names. See Mapping Folders to SharePoint Fields for more information. |
Users who save their files to files system often use folder structure to describe the contents contained there. In SharePoint or OneDrive for Business these folder names can be repurposed to tag the content during the upload process (and optionally remove the folder structure all together).
To do this follow these steps:
1.Initiate the upload process by copying your local files into a SharePoint Library. Select Next and proceed to the Properties screen.
2.On the Properties Screen select the down arrow button next to the field that you wish to tag with folder data.
3.This will bring up the Field Value Selection Screen. On this screen, in the Available Columns section, you will find fields named Folder 1 in the File Path, Folder 2 in the File Path and so on. These are relative to the root of the files structure you are uploading.
|
|
NOTE: You can also enable Data Analysis Mode from the Contents tab menu in order to see the folder names in the Available Values section of the screen. |
4.Select the relative folder that you want to map to your current field and press the Select button.
5.Complete the wizard and press Finish to start the upload.
|
|
NOTE: You may also remove the folder structure during upload. This option is available in the copy items summary screen under Advanced Options. |
The download content from SharePoint option is intended to allow the user to extract content out of SharePoint into a local storage, attached storage, or file share. There are a variety of situations where this feature is helpful. Some examples include:
·Archive or off-board content from SharePoint.
·Move content from one SharePoint to another that is not accessible through a network.
·Ability to download and then reload content into a re-built environment.
Do the following in order to download content from SharePoint:
1.Select the content you want to download. You can select specific items in the content pane, or specific lists/sites in the Navigation pane.
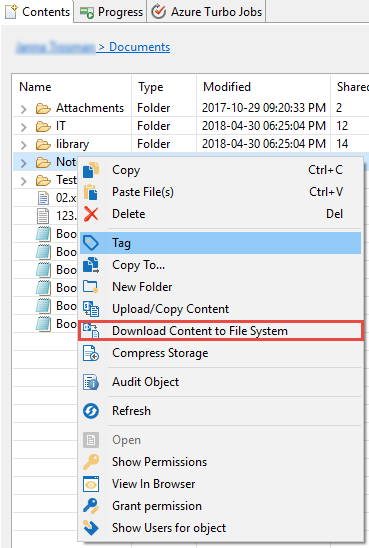
2.Once you have selected the content, select the Download Content option. This option is available in:
·the ribbon.
·right clicking on the object you want to download and selecting "Download Content to File System" from the right click menu.
3.This will open the item or site download wizard, depending on the object you selected for download.
|
|
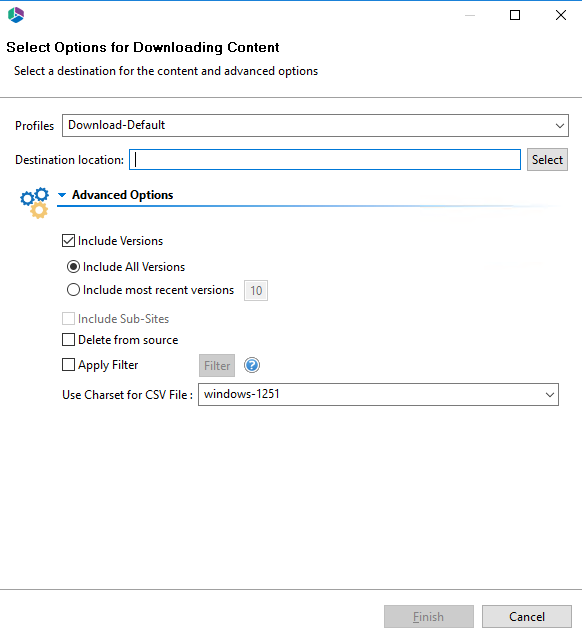
NOTE: An option to include sub-sites is also available but please note that this may result in a lengthy download process |
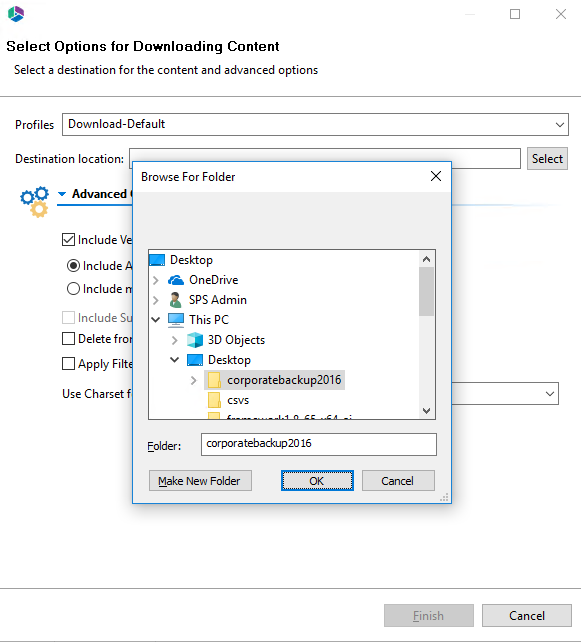
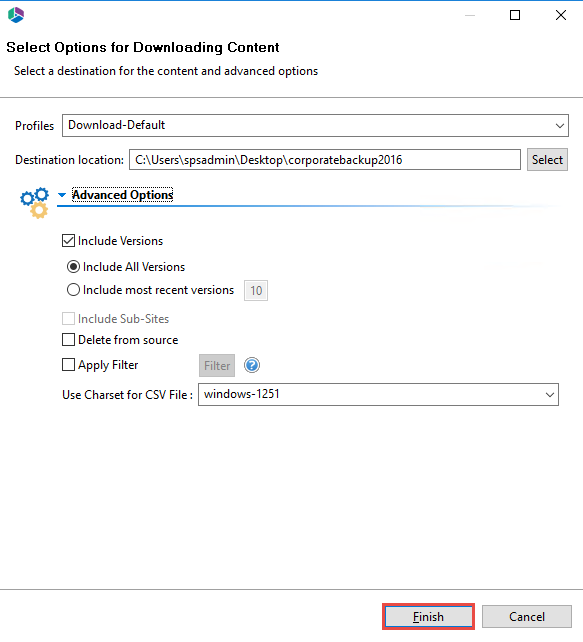
4.Select a location to store your download and appropriate options from the Advanced Options section.
5.Press Finish to begin the download.