Toad Data Modeler offers you two options to merge your models:
- Simple Model Merge - allows you to merge physical models quickly due to skipping several settings dialogs and Model Comparison. The target model will always be overwritten.
-
Simple Model Merge is available in Model Menu | Simple Merge.
-
- Model Merge in the Model Actions - allows you to see differences between two models, select particular items to merge and merge the models either to already existing model or to a new model.
- Example: You work with several models. Use Model Merge to compare the models and merge them either to an existing model, or to a new model altogether.
How to Merge Models
Model Merge can be found in Model Actions (Window Menu | Model Actions), or in Model Menu | Merge Models | Run.
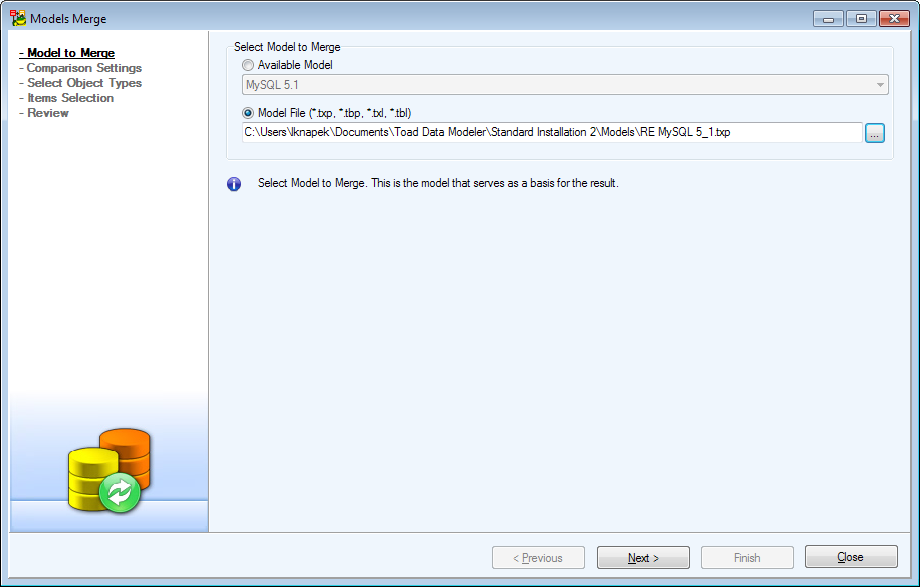
- In the first step select either an opened model or a model from a file.
|
|
note: The selected model has to be of the same database platform and version. You cannot compare DB2 10.5 and MySQL 5.1 models, or MySQL 5.1 and MySQL 5.5 models. |
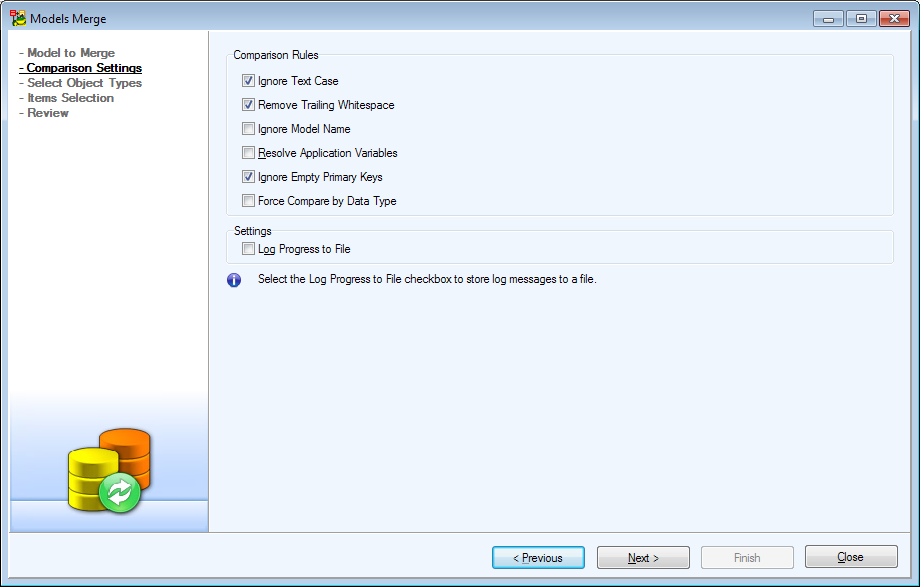
- The next dialog presents you with a couple of setting related to Model Comparison. When you're done editing the options, click on Next.
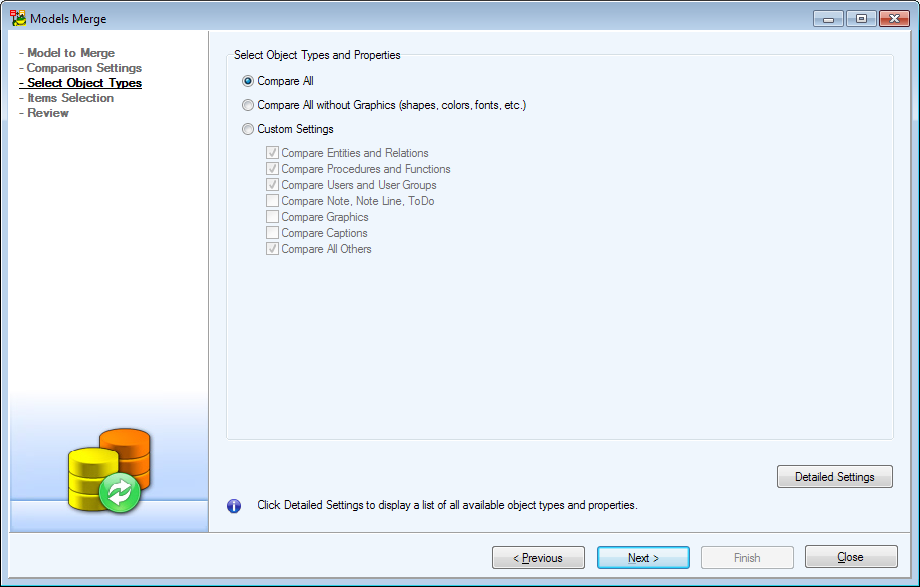
- Now you have to choose what types of objects will be included in the comparison. If you wish to select objects in more detail, click on Detailed Settings.
- Entities and attributes can be easily mapped here in the last step
- Double-click the button (
) to map an entity or attribute to a target entity or attribute
- The Description column displays the current state of the object. Objects can be unmapped
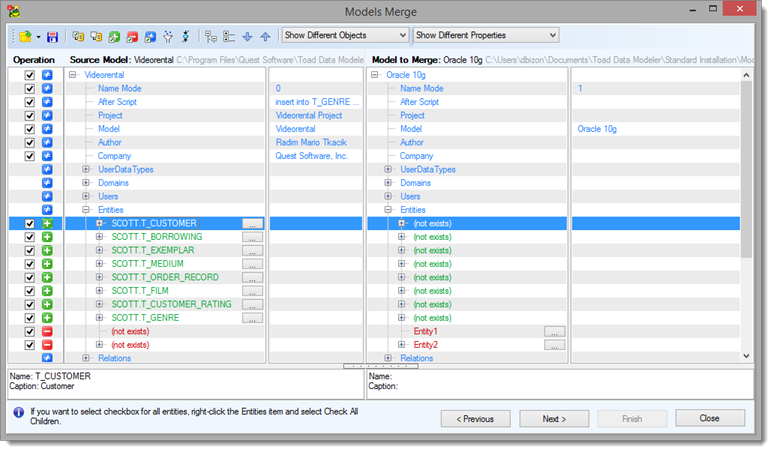
- You are now presented with Compare Tree dialog displaying all differences between the two given models. Check or uncheck items to select what objects will be merged.
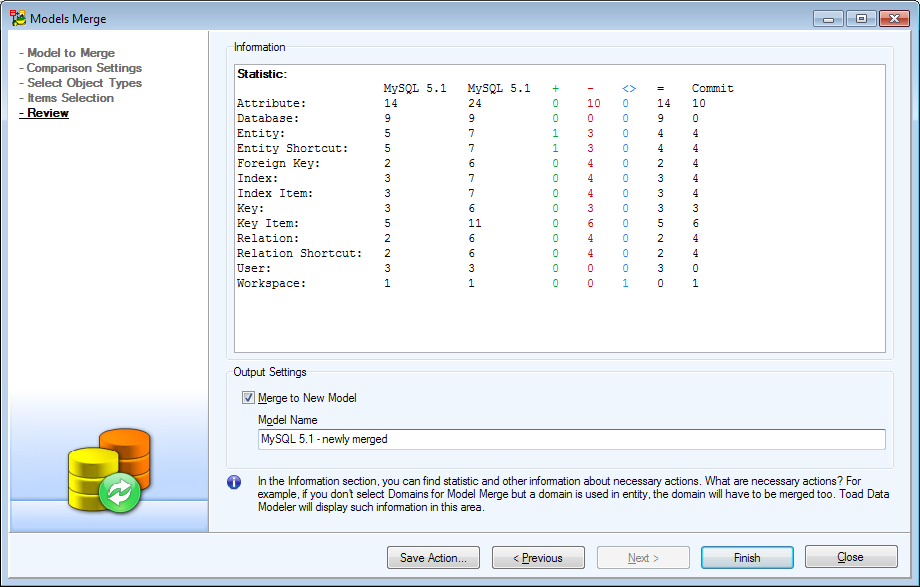
- Check the Review screen which show you the changes for each object type. If you want to merge models into a new model, check Merge to New Model and enter its name.
|
|
TIP:If you plan to do this action again in the future, you might want to click the Save Action button to save this Action Definition. See Model Actions for more information. |
Compare Tree Overview
| Option | Icon | Description |
|---|---|---|
| Import Selection |  |
Import selection from a saved file. |
| Export Selection |  |
Save selection to a file. |
| Verify |  |
Runs the verification process. The verification might return a warning |
| Check All |  |
Checks all items. |
| Uncheck All |  |
Unchecks all items. |
| Check All to Add |  |
Checks all items that exist in the Source model, but not in the Target model (CREATE). |
| Check All to Remove |  |
Checks all items that do not exist in the Source model, but exist in the Target model (DROP). |
| Check All to Modify |  |
Checks all items that exist in both models and are different (ALTER). |
| Wildcard Filter |  |
Opens the Wildcard Dialog where you can define settings for bulk selection/deselection of the Action box of the items listed on page Select Items. |
| Refresh Necessitated Items |  |
Some objects are related together (e.g. entity and domain, entity and relationship). In case you uncheck an object or property in Select Object Types step and a related object or property is selected, the unchecked object or property will be automatically selected too. E.g. You uncheck a domain in Select Object Types but you keep an attribute of the domain type checked for conversion. In the next screen the domain will be selected for conversion (and highlighted in gray). This is because of its relationship with the attribute, which cannot exist without the domain. If you uncheck the attribute, the domain will still be checked for conversion. This is where you use this button. It inspects all checked objects and removes the domain highlighted in gray since the attribute is no longer checked. That means the domain is no longer necessary, since it has no relationships with currently checked objects and you unchecked it in Select Object Types step. |
| Display options for objects |  |
Compare Tree will show only:
|
| Display options for properties |  |
Compare Tree will show only:
|
|
Source |
- | The updated or modified model. |
| Target | - | The model for which you want to generate change script. |
| Operation | - |
Check this checkbox to generate change script for the difference. Uncheck this checkbox to not generate change script for the difference. Default selection: Default selection of the Action checkboxes depend on your settings on page Settings in the Options for Default Selection of Items area. If you select all the options in this area, the Action checkboxes will be selected for all changes (CREATE, DROP and ALTER) by default. |
Compare Tree Icons

Difference between original model and Target model.

This object exists in original model but does not exist in Target model.

This object is missing in original model but exists in Target model.
Right-click menu
Right-click any item to display the following menu:
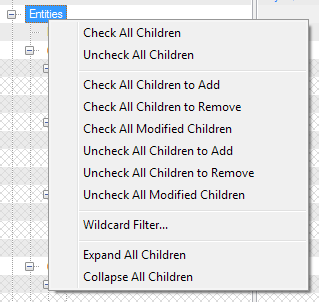
| Option | Description |
|---|---|
| Check All Children | Checks the Operation checkbox of all children items. |
| Uncheck All Children | Unchecks the Operation checkbox of all children items. |
| Check All Children to Add |
Checks the Operation checkbox of children items that exist in Source model but not in the Target model ( |
| Check All Children to Remove | Checks the Operation checkbox of children items that are missing Source model and exist in Target model ( items) to generate the DROP statement. items) to generate the DROP statement. |
| Check All Modified Children | Checks the Operation checkbox of children items where properties differ ( items) to generate the ALTER statement. items) to generate the ALTER statement. |
| Uncheck All Children to Add | Unchecks the Operation checkbox of children items that exist in Source model but not in the Target model ( items) to not generate the CREATE statement. items) to not generate the CREATE statement. |
| Uncheck All Children to Remove | Unchecks the Operation checkbox of children items that are missing Source model and exist in Target model ( items) to not generate the DROP statement. items) to not generate the DROP statement. |
| Uncheck All Modified Children | Unchecks the Operation checkbox of children items where properties differ ( items) to not generate Change Script for this change. items) to not generate Change Script for this change. |
| Wildcard Filter | Opens the Wildcard Dialog where you can define settings for bulk selection/deselection of the Operation box of the items listed on page Select Items. |
| Expand All Children | Expands all sub-items of the selected item. |
| Collapse All Children | Collapses all sub-items of the selected item. |


 . Details are available in Verification Log.