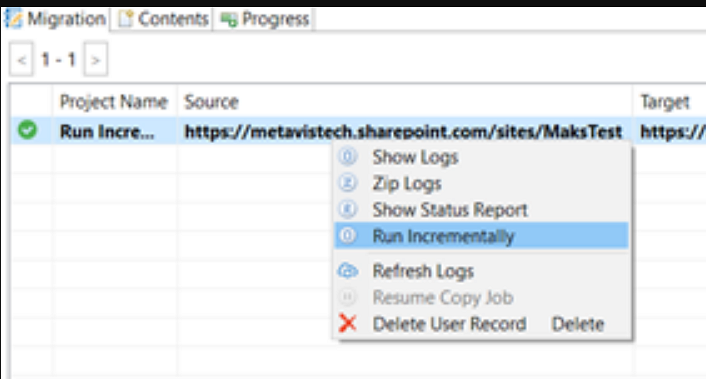
Once a full migration has been run, an incremental or delta copy can be run without the need to create a new project.
IMPORTANT: By default, Azure is enabled as a recommended migration method, although it can be changed in the Profile Manager. However, it is not recommended that you use a different migration method for incremental copy. For example, if CSOM was used for the full migration it should also be used for the incremental copy.
To run an incremental/delta copy on an existing job:
1.In the Migrator tab, select the job for which you want to run an incremental/delta copy.
2.Right-click and choose Run Incrementally.
3.In the Run Incrementally dialog, select the appropriate option. Use the information in the following table for guidance.
|
If you want to .. |
Then select ... | ||
|---|---|---|---|
|
copy content that has changed on the source using the Last Start Date as a filter |
Incrementally from Last Start Date. | ||
|
have Essentials compare source and target content and replace older content on the target with newer content on the source |
Run Delta.
|
Essentials for Office 365 Migrator is intended for both large scale migration activities including lists, libraries, sites, site collections, web parts, views, permissions, navigation and other objects; as well as re-organization and categorization tasks such as tagging/classification and moving/copying content between sites, lists and folders.
|
|
NOTE: A Global or SharePoint Administrator account must be used in order to perform full migrations. An account with less privileges will only be able to perform a limited set of migrations. |
Supported Nintex Forms Platforms:
Source:
OnPrem SharePoint 2013
OnPrem SharePoint 2016
OnPrem SharePoint 2019
SharePoint Online
Target:
SharePoint Online
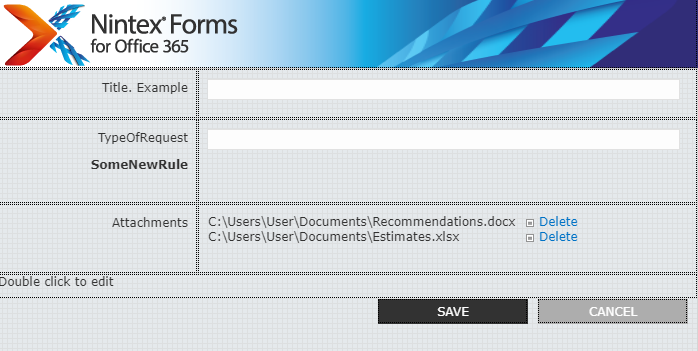
To Copy Nintex Classic Forms do the following:
|
|
NOTE: Responsive is not supported, clients can use Copy Site As Existing Site option or Copy List options instead. |
1.Ensure that you have Nintex Service added on your tenant and that your license is valid and paid.
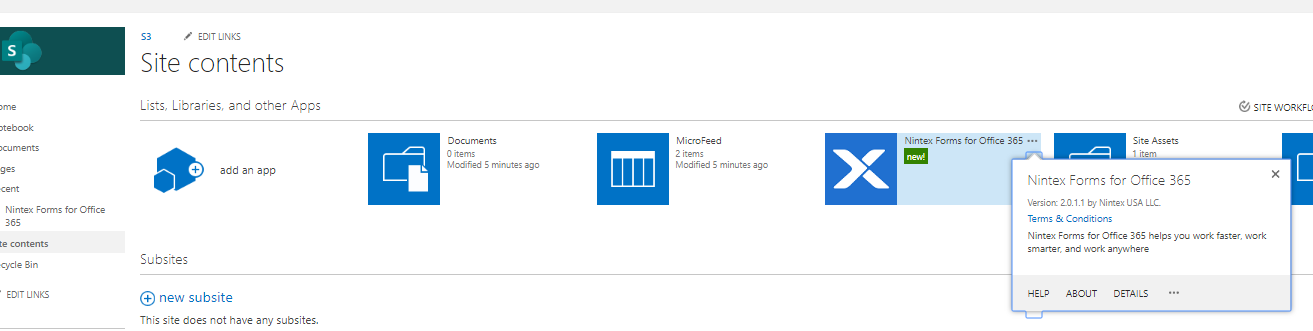
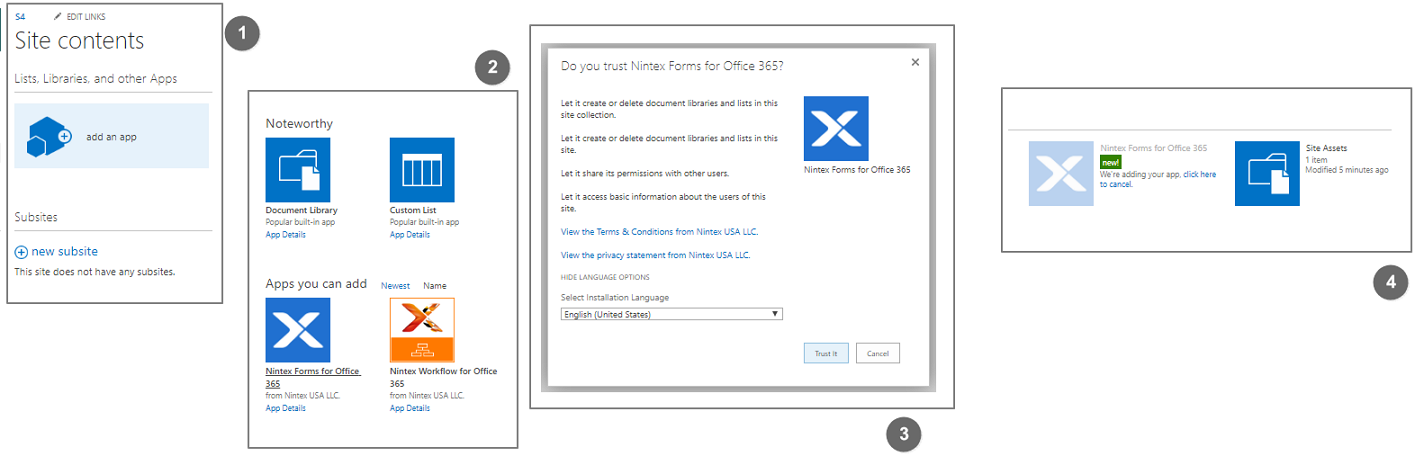
2.Make sure the Nintex Forms Application is add to your target site. Open site in your browser and check the Site Contents.
3.If not the nintex form application is not added on your target site, simply add it and trust it.
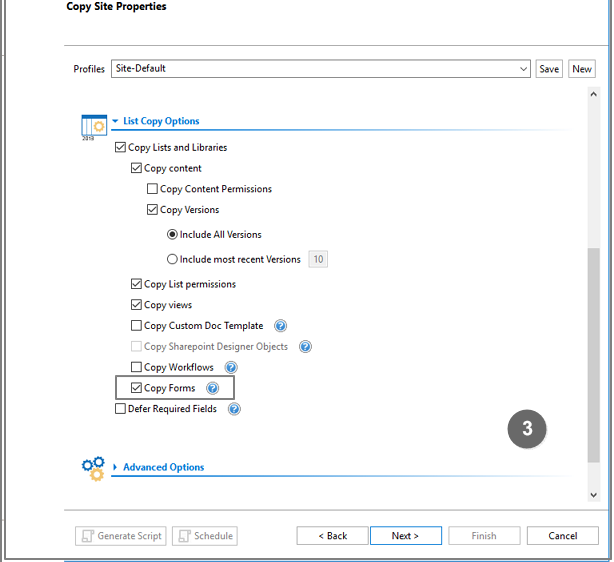
4.Connect Essentials to your Source and Target.
Select the source Site and copy it to the target site as an Existing Site (see the Copy Site section for further details)
Or, select the source list and copy it to the target (see the Copy Lists and Libraries section for further details)
5.On the final page of the wizard, select "Copy Forms" under the List Copy Options section.
6.After the migration has completed, you will see information about forms having been migrated in the post migration .xml log.
7.Check your target site to see the forms have been copied over.
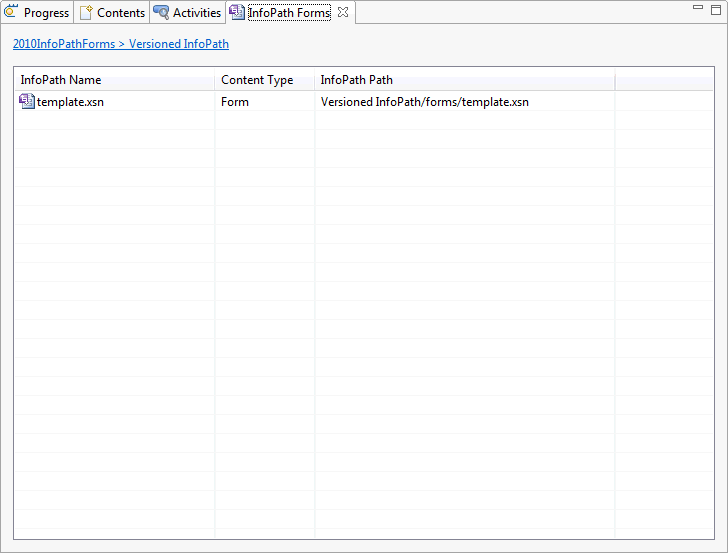
The InforPath Forms Window is displayed within the content pane area and is designed to display InfoPath Forms used within a specific list.
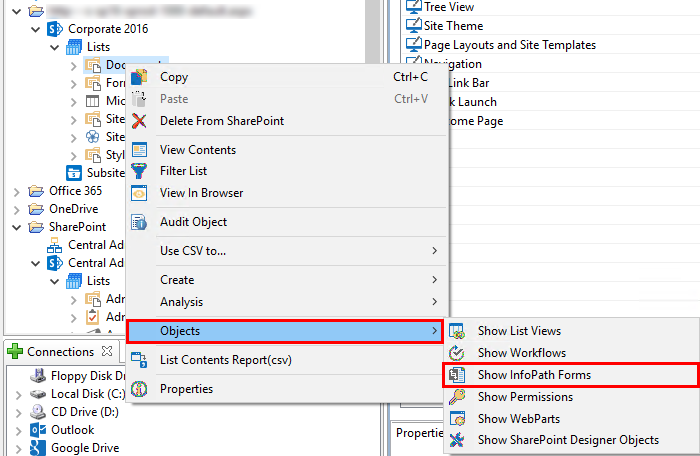
The InfoPath Forms Window can be accessed by right-clicking on a List and selecting Objects followed by Show InfoPath Forms.
Similar to content, users will be able to select one or more of these objects and copy them from one place to another.