Updating the xcAdmin Database After SharePoint Has Been Upgraded via a "Database Attach"
If your SharePoint environment has been upgraded using the "database attach" method, you can use the ControlPoint Database Recovery utility to make data that has been collected in the ControlPoint Service (xcAdmin) database available for use in the upgraded environment. The utility accomplishes this by mapping Farm- and Web Application-level GUIDs in the original environment to those in the upgraded environment.
In order to perform this procedure, Discovery must have been run on both the source and upgraded farms. Instructions can be found in the Metalogix ControlPoint Administration Guide.
Data That Can Be Recovered
For any portion of the farm on which the ControlPoint Discovery job has been run, the utility can recover:
·historical information, including site collection storage and activity
·definitions of ControlPoint Policies
NOTE: It will be necessary to re-register those policies, which will enable the event handlers that actually perform the enforcement.
·Group associations used by the Manage (Linked) SharePoint Groups operation.
NOTE: Associated (linked) group will continue to display in ControlPoint, regardless of whether the content database in which they reside has been migrated.
·Information reported in the ControlPoint Task Audit.
·Scheduled ControlPoint operations.
EXCEPTIONS:
§Scheduled jobs to restore permissions will remain but will fail because permissions backups are not recovered.
§Set Site Properties operations will run if the operation includes the setting of icons or theme.
§For Set List Properties operations, the template URL may not be properly reset for the new environment.
§Any job that references content that has not been migrated will fail until that content that has been migrated.
Data That Cannot Be Recovered
The utility will not recover the following:
·User-specific information (such as last temporary location use in Copy/Move operations).
·Permissions backups.
Prerequisites
Before running the ControlPoint Database Recovery Utility, ensure that:
·the upgraded farm has been created
·ControlPoint has been installed and configured on the upgraded farm (with the existing xcAdmin database specified as the ControlPoint Service (xcAdmin) Database)
·The xcAdmin database is accessible to software running on the upgraded farm
·The content databases for which you want to run the utility have been attached and imported
NOTE: If you are attaching content databases in stages, the utility can be re-run as needed. Remember to also run Manage ControlPoint Licenses for newly attached content databases.
·ControlPoint Discovery has been run on all portions of the upgraded farm for which you want to recover xcAdmin data
The utility assumes that if more than one content database is associated with a Web application, those content databases will continue to be associated with the same Web application. If content databases are reorganized or regrouped, the utility will not work properly.
To run the ControlPoint Database Recovery Utility:
1Launch a browser session and enter the following url:
http://<server_name>:<port_number>/_layouts/axceler/xcControlPointDatabaseRecovery.aspx
where <server_name> is the name of either the server you are upgrading to or the server you are upgrading from and <port_number> is the number of the port that hosts the ControlPoint Web application (1818 is the ControlPoint default value).
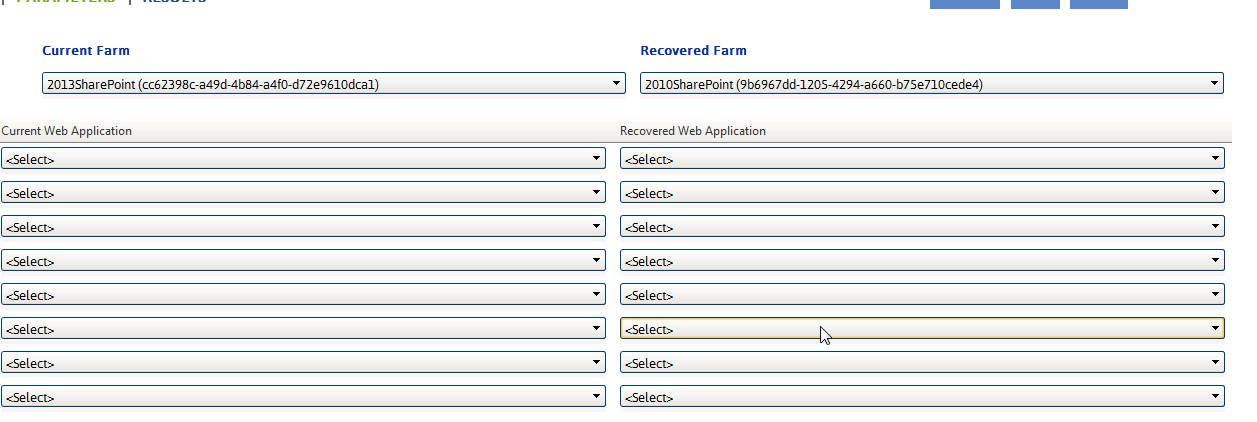
2From the Current Farm drop-down, select the farm to which content databases have been imported (that is, the upgraded farm)..
NOTE: If the upgraded farm does not appear in the drop-down, make sure that:
§the ControlPoint Service (xcAdmin) database of the old farm has been designated as the Database Server for the upgraded farm, and
§Discovery has been run on some portion of the upgraded farm.
3From the Recovered Farm drop-down, select the farm from which the content databases were imported.
Two sets of drop-downs display, which enable you to map Web applications in the old farm with corresponding Web applications in the upgraded farm.
4For each Web application whose ControlPoint xcAdmin data you want to recover, map the Current Web Application to its corresponding Recovered Web Application.
Note that the Recovered Farm list may include the names of Web applications that no longer exist.
5When you have finished mapping Web applications, click [Run Now].
Note that it may take some time for the progress indicator to appear. When the operation is completed, a ControlPoint Task Audit is generated for the action and displays in the Results section.
Moving ControlPoint to A Different Web Front-End Server
If the need arises to move the ControlPoint application from the Web front-end server on which it was originally installed (for example, the machine may have become nonoperational or is being decomissioned), you can install it on a different Web front-end server using the following procedure.
To move ControlPoint to a different Web front-end server:
1In Central Administration, change the url in the default zone for the ControlPoint Web application to a url that includes the new machine name and port number that has already been specified for the ControlPoint Web application (1818 is the ControlPoint default).
NOTE: It is important to complete this step before installing on the new Web front-end to allow the installer to recognize that the Web application that hosts the ControlPoint Configuration Site Collection exists within the context of the new machine name.
2Install, configure, and activate ControlPoint on the new Web front-end using the instructions for First Time Installation and Configuration. Provide all of the same information used for the original installation Service Account credentials, port number, location of the ControlPoint Service database, and so on.
The installer will find and re-use the existing ControlPoint Configuration site and ControlPoint Service (xcAdmin) database, so all settings and historical data will be preserved.
Removing (Uninstalling) ControlPoint
Use the following procedure if you want to remove ControlPoint from your farm.
Note that you will have the option to either retain or remove the following components (you may want to keep some components if, for example you plan to reinstall ControlPoint at a later time or want to archive the data):
·the ControlPoint Services (xcAdmin) database
NOTE: Remember to retain the xcAdmin Database if you are using ControlPoint in a multi-farm environment and want to continue to use it to manage other farms
·the ControlPoint Web Application and Site Collection
·any existing ControlPoint policies
When removing installed components:
Make sure that you:
·run the installer on the Web front-end server on which the original installation was performed, and
·log in using the account from which the original installation was run.
To launch the installer:
From the Control Panel Programs and Features select Metalogix ControlPoint and choose Uninstall.
To remove (uninstall) ControlPoint:
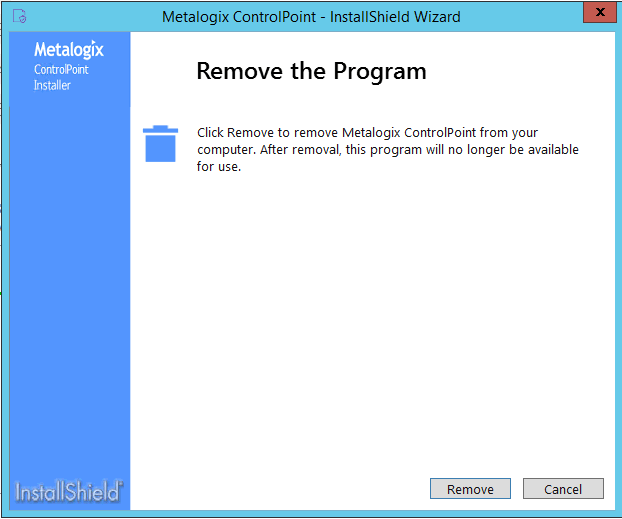
1From the Remove Program dialog click [Remove].
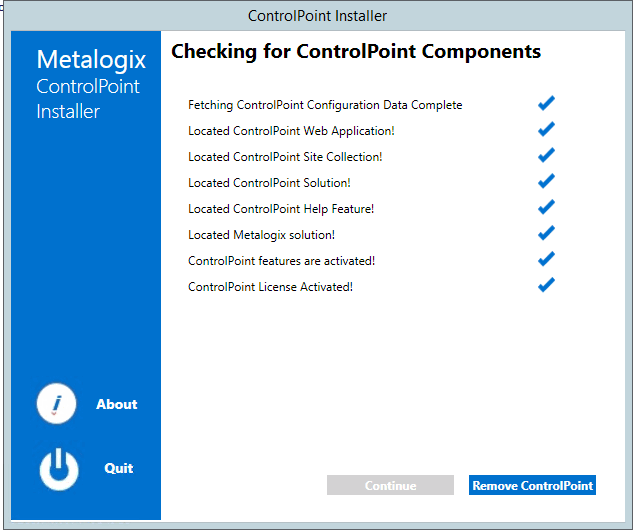
The installer checks for ControlPoint Components.
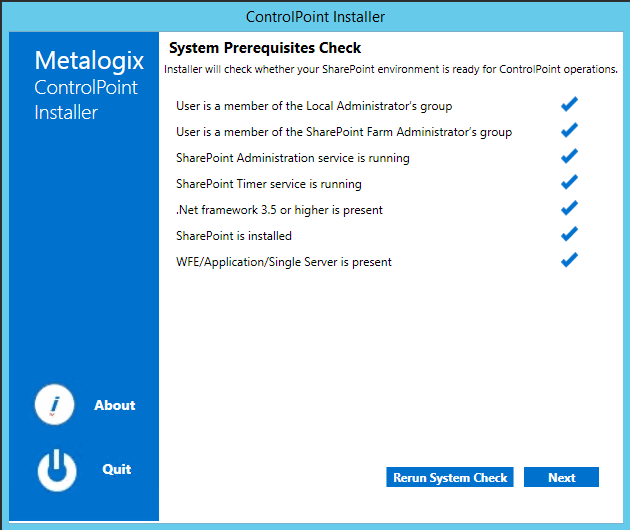
2Click [Remove ControlPoint] to display the system Prerequisites Check dialog.
NOTE: If any of the components to not pass the system check, you will have the opportunity to fix them and then [Rerun System Check].
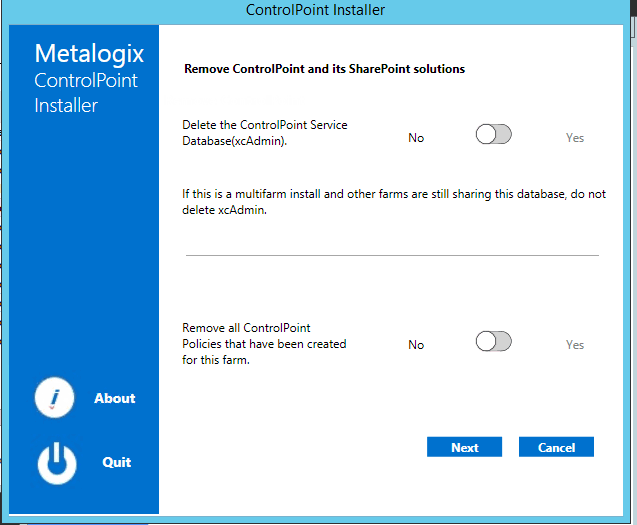
3Click [Next] to display the Remove ControlPoint and its SharePoint solutions dialog.
4Use the information in the following table to determine the appropriate options to select for Delete the ControlPoint Service Database (xcAdmin).
|
If ... |
Then ... |
|---|---|
|
·you are using ControlPoint in a multi-farm environment and want to continue to use it to manage other farms OR ·you plan to reinstall ControlPoint in your environment |
for Delete the ControlPoint Service Database (xcAdmin), select No. |
|
·you are permanently removing ControlPoint from a single-farm environment OR ·you have a multi-farm installation of ControlPoint and you want to permanently remove the application from all farms |
for Delete the ControlPoint Service Database (xcAdmin), select Yes. |
5Use the information in the following table to determine the appropriate option to select for Remove all ControlPoint Policies that have been created for the farm.
|
If ... |
Then ... |
|---|---|
|
·you plan to reinstall ControlPoint in your environment and you want any existing ControlPoint Policies OR ·no ControlPoint Polices have been created for your farm |
for Remove all ControlPoint Policies that have been created for the farm, select No. NOTE: If you chose to Delete the ControlPoint Services Database (xcAdmin), you will be unable to select this option. |
|
you are permanently removing ControlPoint from the farms |
for Remove all ControlPoint Policies that have been created for the farm, select Yes. |
6Click [Next].
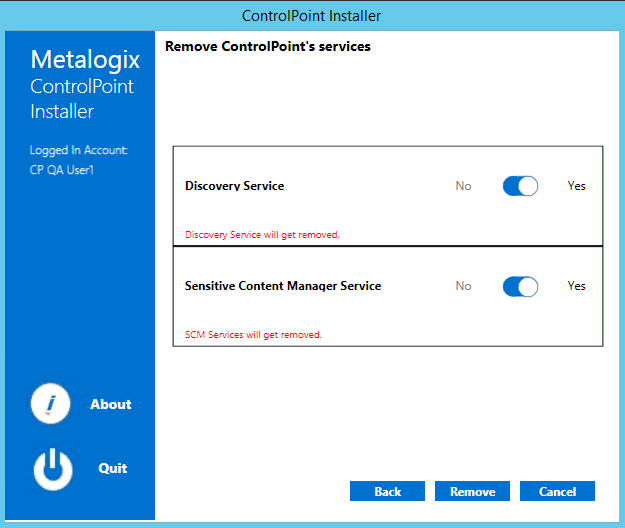
NOTE: If you have configured the ControlPoint SCM Service and/or Discovery Service, you will then be prompted to Remove ControlPoint's services. Note that the only selectable option is Yes (that is, these services cannot be retained if the ControlPoint application is not also installed).
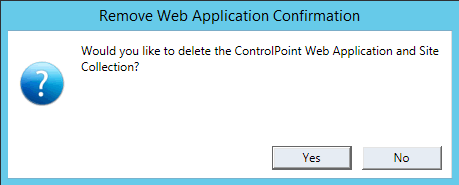
7.Use the information in the following table to determine the appropriate option to select for Remove Web Application Confirmation.
NOTE: If you installed ControlPoint into an existing Web application (which is also known as a Non-Standard installation) a Remove Site Collection Confirmation prompt displays instead.
|
If ... |
Then ... |
|---|---|
|
you plan to reinstall ControlPoint in your environment and you want to retain ControlPoint permissions and any customizations made to menus and settings |
click [No]. |
|
you are permanently removing ControlPoint and/or you do not want to retain ControlPoint permissions and customizations |
click [Yes]. |
7Click [Complete] to begin the ControlPoint Uninstallation.
8When the The program unistall is complete. message displays, click [Finish].
The ControlPoint Installation Logs
The following installation log files are located on the machine on which ControlPoint was installed for the farm, in the directory C:\Program Files\Metalogix\ControlPoint\ControlPointFeatures\Logs:
·RollingAppenderDebugInfo tracks the progress of the installation.
·RollingAppenderWarnErrorFatal.txt and log.txt record errors encountered during the installation.


