Appendix C: Diagnostic and Operational Report Scripts
Migrator Pro for Exchange uses PowerShell as a platform to extend the product and provide external functionality that can be integrated with other applications and services. Migrator Pro for Exchange's PowerShell scripts let you:
-
Diagnose connection and configuration problems
-
Extract operational reports in .csv format
-
Customize and extend the migration pipeline functionality
-
Trigger auto-migrations outside of the Migrator Pro for Exchange Admin Portal
-
Export and import group information between disconnected forests
The Migrator Pro for Exchange Diagnostic scripts are installed in C:\Program Files\Binary Tree\Scripts\E2E\Diagnostic, and include:
-
Get-BTForest.ps1
-
Test-ExchangePowerShellHost.ps1
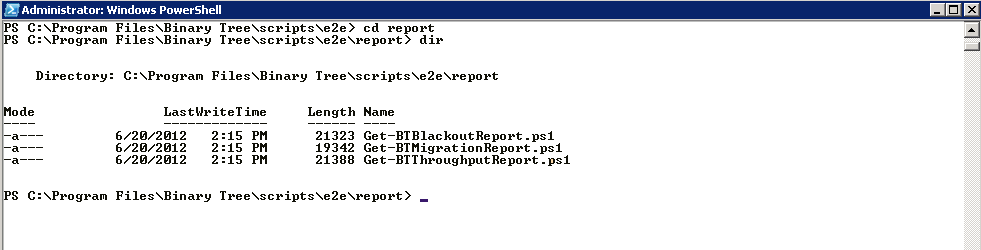
The Migrator Pro for Exchange Operational Report scripts are installed in C:\Program Files\Binary Tree\Scripts\E2E\Report), and include:
-
Get-BTMigrationReport.ps1
-
Get-BTBlackoutReport.ps1
-
Get-BTThroughputReport.ps1
Diagnostic Report Scripts
-
Get-BTForest.ps1 : Used to quickly scan a forest, validate credentials and access via Active Directory.
PowerShell Command:
.\get-btforest.ps1 –<parameter>
-
Test-ExchangePowerShellHost.ps1 : Used to validate the PowerShell host connection in the forest using specified credentials. This is a thorough diagnostic tool to aid in configuring the environment for initial Exchange / PowerShell / Migrator Pro for Exchange usage.
PowerShell Command:
.\test-exchangepowershellhost.ps1 –<parameter>
Operational Report Scripts
-
Get-BTMigrationReport.ps1 : Provides reports on the Mailbox Jobs, and the migrations which have been completed. These reports can be displayed on the screen or output to a CSV file.
PowerShell Command:
.\get-btmigrationreport.ps1 –<parameter>
-
Get-BTBlackoutReport.ps1 : Provides reports on the blackouts which have been defined in Migrator Pro for Exchange. These reports can be displayed on the screen or output to a CSV file.
PowerShell Command:
.\get-btblackoutreport.ps1 –<parameter>
-
Get-BTThroughputReport.ps1 : Provides reports on the Throughput results for completed migrations. These reports can be displayed on the screen or output to a CSV file.
PowerShell Command:
.\get-btthroughputreport.ps1 –<parameter>
Executing Diagnostic and Operational Report Scripts
To execute a script:
-
Open the Windows PowerShell command prompt.

-
Navigate to the location of the scripts.
-
Enter the name of the script and provide any additional parameters. For example:
.\Get-BTMigrationReport.ps1 –archive –csv c:\migrationreport.csv
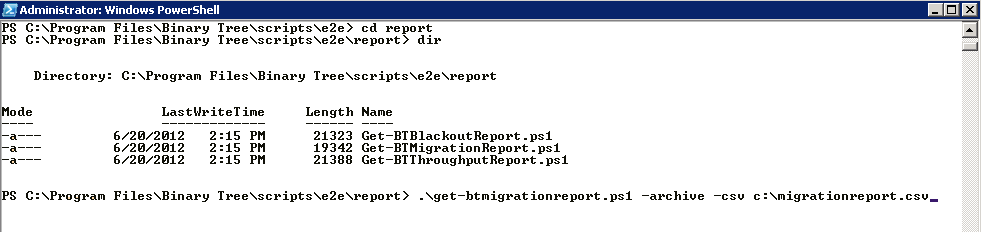
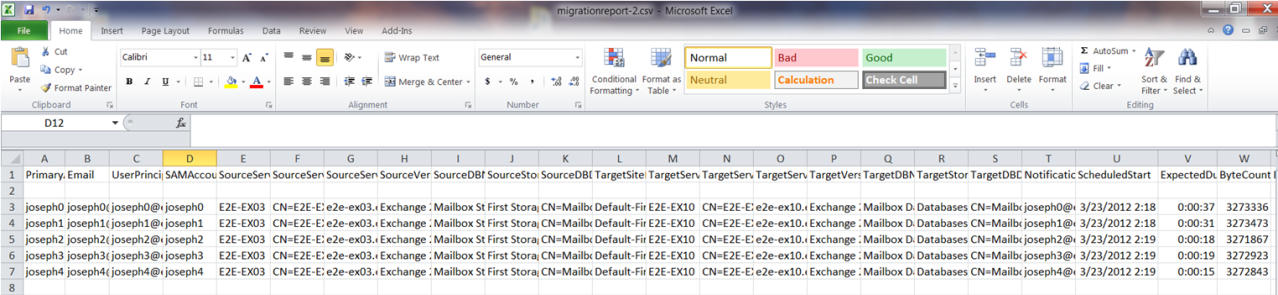
The –csv parameter lets you output a report to a new .csv file on the local drive:
You can use the -? parameter to get additional information on the script and available parameters:

Appendix D: Migration Processing Scripts
The Migration Processing Scripts include these MCP scripts:
-
Confirm-ScheduleMigration.ps1
-
Confirm-BeginMigration.ps1
-
Confirm-EndMigration.ps1
Enabling Migration Customization Scripts
Perform the following steps to enable the migration scripts to be called from Migrator Pro for Exchange.
-
Click Settings in the main toolbar.
-
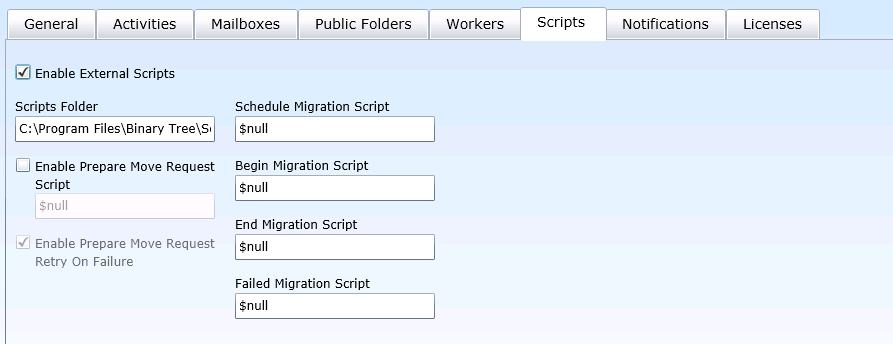
Click the Scripts tab. The script settings are displayed.
-
Check Enable External Scripts.
-
Set the Scripts Folder location. For example, c:\contoso\scripts\ps\
-
Enter the script file name for the Migration Script you want to be called. For example: In the End Migration Script field, enter Confirm-EndMigration.ps1
|
|
Failures designed to halt the migration can be expressed as thrown exceptions or as calls to Write-Error in the confirmation scripts. Both the Schedule and Begin confirmations can halt the migration by failing in this manner. The End confirmation cannot cause the migration to fail if the mailbox is already complete, but it can cause a warning to be reported. Because the confirmation script runs in a non UI environment, calls in PowerShell such as Write-Host will cause faults and should not be used. Write-Error, Write-Warning, and Write-Verbose are acceptable to use, since they write to specific pipelines which are redirected in PowerShell. |

Migration Customization Scripts
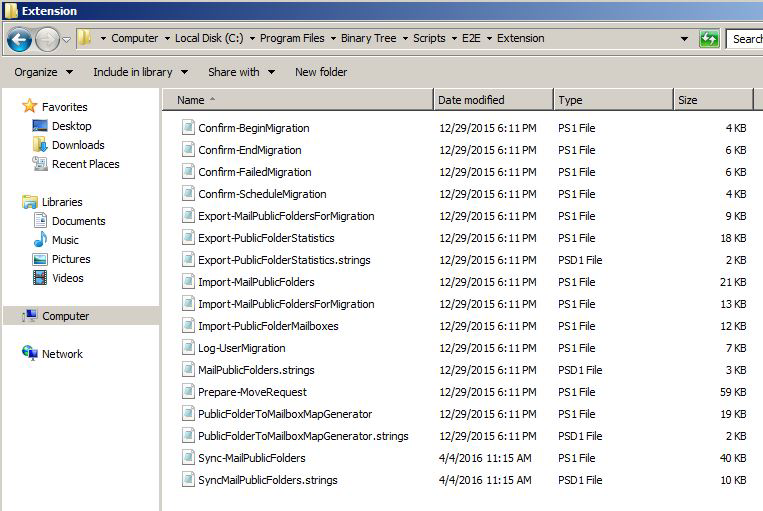
If enabled, the Migration Customization scripts are called by the MCP during mailbox migrations. These scripts are installed to C:\Program Files\Binary Tree\Scripts\E2E\Extension; however, they are not usually run manually from the PowerShell console. The files in the Extension folder are not removed during an uninstall.
Confirm-ScheduleMigration.ps1
This script is called when a mailbox has been scheduled for migration, and can be used to perform any custom actions prior to submitting the mailbox to Exchange.
<add key="Confirm-ScheduleMigration" value="$null"/>
The MCP will not execute any custom scripts for the Schedule Migration step of a mailbox. This is the default entry in the MCP configuration file.
<add key="Confirm-ScheduleMigration" value="Confirm-ScheduleMigration.ps1"/>
The MCP will execute the Confirm-ScheduleMigration.ps1 script located in the defined script folder for the Schedule Migration step of a mailbox.
<add key="Confirm-ScheduleMigration" value=""/>
The MCP will execute the default script (named Confirm-ScheduleMigration.ps1 in this example) located in the defined script folder during the Schedule Migration step of a mailbox.
<add key="Confirm-ScheduleMigration" value="MyCmdlet"/>
The MCP will execute the specified cmdlet during the Schedule Migration step of a mailbox.
Confirm-BeginMigration.ps1
This script is called before a mailbox is migrated, and can be used to perform any prep-work necessary prior to the submission of the mailbox to Exchange.
<add key="Confirm-BeginMigration" value="Confirm-BeginMigration.ps1"/>
The same values listed above for the Confirm-ScheduleMigration script can be used for the Confirm-BeginMigration script.
Confirm-EndMigration.ps1
This script is called after a mailbox is migrated, and can be used to perform any post-processing work necessary after the mailbox has been migrated by Exchange. Note however that this script is only called if the migration job is Completed or CompletedWithWarning.
<add key="Confirm-EndMigration" value="Confirm-EndMigration.ps1"/>
The same values listed above for the Confirm-ScheduleMigration script can be used for the Confirm-EndMigration script.
Script Parameters
All scripts include the following parameters:
-
$SourceCredential: The source forest PS credentials defined in Migrator Pro for Exchange settings
-
$SourceForest: Source forest name
-
$SourceServer: Source server FQDN
-
$SourceDatabase: Source database DN
-
$SourceMailbox: Source mailbox DN
-
$TargetCredential: The target forest PS credentials defined in Migrator Pro for Exchange settings
-
$TargetForest: Target forest name
-
$TargetServer: Target server FQDN
-
$TargetDatabase: Target database DN
-
$TargetMailbox: Target mailbox DN (not mandatory for the Confirm-BeginMigration.ps1 script)
-
$Status: Current job status string
-
$ControllingForest: optional, not used
Appendix E: Migrator Pro for Exchange Mailbox Job Importer
The Binary Tree Migrator Pro for Exchange Mailbox Job Importer utility is installed as part of Migrator Pro for Exchange. The Binary Tree Migrator Pro for Exchange Job Importer allows you import a CSV schedule file of mailbox migration jobs from a command line. A CSV file can also be used to update existing mailbox migration job values. A CSV cancel file can be used to cancel mailbox migration jobs.
Migration jobs that are in AutoSuspended or BlackoutSuspended state (only if Suspend When Ready to Complete flag was set) can be modified. For these jobs, only the Do Not Complete Before Date, Do Not Start Before Date, Migration Group, and Priority fields will be updated.
The Auto license 0365 users and Default Usage Location settings in the Tenant Forest General Settings are used by the Migrator Pro for Exchange Job Importer when scheduling mailbox migration to Office 365.
CSV Schedule File Format
The CSV schedule file of mailbox migration jobs must meet the following requirements:
-
The file should not contain headers.
-
No values can be blank except for the Do Not Start Before Date, Do Not Complete Before Date, Communication Language, Migration Group and Blackout Profile.
-
All columns must be included.
The CSV schedule file must include these columns:
|
Col |
Field |
Example |
Req'd? |
Description |
|---|---|---|---|---|
|
1
|
User Principal Name (UPN) |
eprouser@contoso.com |
Yes |
User Principal Name of desired mailbox. |
|
Matched Against: CMTEUP_PersonADData.userPrincipalName | ||||
|
2
|
Target Forest Name |
contoso.com |
Yes |
Name of target forest. |
|
Matched Against: CMTEUP_Forests.ForestName | ||||
|
3
|
Target delivery domain |
root1.contoso.com |
Yes |
Name of target domain for mailbox. |
|
Saved To: CMTEUP_Job.param_TargetDeliveryDomain | ||||
|
4
|
Target Mailbox Database Name |
primarymailbox1 |
No |
Name of target mailbox database. Leave blank if target is an O365 forest. |
|
Matched Against: CMTEUP_ServerDatabase.ServerDatabaseName | ||||
|
5
|
Do not start before date |
10/15/2016 09:00AM |
No |
The time to start the migration, if not immediately. If specified, must be a valid date/time string. |
|
Saved To: CMTEUP_Job.DoNotStartBefore | ||||
|
6
|
Suspend when ready to complete |
"true" or "false" |
Yes |
Whether migration should be suspended before cutover. |
|
Saved To: CMTEUP_Job.param_SuspendWhenReadyToComplete | ||||
|
7
|
Bad Item Limit |
10 |
No |
Number of bad mailbox items to allow before migration is failed. Must be a valid number >= 0. |
|
Saved To: CMTEUP_Job.param_BadItemLimit | ||||
|
8
|
Large Item Limit |
75 |
No |
Number of large mailbox items to allow before migration is failed. Must be a valid number >= 0. |
|
Saved To: CMTEUP_Job.param_LargeItemLimit | ||||
|
9
|
Ignore Rule Limit Errors |
"true" or "false" |
Yes |
Whether mailbox rules should be moved to target. |
|
Saved To: CMTEUP_Job.param_IgnoreRuleLimitErrors | ||||
|
10
|
Do not complete before date |
10/15/2016 09:00AM |
No |
When to complete the migration. If specified, must be a valid date/time string AND Suspend when ready to complete must be "true." |
|
Saved To: CMTEUP_Job.param_SuspendWhenReadyToComplete | ||||
|
11
|
Communication Language |
0 or "en" or "English" |
No |
Number or name of a valid culture. Must match a culture using CMTEUP_Culture. CultureName, CMTEUP_Cuture.Culture-Display Name or CMTEUP_Culture.Cul- tureID. Also, when specified, CMTEUP_UserMailbox.CultureIDLocked=1 is set to prevent updates to this value from the Migrator Pro for Exchange rationalization process. |
|
Saved To: CMTEUP_UserMailbox.CultureID | ||||
|
12
|
Migration Group |
MyMigrationGroup1 |
No |
Name of a migration group. Will either match an existing group on CMTEUP_MigrationGroups.MigrationGroupName, or create a new group if no match can be found. |
|
Saved To: CMTEUP_UserMailbox.MigrationGroupID | ||||
|
13
|
Priority |
5 |
No |
Relative priority used to schedule the mailbox migration. Must be a number between 1 and 100. If not specified, a default priority of 10 is used. This setting does not apply to migrations to Office 365. |
|
Saved To: CMTEUP_UserMailbox.Priority | ||||
|
14
|
Blackout Profile |
MyBlackoutProfile1 |
No |
The name of a Blackout profile to use. This will either match an existing profile on CMTEUP_Blackout Profiles.BlackoutProfileName or create a new profile if no match can be found. If not specified, the default blackout profile will be assigned. |
|
Saved To: CMTEUP_UserMailbox.BlackoutProfileID | ||||
An example of a valid row in the CSV schedule file looks like:
Test03102@dom1.epro.dom,targetForest.dom,TargetDeliveryDomain.dom,Mailbox Database 12345678,03-25-2014 04:12 pm,true,0,0,true,04-01-2014 05:52 pm,en-US,Group1,10,Profile 1
CSV Cancel File Format
The CSV cancel file used to cancel mailbox migration jobs must meet the following requirements:
-
The file should not contain headers.
-
The file must include column 1: User Principal Name (UPN).
An example of a valid row in the CSV cancel file looks like:
Test03102@dom1.epro.dom
To convert an Excel document to a CSV text file:
-
Open your Excel file.
-
Remove any existing header rows.
-
Format all cells as text by selecting all columns and then right-click > Format Cells > Text.
-
Save the document as a CSV.
Importing the CSV Schedule File of Mailbox Migration Jobs
To schedule or reschedule mailbox migration jobs by importing the CSV schedule file in the command prompt:
-
Open a command prompt.
-
Run C:\Program Files\Binary Tree\Exchange Pro\bin>BinaryTree.E2E.JobImporter /s [CSV schedule file].

-
The schedule file is validated and saved to the database. If an error is encountered, no jobs are saved.
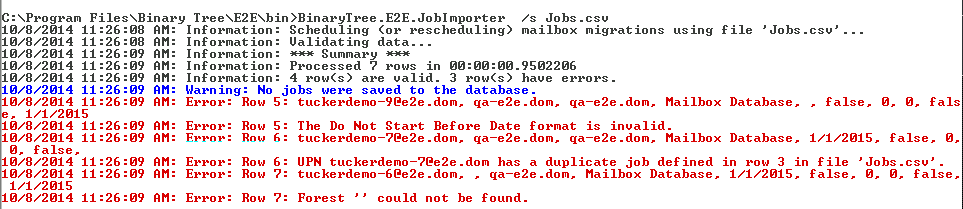
To review and correct import errors:
-
Errors will be displayed below the import command in the command prompt window.
-
Optionally, you can run C:\Program Files\Binary Tree\Exchange Pro\bin>BinaryTree.E2E.JobImporter [CSV schedule file] > OutputReport.txt to generate a text file containing the errors.
-
Correct the errors in the CSV schedule file and attempt the import again. Optionally, you can validate the CSV schedule file without importing (see steps below).
To validate the CSV schedule file without importing:
-
In the command prompt, run C:\Program Files\Binary Tree\Exchange Pro\bin>BinaryTree.E2E.JobImporter /v [CSV schedule file]
-
The number of valid rows and rows with errors are displayed. The CSV schedule file is not imported.
To view the Help file:
-
In the command prompt, run C:\Program Files\Binary Tree\Exchange Pro\bin>BinaryTree.E2E.JobImporter /? or /help
-
The help message is displayed.
Cancelling Mailbox Migration Jobs using the CSV Cancel File
Mailbox migrations jobs can be cancelled using a CSV cancel file that contains a list of UPNs associated with migration jobs.
To cancel mailbox migration jobs by importing the CSV cancel file in the command prompt:
-
Open a command prompt.
-
Run C:\Program Files\Binary Tree\Exchange Pro\bin>BinaryTree.E2E.JobImporter /c [CSV cancel file].
-
The migration jobs for the UPNs are cancelled.
Usage Summary
BinaryTree.E2E.JobImporter [[/s <schedule file>] | [/v <schedule file>] | [/c <cancel file>]] [/?] or [/help]
/s <file> : Schedule (or re-schedule) mailboxes for migration. See JobImporter-ReadMe.txt for details on the format of <schedule file>.
/v <file> : Validate the contents of <schedule file>. Any errors found are reported, but no migration jobs are scheduled.
/c <file> : Cancel mailbox migrations for the list of UPNS found in <cancel file>.
/? or /help : Display this help message.
Appendix F: Migrator Pro for Exchange Public Folder Job Importer
The Binary Tree Migrator Pro for Exchange Public Folder Job Importer utility is installed as part of Migrator Pro for Exchange. The utility will create a job for each row of the input file. If a job already exists with the same source server name and folder path and same target server name and folder path, the information from the input file will update the existing job instead of creating a new one.
If the user elects to add subfolders for a given row, only subfolders that do not have a job will be added. The utility will not update subfolder job settings based on a parent job.
When the utility creates a job and the user does not specify a value for an optional field, the utility will use the same default as the Add folders to migration queue dialog.
CSV File Format (Scheduling New Jobs and Rescheduling Existing Jobs)
|
Col |
Field |
Example |
Req'd? |
Description |
|---|---|---|---|---|
|
1
|
Source folder path |
\TestFolder |
Yes |
Path of job’s source folder. |
|
Matched Against: CMTEUP_PublicFolder.FolderPath | ||||
|
2
|
Source folder server name |
ExchgPro-EX10-1 |
Yes |
Server name where job’s source folder resides. |
|
Matched Against: CMTEUP_Server.ServerName | ||||
|
3
|
Target folder parent path |
\ |
No |
Path of target’s parent folder. |
|
Matched Against: CMTEUP_PublicFolder.FolderPath | ||||
|
4
|
Target folder server name |
QA-ExchgPro-EX10-1 |
Yes |
Server name where job’s target folder resides. |
|
Matched Against: CMTEUP_Server.ServerName | ||||
|
5
|
Target public folder mailbox UPN |
pfmbx@qa-epro.dom |
Only for Exchg 2013+ |
UPN of mailbox where target public folder will reside. |
|
Matched Against: CMTEUP_PersonADData.userPrincipalName | ||||
|
6
|
Add or Modify subfolder jobs |
True / False |
No |
Specifies if importer should add or modify jobs for subfolders. Defaults to “true.” |
|
7
|
Sync Seconds |
30 |
No |
Sets interval for sync job. If value is 0 or omitted, job will run only once. |
|
Saved To: CMTEUP_PublicFolderJob.SyncSeconds | ||||
|
8
|
Scheduled Start Date |
10-25-2016 4:12 pm |
No |
Scheduled start date for the job. If omitted, then defaults to current time. |
|
Saved To: CMTEUP_PublicFolderJob.ScheduledStart | ||||
Example valid lines:
\TestFolder,ExchgPro-EX10-1,\,QA-ExchgPro-EX10-1,,true,0,3-25-2015 04:12 pm
\TestFolder,ExchgPro-EX10-1,\,QA-ExchgPro-EX13-1,pfmailbox@qa-epro.dom,true,0,3-25-2015 04:12 pm
|
|
If the folder name has a quote character (") at the beginning and/or end, you must place quotes (") around the entire folder path. Example: "\Root\Directory\"Example Folder Name"" If the folder name has a quote character (") in the middle of the name, do not place quotes (") around the entire folder path. Example: \Root\Directory\Example "Folder" Name |
CSV File Format (Cancelling existing jobs)
|
Col |
Field |
Example |
Req'd? |
Description |
|---|---|---|---|---|
|
1
|
Source folder path |
\TestFolder |
Yes |
Path of job’s source folder. |
|
Matched Against: CMTEUP_PublicFolder.FolderPath | ||||
|
2
|
Source folder server name |
ExchgPro-EX10-1 |
Yes |
Name of server where job’s source folder resides. |
|
Matched Against: CMTEUP_Server.ServerName | ||||
|
3
|
Target folder parent path |
\ |
No |
Path of target’s parent folder. |
|
Matched Against: CMTEUP_PublicFolder.FolderPath | ||||
|
4
|
Target folder server name |
QA-ExchgPro-EX10-1 |
Yes |
Name of server where job’s target folder resides. |
|
Matched Against: CMTEUP_Server.ServerName | ||||
|
5
|
Target public folder mailbox UPN |
pfmailbox@ExchgPro.dom |
Only for Exchg 2013+ |
UPN of mailbox where target public folder will reside. |
|
Matched Against: CMTEUP_PersonADData.userPrincipalNam | ||||
|
6
|
Cancel subfolder jobs |
True / False |
No |
Specifies if importer should cancel jobs for subfolders. Defaults to “true.” |
|
| ||||
Example valid lines:
\TestFolder,ExchgPro-EX10-1,\,QA-ExchgPro-EX10-1,,true
\TestFolder,ExchgPro-EX10-1,\,QA-ExchgPro-EX13-1,pfmailbox@ExchgPro.dom,true
Command Line
Available command line switches:
BinaryTree.E2E.PFJobImporter [[/s <schedule file>] | [/v <schedule file>] | [/c <cancel file>]] [/? or /help]
-
/s <file>: Schedule (or re-schedule) public folders for migration.
-
/v <file>: Validate the contents of <schedule file>. Any errors found are reported, but no migration jobs are scheduled.
-
/c <file>: Cancel public folder migrations for the list of folders found in <cancel file>.
-
/? or /help: Display this help message.
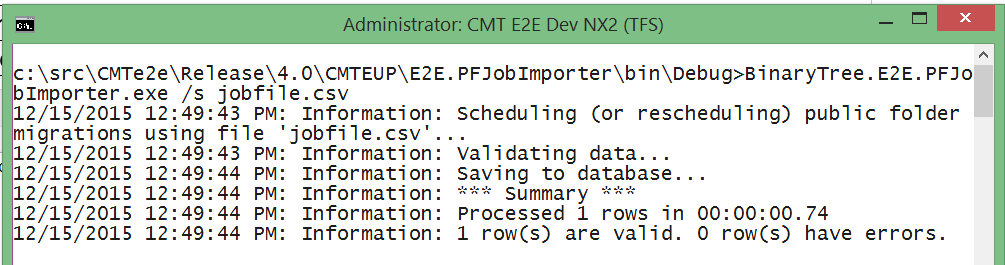
Example command line for scheduling (or re-scheduling) a set of public folder jobs:
BinaryTree.E2E.PFJobImporter.exe /s jobfile.csv
Sample output:
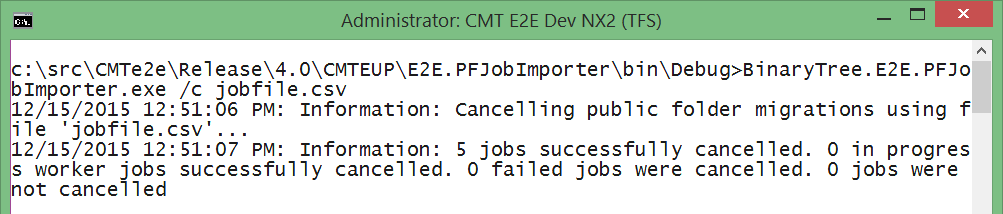
Example command line for cancelling a set of public folder jobs:
BinaryTree.E2E.PFJobImporter.exe /c jobfile.csv
Sample output:
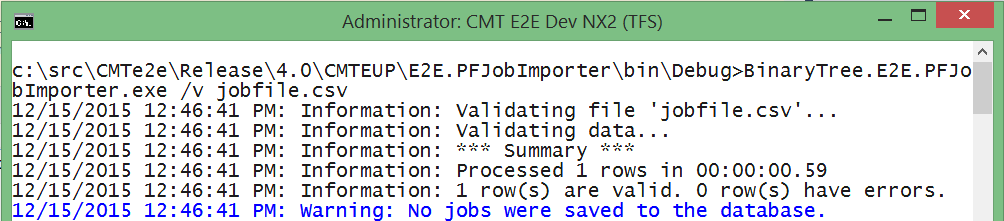
Example command line for validating a set of public folder jobs:
BinaryTree.E2E.PFJobImporter.exe /v jobfile.csv
Sample output: