立即与支持人员聊天
与支持团队交流

KACE Systems Management Appliance 13.0 Common Documents - KACE Service Desk Administrator Guide

About the KACE Service Desk Getting started
Configuring the appliance
Requirements and specifications Power-on the appliance and log in to the Administrator Console Access the Command Line Console Tracking configuration changes Configuring System-level and Admin-level General Settings Configure appliance date and time settings Managing user notifications Enable Two-Factor Authentication for all users Verifying port settings, NTP service, and website access Configuring network and security settings Configuring Agent settings Configuring session timeout and auto-refresh settings Configuring locale settings Configuring the default theme Configure data sharing preferences About DIACAP compliance requirements Configuring Mobile Device Access Enable fast switching for organizations and linked appliances Linking Quest KACE appliances Configuring history settings
Setting up and using labels to manage groups of items Configuring user accounts, LDAP authentication, and SSO Deploying the KACE Agent to managed devices Using Replication Shares Managing credentials Configuring assets
About the Asset Management component Using the Asset Management Dashboard About managing assets Adding and customizing Asset Types and maintaining asset information Managing Software assets Managing physical and logical assets Maintaining and using manual asset information Managing locations Managing contracts Managing licenses Managing purchase records
Setting up License Compliance Managing License Compliance Setting up Service Desk Configure the Cache Lifetime for Service Desk widgets Creating and managing organizations Importing and exporting appliance resources
Managing inventory
Using the Inventory Dashboard Using Device Discovery Managing device inventory
About managing devices Features available for each device management method About inventory information Tracking changes to inventory settings Managing inventory information Finding and managing devices Registering KACE Agent with the appliance Provisioning the KACE Agent Manually deploying the KACE Agent Using Agentless management Adding devices manually in the Administrator Console or by using the API Forcing inventory updates Managing MIA devices Obtaining Dell warranty information
Managing applications on the Software page Managing Software Catalog inventory
About the Software Catalog Viewing Software Catalog information Adding applications to the Software Catalog Managing License assets for Software Catalog applications Associate Managed Installations with Cataloged Software Using software metering Using Application Control Update or reinstall the Software Catalog
Managing process, startup program, and service inventory Writing custom inventory rules
Deploying packages to managed devices
Distributing software and using Wake-on-LAN Broadcasting alerts to managed devices Running scripts on managed devices Managing Mac profiles Using Task Chains
Patching devices and maintaining security
Using the Security Dashboard About patch management Subscribing to and downloading patches Creating and managing patch schedules Managing patch inventory Managing Windows Feature Updates Managing Dell devices and updates Managing Linux package upgrades Maintaining device and appliance security Manage quarantined file attachments
Using reports and scheduling notifications Monitoring servers
Getting started with server monitoring Working with monitoring profiles Managing monitoring for devices Working with alerts
Using the Service Desk
Configuring Service Desk Using the Service Desk Dashboard Managing Service Desk tickets, processes, and reports
Overview of Service Desk ticket lifecycle Creating tickets from the Administrator Console and User Console Creating and managing tickets by email Viewing tickets and managing comments, work, and attachments Merging tickets Using the ticket escalation process Using Service Desk processes Using Ticket Rules Run Service Desk reports Archiving, restoring, and deleting tickets Managing ticket deletion
Managing Service Desk ticket queues About User Downloads and Knowledge Base articles Customizing Service Desk ticket settings Configuring SMTP email servers
Maintenance and troubleshooting
Maintaining the appliance Troubleshooting the appliance
Appendixes Glossary About us Legal notices

Access the Command Line Console

Access the Command Line Console

The Command Line Console is a terminal window interface to the appliance. You can use this interface to configure appliance settings, just as you would in the appliance Administrator Console. This is useful if a DHCP server is not available and you cannot log in to the Administrator Console.

The Command Line Console is not used with K1 as a Service.

The port is the second from the left in the upper middle section of the back plate.
The Command Line Console login screen appears on the monitor connected to the appliance.
The Command Line Console login screen appears.
Login: konfig

Password: konfig

4.
Choose the language to use for the Command Line Console. Use the up- and down-arrow keys to move between fields.
6.
Use the down-arrow key to move the cursor to Save, then press Enter or Return.

Tracking configuration changes

Tracking configuration changes

If History subscriptions are configured to retain information, you can view the details of the changes made to settings, assets, and objects.

This information includes the date the change was made and the user who made the change, which can be useful during troubleshooting.

Configuring System-level and Admin-level General Settings

Configuring System-level and Admin-level General Settings

If the Organization component is enabled on your appliance, General Settings are available at the System level and at the Admin level. If the Organization component is not enabled on your appliance, all General Settings are available at the Admin level.

If the Organization component is enabled on your appliance, see:

If the Organization component is not enabled, see:

Configure appliance General Settings with the Organization component enabled

Configure appliance General Settings with the Organization component enabled

If the Organization component is enabled on your appliance, configure appliance General Settings at the System level.

If the Organization component is not enabled on your appliance, see Configure appliance General Settings without the Organization component.

1.
Go to the System-level General Settings page:
a.
Log in to the appliance System Administration Console, http://appliance_hostname/system, or select System from the drop-down list in the top-right corner of the page.
b.
On the left navigation bar, click Settings, then click Control Panel.
c.
On the Control Panel, click General Settings.

Option

Description

Company Name

Enter the name of your company.

Default Locale

Select the language to use in the Command Line Console, which uses the konfig user account.

Company Email Suffix

Enter the domain from which your users send email. For example: quest.com.

Appliance Administrator Email

Enter the email address of the appliance administrator. System-related messages, including critical alerts, are sent to this address.

Session Timeout

Set the number of inactive hours to allow before closing user sessions and requiring users to log in again. The default is 1. The User Console and Administrator Console have Timeout Session counters to alert users of this time limit. Only periods of inactivity are counted. The counter restarts when the user performs any action that causes the console to interact with the appliance server, such as refreshing a window, saving changes, and changing windows. When the counter reaches the limit, the user is logged out, unsaved changes are lost, and the login screen appears. The Timeout Session counter appears in the upper right of each console.

Enable mobile device access

Enable or disable Mobile Device Access to the appliance. Mobile device access enables you to interact with the appliance using the KACE GO app on iOS and Android smart phones and tablets. Administrators can use the app to access Service Desk, inventory, and application deployment features. See Configuring Mobile Device Access.

Require organization selection at login

Display the Organization drop-down list on the Administrator Console login page, http://appliance_hostname/admin, where appliance_hostname is the hostname of your appliance. This enables you to choose an organization when you log in. If this option is disabled, the Organization drop-down list is not displayed on the login page, and you can only log in to the Default organization from http://appliance_hostname/admin. If organization fast switching is enabled, however, you can switch between organizations after you log in to the Default organization.

Show organization menu in admin header

Display the fast-switching drop-down list in the top-right corner of the Administrator Console next to the login information. This drop-down list makes it possible to bypass the login page when you switch from one organization to another. To appear in the drop-down list, organizations must have the same admin account password; only those organizations whose admin account passwords match appear in the list. Changes to the drop-down list are displayed only after you log out and then log in again.

3.
Optional. In the Beta Notifications section, indicate if you want to participate in the Beta program.
a.
Select Enable beta notifications from KACE.
b.
If you want these notifications to appear only in the System Administration Console, select Restrict beta notifications to System UI.
Leaving this option cleared causes the Beta notifications to appear in both the Administrator Console and System Administration Console.
4.
In the Agent Tasks section, view or configure KACE Agent task throughput:

Option

Description

Last Task Throughput Update

This value indicates the date and time when the appliance task throughput was last updated.

Current Load Average

The value in this field depicts the load on an appliance at any given point of time. For the appliance to run normally, the value in this field must be between 0.0 and 10.0.

Task Throughput

The value that controls how scheduled tasks, such as inventory collection, scripting, and patching updates, are balanced by the appliance.

5.
In the Duplicate Machine Detection Settings (Advanced) section, configure the following options to prevent duplicate device records

Option

Description

Required to match an existing machine record

Select one or more of the following check boxes to indicate which device properties you want the appliance to use to identify potentially duplicated devices.

MAC Addresses

Specify the number of MAC addresses that are associated with the machine record that you to match with the existing device records.

6.
In the User Console section, modify the text as needed:

Option

Description

Title

The heading that appears on the User Console login page.

Welcome Message

A welcome note or description of the User Console. This text appears below the title on the User Console login page.

7.
In the Acceptable Use Policy section, select policy settings:

Option

Description

Enabled

Enable the appliance to display your policy, and require users to accept the terms of your policy, when they access the Administrator Console, User Console, or Command Line Console, or log in using SSH or FTP.

Title

The heading of the policy to be displayed on the login page of the User Console.

Message

Details of the policy, which are displayed below the Title on the login page. Users must agree to the terms of the policy before they can log in to the User Console.

8.
In the Reporting section, specify the password for the reporting system:

Option

Description

Username

(Read-only) The username used to generate reports. The report username provides access to the database (for additional reporting tools), but does not give write access to anyone.

User Password

The report user password. This password is used only by the reporting system and MySQL™.

9.
In the Log Retention section, select the number of days to retain log information. Log entries that are older than the selected number of days are automatically deleted from the log. See View appliance logs.
10.
In the User Notification Retention section, select the number of days to retain user notification. Any user notifications that are older than the selected number of days are automatically deleted from the Notifications pane. See Configure user notifications.
11.
In the Share with Us section, select data sharing options:

To validate the your product license, Quest collects minimal license-related information, such as the MAC Address of the appliance, the version of the appliance software, the license key, and the number of managed devices, regardless of the data sharing options selected in this section.

Option

Description

Share summary usage data...

(Recommended) Share summary information with Quest. This information includes appliance status, uptime, and load averages, as well as the number of devices, Managed Installations, and applications being managed by the appliance. This option is recommended because it provides additional information to Quest Support if you need assistance. In addition, data shared with Quest is used when planning product enhancements.

Share detailed usage data...

(Recommended) Share detailed information with Quest and share anonymous information with ITNinja.com. This information includes Agent and appliance crash reports, user interface usage statistics, and inventory information, such as application titles. Quest uses this information to help improve the Software Catalog, and ITNinja uses anonymous data to identify relevant content on http://www.itninja.com for dynamic feeds to the appliance Administrator Console.

ITNinja.com is a community website where IT professionals can share information and research on a wide variety of systems management and deployment topics. The ITNinja feed is a feature that dynamically displays software deployment tips and other contextual information on relevant pages in the appliance Administrator Console. To enable the ITNinja feed, you need to select Share detailed Usage data.... This setting shares information anonymously with ITNinja. The ITNinja feed is available only if Share Summary Usage Data... is selected, and it is available only on pages related to software or deployment, such as the software, Managed Installation, and File Synchronization detail pages. The feed is not available on the Software Catalog detail page.

Clear this option to prevent the appliance from sharing inventory data with the ITNinja community. However, clearing this option does not remove any information that has already been shared. For more information, contact Quest Support.

Share extended patch diagnostics

(Recommended) Share detailed patch diagnostics with Quest.

12.
To use custom Administrator Console, User Console, or report logos and background colors, in the Login Screen Options sections, provide the following information.

Option

Description

System Console Login Background Color

Admin Console Login Background Color

User Console Login Background Color

You can access the appliance from the following levels:

Administrator Console shows organization-related features.
System Administration Console provides access to appliance-related features.
User Console makes applications available to users on a self-service basis. It also enables users to file Service Desk support tickets to request help or report issues. To access the User Console, go to http://<appliance_hostname>/user where <appliance_hostname> is the host name of your appliance.

For each of these web-based interfaces you can specify a different background color of the login screen. Any colors specified on the organization level override system-level settings.

Click and use the color chooser to specify the color that you want to appear in the background of the login screen. You can select the color using the mouse, or specify the RGB values, as needed. When you close the color chooser, the HTML Color Code field on the right displays the HTML code of the selected color. To undo your selection, click Reset and start over.

System Console Logo

Admin Console Logo

User Console Logo

Report Logo

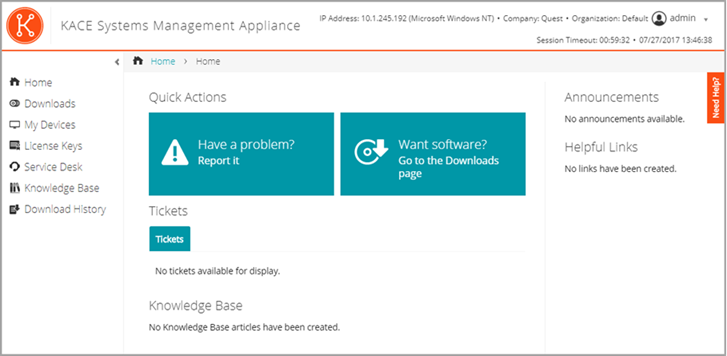
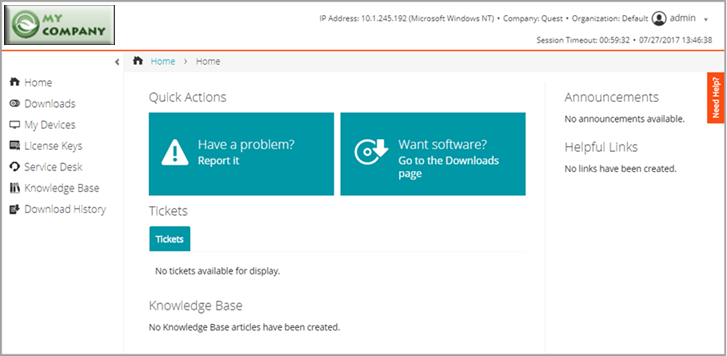
In each applicable section, click Choose File, and specify the graphic file that you want to use as the custom logo in the available web interfaces and in system-generated reports.

The supported graphic file formats are .bmp, .gif, .jpg, and .png. Any logos configured on the organization level override system-level settings.

To see default logos and sample customized versions, refer to the following illustrations.

Figure 1. Default User Console logo

The image of the default User Console shows the Dell logo in the upper left.

Figure 2. Custom User Console logo

The image of the custom User Console includes the custom logo in place of the default Dell logo.

The image of the default report displays the Dell logo in the upper left.

The image of the custom report includes the custom logo in place of the default Dell logo.

13.
If you manage Hewlett-Packard (HP) or Lenovo devices, you can retrieve their warranty information. To do that, in the Manufacturer Warranty API Keys section, provide the HP and/or Lenovo API keys to obtain the warranty data. Lenovo requires only a key whereas HP requires both a key and a secret. These values are stored encrypted in the database.
When configured, the device warranty information appears on the Device Details page in the Inventory Information group when you select an HP or Lenovo device. For more information, see Groups and sections of items in device details.

Option

Description

Hewlett-Packard

Select this option if you want to obtain warranty information for your managed HP devices. If this option is selected and you clear it, the HP API key and secret are removed from the database.

Key

The API key for obtaining warranty information for managed HP devices.

Secret

The secret for obtaining warranty information for managed HP devices.

Lenovo

Select this option if you want to obtain warranty information for your managed Lenovo devices. If this option is selected and you clear it, the Lenovo key is removed from the database.

Key

The API key for obtaining warranty information for managed Lenovo devices.

14.
Click Save and Restart Services.
相关文档

The document was helpful.

选择评级

I easily found the information I needed.

选择评级