This scenario demonstrates how to configure the BLOB Externalization job, which will externalize existing BLOBs previously stored within the SharePoint Content Database, prior to installation and configuration of StoragePoint. Externalizing existing BLOBs from the SharePoint Content Database will allow you to shrink your SQL database and reclaim storage previously occupied by large content databases.
To run through this scenario you must have a site that contained docs before a StoragePoint profile was configured.
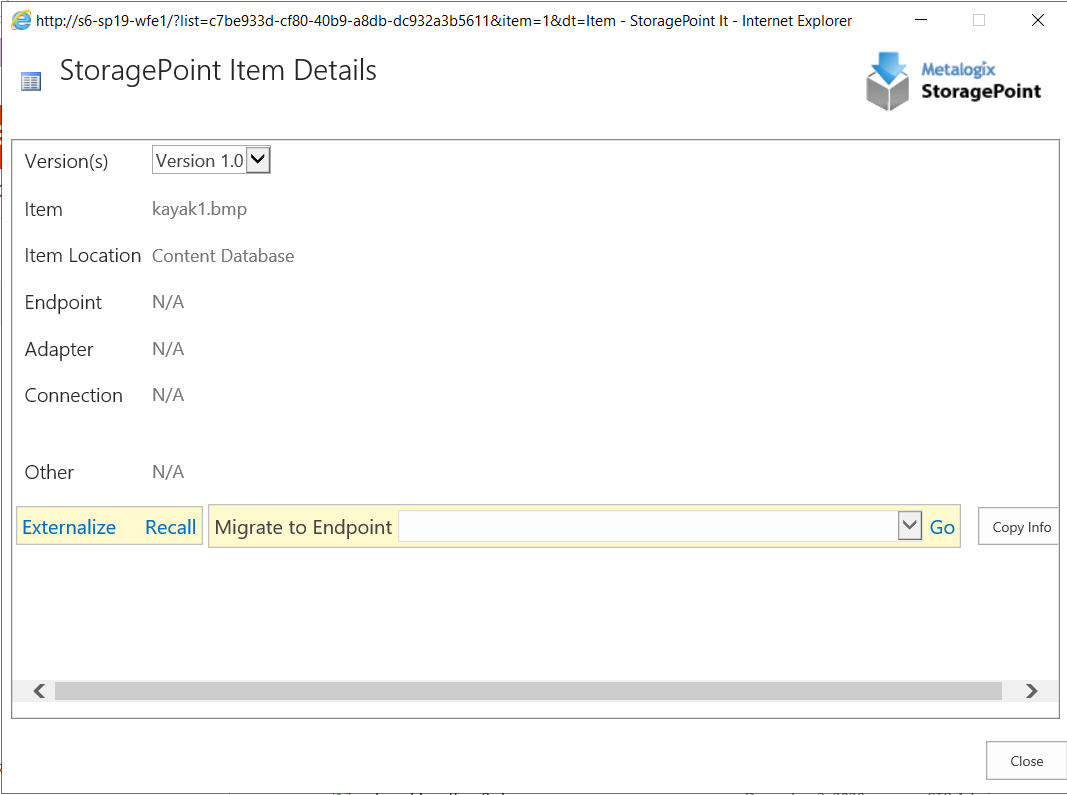
1.Check StoragePoint Item Details for your existing Documents. The items location should be Content Database.
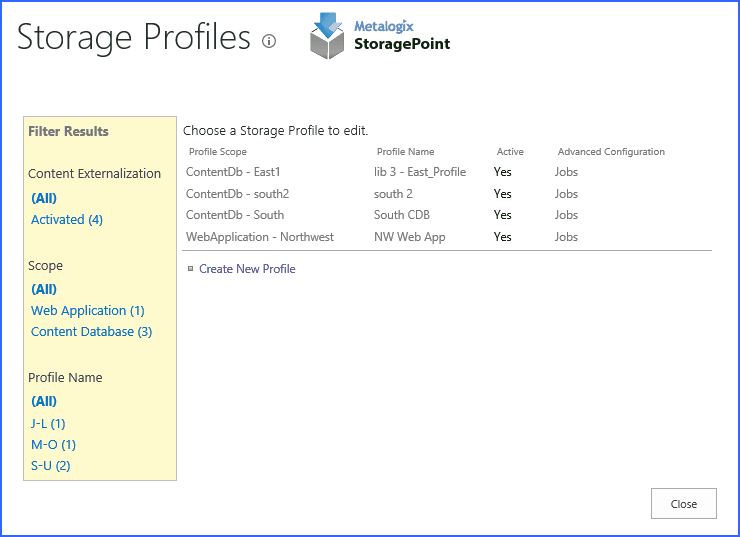
2.Open Central Administration and navigate to Application Management and then Storage Profiles, found under the Metalogix StoragePoint heading.
3.Click Jobs for the profile for which you wish to externalize BLOBs.
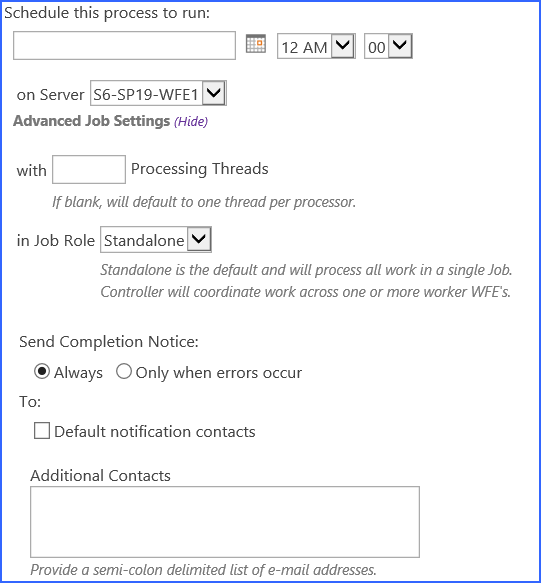
4.On the Job Configuration page, scroll down to the StoragePoint BLOB Externalization section and from the on Server dropdown list, select the web front end server on which you wish to run the job.
5.Click the Show link next to Advanced Job Settings in order to set up notifications. Enter the number of processing threads to use during job execution. It will default to one thread per processor core if no value is supplied.
6.Click the Analyze and Estimate button to display an estimate of the space savings that will result from running the externalize job.
7.Click the Externalize Content Now button in order to run the job immediately. Once you click this, you will see a time stamp for your externalization job, and a link to open the Job Status page if you want to watch the job complete.
Confirmation
Check StoragePoint details for pre-existing documents, the items location will now be Externalized (RBS).
In this scenario you:
üSuccessfully ran the timer job to externalize BLOBs for the documents that existed on your web application prior to the installation and configuration of StoragePoint.
This scenario demonstrates StoragePoints capability to upload and store files larger than the maximum upload size limit set for the web application, using Large File Support. In order to complete this scenario, you must have a file that is larger than the web applications upload size limit, to upload to your document library.
If Large File Support is enabled, the Unused BLOB Cleanup job scans all content for orphaned BLOBs. If a Site Collection has recently been deleted, SharePoint doesnt delete it until the Gradual Site Delete timer job has been run. The Unused BLOB Cleanup job may return errors until the deleted site collection is removed by SharePoint. It is recommended that you run the Gradual Site Delete timer job manually, after deleting a Site Collection.
1.Navigate to SharePoint Central Administration.
2.Navigate to Application Management and then to General Settings found under Metalogix StoragePoint.
3.Scroll down on the General Settings page. Large File Support is located closer to the end of the page. Select Yes from the drop down list. 
4.Click Save to save your setting changes.
5.Navigate to a SharePoint Document Library where you have access to upload files.
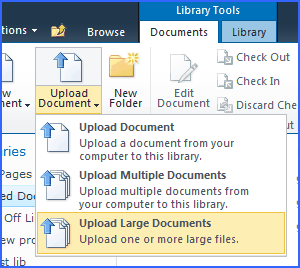
6.A user who has access to upload files in a Document Library will see an option to upload large files with a different type of interface. This tool is only available in the SharePoint Document Libraries.
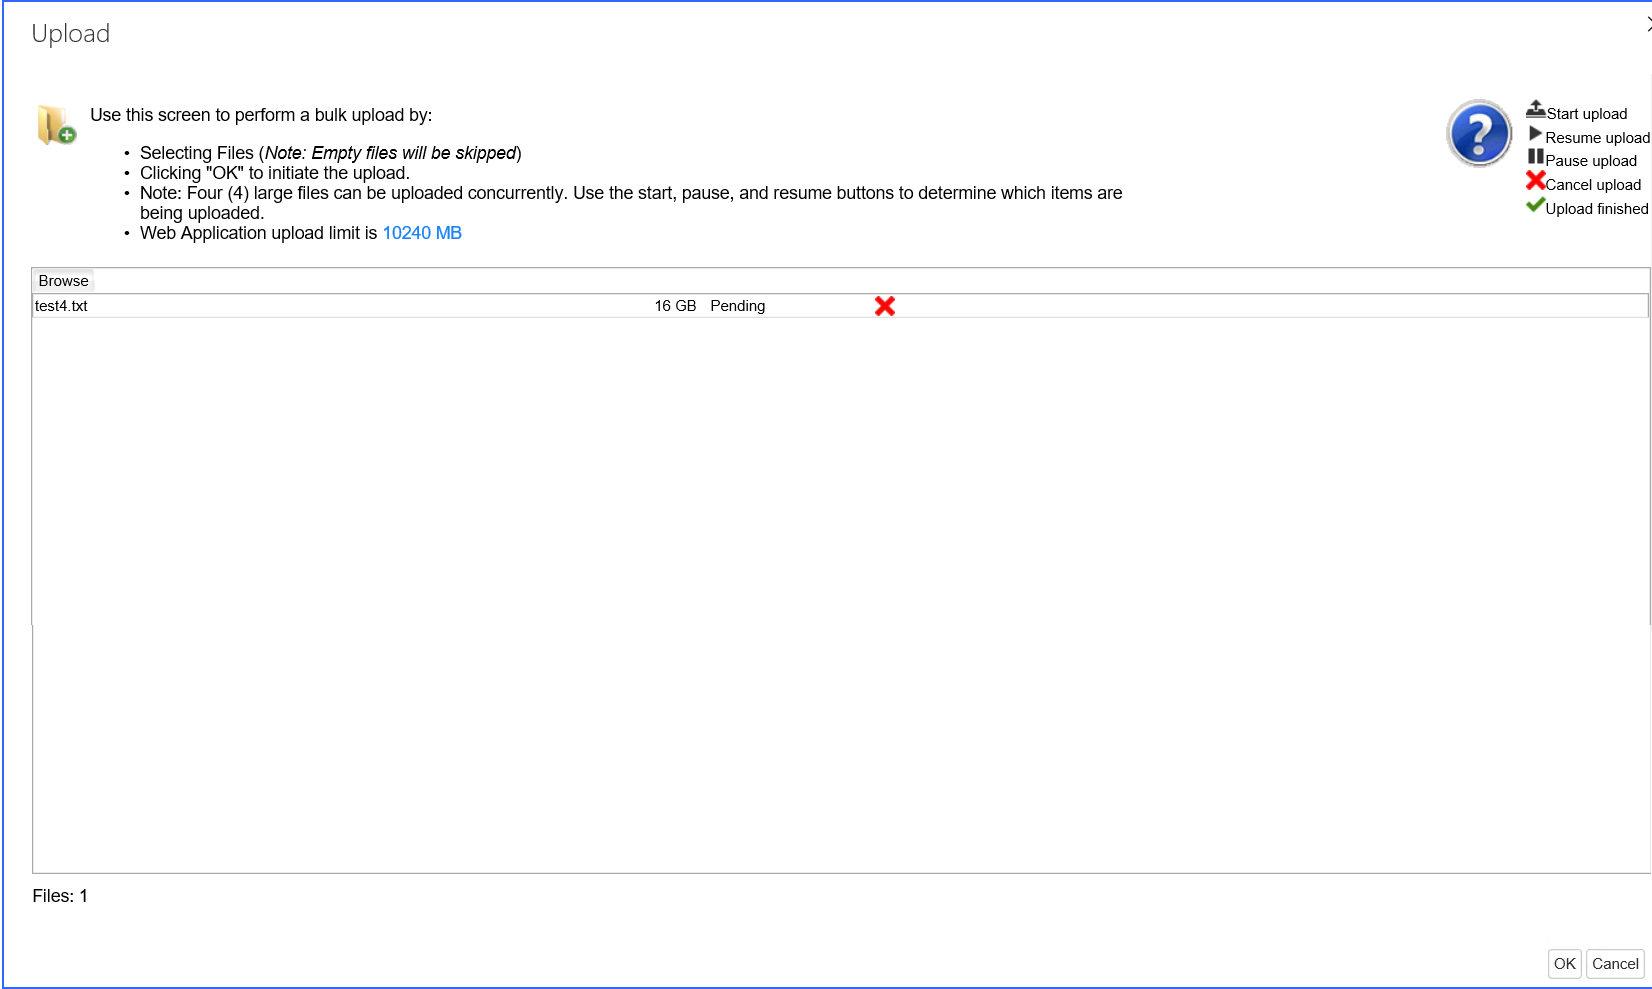
7.From the Documents tab, in the Upload Document dropdown, click Upload Large Documents.
On SharePoint 2013, in the Files tab, click Upload Large Documents.
8.A new window opens. Drag files from the Windows Explorer onto this page and click OK.
Your file will now be uploaded.
Confirmation
1.In the document library, you will see an entry in the library; an aspx file linking to the large file.
2.Click the name of the file and you will then be prompted to open the document or save it.
3.Select Open or Save to verify that the large document is the one you uploaded.
In this scenario you:
üEnabled uploading for large documents.
üUploaded a large document to ensure that the feature does in fact upload the document.
This scenario demonstrates the configuration and execution of a BLOB Migration job. The BLOB Migration job moves the BLOBs from one or more Source Endpoints associated with the storage profile to a single Destination Endpoint. Even though all storage endpoints are available, only BLOBs associated with the storage profile will be migrated.
This scenario requires that you have another storage endpoint set up to use as a destination for migration.
1.Navigate to Central Administration, Application Management.
2.Navigate to Storage Profiles under the Metalogix StoragePoint section.
3.Click Jobs for the profile for which you wish to configure BLOB migration.
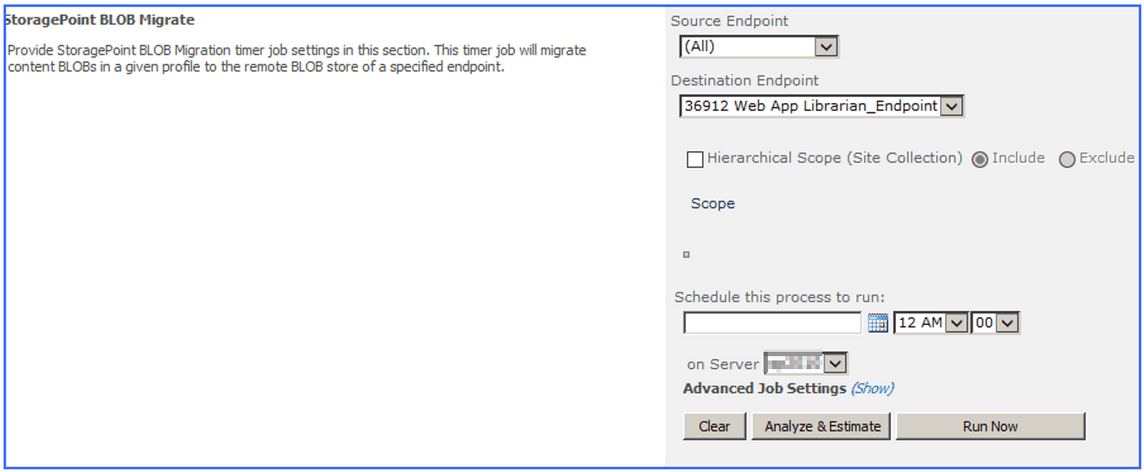
4.Note the Timer Job Scope (at the top of the page) of the Storage Profile selected.
5.StoragePoint BLOB Migrate is located approximately half way down the Job Configuration page.
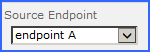
6.Select the Source Endpoint (where the BLOBs are moving FROM) from the dropdown.
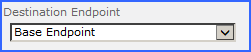
7.Select a Destination Endpoint (where the BLOBs are moving TO) from the dropdown.
8. Click the Run Now button to run the bulk migration job immediately.
Confirmation
1.Check your Destination Endpoint in windows explorer to see whether the BLOBs from the Source Endpoint have been migrated.
2.Go to the documents of the site collection to verify the current location of the BLOB from the StoragePoint details menu.
In this scenario you:
üConfigured a BLOB migration job and successfully migrated BLOBS over from a source endpoint to a destination endpoint.
This scenario demonstrates the configuration of Archiving rules.
Only one rule can be created per scope. The archiving scope cannot be broader than the profile scope.
You must have a second endpoint in order to complete this scenario.
1.Navigate to Central Administration, Application Management.
2.Navigate to Storage Profiles, found under the Metalogix StoragePoint section.
3.Click on the link to open the profile.
4.Scroll down to the Archiving Configuration section and expand.
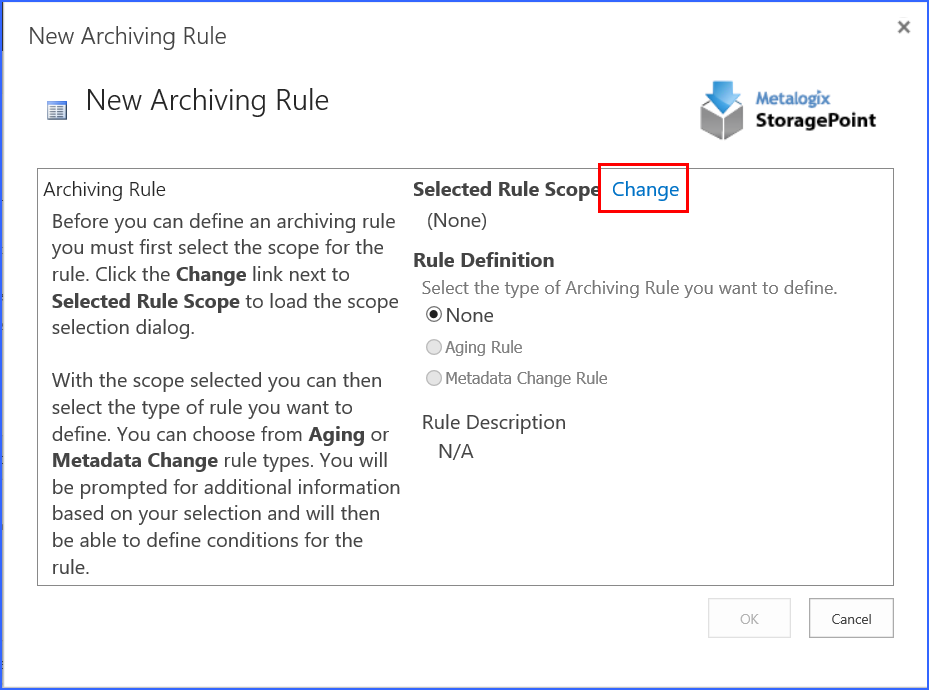
5.Set Enable Archiving to Yes. Click New Rule to create a new archiving rule.
6.Click the Change link to select the scope (i.e. site collection, site, list, or content type).
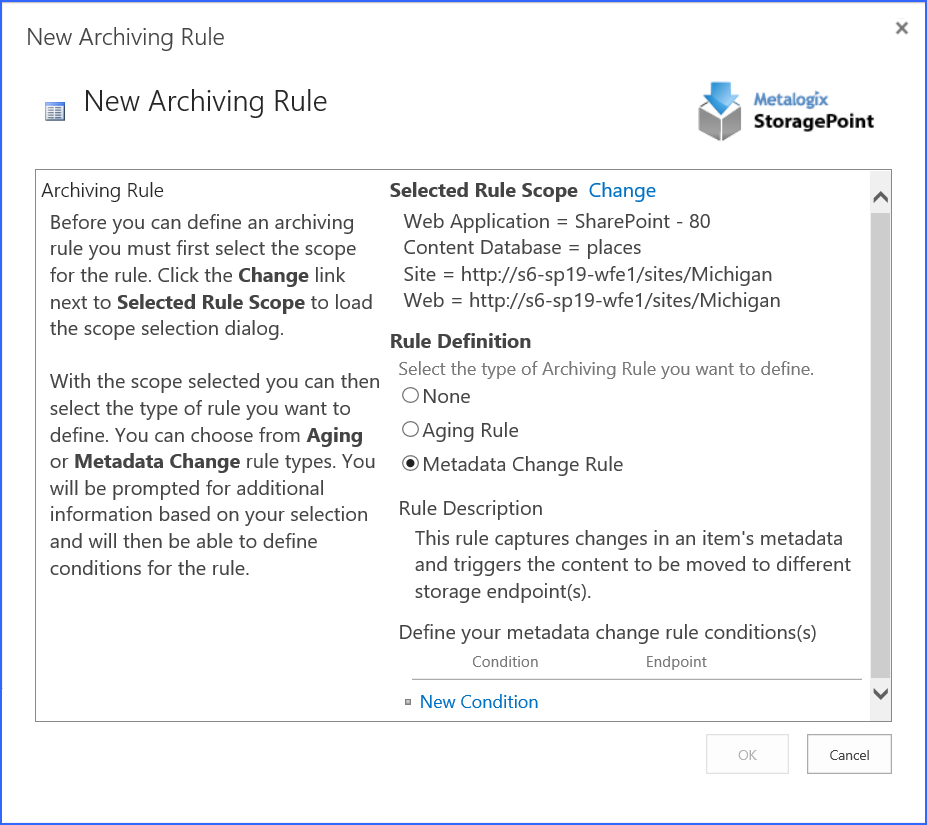
7.Drill down in the hierarchy to select the scope, and click OK. Your selection will be displayed under the Selected Rule Scope option.
8.Select the type of Rule Definition, Metadata Change Rule. This rule captures changes in an items metadata and triggers the content to be moved to different storage endpoint(s). Click the New Condition link.
9.From the Select a Property dropdown, choose the Title property. The selections in this dropdown list will change based on the scope selection made on the Archiving Rule dialog.
10.The Select an Operator and Enter/Select a Value fields will update accordingly. Make your operator Contains and then enter Archived in the text field.
11.Select your archive endpoint from the Destination Endpoint dropdown.
12.Click OK to finish setting up the rule.
13.Click Save on the Profile page.
14.Click Ok when the Process Existing screen pops up.
15.Change the title of an existing document in a document library within the rules scope, adding Archived to the title.
16.Navigate to General Settings in Central Administration, Application Management, in the Metalogix StoragePoint section.
17.Navigate to the Content Migrator section and run the job by pressing Process Queued Content Now.
Confirmation
Check StoragePoint Details for the document you just added to make sure that the rule was processed and the document was sent to your specified endpoint.
In this scenario you:
üEnabled Archiving and configured an Archiving Rule.
üTested the Archiving rule by making a change to a document that met the conditions of the Metadata Archiving rule and confirmed that the BLOB is stored in a different endpoint.