Restoring a backed-up SharePoint object
The Management Console allows you to restore:
·List items and documents
·Folders
·Lists and Libraries
·Sites or Web Sites
·Site Collections
When you perform a restore, you can choose where to restore the backed-up objects. You can restore:
·By replacing existing objects
·In a new SharePoint location
·To a local copy on a computer
What should I consider when I restore SharePoint objects?
Consider the following questions before attempting to restore any SharePoint objects:
·Which objects do you want to restore?
·Where do you want to restore the objects?
·What are the expected results?
Restoring backed-up SharePoint objects can only be done on the same version of SharePoint from which the Backup was taken. For more information about these considerations, the permissions required to restore SharePoint objects, and the overall restore process, see Understanding the granular restore process.
Why are some SharePoint objects disabled in the Management Console?
The Management Console disables or hides some objects when you do not have the appropriate permissions for those objects. In addition, some objects are disabled or hidden if the backup is archived or moved to another location. If the backup set is archived or moved, you may be able to view the backup set in a list, but you cannot view the objects in the backup set.
If you return the archived backup set to its original backup set storage location, you can view the objects in the backup set. For more information about the permissions required to back up SharePoint objects, see Understanding the granular restore process. For more information about archived backup sets, see Managing Backup Set disk space.
How do I restore a backed-up object?
Use the Management Console to restore a backed-up object.
To restore a backed-up object
1.From the Management Console workspace selector click Granular Restore.
2.In the Granular Restore pane, select a farm and then select Mounted Databases.
3.Click the Restore tab.
4.In the ribbon, select the type of restore to perform from one of the following choices:
·In-place. The restored content is returned to the same place in the SharePoint farm in which it originated. All selected items must belong to the same parent site. Multiple targets are not permitted.
·Out-of-place. The restored content is stored in a new location that you specify in your SharePoint farm.
·Local. The restored content is stored in a location accessible from the computer that hosts the Management Console.
5.In the Backup Sets pane, click the backup set from where you want to restore content.
6.In the Backup Content area, select the check boxes for the content to restore.
You can also use the search box to search for item names that start with the expression entered in the search box. If the search items are documents, you can select a document and click Download Document from the ribbon to open the document in its document viewer.
|
|
NOTE: To preview a document, a program that can open the document must be installed on the computer that hosts the Management Console. |
Select the items that you want to restore. You can also use Live Compare to locate and visually verify the objects that you want to restore. For more information see How does Live Compare help me locate missing objects?
7.In the ribbon, click Restore to open the wizard for the selected restore type.
How does Metalogix Backup for SharePoint match file names when searching?
When you specify an object name, Metalogix Backup for SharePoint searches for that name starting at the beginning of the names of the backed-up objects. The value you specify must be at the beginning of the object name, or there must be a space or separator, such as an underscore or period, in the name before the value you specified.
You can also specify a wild card character (? or *) in the middle of the search value. The question mark (?) matches a single character. The asterisk (*) matches one or more characters.
|
If You Specify |
Matches |
Does Not Match |
|
temp |
template.doc Default Template Default_Template |
DefaultTemplate DefaultTemp |
|
Def*Template |
Default Template Default Template01 Default_Template |
Default Temp01 Default_Template |
|
Defaul?Temp |
DefaultTemplate DefaultTemplate01 Defaul Template |
Default Temp01 DefaultTemplate |
|
Def*Template?? |
DefaultTemplate01 Default Template01 Def Templates2 |
DefaultTemplate DefaultTemplate1 01DefaultTemplate01 |
|
Default Template |
The DefaultTemplate Default Template |
DefaultTemplate01 01DefaultTemplate |
How do I control the number of search results ?
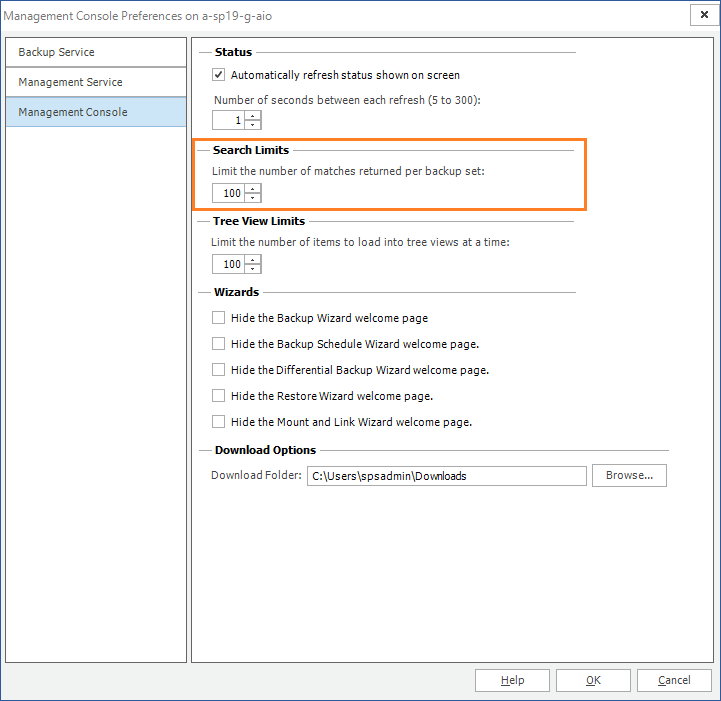
By default, search results include only the first 100 results per backup set. Use the Management Console to change this setting and display between 20 and 999 results per backup set.
1.From the Management Console workspace selector click Configuration.
2.In the Configuration pane, select the farm whose Management Service search preference you want to set.
3.In the Configuration tab ribbon, click Management Console. The Management Console Preferences window opens.
4.Set the search limit value in the Limit the number of matches returned per backup set between 20 to 9999.
5.Click OK to close the window and save the changes you made to the Management Console preferences.
How does Live Compare help me locate missing objects?
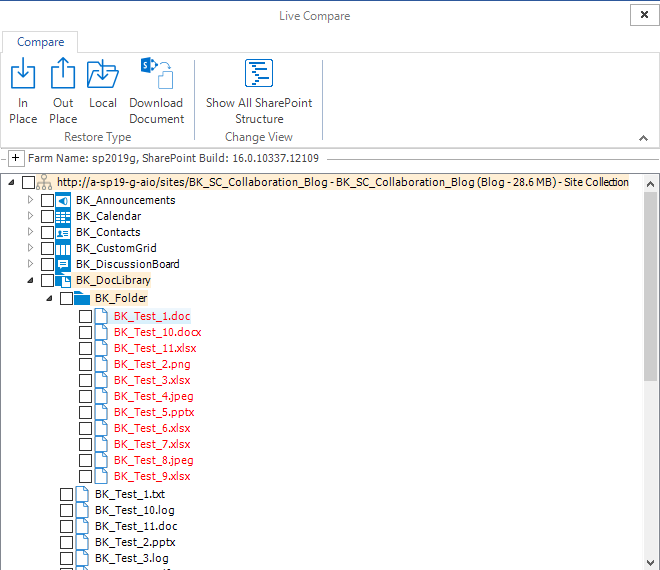
You can compare the objects in a backup set with the objects in the live SharePoint farm which you want to restore. The comparison is color-coded to indicate the difference between the farm and the backup set.
1.In the Backup Content area, select the check boxes for the content to restore.
2.Select any node that you want to inspect.
3.Right-click the node or anywhere in the hierarchy pane and from the context-menu select Live Compare.
4.Expand the highlighted node in the Live Compare window. A highlighted node indicates that one or more differences were detected in that node. Optionally, you can expand your search for more differences by clicking Show All SharePoint Structure to list the entire farm hierarchy.
5.When you expand a highlighted node all the way, you will find the differences. Use the following color code:
a.Black - The object exists in the farm and the backup set.
b.Gray - The object exists in the farm but not in the backup set.
c.Red - The object exists in the backup set but not in the farm.
6.Select one or more items, folders, lists, sites or site collections you want to restore. If the items are documents, you can select a document and click Download Document from the ribbon to open the document in its document viewer.
|
|
NOTE: To preview a document, a program that can open the document must be installed on the computer that hosts the Management Console. |
7.From the ribbon, select a Restore Type: In-place, Out-of-place or Local.
8.Click Restore. The restore wizard for the selected restore type starts.
Restoring Lists and List items
Follow the steps below to restore list items and documents:
1.From the Management Console workspace selector click Granular Restore.
2.In the Granular Restore pane, select a farm and then select Mounted Databases.
3.Click the Restore tab.
4.In the ribbon, select a Restore Type: In-place, Out-of-place or Local.
5.In the Backup Sets pane, click the backup set from where you want to restore content.
6.In the Backup Content area, select the check boxes for the list items or documents to restore. You can also use the search box to search for the list item or document names that start with the expression entered in the search box.
7.In the ribbon, click Restore. Depending on your choice of Restore Type, the In-Place Restore Wizard, Out-of-Place Restore Wizard or Local Restore Wizard opens.
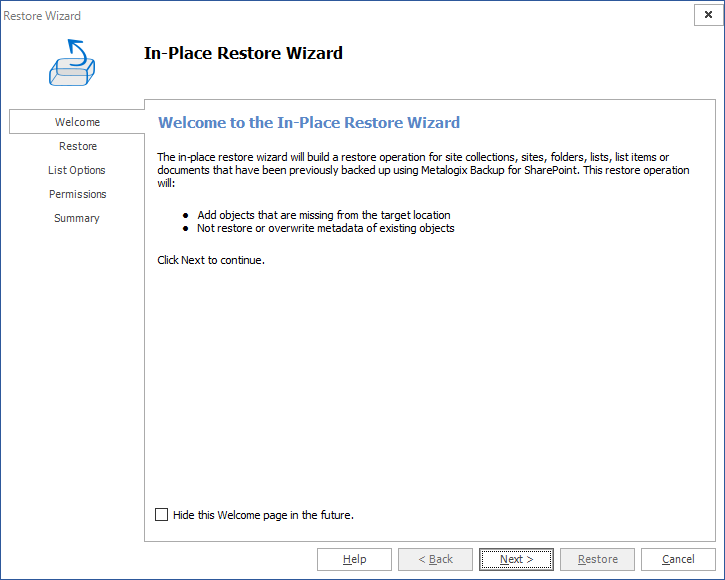
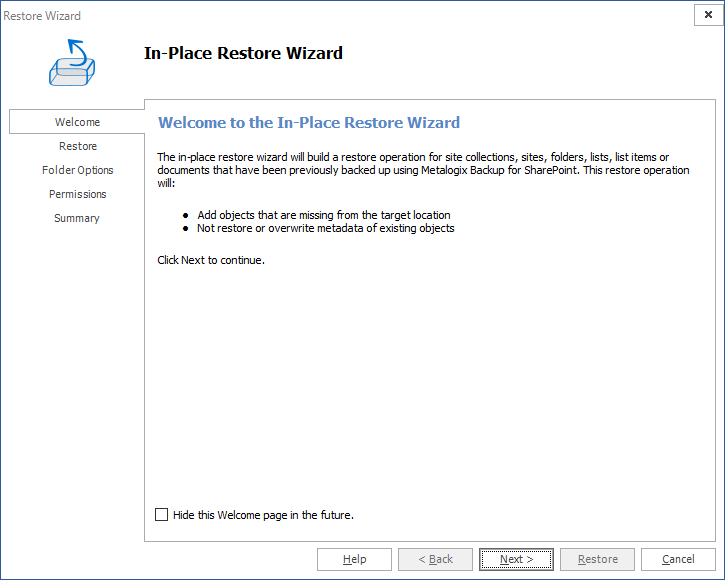
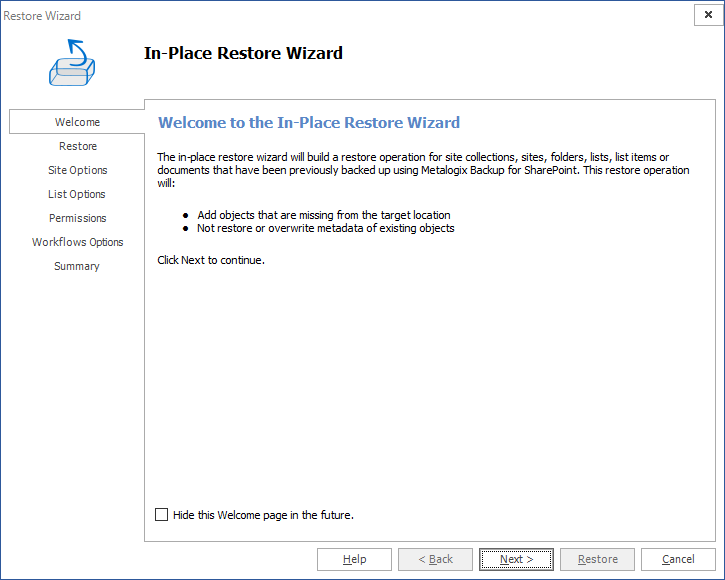
8.In the Welcome step you can select the Hide this Welcome page in future to skip this step the next time you invoke the wizard.
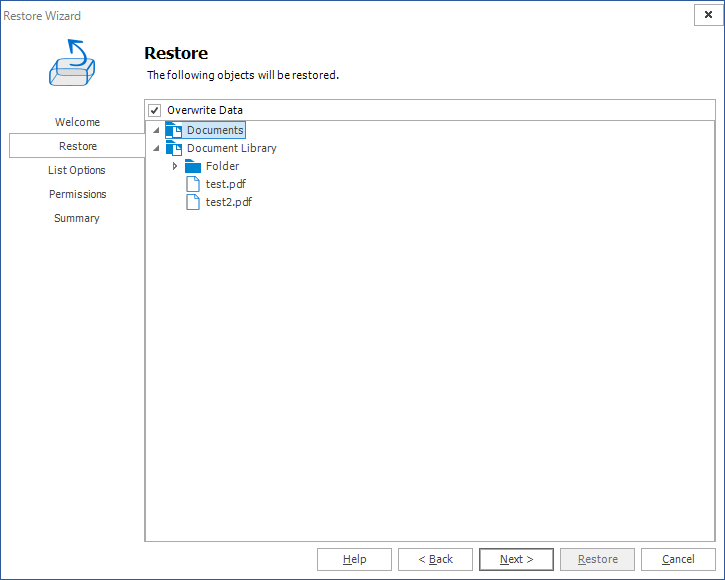
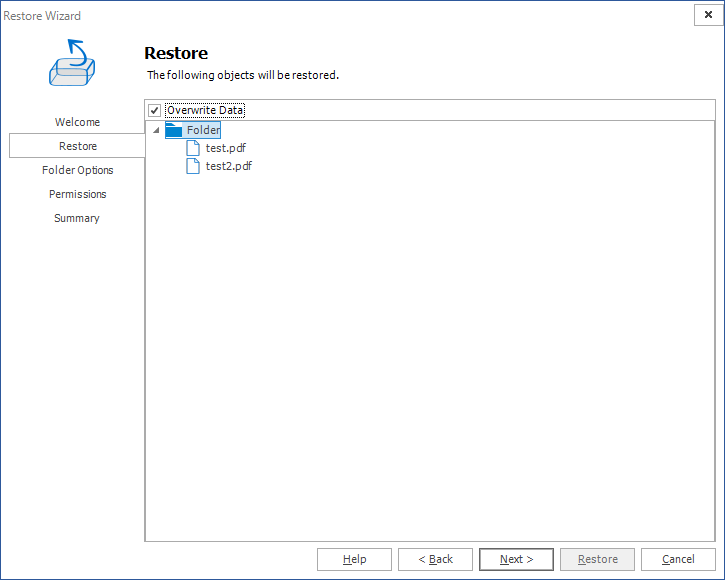
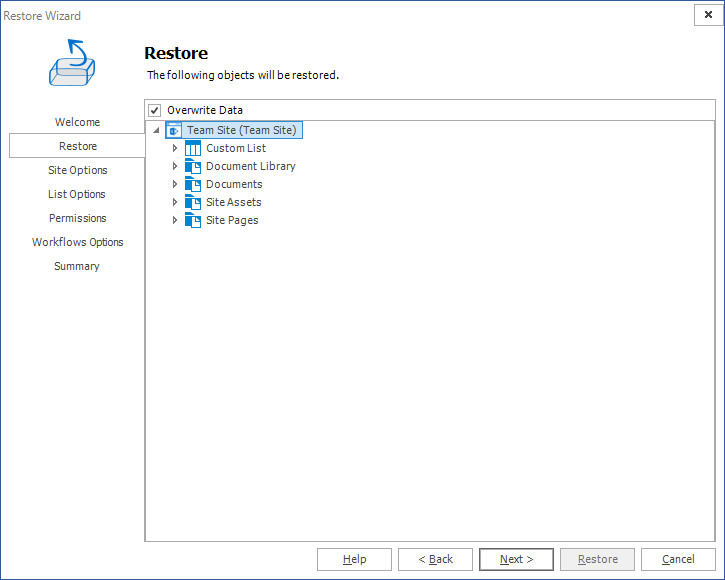
9.Click Next. The the Restore step appears. Review the objects to restore. If you want to overwrite all the objects that will be restored, then select Overwrite Data.
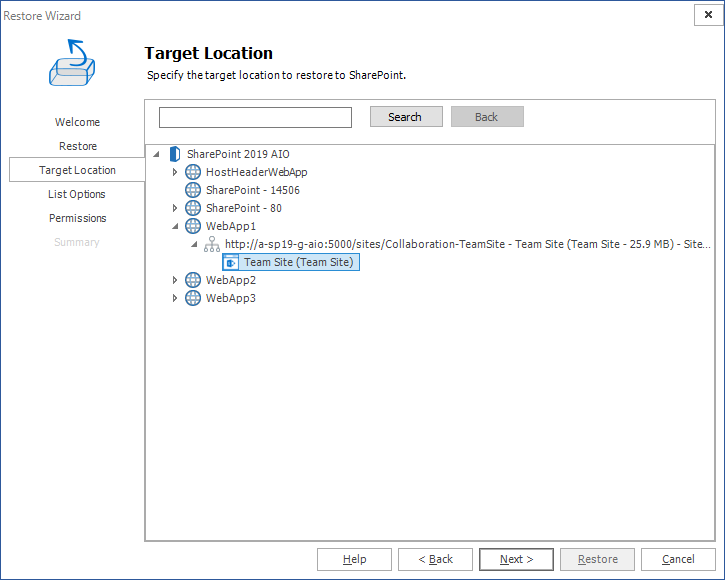
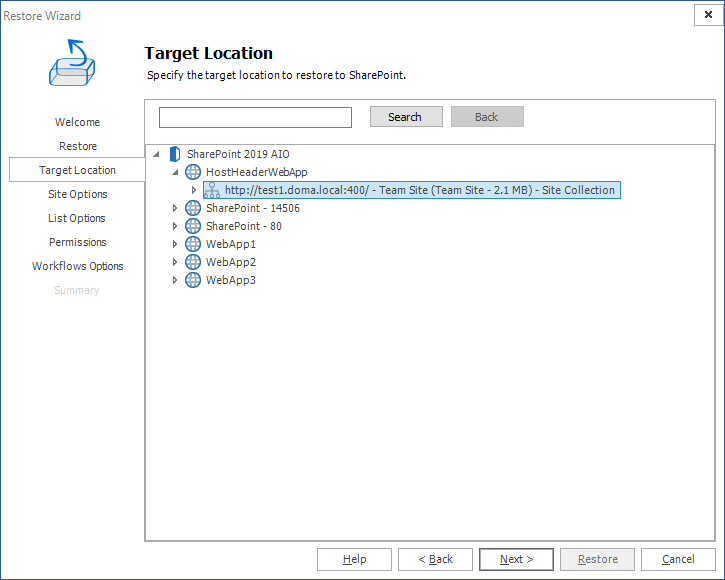
10.Click Next. The Target step appears. Specify the target location for where you want your restore to occur . You can specify a target in the search field when you have a large number of targets.
|
|
NOTE: This option is only available when you perform an out-of-place restore, or a restore to a local folder. For in-place and out-of-place restore types, Metalogix Backup for SharePoint displays a tree selection model based on the objects you selected to restore so you can select only valid places to restore those objects. You must have the appropriate permissions in the target SharePoint site. For the local restore type, specify the folder where you want Metalogix Backup for SharePoint to restore the local copy of the files. For more information and additional important considerations, see Understanding the granular restore process. |
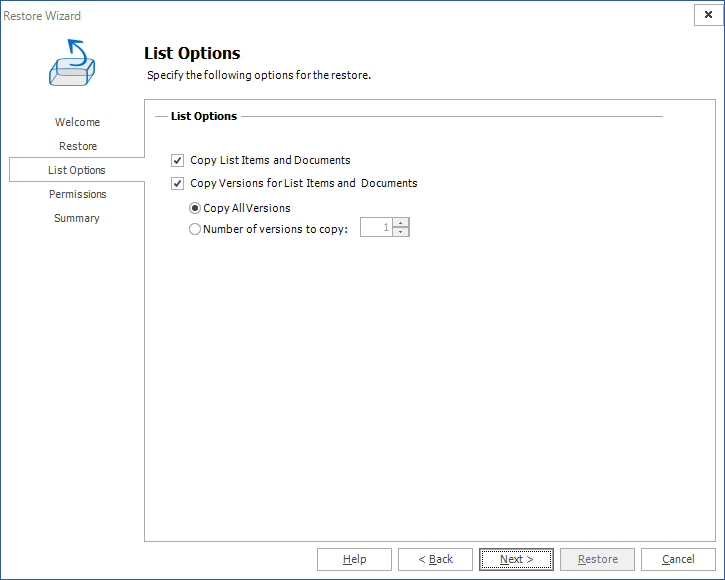
11.Click Next. The Item Options step appears.
Select from the following settings:
a.Copy List Items and Documents: This option allows granular copy of list items and documents.
b.Copy versions for List Items and Documents: This option allows including major and/or minor versions of the content. Versioning must be enabled on the target destination. By default Copy all versions is selected. If the end user wants to copy just some versions, they must check select Number of versions to copy and enter the amount of versions to be used during the restore.
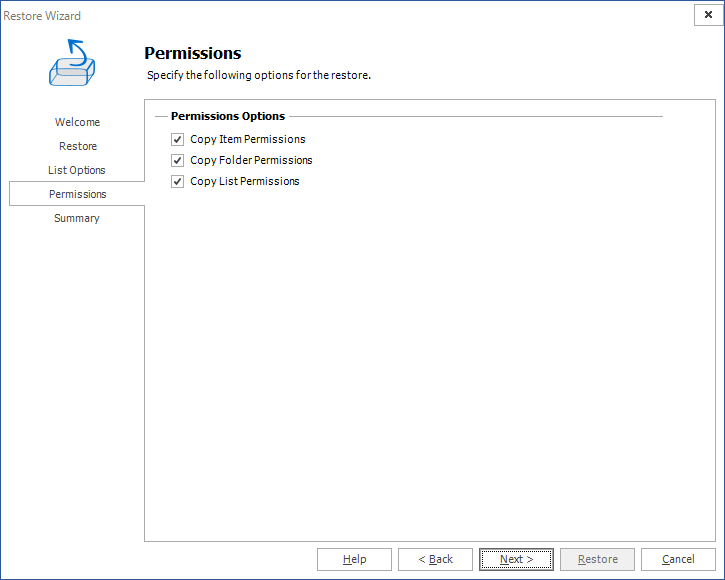
12.Click Next. The Permissions step appears.
Select from the following options:
a.Copy Item Permissions: Unique permissions to the specific items to be restored.
b.Copy Folder Permissions: Unique permissions to the specific folder nodes to be restored.
c.Copy List Permissions: Unique permissions to the specific list or library to be restored.
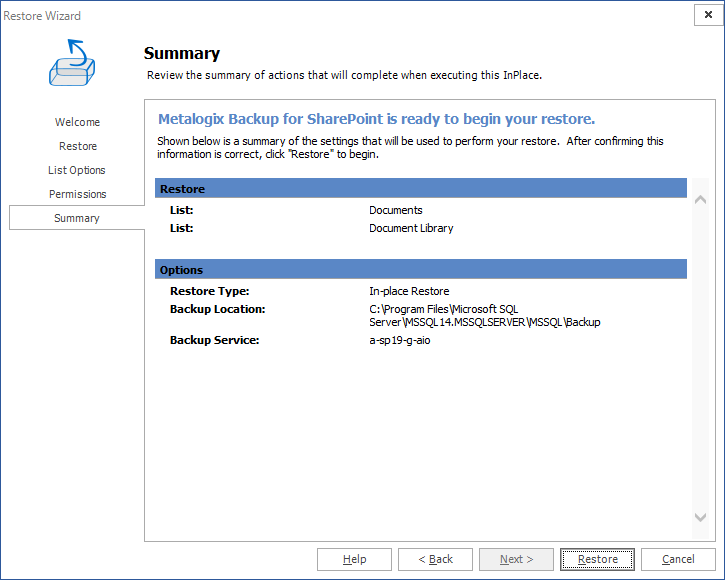
13.Click Next. The Summary step appears.
14.Review the restore settings and click Restore.
Restoring Folders
Follow the following steps to restore folders:
1.From the Management Console workspace selector click Granular Restore.
2.In the Granular Restore pane, select a farm and then select Mounted Databases.
3.Click the Restore tab.
4.In the ribbon, select a Restore Type: In-place, Out-of-place or Local.
5.In the Backup Sets pane, click the backup set from where you want to restore content.
6.In the Backup Content area, select the check boxes for the folders to restore. You can also use the search box to search for the folder names that start with the expression entered in the search box.
7.In the ribbon, click Restore. Depending on your choice of Restore Type, the In-Place Restore Wizard, Out-of-Place Restore Wizard or Local Restore Wizard opens.
8.In the Welcome step you can select the Hide this Welcome page in future to skip this step the next time you invoke the wizard.
9.Click Next. The Restore step appears. Review the objects to restore. If you want to overwrite all the objects that will be restored, then select Overwrite Data.
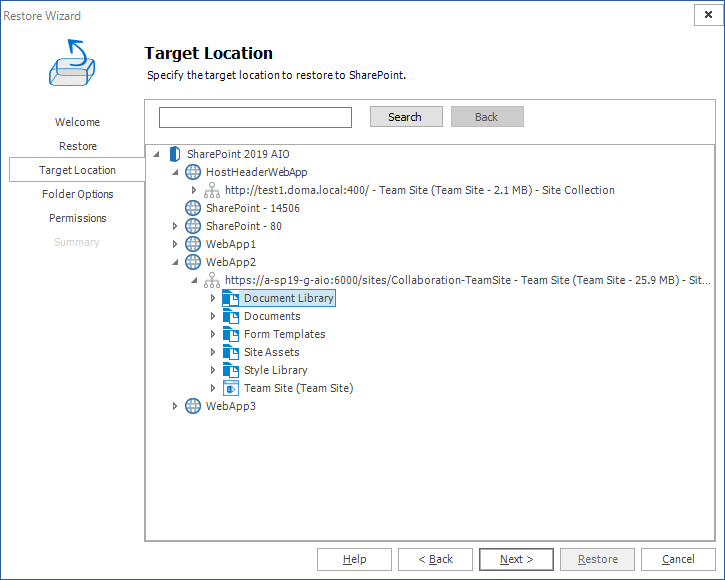
10.Click Next. The Target step, specify the target location for where you want your restore to occur (this option is only available when the restore is done out-of-place or to a local folder). You can specify a target in the search field when you have a large number of targets.
|
|
NOTE: This option is only available when you perform an out-of-place restore, or a restore to a local folder. For in-place and out-of-place restore types, Metalogix Backup for SharePoint displays a tree selection model based on the objects you selected to restore so you can select only valid places to restore those objects. You must have the appropriate permissions in the target SharePoint site. For the local restore type, specify the folder where you want Metalogix Backup for SharePoint to restore the local copy of the files. For more information and additional important considerations, see Understanding the granular restore process. |
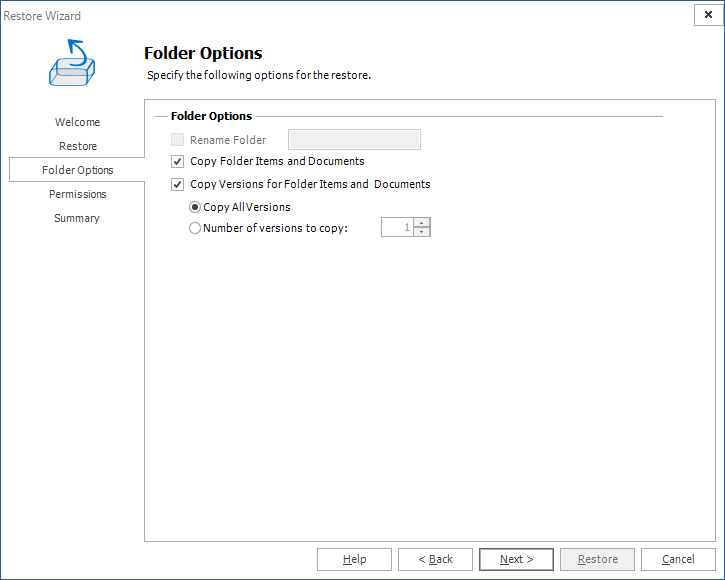
11.Click Next. The Folder Options step appears.
Select from the following options:
a.Rename Folder: (enabled only in the out-of-place restore wizard or if restoring to a local folder) Gives a new name to the folder on the target destination. The check box must be checked and a correct folder name must be typed in the text box.
b.Copy Folder Items and Documents: This option allows folder items and documents to be copied. This option is checked by default.
c.Copy Versions for Folder Items and Documents: This option allows the inclusion of major and/or minor versions of the content. Versioning must be enabled on the target destination. By default Copy all versions is selected. If the end user wants to copy only some versions, they must check the radio button Number of versions to copy and enter the number of versions to be used during restore.
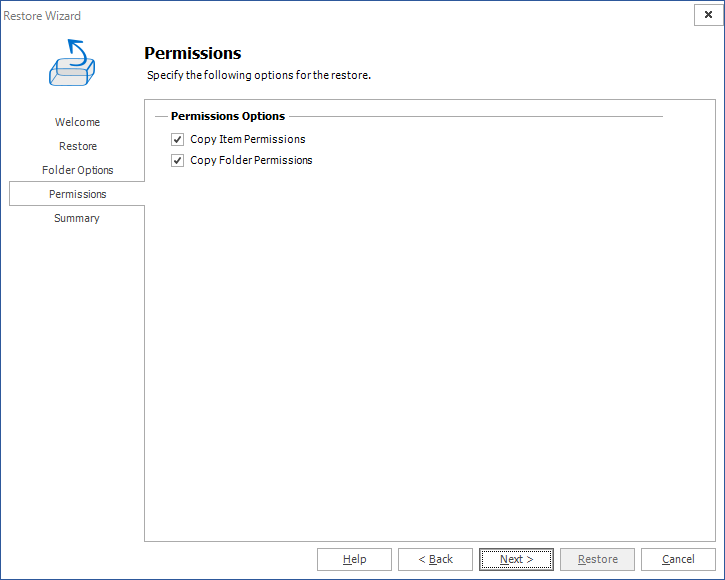
12.Click Next. The Permissions step appears.
Specify which permissions you would like to copy:
a.Copy Item Permissions: Unique permissions to the specific list or library items are going to be restored. This option is not checked by default.
b.Copy Folder Permissions: Unique permissions for the folder and child folders are going to be restored. This option is not checked by default, you can choose to copy items, folders, and list permissions.
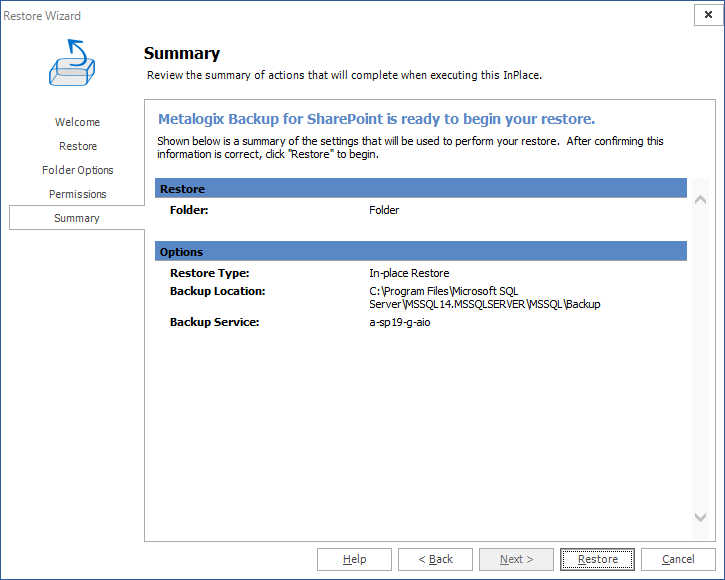
13.Click Next. The Summary step appears.
14.Review the restore settings, then click Restore.
Restoring Sites or Web Sites
Follow the following steps to restore sites and web sites:
1.In From the Management Console workspace selector click Granular Restore.
2.In the Granular Restore pane, select a farm and then select Mounted Databases.
3.Click the Restore tab.
4.In the ribbon, select a Restore Type: In-place, Out-of-place or Local.
5.In the Backup Sets pane, click the backup set from where you want to restore content.
6.In the Backup Content area, select the check boxes for the sites or web sites to restore. You can also use the search box to search for the site or web site names that start with the expression entered in the search box.
7.In the ribbon, click Restore. Depending on your choice of Restore Type, the In-Place Restore Wizard, Out-of-Place Restore Wizard or Local Restore Wizard opens.
8.In the Welcome step you can select the Hide this Welcome page in future to skip this step the next time you invoke the wizard.
9.Click Next. The Restore step, review the objects to restore, then click Next to continue. If you want to overwrite all the objects that will be restored, then select Overwrite Data.
10.Click Next. The Target step, specify the target location for where you want your restore to occur (this option is only available when the restore is done out-of-place or to a local folder). You can specify a target in the search field when you have a large number of targets.
|
|
NOTE: This option is only available when you perform an out-of-place restore, or a restore to a local folder. For in-place and out-of-place restore types, Metalogix Backup for SharePoint displays a tree selection model based on the objects you selected to restore so you can select only valid places to restore those objects. You must have the appropriate permissions in the target SharePoint site. For the local restore type, specify the folder where you want Metalogix Backup for SharePoint to restore the local copy of the files. For more information and additional important considerations, see Understanding the granular restore process. |
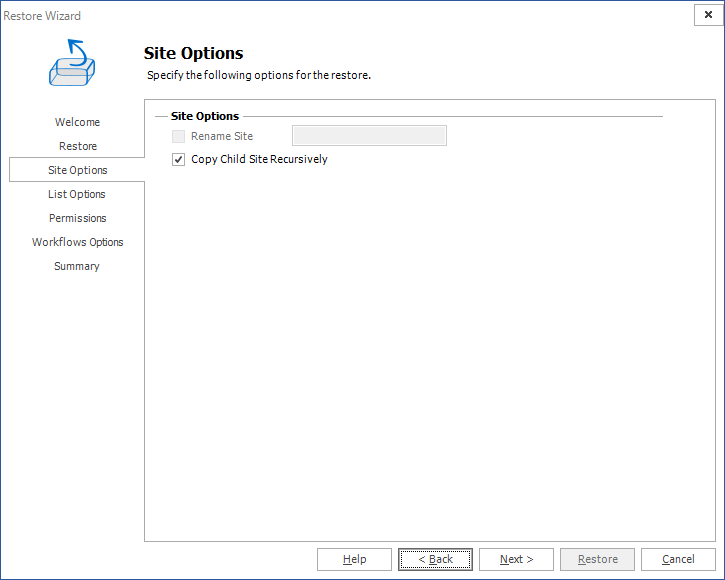
11.Click Next. The Site Options step appears.
Choose from the following options:
a.Rename Site: (enabled only in the out-of-place restore wizard or if restoring to a local folder) Gives a new name for the Site on the destination. If this option is checked, the text box on the right is enabled and then a valid name for a site has to be entered.
b.Copy Child Site Recursively: This option allows child Sites to be copied recursively, down through any existing levels.
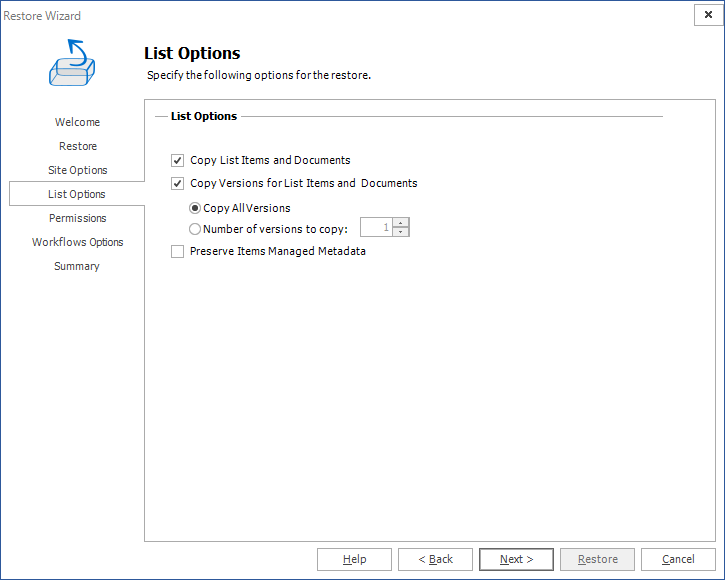
12.Click Next. The List Options step appears.
Choose from the following options:
a.Copy List Items and Documents: Include the content of the selected site to be restored on the destination. If this option is not checked, then just the basic structure for a site will be restored.
b.Copy Versions for Lists Items and Documents: This option allows users to include major and/or minor versions of the content. For this feature to work, versioning must be enabled on the target destination. By default Copy all versions is selected. If the end user wants to copy just some versions, they must check the radio button Number of versions to copy and enter the number of version to use on the restore.
c.Preserve Items Managed Metadata - must be checked if the metadata information related to term sets should be preserved.
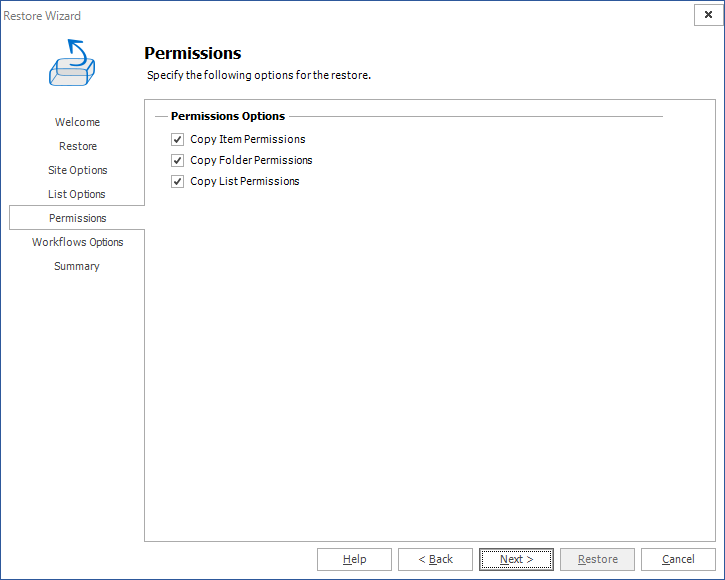
13.Click Next. The Permissions step appears.
Choose from the following options:
a.Copy item Permissions: Permissions unique to the specific list or library items are going to be restored.
b.Copy Folder Permissions: Permissions unique to the folder and child folders are going to be restored.
c.Copy List Permissions: Permissions unique to the list are going to be restored.
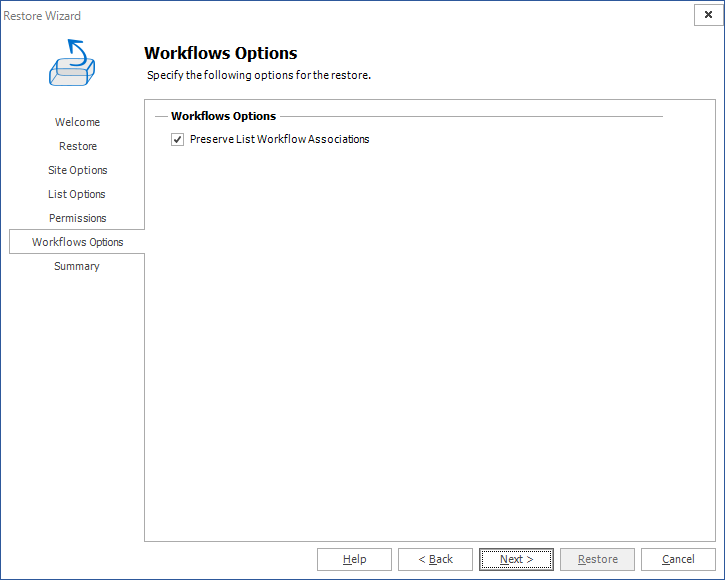
14.Click Next. The Workflow Options step appears. You can choose whether you would like to preserve list workflow associations. By selecting Preserve List Workflow Associations, you are choosing to keep Workflow content types on the content being copied.
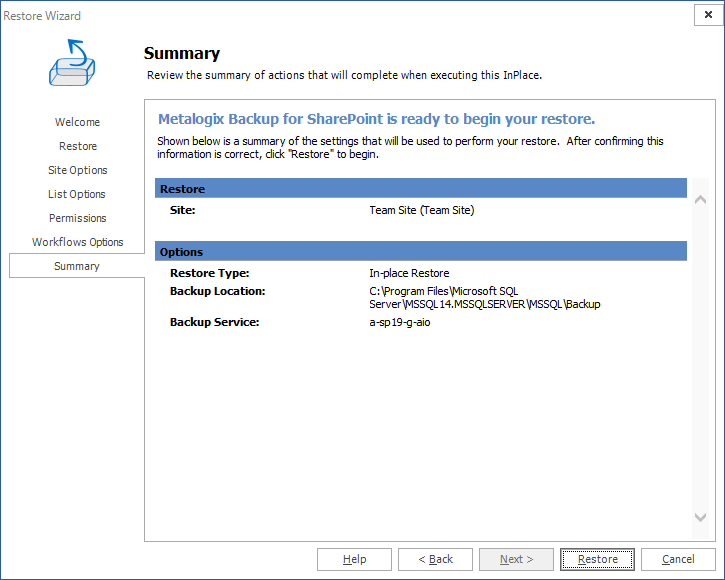
15.Click Next. The Summary step appears.
16.Review the restore settings and click Restore.

