
User Mappings
|
Navigation: Configuring Copying Options > Mapping Options > Global Mappings > User Mappings |
During a migration, user mappings are carried out in the following order of precedence:
D.Mapping missing users to a user specified on the Mapping Options dialog
E.Mapping to logged-in user
Explicit User Mappings
|
Navigation: Configuring Copying Options > Mapping Options > Global Mappings > User Mappings > Explicit User Mappings |
Explicit user mappings are generally used when trying to migrate a user account that is "orphaned": that is, it exists on the source but is no longer active (or may not be in Active Directory). While the user may not exist, the users data may still need to be migrated to the target.
One alternative to adding such an orphaned user to the target is to map the account to another user account. All of the users basic metadata would be migrated, but the user name would be populated with the mapped account name instead.
User mappings can also be imported using the Import mappings from XML option.
If you want to map all users (which includes "orphaned" users) from the source domain to a different domain on the target, you can do so using Domain Mappings.
To configure explicit user mappings:
1.In the Specify Global Mappings dialog, make sure the User Mappings tab is selected.
2.From the Source: drop-down on the left side of the dialog, select the source object containing the users you want to map to the target.
The Source list becomes populated with the users that have permissions for that object.
3.Use the information in the following table to determine the appropriate action to take.
|
If the user ... |
Then |
|---|---|
|
already exists on the target |
A.Select the source user that you want to map. B.From the drop-down on the right (target) side of the dialog, select the target object containing the user to which you want to map. C.The target list becomes populated with users that have permissions for the selected object. D.Select the target user to which you want to map the source user. |
|
does not already exist on the target |
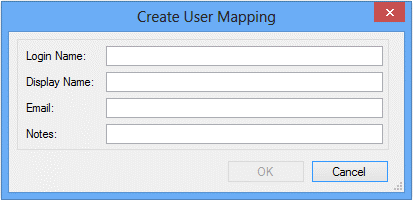
A.Click Create New User to display the Create New User dialog. B.(Required) Specify a Login Name. NOTE: This is the most important field as it is used to create/add a new user and should automatically retrieve any necessary values from the target side authenticator. Be sure to use the appropriate format for the authentication method (for example domain\user name, the O365 login name, or, if using Claims authentication, the appropriate Claims prefix and format). C.(Optional) Complete the Display Name and/or Email fields. If the Login Name does not authenticate for any reason, these fields will be used to fill out the user data. D.Click [OK]. |
4.Click Map.
The mapping displays in the lower half of the dialog.
5.Repeat steps 2-4 until you have completed mapping users.
NOTE: You can map multiple source users to a single target user.
Auto User Mapping
|
Navigation: Configuring Copying Options > Mapping Options > Global Mappings > User Mappings > Auto User Mapping |
For migrations to SharePoint Online, unless users are mapped explicitly all users will be automatically mapped from a source domain to a domain with the same name on the target.
IMPORTANT: Users will not be automapped if the Import Pipeline is used.
For example, if you are migrating users from an Active Directory domain called quest on the source to users in an Office 365 tenant domain has the same name, the users would be migrated as follows:
quest\amahfudh -> amahfudh@quest.onmicrosoft.com
quest\doconnor -> doconnor@quest.onmicrosoft.com
quest\fsullivan -> fsullivan@quest.onmicrosoft.com
quest\gbond -> gbond@quest.onmicrosoft.com
and so on.
NOTE: If the source and target domains have different names, you can use Domain Mappings.
To bypass some of the limitations with Auto User Mapping (including use of the Import Pipeline) and to provide more flexible mapping options for both on premises and online targets, you can instead use a utility available from Quest Support to generate, configure, and import User Mappings.
Generating, Configuring, and Importing User Mappings with the UserMappingCLI Utility
|
Navigation: Configuring Copying Options > Mapping Options > Global Mappings > User Mappings > Generating, Configuring, and Importing User Mappings with the UserMappingCLI Utility |
Quest Support offers a powerful command line utility to help with automatically generating and configuring user mapping files, along with PowerShell Cmdlets for importing user mappings as a .csv file. For a copy of the utility with complete instructions, visit https://support.quest.com/metalogix-content-matrix/kb/311358/best-practices-for-generating-configuring-and-importing-user-mapping.