For more information on this topic, please see:
Mail Restore prerequisites
Before you can restore mail items, you must meet the following prerequisites:
- Outlook 2007 or later is installed on the Core machine.
- There is at least one profile configured in Microsoft Outlook.
- The Outlook profile has full-control permissions, including Send As and Receive As permissions. For more information, see Granting the required permissions in Microsoft Exchange Server.
- The Outlook Cached Exchange Mode option under the Outlook profile associated with Rapid Recovery is disabled.
- The Core machine is in the same domain as the Exchange database.
- The required Exchange database is open and you are on the Mail Restore page of the Rapid Recovery Core Console. For more information, see Opening an Exchange database in Rapid Recovery Core.
The process for restoring by using Mailbox Restore is as follows:
Method 1:
NOTE: These steps should be used within the LMU only.
- Launch the Local Mount Utility.
- Select the Exchange Server Agent.
- Expand the recovery point that you want to restore from.
- Right-click on the mailbox store and select the option to Open the Database for Recovery. The Exchange database (EDB) file will open in Mailbox Restore.
- Select the folders, messages, calendar items, tasks, or notes that you want to restore and click the Restore button at the top of the window. The Restore option is also available by right-clicking the item to restore.
- The Restore Wizard will open with these options:
- Redirect items to a recovery folder – Restores select items to a recovery folder of an online mailbox.
- Redirect restored items to a PST file – Restores selected items (including the folder hierarchy) to the PST file you specify.
- Redirect restored items to a PST file(s) - Restores selected items (including the folder hierarchy) to separate PST files for each mailbox.
- Restore to the original location – Redirects selected items (including the folder hierarchy) directly into the mailbox in the online store where they originally resided.
- Based on your selection, the wizard will prompt for additional information. Go through the rest of the wizard to initiate the restore. Once the restore completes, a message will display that the items were restored successfully.
Method 2:
You also have the ability to manually open Exchange EDBs by using Mailbox Restore.
- From the Local Mount Utility or the Core console, select the recovery point from which you would like to restore. Right-click this recovery point and choose “Mount Writeable.”
- Once mounted, If you need to locate a mounted recovery point from the Local Mount Utility, click “Options” to determine where the mount point directory is located. If the recovery point was mounted from the Core console click on the Tools tab and select Mounts.
- Open Mailbox Restore.
- Select “Open” at the top left corner to browse for the Exchange database file location.
- Navigate to or enter the Exchange Database, Log File & Database system path. If the logs or system path are in different locations, you must manually browse to their locations.
- Once you have verified the paths, click “Open.” The Mailbox Restore will begin to populate with the contents of the selected database.
- Select the folders, messages, calendar items, tasks, or notes that you want to restore and click the Restore button at the top of the window. The Restore option is also available by right-clicking the item to restore.
- The Restore Wizard will open with these options:
- Redirect items to a recovery folder – Restores select items to a recovery folder of an online mailbox.
- Redirect restored items to a PST file – Restores selected items (including the folder hierarchy) to the PST file you specify.
- Redirect restored items to a PST file(s) - Restores selected items (including the folder hierarchy) to separate PST files for each mailbox.
- Restore to the original location – Redirects selected items (including the folder hierarchy) directly into the mailbox in the online store where they originally resided.
- Based on your selection, the wizard will prompt for additional information. Go through the rest of the wizard to initiate the restore. Once the restore completes, a message will display that the items were restored successfully.
Method 3:
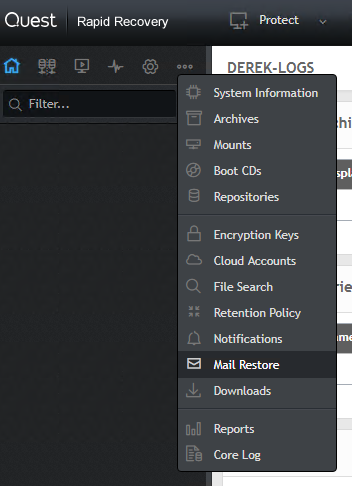
Beginning Rapid Recovery 6.2, you can restore mail items without leaving the Core interface. The mail items exist in the Exchange database within the recovery point of a protected Exchange Server machine, which you can open using the Open Exchange Databases Wizard. Instructions to complete these steps can be read in detail in our User Guide in the Opening an Exchange database in Rapid Recovery section.


