Use the following procedure if you need to:
·extend the period of an evaluation license
·update your ControlPoint license to include additional SharePoint users
·upgrade from an evaluation version to a full version of ControlPoint, or
·reactivate a license that has expired or is about to expire.
To change the terms of a ControlPoint license:
1Contact Quest and request a license update.
2From the left navigation pane, choose LICENSE.
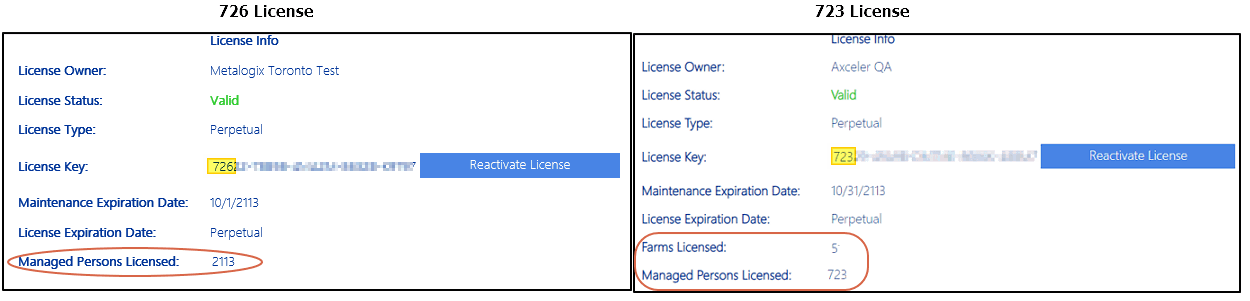
The License Status may be one of the following:
Valid
Expired
Disabled
To reactivate a license:
1Click the [Reactivate License] button to the right of the License Key field to display the Change License Key dialog.
2If you have received a new license key, overwrite the existing license in the License Key field.
3Use the information in the following table to determine the appropriate action to take.
|
If .... |
Then ... |
|---|---|
|
you have internet access and want to activate your license updates online. |
make sure the Activate Online radio button is selected. |
|
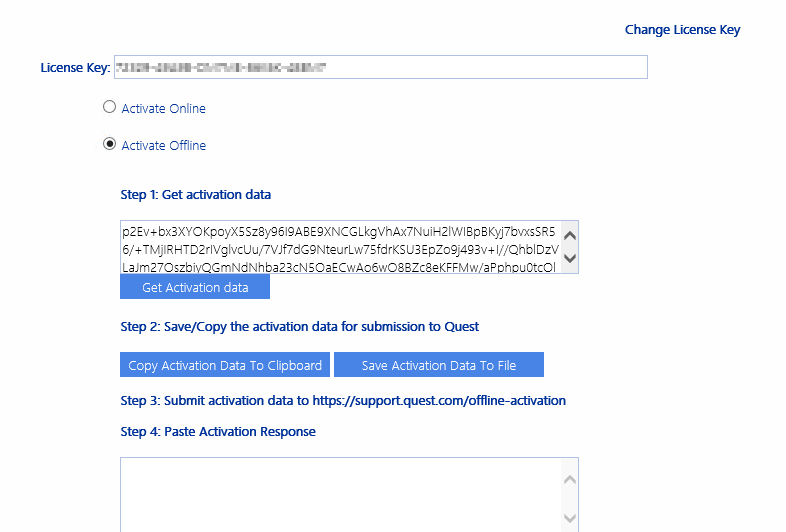
you do not have internet access and/or want to activate your license offline |
select the Activate Offline radio button and follow the instructions that display in the dialog to complete the activation process. NOTE: Because the request for the Activation Data must be submitted via the Quest website, the request itself must be submitted from a machine that has internet access. The Activation Data can then be copied to the server that hosts ControlPoint. |
4Click [Activate].
As part of the initial configuration of ControlPoint Online, is created in the Windows Task Scheduler on the server where ControlPoint Online is installed, in the folder Task Scheduler Library > Metalogix > ControlPoint Online.
the ControlPoint Scheduler Job, scheduled to run by default ever 10 minutes to check for and initiate the running of operations scheduled via the ControlPoint Scheduler.
This task is configured to run using the credentials of the ControlPoint Service Account.
NOTE: Although the Scheduler Job specifies an initial Start Date and Time, the task is actually triggered for the first time when the first ControlPoint Online scheduled job is submitted.
If you want to change the scheduled run time or frequency, you can do so directly in the Windows Task Scheduler.
CAUTION: The Scheduler is an application-wide job. Changing the start time and or/frequency will impact all of ControlPoint.
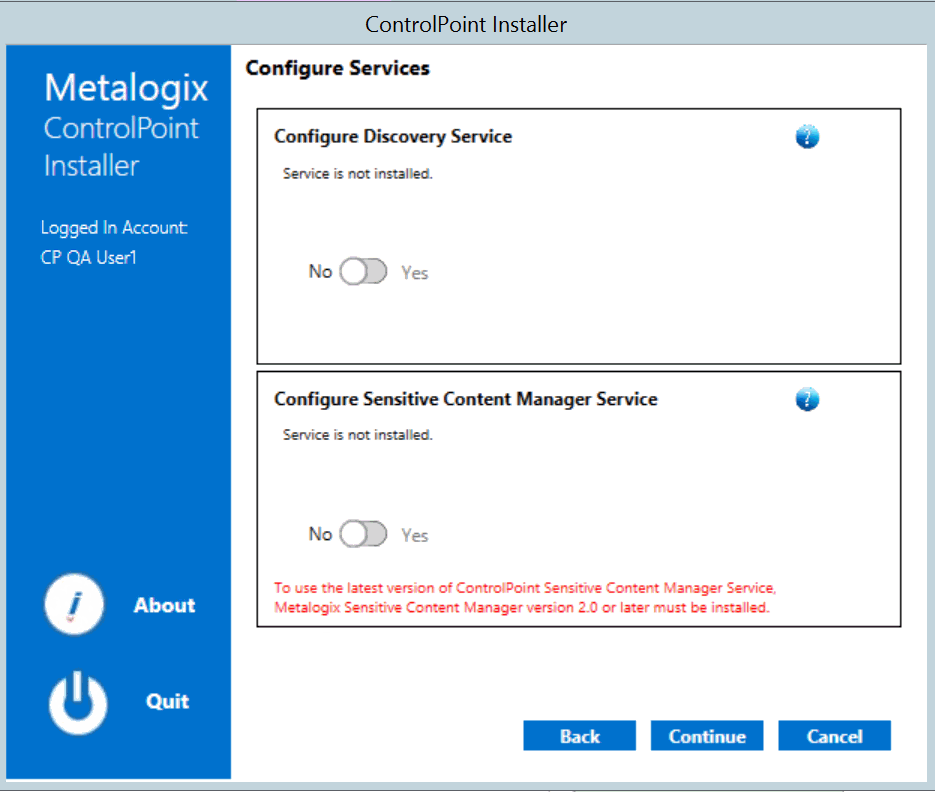
Toward the end of ControlPoint configuration process you have the option to configure the following Windows service(s):
·The ControlPoint Discovery Service, which collects data and stores it in the ControlPoint Services (xcAdmin) database cache for use in ControlPoint data analysis and reporting.
AND/OR
·If Sensitive Content Manager is installed in your environment, ControlPoint Sensitive Content Manager (SCM) Services will allow you to use it within ControlPoint:
§as a means of checking for:
oContent Analysis (CA) jobs ready to be uploaded from ControlPoint to Sensitive Content Manager for scanning.
AND
oScan results ready to be downloaded from Sensitive Content Manager to ControlPoint for further action.
AND
§Because they support multi-threading, SCM Services are especially suited to very large content analysis jobs.
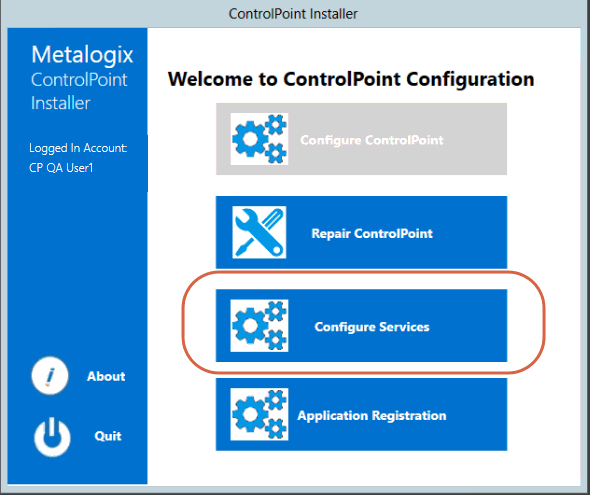
NOTE: If you want to configure services at a later time, you can do so by launching the Configuration Wizard from the server on which ControlPoint is installed (using the same on premises and O365 login accounts used to install the ControlPoint application). After you have verified the Wizard has finished checking installed components, select Configure Services.
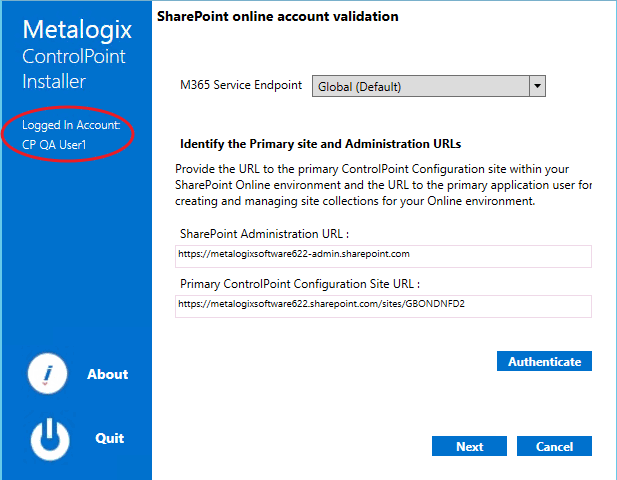
If you do choose to perform this action at later time, you will be prompted to complete the SharePoint online account validation dialog and authenticate using the Office 365 account used at the time ControlPoint was installed (which must be a Global Administrator for the tenant).
To configure ControlPoint Services:
1On the Configure Services dialog, select the service(s) you want to configure.
IMPORTANT:
§The Service Account must meet all of the requirements of the ControlPoint Service Account, as well as permission to Run as a Service.
§Keep in mind that the latest version of ControlPoint Sensitive Content Manager Service will only work with version 2.0 or later of Metalogix Sensitive Content Manager.
2Select the service(s) you want to configure.
3Click [Continue].
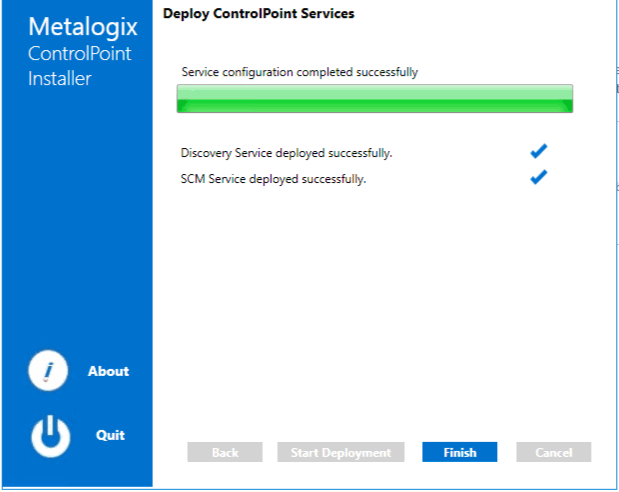
4Click [Start Deployment].
The installer deploys the selected Windows service(s).
5When the services have been successfully deployed, click [Finish].
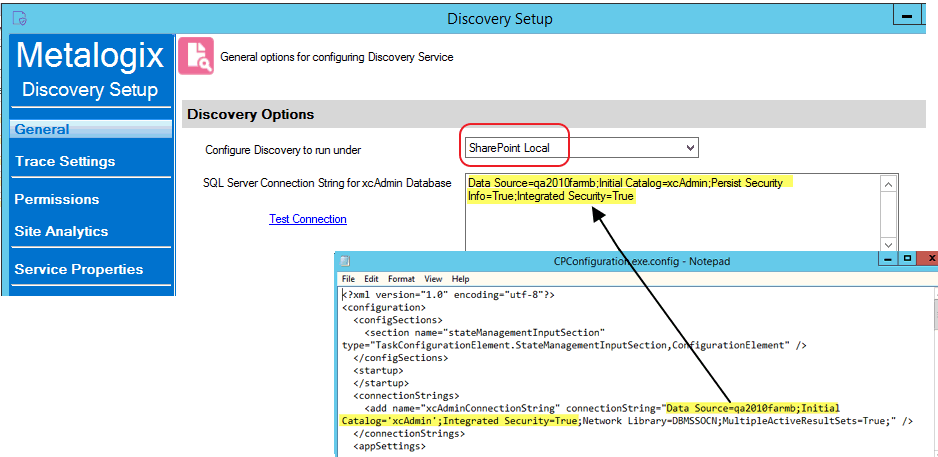
Additional Setup Requirement for the ControlPoint Discovery Service
Before you can use the ControlPoint Discovery Service for the first time, you must also perform the following configuration tasks on the General tab of the Discovery Setup application (located, by default, in the folder C:\Program Files\Metalogix\ControlPointOnline\ControlPointFeatures\Services\Discovery):
·For Configure Discovery to run under, select SharePoint Local, and
·Add the SQL Server Connection String for xcAdmin Database.
NOTE: You can copy the Connection String from the file CPConfiguration.exe.config, located, by default, in the folder C:\Program Files\Metalogix\ControlPointOnline\ControlPointFeatures. Use the portion of the string that starts with the words Data Source and ends with Integrated Security = <value>.
IMPORTANT: Before Services Can be Run:
Before you can run Discovery and Sensitive Content Manager services, make sure that:
·TLS version 1.2 is enabled on the server where the services are installed
AND
·the .NET Framework is configured to support strong cryptography (via the Windows Registry setting SchUseStrongCrypto).
Refer to the following Microsoft articles for complete details.
·Transport Layer Security (TLS) best practices with the .NET Framework
ControlPoint Discovery is a tenant-specific background task that collects information and stores it in the ControlPoint Services (xcAdmin) database cache for use in ControlPoint data analysis and reporting.
·for use in ControlPoint data analysis and reporting
·to populate and update statistics lists used to create dashboards.
Discovery is triggered by the ControlPoint Discovery Service to run on a pre-defined schedule.
If you want to ensure that your ControlPoint analyses have the most recent cached datayou can run the Discovery process interactively from the ControlPoint application. The ControlPoint installer includes the option to configure the Discovery Service.
If the ControlPoint Discovery Service is not installed, the operations and parameters that rely on cached data collected by Discovery are disabled.