Sets the level of alarms that the system generates, stores, and displays.
|
1 |
Log in to the Foglight browser interface. On the navigation panel, click Dashboards > OpenStack Environment. |
|
2 |
|
3 |
|
4 |
In the Set Alarm Sensitivity Level dialog box, select the desired sensitivity level: Essential, Normal, or Tuning. |
|
5 |
Click Save. |
Review existing OpenStack object instances. The list displays the Object Type and Count.
Review and delete OpenStack object instances that are no longer needed.
|
1 |
On the OpenStack Environment dashboard, open the Administration tab. |
|
2 |
|
3 |
In the Expired Data Removal Wizard dialog box, select the object type that you want to review, and type the number of days during which the object instances were not updated. |
|
4 |
Click Next. |
|
• |
If you want to modify your search, click Previous, make your changes, and observe your results again. For example, to show fewer instances, click Previous, and increase the time period. When satisfied, click Next. |
|
7 |
Click Finish. |
The Agents view has three tabs for embedded agents. Each tab shows a list of existing agent instances and agent management buttons at the top of the table.
Foglight for OpenStack uses agents to collect information about the monitored hosts.
The Foglight Agents view shows a list of all configured Foglight agent instances. The following buttons are available on the table:
|
• |
Add — starts a workflow for creating agent instances. |
|
• |
Refresh — refreshes the list of agent instances and their states. |
|
• |
Activate—activates one or more selected agent instances. Activating an agent instance starts the agent process on the machine on which the agent is installed. |
|
• |
Deactivate — deactivates one or more selected agent instances. Deactivating an agent stops the agent process on the machine on which the agent is installed. |
|
• |
Start Data Collection — the active Foglight Agent begins to monitor your OpenStack environment and send data about it to the Foglight Management Server. |
|
• |
Stop Data Collection — stops the data collection for one or more selected agent instances. |
|
• |
Remove — deletes the selected agent instance. |
|
• |
Update Agent — upgrades the agent to a new version, after a new cartridge is installed. |
|
NOTE: When a newer Foglight for OpenStack version is installed on your system, the Agent Version column in the Agents table is updated to read Update Agent. To apply the new features, update the agents to the latest version. You can upgrade the agents one by one, by selecting from the table and clicking the corresponding Update Agent link in the Agent version column. You can upgrade all agents at once by selecting all the listed agents and clicking the Update Agent button at the top of the list. |
|
1 |
Click the Edit Properties icon associated with that agent. |
|
• |
User Name — user name, the agent uses to connect to the monitored OpenStack. This user should have administrative privileges to OpenStack. |
|
• |
Password — user password. |
|
• |
Project — the project on which the user has been granted a role. |
|
• |
User domain name — the domain to which the user is associated. |
|
• |
Project domain name — the domain to which the project is associated. |
|
3 |
Click Save. |
The Download Log button offers a convenient way to get the current log file of the corresponding agent, for review and diagnostics.
|
1 |
Click the Add button on the Foglight Agents tab. |


|
3 |
|
• |
Server Name — OpenStack (Keystone host) name or IP address. |
|
• |
Port — through which a remote host communicates with the system running the Identity service. |
|
• |
Use HTTPS — (optional) use secure communications with the OpenStack server. |

|
4 |
|
• |
User Name — user name. The user should have administrative privileges to OpenStack. |
|
• |
Password — user password. |
|
• |
Project — the project on which the user has been granted a role. |
|
• |
User domain name — the domain to which the user is associated. |
|
• |
Project domain name — the domain to which the project is associated. |
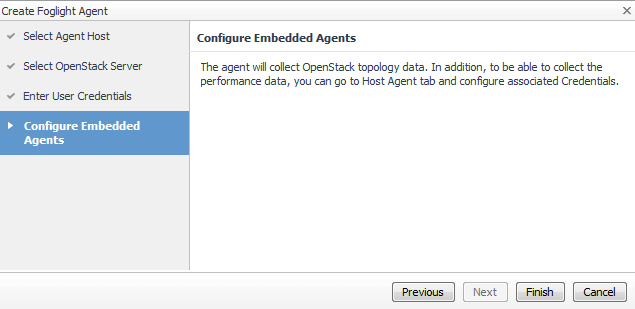

When the agent is created, a message indicating successful completion appears.
The Administration tab refreshes, showing the newly created instance of the Foglight Agent in the list.
The agent is activated and data collection starts.
The next step is to obtain performance data by setting up host agents.
The Host Agents tab displays a list of all discovered hosts with the statuses for the embedded agents. A set of host management buttons are available:
|
• |
Refresh — refreshes the list of host agents and their statuses. |
|
• |
Credentials — adds or removes the credentials of one or more host agents. |
|
• |
Activate — installs the host agent. |
|
• |
Deactivate — deletes the host agent. |
The Download Log button offers a convenient way to get the current log file of the corresponding agent, for review and diagnostics.
|
1 |

|
2 |
Click Add. |

|
4 |
Click Add Hosts. |
|
5 |
|
6 |
Click Assign a Credential. |
|
7 |
|
NOTE: To add more Credentials, go to the Administration dashboard and click Credentials > Manage Credentials > Add. |
|
8 |
Click Save. |
|
9 |
Click Close. |
The Instance Agents tab shows a list of Instance Agents and a set of management buttons at the top of the list. The following buttons are available:
|
• |
Refresh — refreshes the list of Instance Agents and their statuses. |
|
• |
Credentials — adds or removes the credentials of one or more Instance Agents. |
The workflow to configure credentials for new instances is the same as clicking the Credentials button on the Host Agents tab. For more information, see Host Agents tab .
