|
|
If you are planning to migrate to Office 365, you should first enable Office 365 migrations on the Office 365 tab. Doing this will display additional settings for Office 365 migrations in various tabs. Refer to the Migrator for Notes User Guide for Office 365 Migrations for additional information. Office 365 migrations will require a Modern Authentication configuration and an Azure Application ID for Microsoft Graph. Refer to Appendix E: Microsoft Graph Application ID for this additional set up. |
Click the Office 365 tab; configure these settings when migrating to Office 365:

Configure these settings if you want to migrate to Office 365
Use the following table to help enter the correct values for each setting:
|
Settings |
Description |
|---|---|
|
Migrate to Office 365 |
Select Yes to enable migration to Office 365 and display the Office 365 settings below. |
|
Office 365 Global Administrator |
Specify the Office 365 Admin SMTP address used to pass credentials to Office 365 for remote access. |
|
Office 365 Security Group |
Specify the Office 365 Security Group Name used to set mailbox permission for migration purposes. |
|
Office 365 License Type |
Select the license type. All accounts will be activated under the selected license. Select “Multiple License Types” if you have multiple types to choose from. |
|
Override existing license |
If the user already has an applied license, the provisioning process can override it with the specified type. Yes – change the existing license to the selected type No – leave license type unchanged. |
|
Office 365 Account Sku ID Prefix |
Specify the tenant name of the client which is used to build the folder structure for reporting and activation. The required naming convention is to duplicate the given tenant name. For example, @contoso.onmicrosoft.com would have an Account Sku ID of “contoso”. |
|
PowerShell Logging Path |
Specify the PowerShell logging path used when generating, executing, and logging PowerShell scripts. |
|
Default Reporting Path for Validation |
Specify the reporting path used by the validation process. |
|
Default Reporting Path for Activation |
Specify the reporting path used by the activation process. |
|
Default Reporting Path for Permission |
Specify the reporting path used by the permission process. |
|
O365 Location Country Codes |
Specify the ISO Country Codes that will be assigned to the account in Office 365. These values will be used during the activation process. |
The preferred method of migrating end user archives is to configure the Local Archive Discovery settings and sending the Local Archive Discovery application to users to identify the local archives on the user’s workstation. Detailed information for configuring and using the Local Archive Discovery application is available in the Archive Migrator for Notes User Guide.
|
|
The method using Archive Migrator for Notes requires PowerShell matching. For migrating to Office 365 online archives with Modern Authentication enabled, the PowerShell processing should also use the Modern Auth configuration. |
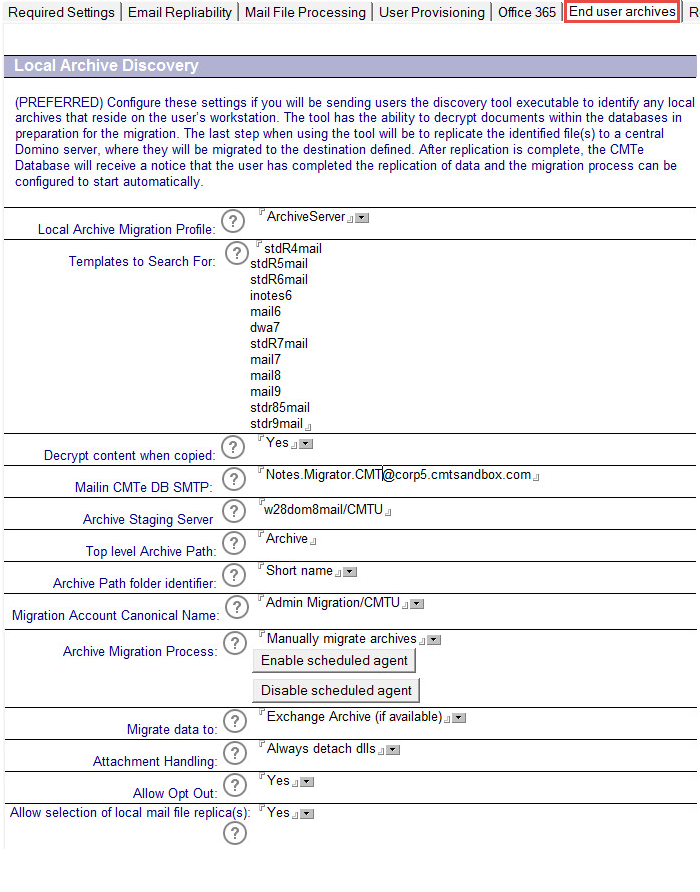
If you are using the Lotus Script agent instead of the Local Archive Discovery application (Archive Migrator for Notes), configure the settings in the Legacy Archive Processing section.
On the End user archives tab, configure the following settings to copy local Notes archives to a server for centralized migration:

Use the following table to help enter the correct values for each setting:
|
Settings |
Description |
|---|---|
|
Archive Processing |
Specify where Archive data will be copied; to a specified Archive server OR into user’s existing Domino mail file. |
|
Create Archive Copy or Replica |
Specify whether you want to create a copy or replica of the Archive database. It is recommended that you create a replica. This will ensure that your archives will remain updated even if there is a time lapse between the preprocessing phase and actual migration. |
|
Archive Destination Server |
Specify the destination Domino server where the copy/replica of the Archive Database will be stored.
Leave it blank if you are copying them to a file server or a local workstation. |
|
Archive Destination Path |
Specify the destination path where the copy/replica of the Archive database will be stored.
Ensure that the path is relative if destination is a Domino server. However, if destination is a file server, full path must be specified |
|
Local Archive Discovery |
Specify how Migrator for Notes will look for Archive databases on the end user machine. You can either select Auto Discover or Prompt User. |
Configure these settings if you want to send an email to end users that will contain instructions and a button, which when clicked will copy their Archive database to the Domino server. Once on the server, the Archive databases can be migrated either to .pst files or to Microsoft Exchange.
Once you click on the button to perform the copy/replicate your local archives to the Domino server, a new archive Person Document is created for each archive database copied to the server. The archive Person Documents are then listed in the Set Migration Profile view.
To view which archive database will be migrated, double-click and open the username archive Person document:
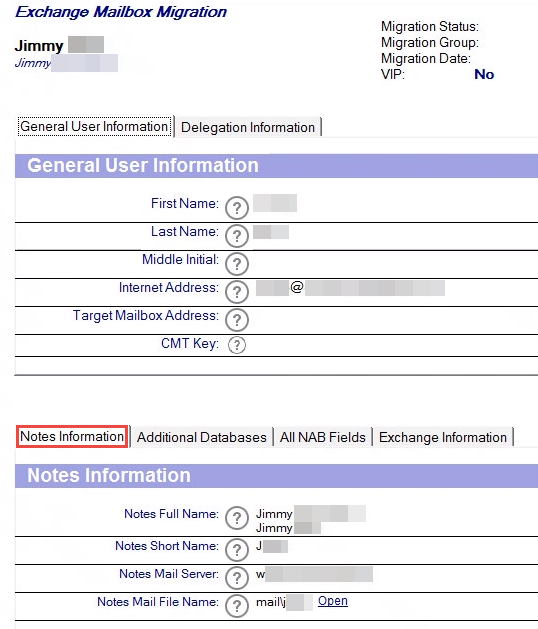
Assign a migration profile and the user will be promoted to the Migrate view to perform the migration.
The Archive Processing field can copy the archive data to either the end user’s existing mailbox or a specified archive server:

If you select Copy Data to End User’s Existing Mail, the form changes to display the Archive Folder Name field and remove the following three fields (Create Archive Copy or Replica, Archive Destination Server and Archive Destination Path). The added field specifies the folder name where all the archived data will be copied in users’ mailbox. You can specify any name in this field:

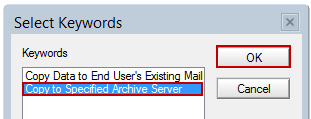
Retain the default selection of Copy to Specified Archive Server in the Archive Processing field and click OK:
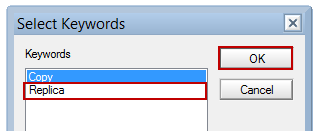
Click the down-arrow next to the Create Archive Copy or Replica field. Select Replica and click OK:
In the Archive Destination Server field, specify the IP address of the server where either copies or replicas of end users’ Archive databases will be stored. Leave the field blank since you are copying archives to a local workstation.
Specify the destination path where end user .pst files will be stored in the Archive Destination Path field. In the field, specify Archives.
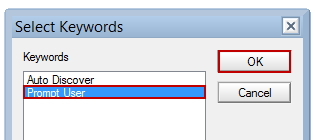
Click the down-arrow next to the Local Archive Discovery field. You can either auto discover or prompt the user; click OK:
The preferred method of migrating end user archives is to configure the Local Archive Discovery settings and sending the Local Archive Discovery application to users to identify the local archives on the user’s workstation. Detailed information for configuring and using the Local Archive Discovery application is available in the Archive Migrator for Notes User Guide.
|
|
The method using Archive Migrator for Notes requires PowerShell matching. For migrating to Office 365 online archives with Modern Authentication enabled, the PowerShell processing should also use the Modern Auth configuration. |

If you are using the Lotus Script agent instead of the Local Archive Discovery application (Archive Migrator for Notes), configure the settings in the Legacy Archive Processing section.
On the End user archives tab, configure the following settings to copy local Notes archives to a server for centralized migration:

Use the following table to help enter the correct values for each setting:
|
Settings |
Description |
|---|---|
|
Archive Processing |
Specify where Archive data will be copied; to a specified Archive server OR into user’s existing Domino mail file. |
|
Create Archive Copy or Replica |
Specify whether you want to create a copy or replica of the Archive database. It is recommended that you create a replica. This will ensure that your archives will remain updated even if there is a time lapse between the preprocessing phase and actual migration. |
|
Archive Destination Server |
Specify the destination Domino server where the copy/replica of the Archive Database will be stored.
Leave it blank if you are copying them to a file server or a local workstation. |
|
Archive Destination Path |
Specify the destination path where the copy/replica of the Archive database will be stored.
Ensure that the path is relative if destination is a Domino server. However, if destination is a file server, full path must be specified |
|
Local Archive Discovery |
Specify how Migrator for Notes will look for Archive databases on the end user machine. You can either select Auto Discover or Prompt User. |
Configure these settings if you want to send an email to end users that will contain instructions and a button, which when clicked will copy their Archive database to the Domino server. Once on the server, the Archive databases can be migrated either to .pst files or to Microsoft Exchange.
Once you click on the button to perform the copy/replicate your local archives to the Domino server, a new archive Person Document is created for each archive database copied to the server. The archive Person Documents are then listed in the Set Migration Profile view.
To view which archive database will be migrated, double-click and open the username archive Person document:

Assign a migration profile and the user will be promoted to the Migrate view to perform the migration.
The Archive Processing field can copy the archive data to either the end user’s existing mailbox or a specified archive server:

If you select Copy Data to End User’s Existing Mail, the form changes to display the Archive Folder Name field and remove the following three fields (Create Archive Copy or Replica, Archive Destination Server and Archive Destination Path). The added field specifies the folder name where all the archived data will be copied in users’ mailbox. You can specify any name in this field:

Retain the default selection of Copy to Specified Archive Server in the Archive Processing field and click OK:

Click the down-arrow next to the Create Archive Copy or Replica field. Select Replica and click OK:

In the Archive Destination Server field, specify the IP address of the server where either copies or replicas of end users’ Archive databases will be stored. Leave the field blank since you are copying archives to a local workstation.
Specify the destination path where end user .pst files will be stored in the Archive Destination Path field. In the field, specify Archives.
Click the down-arrow next to the Local Archive Discovery field. You can either auto discover or prompt the user; click OK:

The preferred method of migrating end user archives is to configure the Local Archive Discovery settings and sending the Local Archive Discovery application to users to identify the local archives on the user’s workstation. Detailed information for configuring and using the Local Archive Discovery application is available in the Archive Migrator for Notes User Guide.
|
|
The method using Archive Migrator for Notes requires PowerShell matching. For migrating to Office 365 online archives with Modern Authentication enabled, the PowerShell processing should also use the Modern Auth configuration. |

If you are using the Lotus Script agent instead of the Local Archive Discovery application (Archive Migrator for Notes), configure the settings in the Legacy Archive Processing section.
On the End user archives tab, configure the following settings to copy local Notes archives to a server for centralized migration:

Use the following table to help enter the correct values for each setting:
|
Settings |
Description |
|---|---|
|
Archive Processing |
Specify where Archive data will be copied; to a specified Archive server OR into user’s existing Domino mail file. |
|
Create Archive Copy or Replica |
Specify whether you want to create a copy or replica of the Archive database. It is recommended that you create a replica. This will ensure that your archives will remain updated even if there is a time lapse between the preprocessing phase and actual migration. |
|
Archive Destination Server |
Specify the destination Domino server where the copy/replica of the Archive Database will be stored.
Leave it blank if you are copying them to a file server or a local workstation. |
|
Archive Destination Path |
Specify the destination path where the copy/replica of the Archive database will be stored.
Ensure that the path is relative if destination is a Domino server. However, if destination is a file server, full path must be specified |
|
Local Archive Discovery |
Specify how Migrator for Notes will look for Archive databases on the end user machine. You can either select Auto Discover or Prompt User. |
Configure these settings if you want to send an email to end users that will contain instructions and a button, which when clicked will copy their Archive database to the Domino server. Once on the server, the Archive databases can be migrated either to .pst files or to Microsoft Exchange.
Once you click on the button to perform the copy/replicate your local archives to the Domino server, a new archive Person Document is created for each archive database copied to the server. The archive Person Documents are then listed in the Set Migration Profile view.
To view which archive database will be migrated, double-click and open the username archive Person document:

Assign a migration profile and the user will be promoted to the Migrate view to perform the migration.
The Archive Processing field can copy the archive data to either the end user’s existing mailbox or a specified archive server:

If you select Copy Data to End User’s Existing Mail, the form changes to display the Archive Folder Name field and remove the following three fields (Create Archive Copy or Replica, Archive Destination Server and Archive Destination Path). The added field specifies the folder name where all the archived data will be copied in users’ mailbox. You can specify any name in this field:

Retain the default selection of Copy to Specified Archive Server in the Archive Processing field and click OK:

Click the down-arrow next to the Create Archive Copy or Replica field. Select Replica and click OK:

In the Archive Destination Server field, specify the IP address of the server where either copies or replicas of end users’ Archive databases will be stored. Leave the field blank since you are copying archives to a local workstation.
Specify the destination path where end user .pst files will be stored in the Archive Destination Path field. In the field, specify Archives.
Click the down-arrow next to the Local Archive Discovery field. You can either auto discover or prompt the user; click OK:
