This user guide covers the steps required to configure and perform a Domain Move. The Domain Move Quick Start Guide summarizes these steps and addresses some frequently asked questions.
This user guide covers the steps required to configure and perform a Domain Move. The Domain Move Quick Start Guide summarizes these steps and addresses some frequently asked questions.
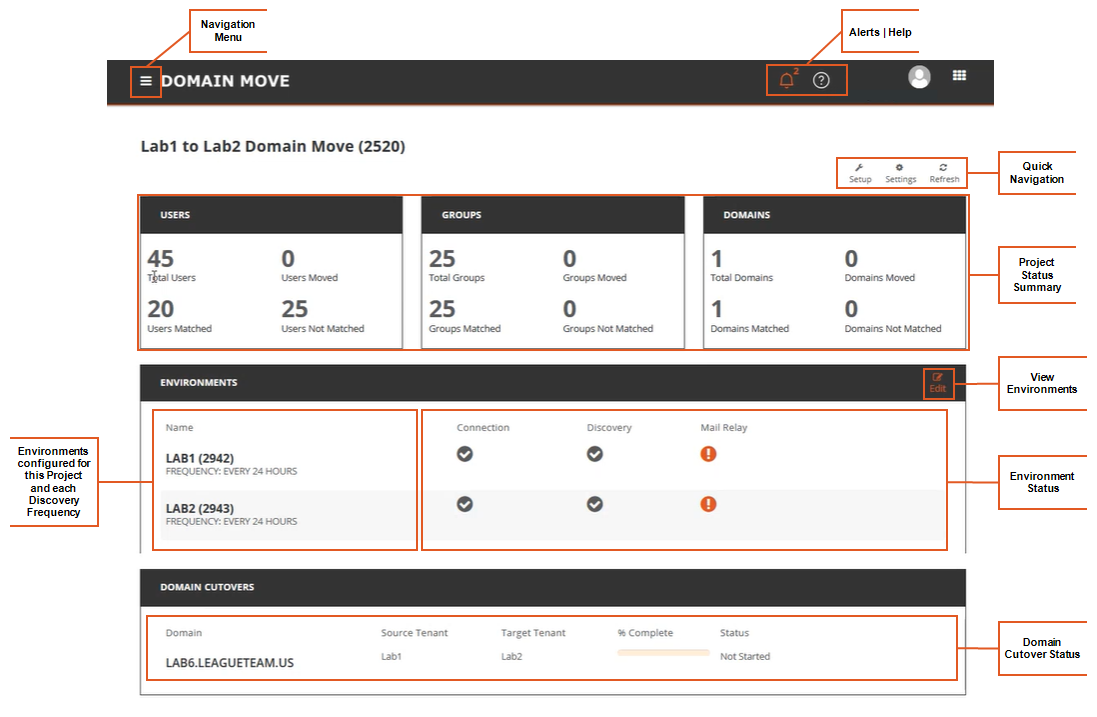
The project dashboard includes overall project status statistics and summary sections covering project status, environments, and Domains ready for Cutover. Quick navigation icons are available at the top of the dashboard to go directly to project setup, settings, and refresh functions. Names and figures can be clicked on to view more detailed information for each item.
Yes. Each project has its own dashboard. The project's name and number appears in the upper left of the dashboard. To change to another project’s dashboard, select "Projects" in the navigation menu.
A visual guide to the features of the project dashboard are presented in the images below. Click on a image to enlarge the image.

Domain Move consists of two (2) menus. The left navigation menu which is sometimes referred to as the “Hamburger” menu and the right application menu which is called the “Waffle” menu.
The hamburger menu is used to navigate through the application’s different areas of management and configurations.
The waffle menu is your application menu where you can quickly navigate directly to an applications dashboard.
Actions are activities that can started either manually by clicking the action button or some may be scheduled to start.
Within Domain Move projects the following actions are available.
Actions are located within each Users and Groups management table. From the Dashboard, just click Total Users to open the management view for either Users + Mailboxes or Groups + Teams.
Once you have selected the desired table, actions are located below the list of records. Simply select the desired records, the chosen action then Click, Apply Action.