After selecting objects on which to perform a ControlPoint operation, you can add or remove objects using the Change Selection feature.
NOTE: If you chose an operation designed to work on a single object (such as Copy/Move), the Change selection option will not be available.
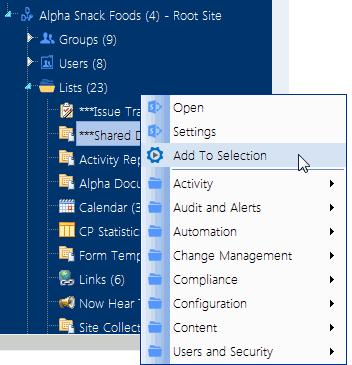
You can also add individual objects to your current selections using the Add to Selection menu item. See Adding Objects from the SharePoint Hierarchy to Your Selection.
To access the Change Selection pane:
In the Selection section of the work area, click the Change selection icon ( 
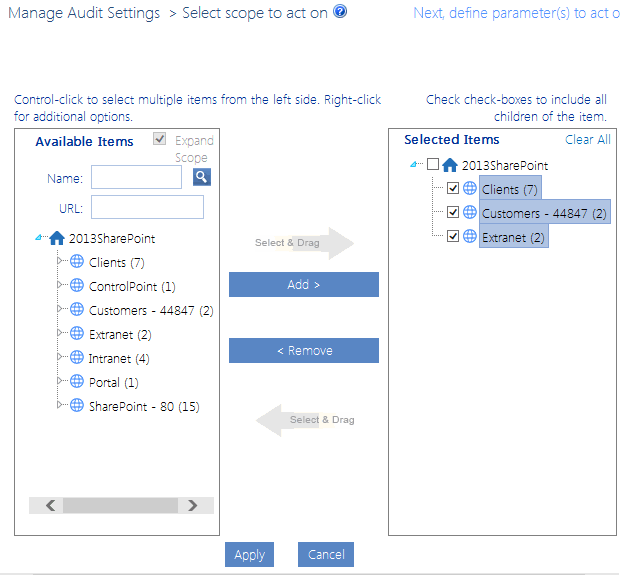
The Change Selection pane displays, which consists of two sections:
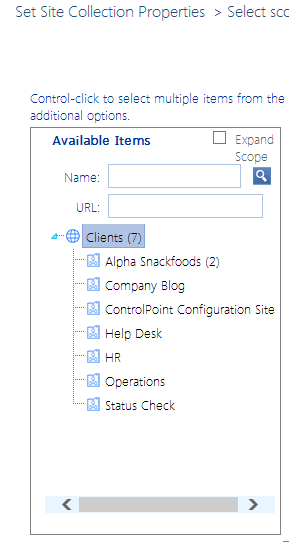
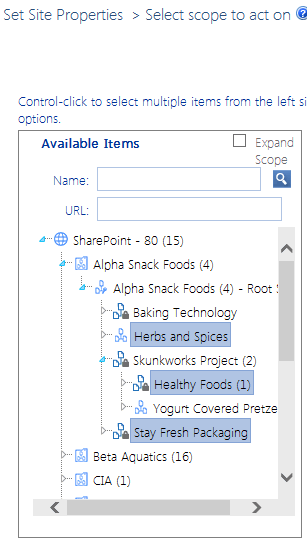
§the Available Items section lists all of the objects available for selection (as determined by the scope of your original selection)
§the Selected Items section lists currently-selected objects.
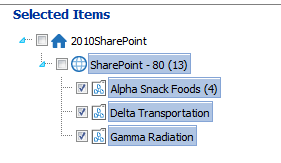
Typically, all child items (site collections, sites, and subsites) are included in the scope by default, as indicated by a check mark to the left of the item in the Selected Items section.
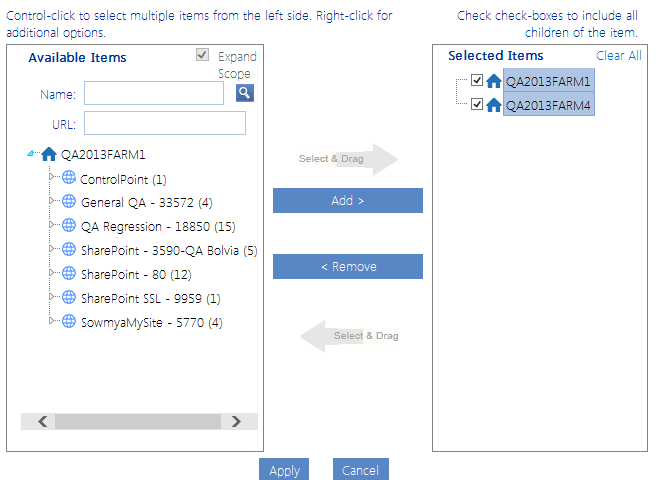
If your selection includes multiple farms, note that previously Selected Items from remote farms display, but only objects from the home farm are selectable from the Available Items list.
The level to which you can drill down in the Available Items list depends on the action that you want to perform.
EXAMPLES:
If you chose Set Site Collection Properties which, by definition, applies only to site collections, you cannot drill down beyond the site collection level.
·If you chose Set Site Properties, you can drill-down and select individual sites within the collection.
To modify the list of available items:
Use the information in the following table to determine the appropriate action to take.
|
If you want to ... |
Then ... |
|---|---|
|
expand the scope of available items to encompass the farm |
check the Expand Scope box.
NOTE: If you originally selected the farm, multiple Web applications, or site collections within multiple Web applications, Expand Scope is checked by default and all available items in the farm display. |
|
narrow the scope of available items |
·enter a full or partial site Name and/or URL , and ·click the magnifying glass icon ( NOTE: By default, ControlPoint uses real-time data for this type of hierarchical search. However, to enable faster searches in large environments, ControlPoint Application Administrators can configure the application to use cached data for hierarchical searches. |
To modify the Selected Items list:
1Uncheck the "include all children" box to the left of each object whose scope you want to modify.
2In the Available Items list, select each object that you want to include. Use the information in the following table for guidance.
|
If you want to ... |
Then ... |
|---|---|
|
select multiple items individually |
hold down the [Ctrl] or [Shift] key and highlight each item you want to add. |
|
immediately add an item and all of its children to the Selected Items column |
highlight the item, then right-click and choose Add Item and All Children. |
|
select an item and its immediate children (for example, a site collection and its root site only) |
highlight the item, then right-click and choose Highlight Immediate Children. (If objects are grouped into a folder, you must first expand the folder.) TIP: You can use this option as a time-saver if you want to add most, but not all of the selected child items. After highlighting the item you can then individually de-select those that you want to exclude. |
3To add the highlighted item(s) to the selection list, do one of the following:
§drag and drop the item(s) to the Selected Items column. ControlPoint will automatically place them in the correct location in the tree.
OR
§click the [Add] button.
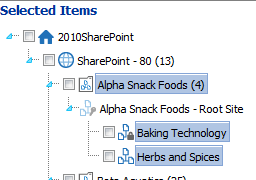
Note that if a checkbox displays to the left of a selected item (indicating that you want to include all child items), those child items do not display explicitly in the Selected Items list.
If you uncheck this box then add child items using the procedure above, however, each item you add will display explicitly in the list.
To remove items from the Selected Items list:
1In the Selected Items list, highlight each item that you want to remove. Hold down the [Ctrl] or [Shift] key to highlight multiple items individually.
2Either:
§drag and drop the items to the Available Items column.
OR
§click the [Remove] button.
Applying changes to the selection list:
When you have finished updating the Selected Items list, click [Apply].
The Customize Selection pane is closed and the Selection list is updated to reflect your changes.
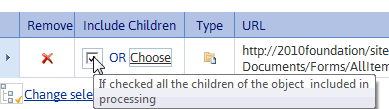
Some ControlPoint operations can be performed on individual items within a list or library. If the option to act on folders/items is available, a Choose link displays in the Include Children column for the list. (If you do not select individual folders/items, the operation will be performed on the list itself.)
NOTE For a multi-farm operation, you can only choose items from lists in the home farm. For lists in remote farms, the operation can only be performed on the list itself.
To include both the list itself and all of its child items:
In the Selection section, check the Include Children checkbox.
NOTE: The Include Children checkbox will not be visible if the operation requires that you select items explicitly. (Copy/Move List Items is a notable example).
To specify folders and items to include (with or without the list itself):
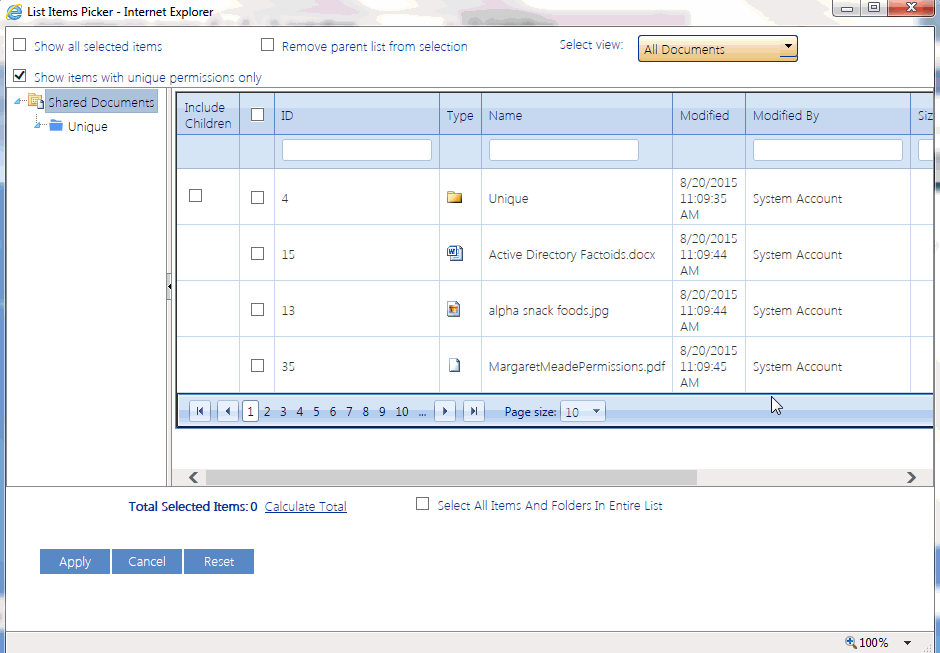
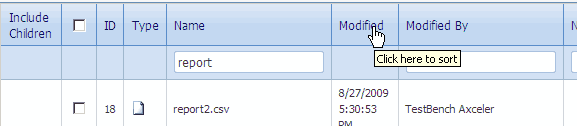
1Click the Choose link to display the List Item picker.
A pop-up window displays all of the items at the top level of the list hierarchy. If you want to display items within folders and subfolders, click the folder in the tree in the left pane. (You can drag the border between the left and right pane to resize, or click the arrow to open/close the left pane).
You can sort or filter list items by most of the column headers.
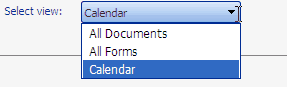
If more than one view has been defined for a list or folder, you can select a different view from the Select view drop-down.
2Use the information in the following table to determine the appropriate action(s) to take.
|
If you want to include ... |
Then ... |
|---|---|
|
items with both inherited and non-inherited permissions |
uncheck the Show items with unique permissions only box. NOTE: If you leave this box checked, only items with unique (non-inherited) permissions will display. |
|
all items and folders |
check the box in the header. NOTE: When you check this box and your selection includes folders, only the folder itself will be selected, not its children. |
|
selected items and folders within the root of the list |
check each item and folder that you want to include. NOTE: If you check a box immediately to the left of a folder, only the folder itself will be selected, not its children. |
|
all items within a folder |
check the Include Children box to the left of the folder. |
|
individual items within a folder |
in the left pane: ·expand the folder, and ·select the item(s) you want to include. |
NOTE: Normally, as you select items, the Total Selected Items value is updated automatically. Exceptions are if you check the box in the header to select all items then deselect items individually or if you select items by highlighting rows instead of explicitly clicking checkboxes. For both of these cases, you will need to click the Calculate Total link to update this value.
3If, after you have finished selecting items you want to trim the list to display only selected items, check the Show All Selected Items box.
4If you want to exclude the list itself (that is, perform the operation only on item(s) within the list, check the Remove Parent List from Selection box.
5When you have finished, click [Apply].
After you have initiated a ControlPoint operation from the SharePoint Hierarchy, you can easily add objects to your selection using the Add to Selection menu option.
EXCEPTIONS:
You cannot add an object to your selection if the operation:
·has not yet been chosen from the menu
·is already within the scope of your selection (for example, you are attempting to add a site collection within a Web application that has already been selected)
·is not relevant for the object (for example, you initiated a Site Permissions analysis then attempted to add a list to your selection)
·can only be performed on a single object (such as a copy or move action).
NOTE: If you attempt to add an object to an operation that can only be performed on a single object, it will replace the object that was originally selected.
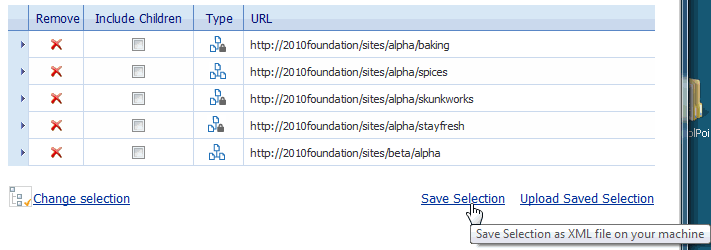
If you frequently perform ControlPoint operations on the same set of SharePoint objects, you can save your selection to a local drive or network file share as an XML file. You can then upload the file on an as-needed basis, and eliminate the need to select the same set of objects whenever you perform a ControlPoint operation.
Only objects that are valid for the current operation will be included in the scope. For example:
·If your selection includes list items and you initiate an operation that is not valid for list items, those items will be excluded from scope.
·If you initiate an operation that can only be performed on a single object, the option to upload a selection from XML will not be available.
Generally, a selection saved on one farm cannot be uploaded to a different farm.
EXCEPTION: In a multi-farm environment, if a saved selection include items from more than one farm and you have initiated a ControlPoint operation that can act on multiple farms, it can be uploaded to any farm involved in the operation.
Once you have initiated an operation then upload a selection from XML, you have the option of replacing the current selection with the selection in the XML file or adding to it. It is important to note, however, that if you chose to add to the current selection and one group of objects is within the scope of the other (for example, the saved selection includes objects within the scope of the existing selection), the larger scope will be applied.
To save a selection to an XML file:
1Initiate a ControlPoint operation for the selection you want to save.
2In the Selection pane, click the Save selection link.
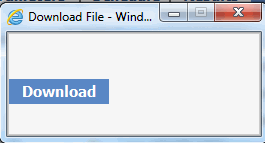
The Download File dialog displays.
3Click [Download] to display the File Download dialog.
4Click [Save] then save the file to the local or network location of your choice.
NOTE: It is recommended that you change the default file name, Selection.XML, to a name that is unique and descriptive.
5When the file has finished saving, click [Close] to dismiss the open dialogs.
To upload a selection from an XML file:
1Initiate the ControlPoint operation you want to perform.
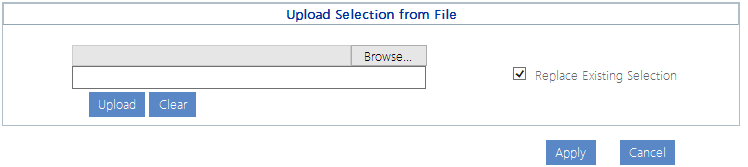
2In the Selection section, click the Upload Selection link.
3Click [Browse] and navigate to the file you want to upload.
4The path to the file displays in the field to the left of the [Browse] button.
5Click [Upload] to move the file path to the field below.
6If you want the uploaded selection to Replace Existing Selection, check this box.
NOTE: If you leave this box unchecked, the uploaded selection will be appended to the current selection.
7Click [Apply].

 ).
).