The ControlPoint Solution Summary analysis lets you view details about solutions deployed within or across SharePoint farms:
·if you are a Farm Administrator, all deployed Farm Solutions
AND/OR
·sandboxed solutions deployed to site collections within your selected scope.
To generate a Solution Summary analysis:
1Select the object(s) you want to include in your analysis.
2Choose Content > Solution Summary.
3Specify the parameters of your analysis:
§If you want your results to include only solutions whose name matches a specific text string, enter the string in the Solution name contains: field.
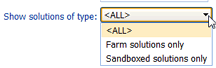
§If you want results to include ONLY Farm solutions OR Sandboxed solutions, select the appropriate option from the drop-down.
REMINDER: Farm solutions will be included only if you are a Farm Administrator.
Now you can:
·run the operation immediately (by clicking the [Run Now] button)
OR
·schedule the operation to run at a later time or on a recurring basis.
OR
·save the operation as XML Instructions that can be run at a later time.
For each solution type you chose to include, the farm(s) within the selected scope display.
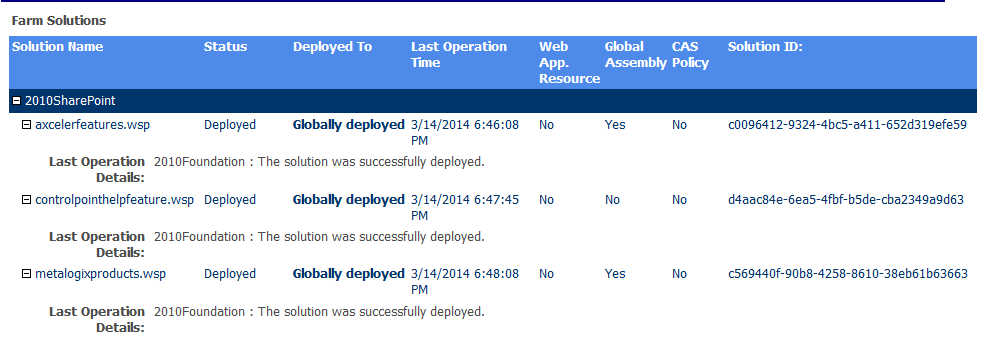
Farm Solutions section
If you are a Farm Administrator, the Farm Solutions section lists all of the solutions deployed to the entire farm (regardless of the selected scope), along with the following information:
·the Solution Name
·its current deployment Status
·where the solution is Deployed To
·the Last Operation Time that an action was taken
·whether the solution contains a Web Application Resource, Global Assembly, and/or Code Access Security (CAS) Policy:
·the Solution ID, and
·upon further drill-down, the Last Operation Detail.
Sandboxed Solutions section
If any sandboxed solutions have been installed in site collections within your selected scope, the Sandbox Solutions section lists each of these site collections, along with the following information about the installed solution(s):
·the Solution Name
·the solution's deployment Status
NOTE: A blank Status indicates that the solution is installed but has never been activated.
• the installed Version of the solution
·the solution's Last Modified date and time
·the solution's Resource Usage.
NOTE: For information on the concept of Resource Usage, consult your SharePoint documentation.
• the Solution ID
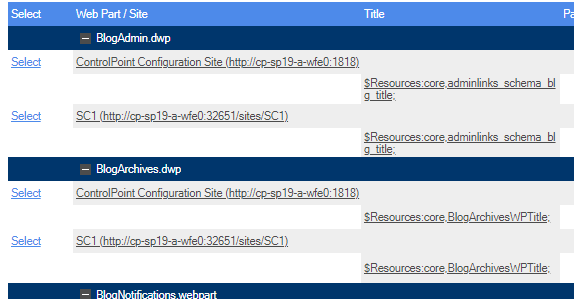
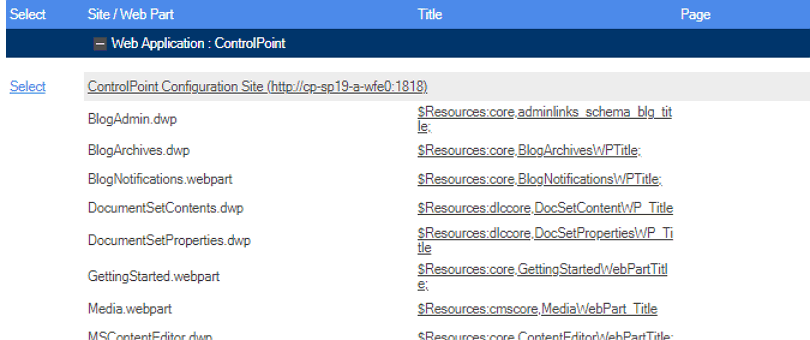
The Web Parts analysis provide detailed statistics about Web Parts used in your SharePoint environment.
To generate a Web Parts analysis:
1Select the object(s) on which you want to perform the analysis.
2Choose Change Management > Web Parts.
3Select the option you want to Group By: Parts or Sites.
4Specify additional parameters for your analysis.
In addition to the "standard" parameters, you can limit results to Web Parts that meet one or more specific criteria, as described in the following table.
|
If you want results to include ... |
Then ... |
|---|---|
|
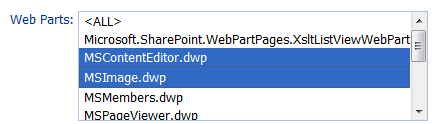
one or more specific Web Parts |
select from the Web Parts list box. NOTE: If you do not select specific Web Parts, all Web Parts will be returned. EXCEPTION: If the ControlPoint Application Administrator has chosen to exclude Web Parts from the ControlPoint Discovery process, the message No Values Available will display in the list box. |
|
Web Parts whose name contains a specific text string |
enter the text string in the Web Part Name contains field. NOTE: You can enter multiple text strings as a comma-separated list. |
|
only Web Parts that are currently in use |
check the Show only parts used in pages box. NOTE: If you leave this box unchecked and you do not select a specific Web Part, analysis results will also include Web Parts that are not currently in use. |
|
only Web Parts that are closed and hidden |
check the Show only Closed and Hidden box. |
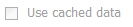
Note that the option to Use cached data will be disabled if Web Parts have been excluded from the ControlPoint Discovery job. The inclusion or exclusion of Web Parts can be managed by the ControlPoint Application Administrators. Details can be found in the ControlPoint Administration Guide.
Now you can:
·run the operation immediately (by clicking the [Run Now] button)
OR
·schedule the operation to run at a later time or on a recurring basis.
OR
·save the operation as XML Instructions that can be run at a later time.
|
If you chose to group results ... |
Then .... |
|---|---|
|
By part |
the top level of the analysis lists the Web Part(s) within the scope of your analysis, as well as the total number of pages in which each is used. When expanded, a list of sites that use each Web Part displays. |
|
By site |
the top level of the analysis lists the Web applications/site collections within the scope of your analysis. When expanded, a list of Web Parts used by each site displays.
|
Within the context of the site, the following information displays for each Web Part:
·the Title of the Web Partthat is, the name assigned to that instance of the Web Part
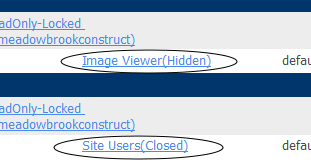
NOTE: If the same Web Part is used more than once on a page, the title of each instance is listed in a comma-separated list. Web Parts that are hidden or closed are annotated.
·the Page on which the Web Part is used
·the following values, which are the same as those reported in the SharePoint Web Gallery:
§the user account that the Web Part was Created by, well as the user account it was Last Modified by
§the dates when the Web Part was both Created and Last Updated
NOTE: The Created by, Last Modified by, Created, and Last Updated values refers to the Web Part itself, not its instance on a specific page. Often, the Created date is the date that the Web Part was installed on the system.
·the Size of the Web Part in kilobytes (KB).
Note that some commonly-built Web Parts that display in analysis results (such as the List View Web Part) are not listed in the Web Parts Gallery and are not associated with a specific creator or created by/modified by dates. Often, such Web Parts have names that begin with "Microsoft SharePoint."
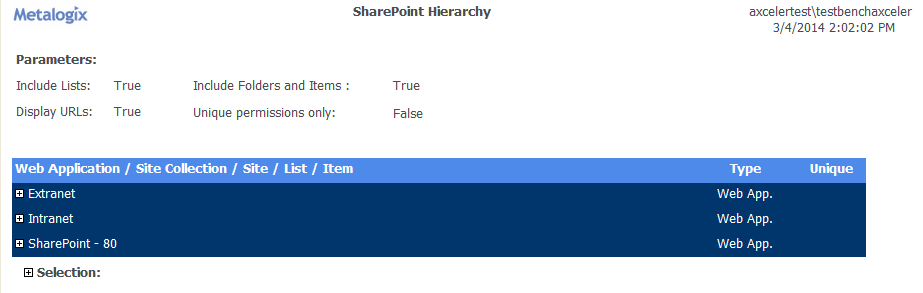
The SharePoint Hierarchy Report lets you view and print the hierarchy of Web applications,site collections, sitesand optionally, listswithin a SharePoint farm. You can generate this report for the entire farm or for selected objects within the Hierarchy.
Information in this report is current as of the last ControlPoint Discovery.
EXCEPTION: If you ran the report at the site level and Include Children is checked, the report will be run on real-time data.
In a multi-farm environment, this analysis can only be run on the home farm.
To generate a SharePoint Hierarchy Report:
1Select the object(s) that you want to include in the report.
2Choose Configuration > SharePoint Hierarchy.
3Specify one or more parameters for your analysis:
|
If you want results to ... |
Then ... |
|---|---|
|
include lists and libraries within sites |
check the Include Lists box. NOTE: If you check this box, ControlPoint must iterate through all lists. Depending on the scope of your analysis and the number of lists within that scope, processing time may increase noticeably. |
|
include folders and items within sites |
check the Include Folders and Items box. NOTE: If you check this box, ControlPoint must iterate through all list items. Depending on the scope of your analysis and the number of items within that scope, processing time may increase noticeably.
|
|
display the url for each site collection and site to the right of each site name |
check the Display URLs box. NOTE: If you leave this box unchecked, only the names of the site collections and sites will display. |
|
include objects whose permissions are unique (not inherited) |
check the Unique permissions only box. NOTE: If you check this box, objects will be shown within the context of the hierarchy, even if the parent object has inherited permissions. |
Now you can:
·run the operation immediately (by clicking the [Run Now] button)
OR
·schedule the operation to run at a later time or on a recurring basis.
OR
·save the operation as XML Instructions that can be run at a later time.
.
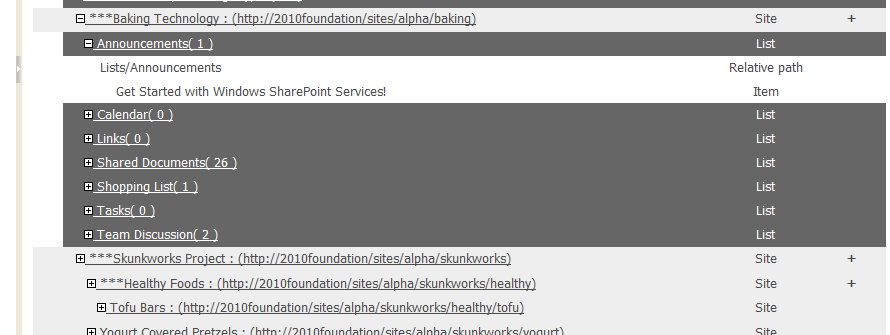
The top level displays all Web applications within the scope of your analysis.
When expanded:
·the name of the object and its Type (site collection, site, list, item, and so on) displays
NOTE: If you chose to Display URLs, the url for each site collection and site displays in parentheses to the right of its name.
·a plus sign (+) identifies each object whose permissions are unique (that is, not inherited from the parent objects).
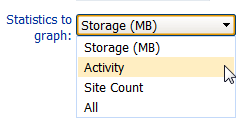
For a single farm, Web application, or site collection, you can analyze trends over a specified time period in:
·activity
·site count, and/or
·storage.
To generate a Trends analysis:
1Select the object for which you want to analyze trends.
NOTE: You can only analyze trends for one at a time. If you multi-select, only the object on which you right-clicked will apply.
2Use the information in the following table to determine the appropriate action to take.
|
If you want to analyze trends in ... |
Choose ... |
|---|---|
|
activity |
Activity > Trend Analysis for Activity. |
|
site count |
Content > Trend Analysis for Site Count. |
|
storage |
Storage > Trend Analysis for Storage. |
3Specify the following parameters for your analysis:
a)Enter or select a Start Date and End Date for your analysis.
The date range you select determines the time intervals captured in the analysis, as described in the following table.
|
If the time period you specified is ... |
Then the Trend Analysis will be reported ... |
|---|---|
|
up to 60 days |
by Day |
|
between 61 and 364 days |
by Week |
|
365 days or greater |
by Month. |
b)If you want to change the Statistics to Graph, select a different value from the drop-down.
c)If you want your graph to include a line that smooths out short-term fluctuations, check the Include moving Average box.
The default value for Moving average period (days) is 7, which represents the number of days within a given week. This value is useful for many business users who can expect less activity, for example, on the weekend. You can, however, change this value to measure moving average for a different time period. For example, if you generally experience week-to-week fluctuations over the course of a month, you may choose to set the Moving average period to 31.
Now you can:
·run the operation immediately (by clicking the [Run Now] button)
OR
·schedule the operation to run at a later time or on a recurring basis.
OR
·save the operation as XML Instructions that can be run at a later time.
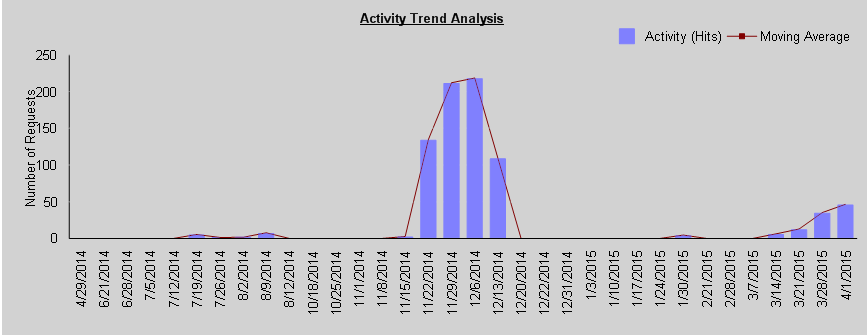
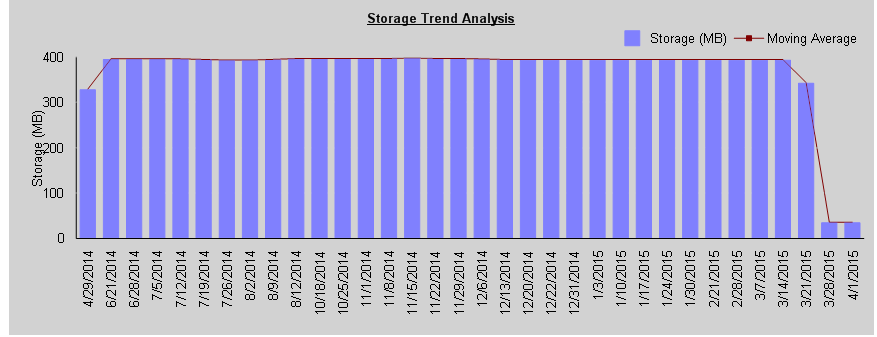
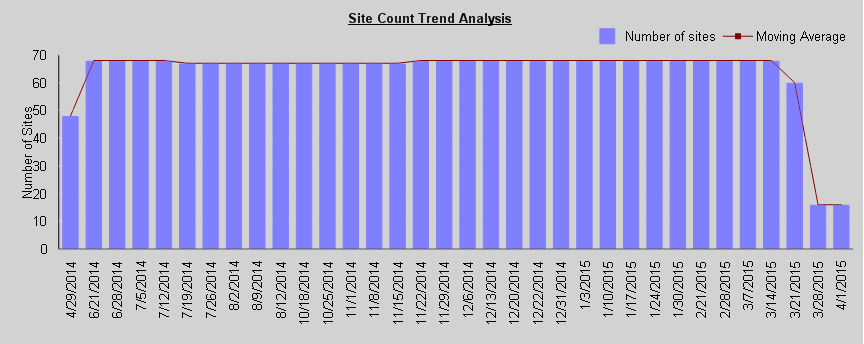
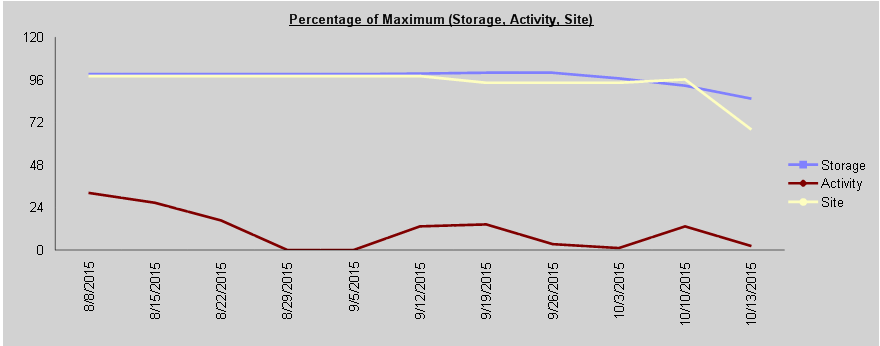
Trend Analysis results consist of two graphs:
·The Trend Analysis bar graph includes the statistics for the selected criterion. (Note that if you selected ALL from the Statistics to graph drop-down, a separate graph will be included for each). Below are examples of Trend Analyses by Day reports (including a 7-day moving average) for Activity, Storage, and Site Count over the same 28-day time period.
Activity Trend Analysis
Storage Trend Analysis
Site Count Trend Analysis
·The second graph is a line graph that shows statistics for all three options (activity, storage, and site count) in terms of a percentage over the course of the selected time period. Note that the maximum value (100%) represents the most storage used, greatest level of activity, and largest site count over the selected time period.