The Administration area contains links to administrative tasks that you can initiate from this tab:
|
• |
Rule Configurations: Sets the level of alarms that the system generates, stores, and displays. |
|
• |
Agents: Review existing Hyper-V/SOFS/SCVMM object instances. For more information, see Agents view commands. |
|
• |
Advanced Options: Review and delete Hyper-V object instances that are no longer needed. For more information, see Reviewing object instances and deleting expired data. |
The Agents view shows a list of existing agent instances and a set of agent management commands at the top of the list. Use it to verify that your agents are collecting data from the monitored environment.
The following commands are available:
|
• |
Add: Starts a workflow for creating new agent instances. For more information, see Configuring monitoring agents. |
|
• |
Refresh: Refreshes the list of agent instances and their states. |
|
• |
Activate: Activates one or more selected agent instances. Activating an agent instance starts the agent process on the machine on which the agent is installed. |
|
• |
Deactivate: Deactivates one or more selected agent instances. Deactivating an agent stops the agent process on the machine on which the agent is installed. |
|
• |
Start Data Collection: Starts the data collection for one or more selected agent instances. Starting an agent’s data collection causes the agent to begin monitoring the Hyper-V server and to send the collected metrics back to the Management Server. |
|
• |
Stop Data Collection: Stops the data collection for one or more selected agent instances. Stopping an agent’s data collection causes the agent to stop monitoring the Hyper-V server. |
|
• |
Edit Properties: Starts a workflow for editing the properties of one or more selected agent instances. Each agent comes with a set of properties that it uses to configure its correct running state. For more information, see Configuring agent properties. |
|
• |
Remove: Deletes the selected agent instance. |
|
• |
Update Agent: Updates the agent package to the latest version. For more information, see the Installing and Configuring Foglight for Storage Management Guide. |
|
IMPORTANT: Updating the agent package using this command generates the previously existing credentials. However, if you update the agent package by re-deploying its .gar file through the Agent Status page, the credentials need to be re-created. To do that, select an agent instance, click Edit Properties, and configure the required credentials on the Credentials tab of the Edit Tab Manager dialog box. |
The Agents area contains three tabs: Hyper-V Agents, SCVMM Agents, and SOFS Agents. Each tab displays a list of the existing Hyper-V, SCVMM, or SOFS Agent instances and shows their status. Use it to verify if your agents are collecting data from the monitored environment.
| |||
| |||
| |||
| |||
| |||
| |||
| |||
| |||
| |||
| |||
|
Hyper-V Monitoring in Foglight® Evolve Cloud uses the Hyper-V, SCVMM, and SOFS agents to collect information about your virtual environment:
|
• |
Hyper-V Agents collect information from monitored Hyper-V servers. A Hyper-V server is a physical component required to begin building a virtual infrastructure. Hyper-V servers provide hypervisor-based architecture for controlling and managing resources for the virtual machines that run on it. |
|
• |
SCVMM Agents collect information from Virtual Machine Managers (VMM). A VMM allows you to manage host, networking, and storage resources when creating and deploying virtual machines to virtual clouds. |
|
• |
SOFS Agents collect information from monitored SOFS servers. A SOFS server is a Windows Server cluster with some form of shared storage. SOFS servers provide highly available file-based storage for applications and general use. |
When Hyper-V, SCVMM, and SOFS agent packages are successfully deployed, you can create agent instances, activate them, and start their data collection. To perform these steps in a single operation for one or more monitored hosts, use the Agents area on the Hyper-V Configuration dashboard.
|
2 |
|
3 |
On the Administration tab, under Agents, open the Hyper-V Agents, the SCVMM Agents tab, or the SOFS Agents tab, as required. |
|
4 |

|
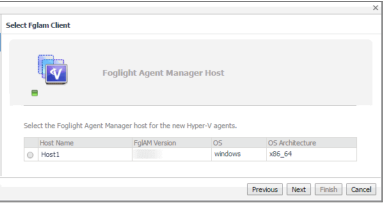
• |
To configure these settings manually, see the Agent Manager Guide. |
|
7 |
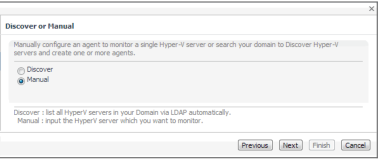
Hyper-V Agents only. On the Discover or Manual page that appears, you can indicate if you want to manually specify the Hyper-V Server that you want to monitor, or to choose between the servers running in a given domain. |
|
a |
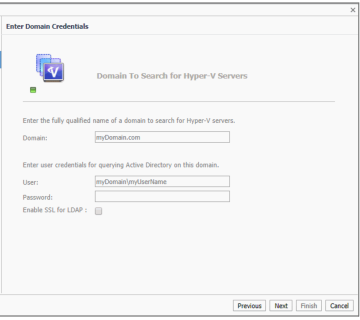
Discovering Hyper-V Servers only. On the Enter Domain Credentials page that appears, specify the information needed to search for the running Hyper-V Servers. |
|
• |
Domain: Type the fully qualified name of a domain to search for the Hyper-V Server. For example, myDomain.com. |
|
• |
User: Type the user name to be used by the agent to be used to query Active Directory on the selected domain using the syntax Domain\UserName. For example, myDomain\jsmith. |
|
• |
Password: Type the password associated with the above user name. |
|
• |
Enable SSL for LDAP. Select this option to enable SSL for LDAP connection. |


|
d |
|
b |
Manually specifying a Hyper-V Server only. On the Manual Agent Properties page that appears, specify the information needed to search for the running Hyper-V servers. |

|
c |
On the Credential Verification page that appears, review the existing set of credentials. If the wizard determines that the selected Agent Manager has any credentials configured for the host on which the Hyper-V Server is running, they appear listed on this page. |
|
8 |
SCVMM Agents only. On the Input Agent Properties page that appears, type the name of the SCVMM server, and click Next. |

|
9 |
On the Credentials Verification page that appears, select one of the following options: |
|
• |
Do not configure a credential: Select this option if you want to configure the credential for this resource at a later time. Click Next and continue with Step 12. |
|
• |
Add host(s) to a new credential: Select this option if you want to add the host to a new credential. This option is suitable if none of the existing credentials have the connection details needed to access the new host. Click Next and continue with Step 10. |
|
• |
Add host(s) to an existing credential: Select this option if you want to add the host to an existing credential. This option is suitable if an existing credential has the security data needed to access the new host, but you need to edit its resource mappings to include this host. Click Next and continue with Step 11. |

|
a |
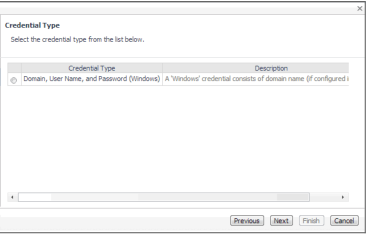
On the Credential Type page that appears, select the credential type from the available options. |
|
b |
Click Next. |
|
c |
|
d |
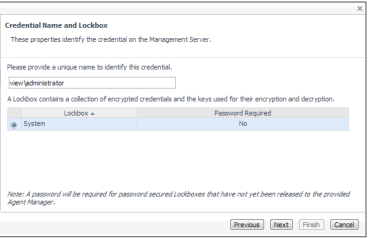
On the Credential Name and Lockbox page, provide a name to uniquely identify the credential, and select a lockbox in which you want to keep the credential. A lockbox can be used to group credentials for access and/or security. In smaller Foglight Evolve Cloud installations, using the default System lockbox should be sufficient. |
|
e |
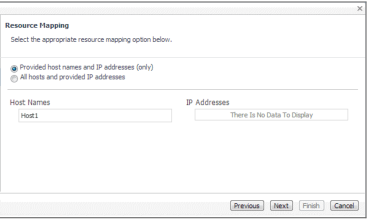
On the Resource Mapping page, indicate which hosts you want to associate with this credential. Click Next. |
|
f |
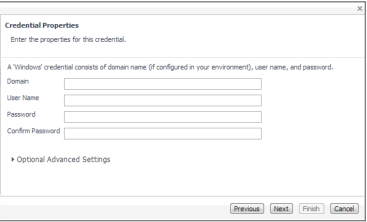
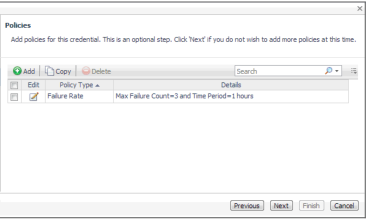
Optional—On the Policies page, define one or more policies for this credential. A policy defines the number of times a credential can be used, the number of allowed authentication failures, the time range during which the credential is valid, or the length of time the credential data can be cached on the client. For example, you can specify the number of times the credential can be used, or the time period during which it can be used. For complete information about the available credential policies, see the Administration and Configuration Help. |
|
a |
On the Credential page that appears, select an existing credential to contain this host. |

|
b |
Click Next. |

|
c |
On the Resource Mapping page, indicate which hosts you want to associate with this credential. You can either select the host that you are about to start monitoring, all monitored hosts, or hosts whose name contains a specific text string. |
|
12 |
On the Connectivity Diagnostic page that appears, select the Hyper-V servers you want to diagnose connectivity and click Next to perform diagnostic. If no connectivity diagnostic is required, unselect any Hyper-V servers and click Next. |


|
13 |
On the Summary page that appears, review the information provided about the host and the monitoring agent. |

|
14 |
Click Finish. |
|
a |
Select an agent and click Edit Properties. |

|
c |
Open the Credentials tab, and review the available credentials. |

|
• |
New credentials. Click New Credential and use the Create Credential Wizard that appears to provide the required information. For more details, see Step 10. |
|
• |
Existing credentials. Click Add to Existing Credential and use the Create Credential Wizard that appears to provide the required information. For more details, see Step 11. |
|
18 |
Click Refresh. |


