Analyzing Change Log Contents
The ControlPoint Change Log lets you view the contents of SharePoint change logs for one or more selected event types.
To generate a Change Log analysis:
1Select the object(s) for which you want to view change log entries.
2Choose Audit & Alerts > Change Log Analysis.
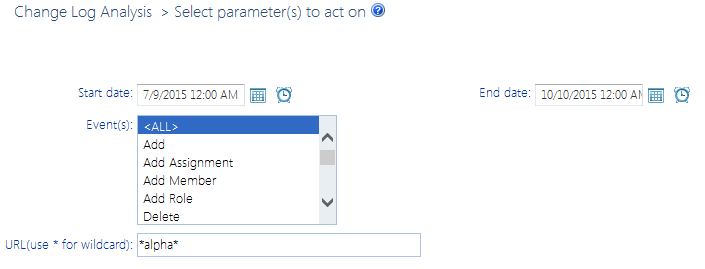
3Specify one or more of the following parameters for your analysis:
§select both a Start and End date (

The time period for which you can generate a change log analysis depends on how many days change log data is retained. ControlPoint relies on the history maintained by SharePoint. SharePoint for Office 365 retains Change Log data for 60 days.
§enter a relative URL (note that you can enter a url down to the item level; you can also use an asterisk (*) at the beginning and end of a url as wildcards)
EXAMPLES
§sites/al*
§sites/alpha/shared documents/SharePointPlanning.docx
§select one or more Event types from the list box. Refer to the topic Events Captured in SharePoint Logs for guidance in selecting the appropriate event type(s).
Now you can:
·run the operation immediately (by clicking the [Run Now] button)
OR
·schedule the operation to run at a later time or on a recurring basis.
OR
·save the operation as XML Instructions that can be run at a later time.
Information in the Change Log Analysis
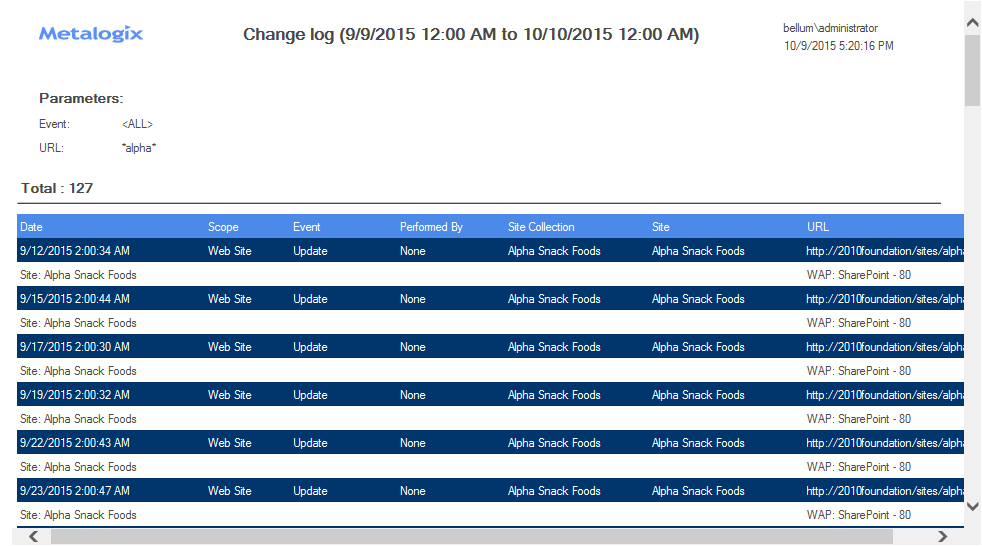
The ControlPoint Change Log Analysis contains the following information:
·the Date and time that the event occurred
·the Scope of the event
·the Event type
·the individual the event was Performed By
NOTE: For many event types, SharePoint change logging does not record the user who performed the event. In such cases, the value "None" will appear in the Performed By column.
·the name of the Site Collection and Site on/within which the event occurred.
·the URL for the item (if applicable).
Analyzing SharePoint Alerts
The following analysis tools provides information about SharePoint alerts that have been created for users in your SharePoint environment:
·SharePoint Alerts by Site lets you review alerts that have been created within one or more selected sites.
·SharePoint Alerts by User lets you review alerts that have been created for one or more specific users.
Analyzing SharePoint Alerts by Site
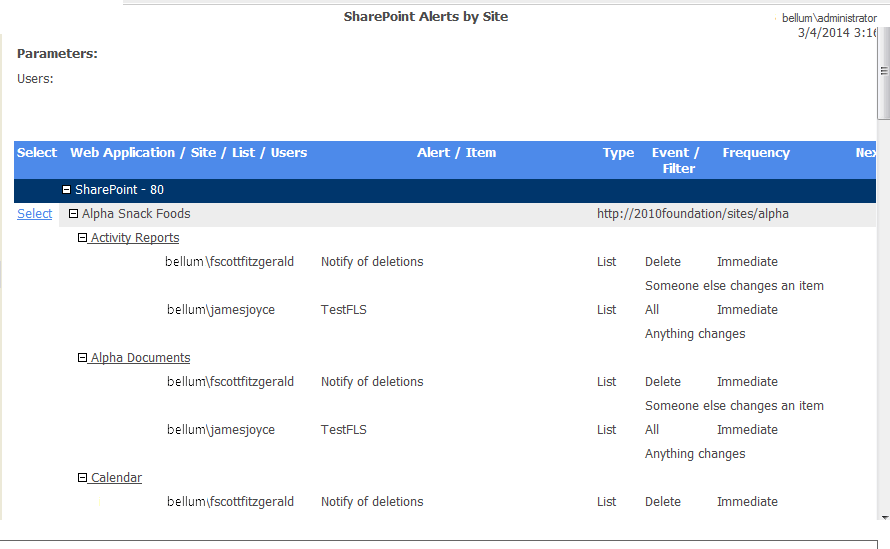
The SharePoint Alerts by Site analysis provides the following information about SharePoint alerts that have been set within one or more selected sites:
·the user for whom the alert was set
·the list or item on which the alert was set
·alert properties (including event type and frequency), and
·the date and time of the next alert.
To generate a SharePoint Alerts by Site analysis:
1Select the object(s) you want to include in your analysis.
2Choose Audits and Alerts > SharePoint Alerts by Site.
3Specify the parameters for your analysis.
Now you can:
·run the operation immediately (by clicking the [Run Now] button)
OR
·schedule the operation to run at a later time or on a recurring basis.
OR
·save the operation as XML Instructions that can be run at a later time.
The top level of analysis results lists all of the Web applications within the scope of your analysis.
When expanded, a list of sites on which alerts have been set displays, along with the following detail about each alert:
·the Site for which the alert was created
·the Titles of the list, and if applicable, item, for which the alert was set
·each of the Users for whom the alert was set, along with:
§the title of the Alert
§the alert Type (List or Item)
§the Event that triggers the alert and, if the alert was created for an item, the Filter (that is, the option selected for "Send Alerts for These Changes")
§the Next Alert date and time
Analyzing SharePoint Alerts by User
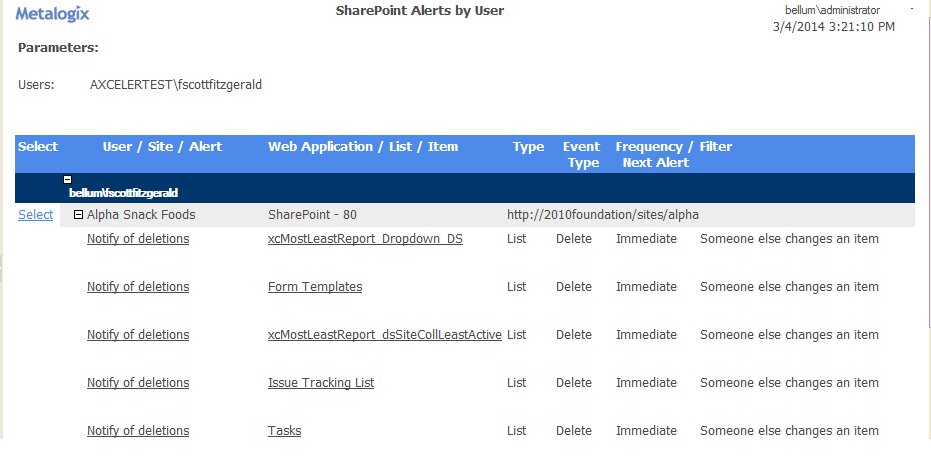
The SharePoint Alerts by User analysis provides the following information about SharePoint alerts that have been set for one or more users:
·the site within which the alert was set
·the list or item on which the alert was set
·alert properties (including event type and frequency), and
·the date and time of the next alert.
To generate an Alerts by User analysis:
1Select the object(s) you want to include in your analysis.
2Choose Audits and Alerts > SharePoint Alerts by User.
3Specify the parameters for your analysis .
Now you can:
·run the operation immediately (by clicking the [Run Now] button)
OR
·schedule the operation to run at a later time or on a recurring basis.
OR
·save the operation as XML Instructions that can be run at a later time.
When expanded, each Site for which alerts have been created displays, along with the following detail about each alert:
·the title of the Alert
·the List and (if applicable) Item on which the alert was created
·the alert Type (List or Item)
·the Event Type that triggers the alert
·the Frequency of the alert as well as the Next Alert date and time
·if the alert was set for an item, the Filter used (that is, the option selected for "Send Alerts for These Changes")


