SharePoint Online
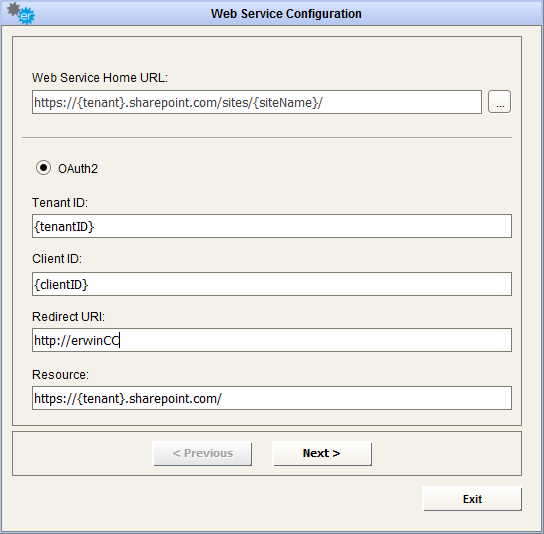
To use the adapter for SharePoint Online, fill the field “Web Service Home URL” with the SmartSheet home page URL you want to connect to.
To provide required parameters, please ensure that erwin DT is registered on target tenant Azure Active Directory.
See: https://docs.microsoft.com/en-us/azure/app-service/app-service-mobile-how-to-configure-active-directory-authentication#optional-configure-a-native-client-application about registering a native application.
Register DT with:
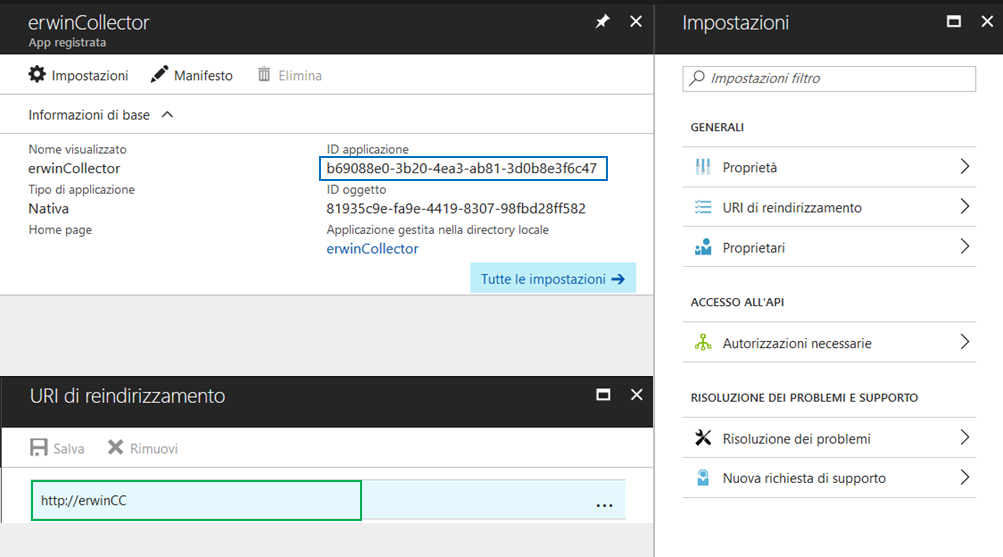
•Name: erwinCollector
•Application Type: Native
•Redirect URI: http://erwinCC
and provide all grants to read site list, for specific Microsoft API:
•Microsoft Graph:
oRead items in all site collection
oAccess directory as the signed in user
•Microsoft Azure Active Directory:
oRead all users' basic profiles
oSign in and read user profile
•Office 365 SharePoint Online (Microsoft.SharePoint)
oRead and write items and lists in all site collections
oRead and write items in all site collections
oRead items in all site collections
oRead managed metadata
The 
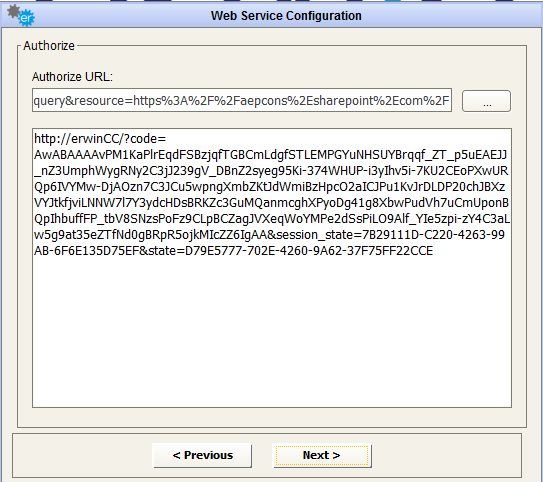
Wait for the browser to complete the request; a new page will be presented, with a URL like:
http://erwinCC/?code= AwABAAAAvPM1KaPlrEqdFSBzjqfTGBCmLdgfSTLEMPGYuNHSUYBrqqf_ZT_p5uEAEJJ_nZ3UmphWygRNy2C3jJ239gV_DBnZ2syeg95Ki-374WHUP-i3yIhv5i-7KU2CEoPXwURQp6IVYMw-DjAOzn7C3JCu5wpngXmbZKtJdWmiBzHpcO2aICJPu1KvJrDLDP20chJBXzVYJtkfjviLNNW7l7Y3ydcHDsBRKZc3GuMQanmcghXPyoDg41g8XbwPudVh7uCmUponBQpIhbuffFP_tbV8SNzsPoFz9CLpBCZagJVXeqWoYMPe2dSsPiLO9Alf_YIe5zpi-zY4C3aLw5g9at35eZTfNd0gBRpR5ojkMIcZZ6IgAA&session_state=7B29111D-C220-4263-99AB-6F6E135D75EF&state=D79E5777-702E-4260-9A62-37F75FF22CCE &session_state=7B29111D-C220-4263-99AB-6F6E135D75EF&state=D79E5777-702E-4260-9A62-37F75FF22CCE
Copy the entire URL to DT text area:
The
After selecting the desired operation, it is required to enter a name and a description for the adapter in the appropriate fields; the user must browse the file system for the adapter folder (used to save intermediate and result file for adapter execution).
The next button
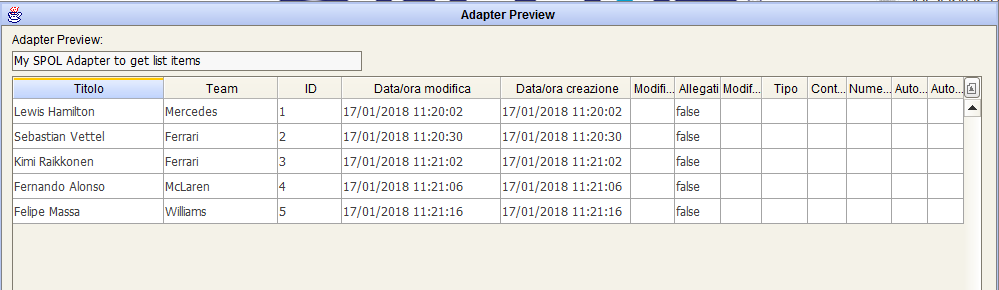
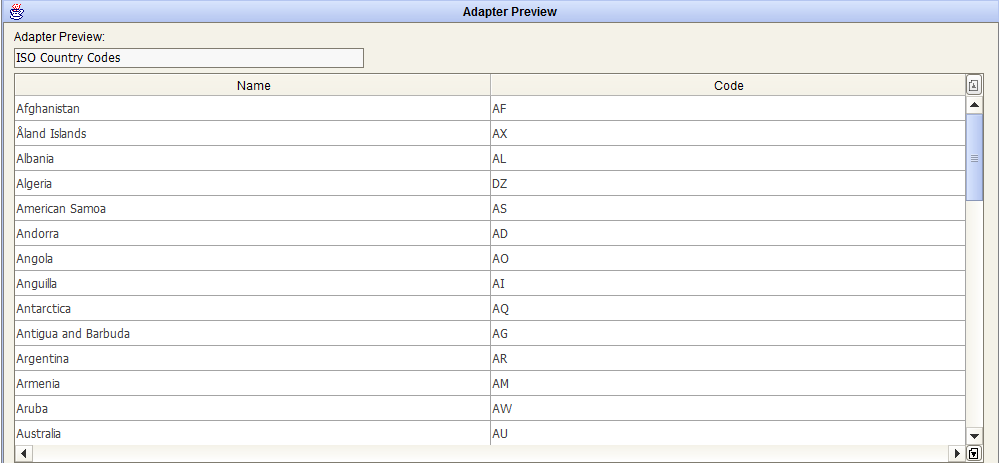
Select the list – double click on lens icon beside “List GUID” open a list of available lists – and apply the selection, and the desired list GUID (as expected by Sharepoint export API) fills the parameter value
Pressing the 
Pressing the 
The 
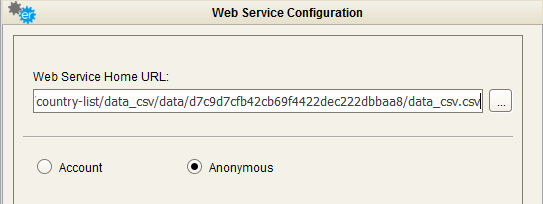
Generic data provider - CSV
To use the adapter for a generic http data provider, fill the field “Web Service Home URL” with the URL to the data provider service, ex:
Then, provide a valid User/Password if service requires (basic) authentication, or select “Anonymous” access option
The
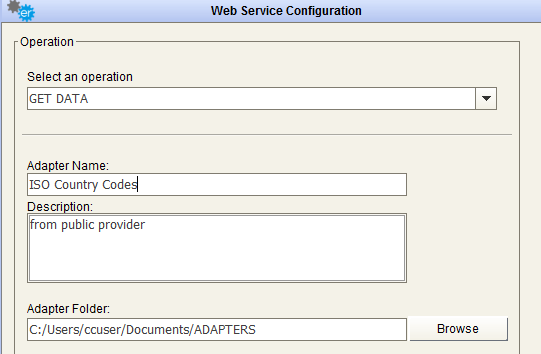
After selecting the desired operation, it is required to enter a name and a description for the adapter in the appropriate fields; the user must browse the file system for the adapter folder (used to save intermediate and result file for adapter execution).
The next button
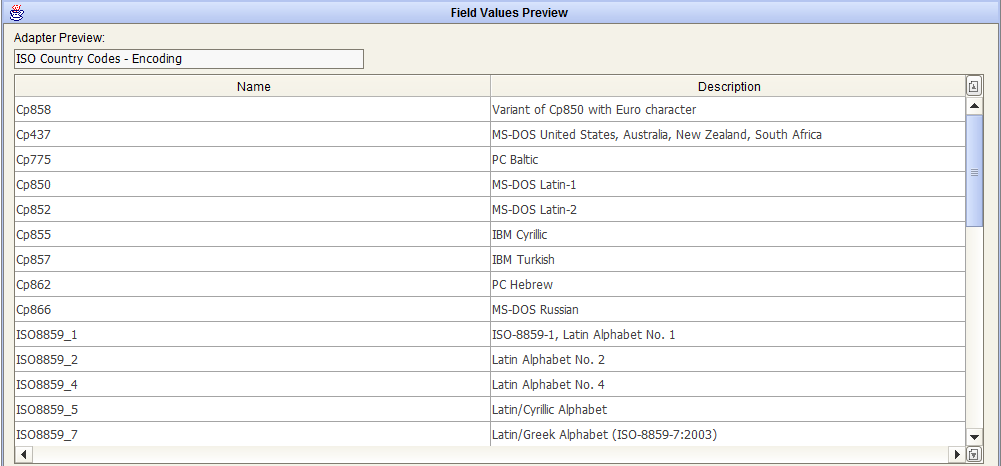
When a lens icon shows beside the parameter name:
this means that user may choose the parameter value from a list of available items. In case of this example, with the double-click on the lens icon, a table appears, with the available encoding:

Select and apply the selection, and the desired values for other fields, like the CSV column separator and parameters should the service require them.
Pressing the
Pressing the
The
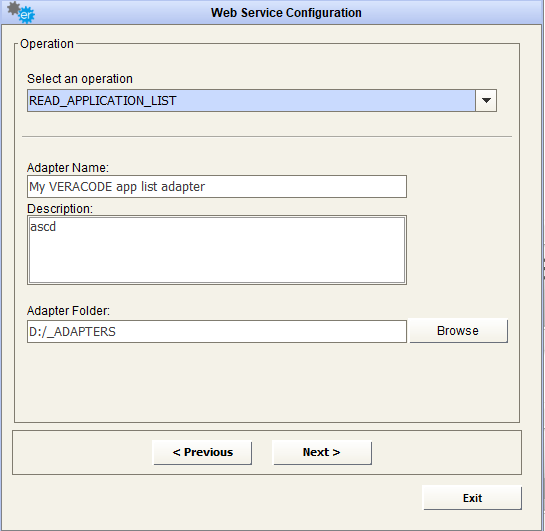
Veracode – READ APPLICATION LIST
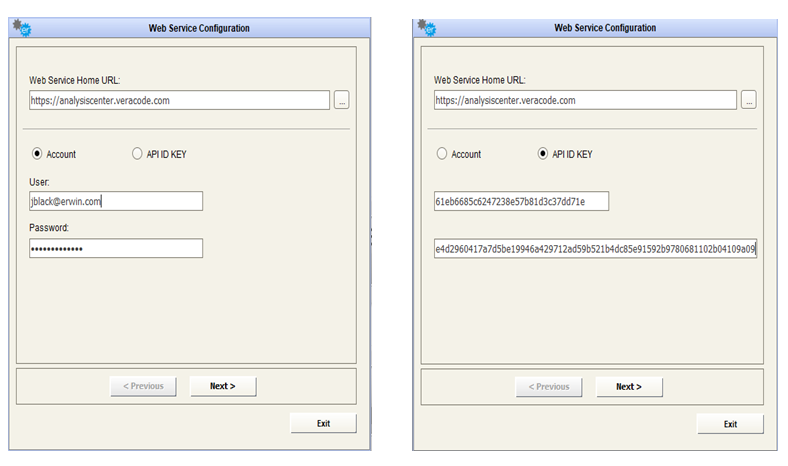
To use the adapter for Veracode, to read application list, fill the field “Web Service Home URL” with the Veracode URL you want to connect to. Then, provide a valid username/password to connect, or the API credentials (ID/KEY), that can be generated by a valid account.
Please, make sure that the account has the correct permissions to use Veracode API: https://help.veracode.com/reader/LMv_dtSHyb7iIxAQznC~9w/2nDnsqbBHfc2TPcl_Ps~KQ
The 
After selecting the desired operation, it is required to enter a name and a description for the adapter into the appropriate fields; the user must browse the file system for the adapter folder (used to save intermediate and result file for adapter execution).
The next button
Pressing the
Pressing the
The
Veracode – IMPORT APPLICATION DATA
To use the adapter for Veracode, to import application data, fill the field “Web Service Home URL” with the Veracode URL you want to connect to. Then, provide a valid username/password to connect, or the API credentials (ID/KEY), that can be generated by a valid account.
Please, make sure that the account has the correct permissions to use Veracode API: https://help.veracode.com/reader/LMv_dtSHyb7iIxAQznC~9w/2nDnsqbBHfc2TPcl_Ps~KQ
The
After selecting the desired operation, it is required to enter a name and a description for the adapter in the appropriate fields; the user must browse the file system for the adapter folder (used to save intermediate and result file for adapter execution).
The next button
Pressing the
The
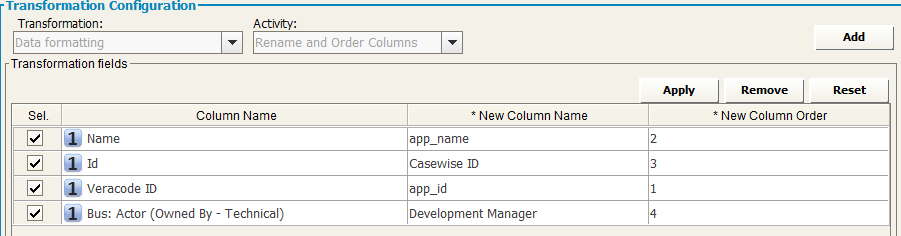
The Adapter, as mentioned, can be used to push data to Veracode and fill applications metadata. For example, if the application object type in Veracode has two custom fields named “Casewise ID” and “Development Manager”, the alignment can be done configuring a workflow, with a source providing values for the fields, and with the target operation “Web Service POST”, using the configured adapter. To provide mappings between source and target field, use a “Data Formatting: Rename and Order Columns” transformation, with the required “app_id” and “app_name” fields, and all others desired fields. Where “app_id” (numeric) value is null or 0, the application with provided name will be created, or updated, if an existing Veracode application with the same name already exists.