Chat now with support
Chat with Support

On Demand Migration Current - Active Directory Entra-Joined Devices Quick Start Guide

Introduction Requirements Preparing the Environment Preparing the Provisioning Package Preparing ODMAD for Device Migration Migrating your Device Validating your Device After Microsoft Entra ID Join Frequently Asked Questions

Preparing ODMAD for Device Migration

This chapter describes the steps to prepare the On Demand Active Directory Migration service to migrate the source devices to the target Microsoft Entra ID only tenant. 

In this chapter:

Preparing the Directory Sync Local Environment

Follow the steps described below to setup the Directory Sync Local Environment.

  1. Log in to Quest On Demand.
  2. Navigate to Migrate > Directory Sync.
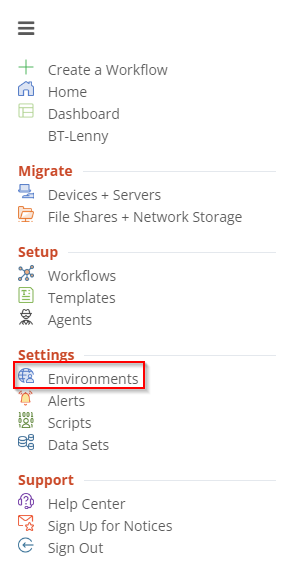
  3. Click Environments in the left navigation menu to display the Environments view.

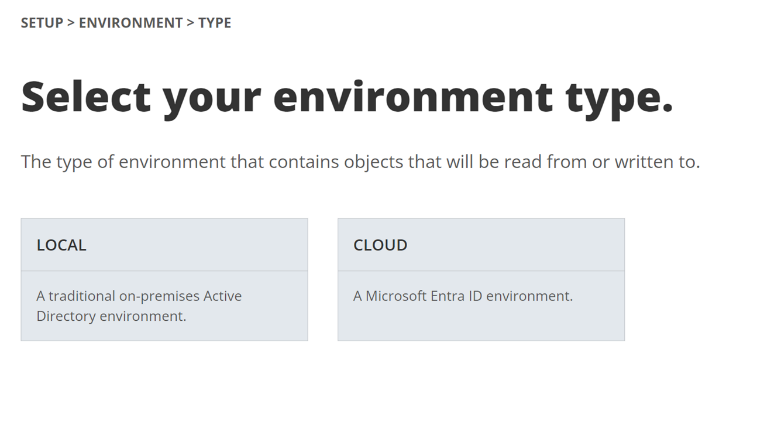
  4. Click New. The Select your environment type page opens.

  5. Select Local as the environment type. Click Next.
  6. Specify a name for the local environment. Click Next.
  7. Specify a name for the local agent. Click Next.
  8. Note the agent Registration URL and Registration Key for later use.
  9. Click Download Agent to download the agent installer. Click Finish.
  10. Install the agent in the Windows Server that is joined to the local AD domain, and follow the steps below to configure the agent:

    NOTE See the On Demand Migration Active Directory User Guide for detailed information about agent installation and set-up requirements.

    1. Launch the On Demand Migration Directory Sync Agent installation in the target workstation or server.
    2. Accept the license agreement and click Next.
    3. Enter the target active directory environment information by providing the following and click Next.
      • Domain Name
      • Global Catalog Server
      • Username
      • Password
    4. Enter the On Demand Migration Directory Sync agent Registration URL and agent Registration Key that you had saved and click Next.
    5. Skip the sIDHistory Migration step as sIDHistory is not in-scope for this project.
  11. After the agent is installed return to the Quest On Demand Directory Sync Environments page, and verify that the local environment is discovered

  12. Select your local environment and click Settings to access the local AD environment setting page.
  13. Click the Organization Unit tab and define the OU filter based on your project scope. In this case, we should include the following:
    1. Users and Groups objects in-scope of the migration.
    2. Devices in-scope of the migration.
  14. Click the Filters tab and define any LDAP filter based on your project scope.
  15. Click Save.

Preparing the Directory Sync Cloud Environment

An Office 365 Global Administrator account is required to add Microsoft Entra tenant to Quest On Demand.

  1. Log in to Quest On Demand.
  2. Navigate to Migrate > Directory Sync.
  3. Click Environments in the left navigation menu to display the Environments view.

  4. Click New. The Select your environment type page opens.

  5. Select Cloud as the environment type. Click Next.
  6. Specify a name for the cloud environment. Click Next.
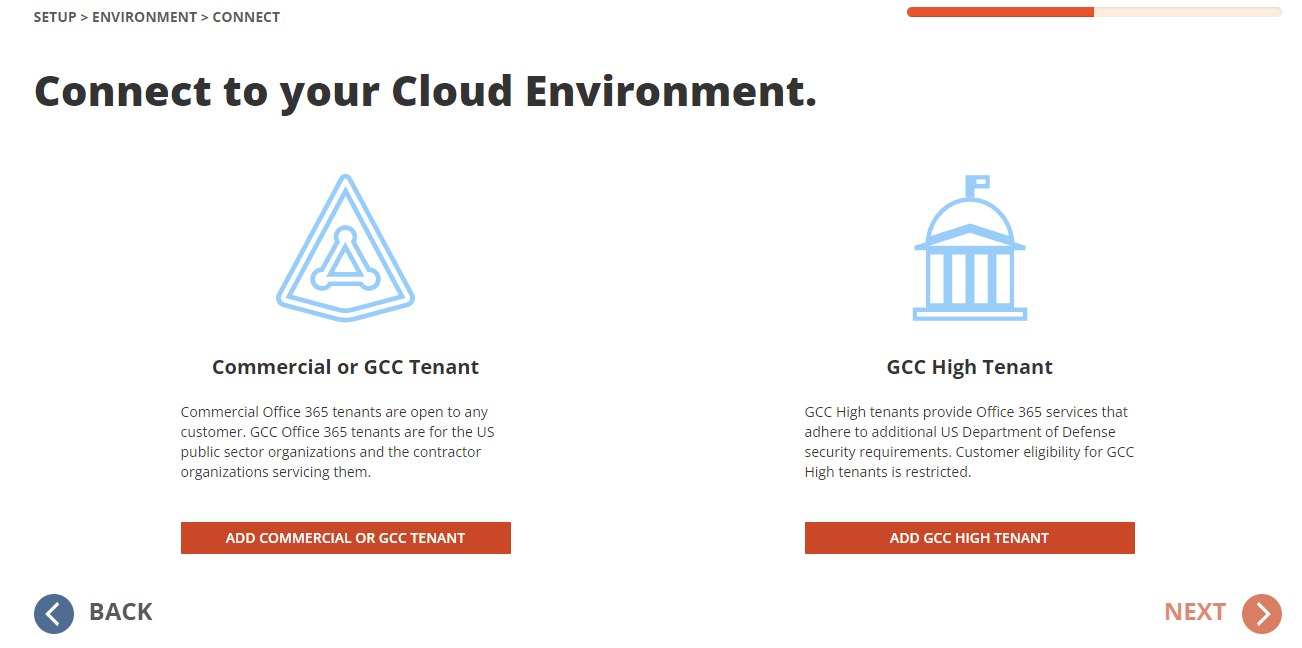
  7. Click Add Commercial or GCC tenant.

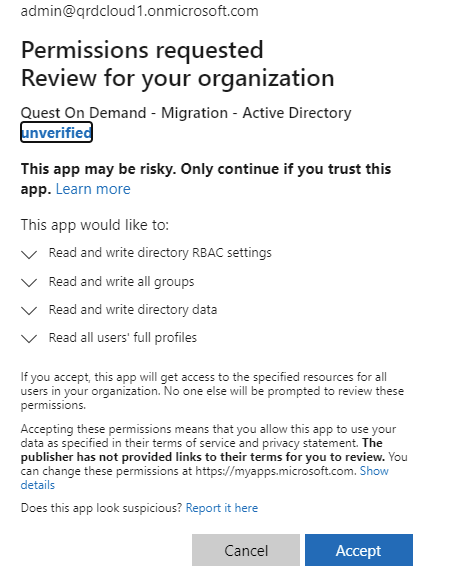
  8. Enter the tenant Admin Credential and click Accept to grant the consents.

  9. Click Next.
  10. Select your cloud environment and click Settings to access the cloud environment settings page.
  11. Configure the cloud environment object and filter groups and. Click Next.
  12. Select the Include Objects Synchronized with a Local Active Directory via Microsoft Entra Connect option if you want to include Hybrid Objects.  For the purpose of this guide, we will leave this option unchecked and click Next.
  13. Review the environment summary and click Finish.

NOTE When migrating devices between two Microsoft Entra tenants without Local On-Premise Active Directory, please add and configure environments for both source and target tenant as Cloud environments.

Preparing the Directory Sync Template

Follow the steps described below to configure the Directory Sync Template.

  1. Log in to Quest On Demand.
  2. Navigate to Migrate > Directory Sync.
  3. Click Templates in the left navigation menu.

  4. Click New to open the Template Wizard.
  5. Enter the name and description for the template. Click Next.
  6. Select Local for source environment type. Click Next.
  7. Select Cloud for target environment type. Click Next.
  8. Configure the Users synchronization options. Click Next.  For the purpose of this guide, use the default options.
  9. Configure the Groups synchronization options. Click Next.  For the purpose of this guide, use the default options.
  10. Configure the M365 Groups and Teams synchronization options. Click Next.  For the purpose of this guide, use the default options.
  11. Configure the Contact Synchronization options. Click Next.  For the purpose of this guide, use the default options.
  12. Specify the default user password. Click Next.
  13. Configure the Attribute mappings. Click Next.  For the purpose of this guide, use the default options.
  14. Review the template summary. Click Next.

NOTE If you don’t want to create objects in your target environment, choose Skip, Disable or Do Not Create option for each object type.

Related Documents

The document was helpful.

Select Rating

I easily found the information I needed.

Select Rating