
BLOB Migration
The BLOB Migration job moves the BLOBs from one or more Source Endpoints associated with the storage profile to a single Destination Endpoint. Even though all storage endpoints are available, only BLOBs associated with the storage profile will be migrated.
|
|
NOTE: Although it is a profile timer job, any endpoint filters for the profile are ignored for bulk migration. The only way to invoke the endpoint filters is to recall and externalize the content on the library or profile level. |

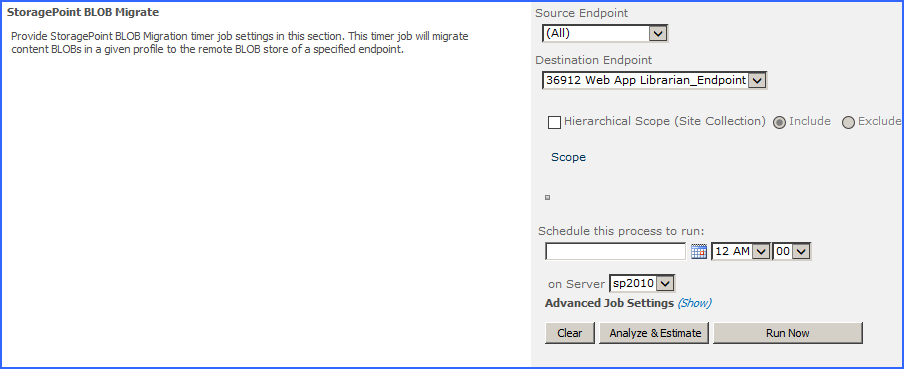
To configure the BLOB Migration job:
1.Note the Timer Job Scope (at the top of the page) of the Storage Profile selected.
2.Select the Source Endpoint (where the BLOBs are moving FROM) from the dropdown.
|
|
NOTE: The availability of bulk migration and the list of storage endpoints in the Source field are built by logic used against all storage endpoints. ·Librarian endpoints used on other profiles will not be available. ·The (All) option is only available if there is more than one endpoint in the Source field. ·Backup endpoints will not be available. ·Profile Endpoint settings (Use SharePoint Folder and/or Filename) used on the destination endpoint will not be applied to migrated data. |
3.Select a Destination Endpoint (where the BLOBs are moving TO) from the dropdown.
4.(Optional) Hierarchical Scope Filter - A filter to restrict the migrate job to a specific site collection, if the scope of the profile is a content database or web application.
a.Select whether to include or exclude the site collection that is in the scope of the profile.
b.Click Add Scope, and in the dialog box that opens, select a site collection.
c.Click Ok to add the filter.
5.Enter a date in the Schedule this process to run box or click the calendar icon to pick the date from a calendar.
6.Select a time from the supplied time dropdowns.
7.(Optional) On the on Server dropdown list, select the WFE server to run the job on.
8.(Optional) Click the Show link next to the Advanced Job Settings to view notification settings.
9.(Optional) Enter the Number of Processing Threads to use during job execution. It will default to one thread per processor core if no value is supplied.
10.(Optional) Configure job roles. See Controller and Worker Configuration for more information.
11.Under the Send Completion Notice: header, select whether the email notification should go out Always, or Only when errors occur.
12.(Optional) In the To section:
a.Check the Default Notifications Contacts box to have a completion email sent to the email address entered in General Settings. Note that for this feature to work, the Default Notification field on General Settings must contain a valid email address.
b.In the Additional Contacts box, enter a semi-colon delimited list of other email addresses that should receive the notification.
13.Click Save to save the configured job schedule.
14.(Optional) Click Run Now to run the job immediately.
Migration – Analyze & Estimate
To display an estimate of the space needed to migrate content from one endpoint to another:
1.Click Analyze and Estimate.
2.The estimates for how many BLOBs will be migrated to the target endpoint selected will be displayed.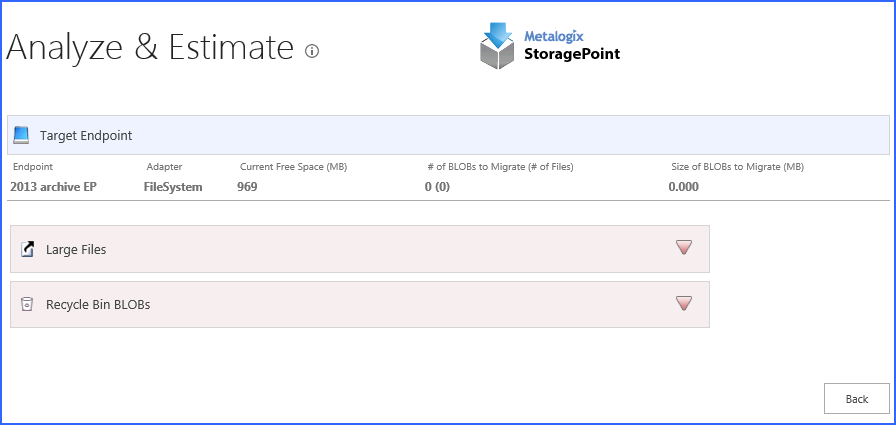
3.Click Back to return to the Timer Jobs screen.
Archive Aging Configuration
The Archive Aging Timer Job will evaluate defined aging rules against items within the scope of the profile and queue content for migration to the configured destination endpoint. There is no notification when a BLOB meets the aging rule definition, so this timer job should be scheduled in order to scan for content. To configure aging archive conditions, open the profile. See Configuring Archiving Rules for more information.
The Archive Aging Timer job is found on the Timer Jobs page, which is linked from the Profiles page.
1.Set up the schedule for the Archive Aging timer job.
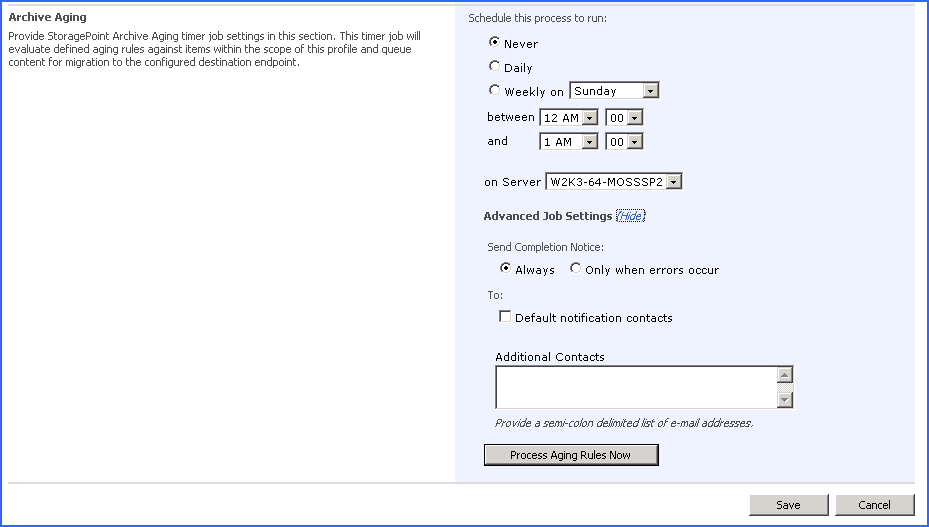
2.Select an option for the Schedule this process to run field. Select a day if the process will run Weekly. Process Aging Rules Now can be used to manually archive content at any time.
3.Select a timeframe from the supplied between and and dropdowns for the archiving job to begin.
4.On the on Server dropdown list, select the WFE server to run the job on.
5.Click the Show link next to Advanced Job Settings to view notification settings.
6.Under the Send Completion Notice: header, select whether the email notification should go out Always, or Only when errors occur.
7.In the To section:
a.Check the Default Notifications Contacts box to have a completion email sent to the email address entered in General Settings. Note that for this feature to work, the Default Notification field on General Settings must contain a valid email address.
b.In the Additional Contacts box, enter a semi-colon delimited list of other email addresses that should receive the notification.
8.Click Save to save the configured job schedule or click Process Aging Rules Now to run the job immediately.
Deleting a Scheduled Storage Profile Timer Job
1.Click Clear to clear the date and time settings. (For Unused BLOB Cleanup, select Never.)
2.Clicking Save with no date specified will delete an existing job schedule, if one exists.