Overview
The Azure Knowledge Pack for InTrust helps you extend your auditing scope to your Azure-based resources. Using the familiar InTrust Deployment Manager workflow with minor adjustments, you can collect the following:
- Events from Windows virtual machines hosted in Azure.
- Events that originate in Azure and are directed to event hubs.
|
IMPORTANT: This distribution of the Azure Knowledge Pack is a technical preview with known limitations and issues, which are noted in the documentation (see Known Issues). Quest appreciates your feedback on the available functionality and will try hard to complete the solution and align it with your expectations.
In the final release of the Azure Knowledge Pack, the workflow will be more streamlined and auditing of a variety of other Azure resources will be supported, including the Activity log, Azure portal permission and role assignments and Managed SQL. |
To download the Azure Knowledge Pack technical preview, go to https://support.quest.com/intrust/11.4.1/download-new-releases. Note that the Knowledge Pack is compatible only with InTrust 11.4.1 without Update 1.
How It Works
The Azure Knowledge Pack adds two dedicated types of collection to InTrust Deployment Manager:
- Azure collection
This type of collection contains virtual machines that are included in the Azure resource group that you specify. In a fully populated Azure collection, the items look and feel the same as Windows computers in a regular Windows collection.
- Azure log (Event Hub) collection
This type of collection contains Azure event hubs instead of computers.
Retrieval of Logs from Virtual Machines
The Azure Knowledge Pack provides the Azure Proxy Service, which resides both on the on-premises InTrust server and on the individual Azure virtual machines that events come from. The service performs the following sets of tasks, depending on where it is running:
- On an Azure virtual machine, it works alongside a regular InTrust agent and collects data directly to the Azure blob storage.
- On the InTrust server, it retrieves data from the Azure blob storage and puts it in a repository.
The two parts of the solution never communicate with each other. Their only shared resource is the blob storage.
Retrieval of Azure Logs
Azure logs are collected through communication with Azure event hubs. A specialized Azure Knowledge Pack component on the InTrust server is responsible for connection to the specified event hub and retrieval of events from it.
Installation
Due to the technical preview status of this distribution of the Azure Knowledge Pack, it is recommended that you deploy it in a dedicated sandboxed InTrust organization. The best configuration for the Azure Knowledge Pack technical preview is InTrust Server and InTrust Deployment Manager on the same server, which is in its own InTrust organization.
In this configuration, to install the Azure Knowledge Pack on the server of your choice:
- Make sure none of the following applications are running: InTrust Deployment Manager, InTrust Manager, Repository Viewer.
- Run the InTrust_AzureKP.11.4.1.*.msi file provided to you. This will upgrade InTrust Server on the computer.
- Run the RTC_UI.11.4.1.*.msi file. This will upgrade InTrust Deployment Manager on the computer.
If you need to work with this instance of the Azure Knowledge Pack on a different computer, install InTrust Deployment Manager on that computer, and then upgrade InTrust Deployment Manager using the RTC_UI.11.4.1.*.msi file.
|
IMPORTANT: Deploying this technical preview in your production environment is discouraged, because this may result in InTrust configuration conflicts. In addition, upgrading InTrust from version 11.4.1 will cause the features of this technical preview to stop working.
For more details and caveats, see Known Issues. |
Providing Access to Your Azure Environment
Before you can set up Azure auditing in InTrust, you need to retrieve a number of settings from your Azure environment and possibly create a few dedicated Azure objects for auditing purposes. After you have made notes of the necessary configuration data, you will be ready to supply it in InTrust Deployment Manager. The following configuration information is required:
- For real-time collection from Azure virtual machines:
- Resource group name
- Tenant ID
- Application ID
- Application key
- Subscription ID
- Storage account connection string
- For gathering from event hubs:
- Consumer group name
- Event hub connection strings
- Storage account connection string
All of these settings are available on the Azure portal. If you are not sure where to look up any of them, see the following few topics. If you don't need guidance for getting them, skip directly to Collecting Events from Azure Virtual Machines or Collecting Events from Azure Event Hubs.
|
IMPORTANT:
- In this technical preview, the scope of auditing for Azure virtual machines is a single resource group. A single Azure Knowledge Pack deployment cannot audit multiple resource groups. Populate your resource groups accordingly.
- If you want to use multiple deployments of the Azure Knowledge Pack for auditing Azure virtual machines (for example, as a way to audit multiple resource groups), make sure each resource group is audited and each storage account is used by only one deployment.
|
Get Your Shortcuts Handy
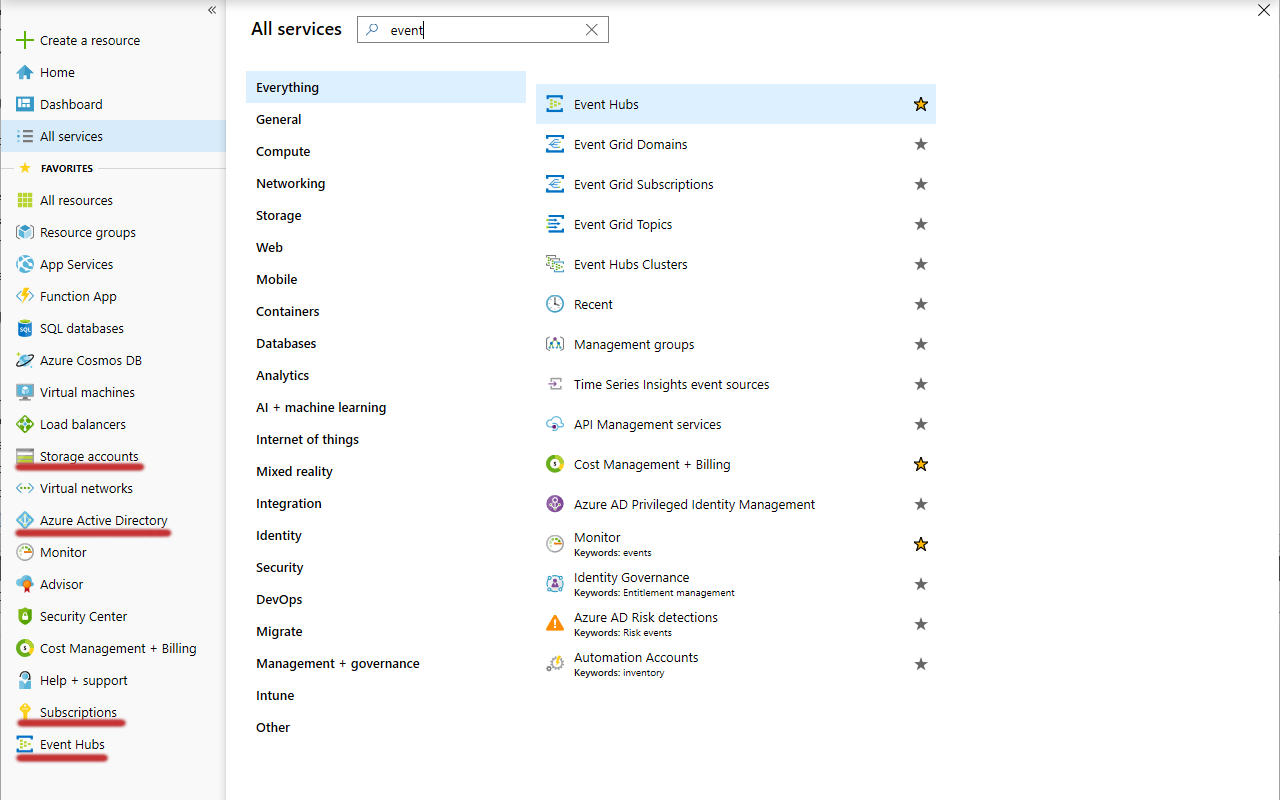
For quick access to all the necessary configuration data, make sure the Favorites list on the Azure portal contains the followings items:
- Azure Active Directory
- Subscriptions
- Storage accounts
- Event hubs
If any of these items is absent from the list, click All services above the list, search for them and add them by selecting their star icons.
Look Up the Tenant ID, Application ID and Application Key
- In the Favorites list, click Azure Active Directory.
- In the menu pane, click App registrations.
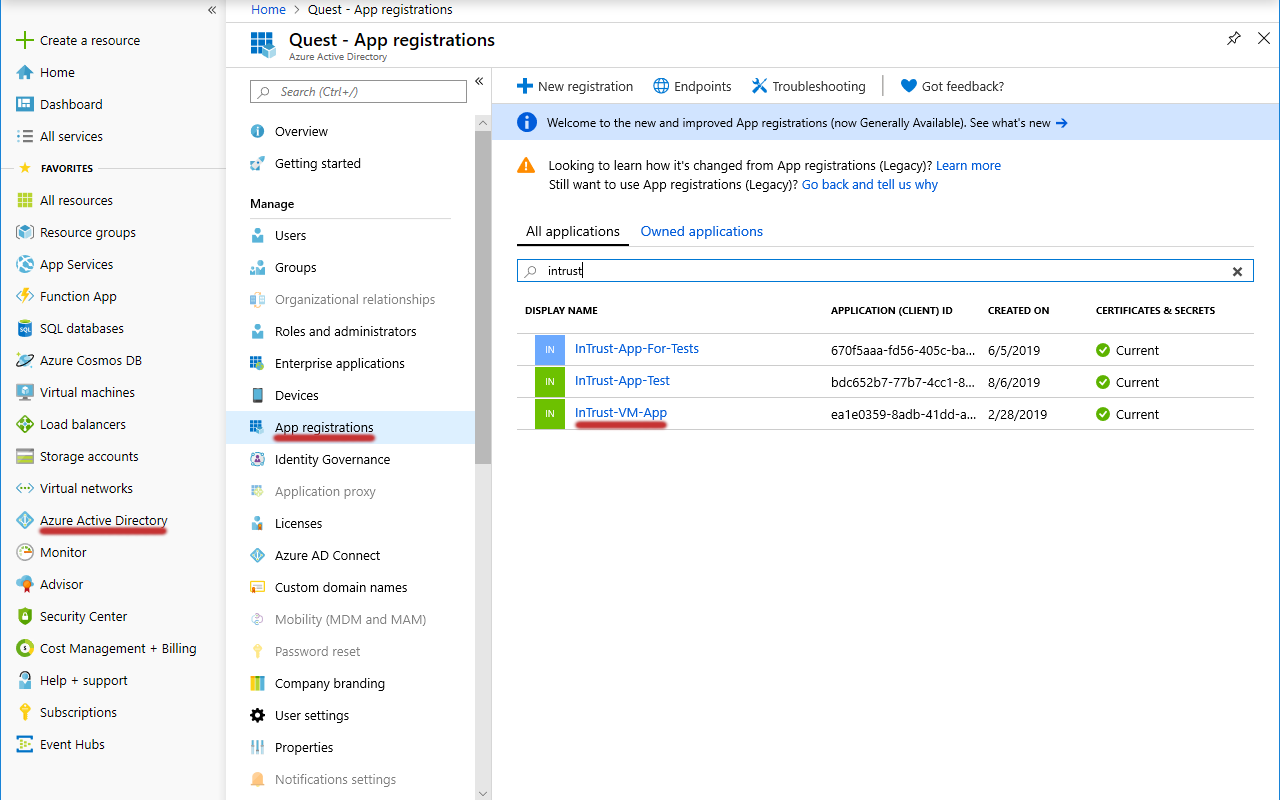
- If you have an existing application dedicated to InTrust, search for it and select it. Otherwise, create a new application by clicking New. Supply a meaningful name, and for the remaining options you can leave the default settings.
- Make sure the application is registered with the right Azure subscription. If you need details, see the To register an application with a subscription procedure below.
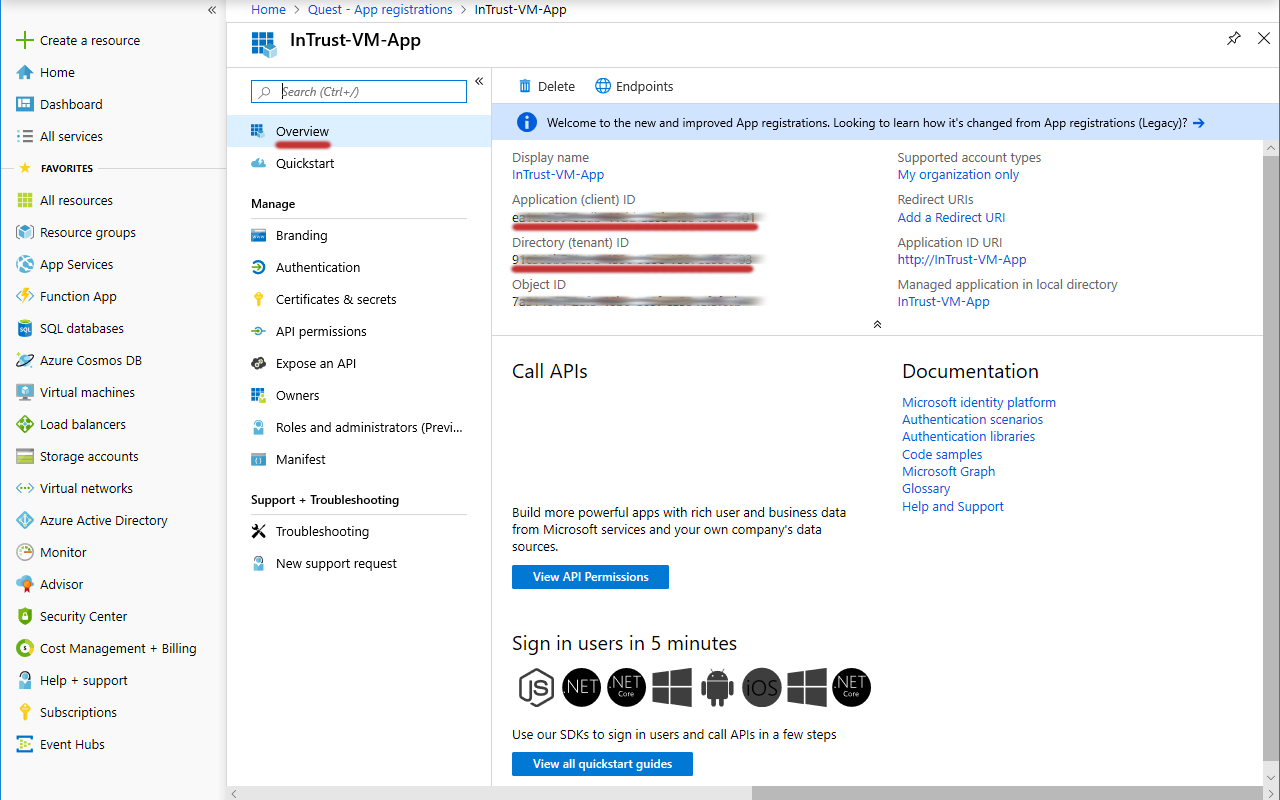
- On the Overview screen for the application you specified, copy the values of the Directory (tenant) ID and Application (client) ID settings and save them for later use.
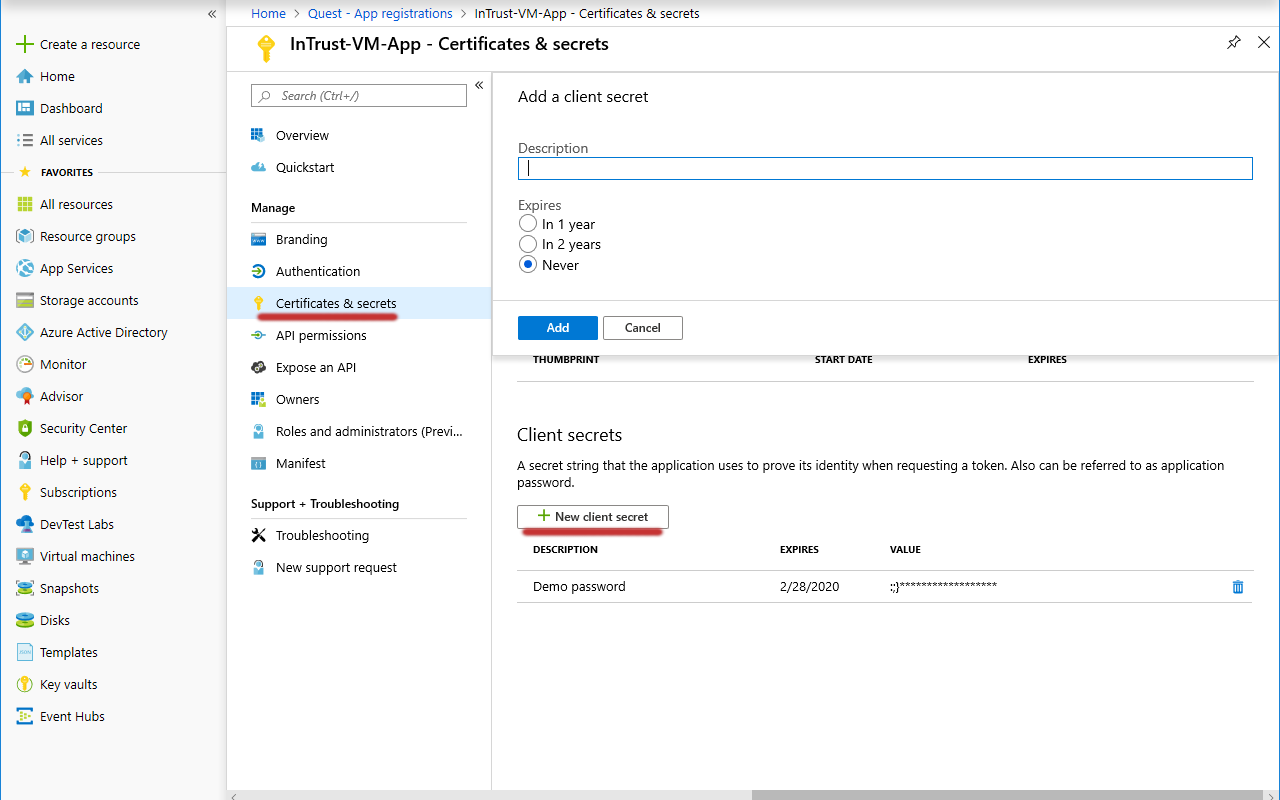
- In the menu pane, switch to the Certificates & secrets screen.
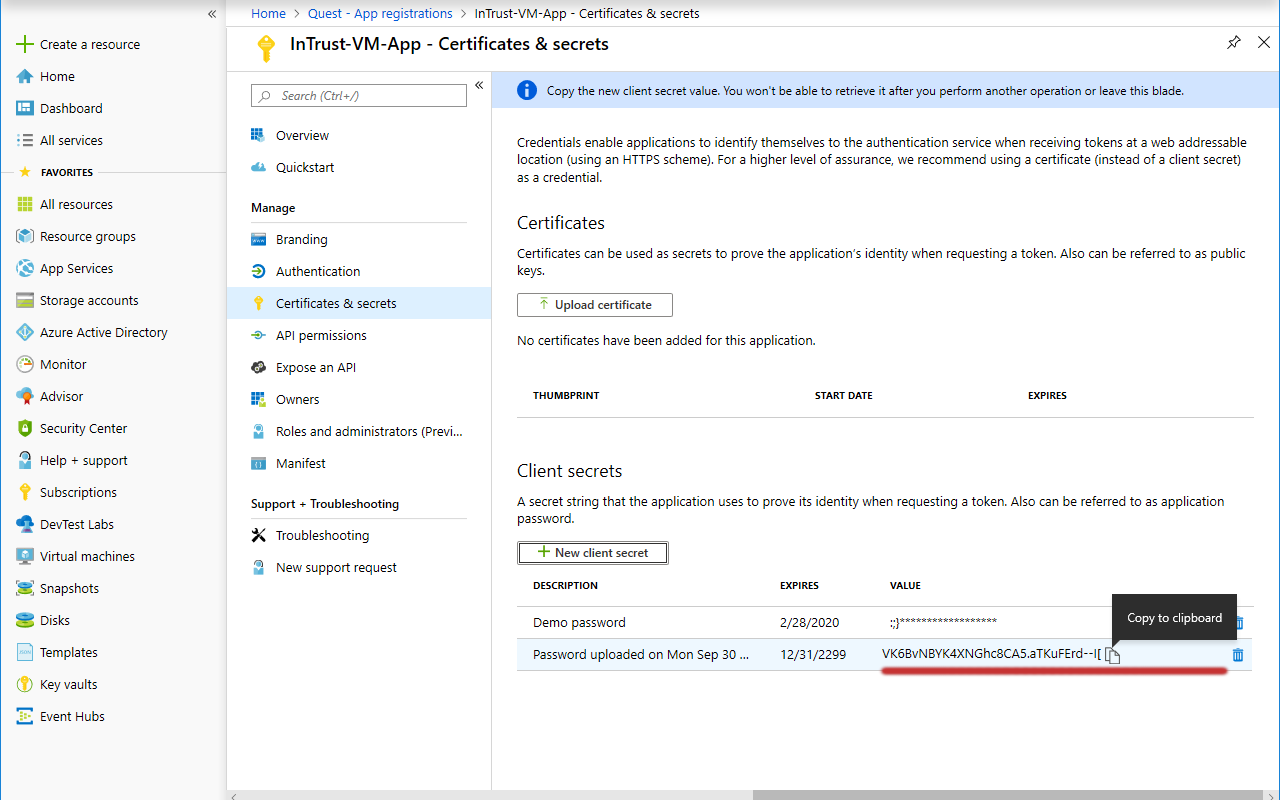
- Under Client secrets, click New client secret. In the popup that is displayed, configure the secret's settings and click Add.
- Copy the generated application key and save it for later use.
To register an application with a subscription
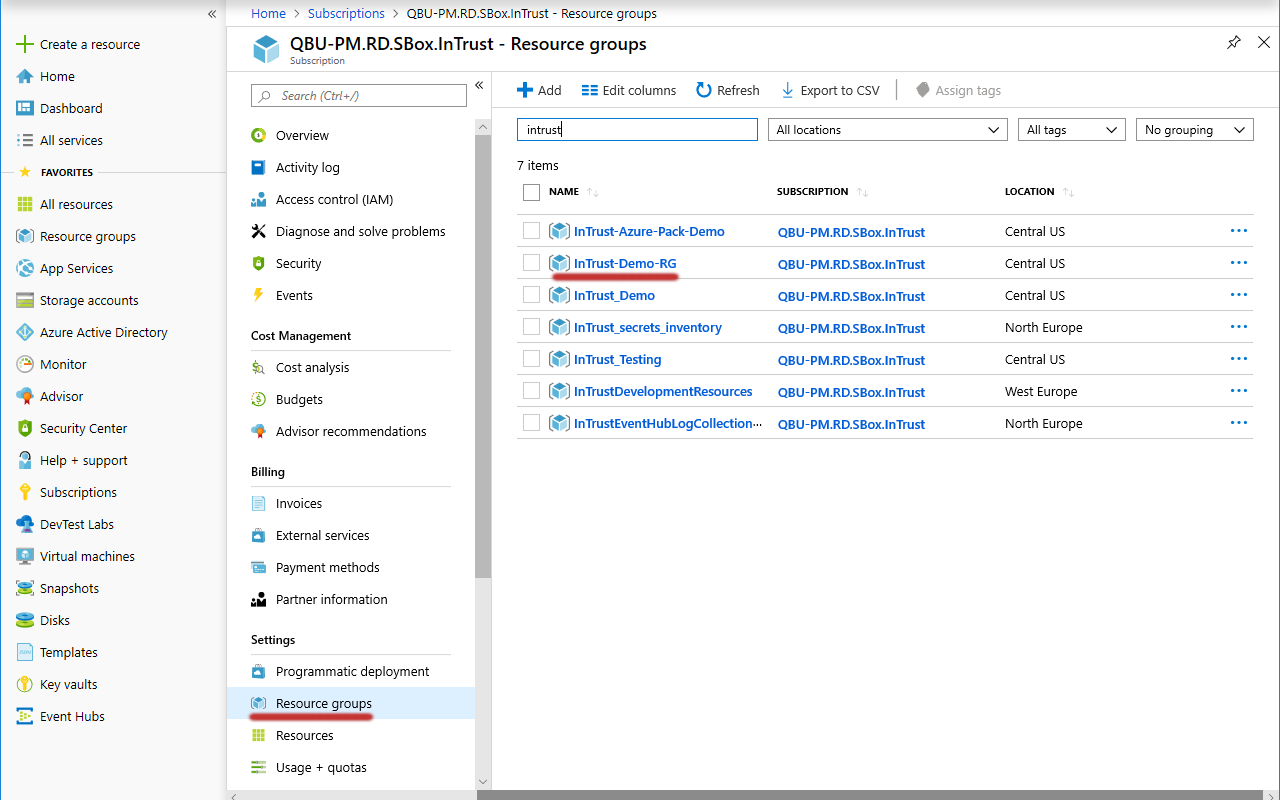
- In the Favorites list, switch to the Subscriptions service and select the subscription you need.
- In the menu pane, click Resource groups.
- Select the resource group you need from the list that is displayed, or create a new resource group by clicking Add. You can leave the default settings for your new resource group.
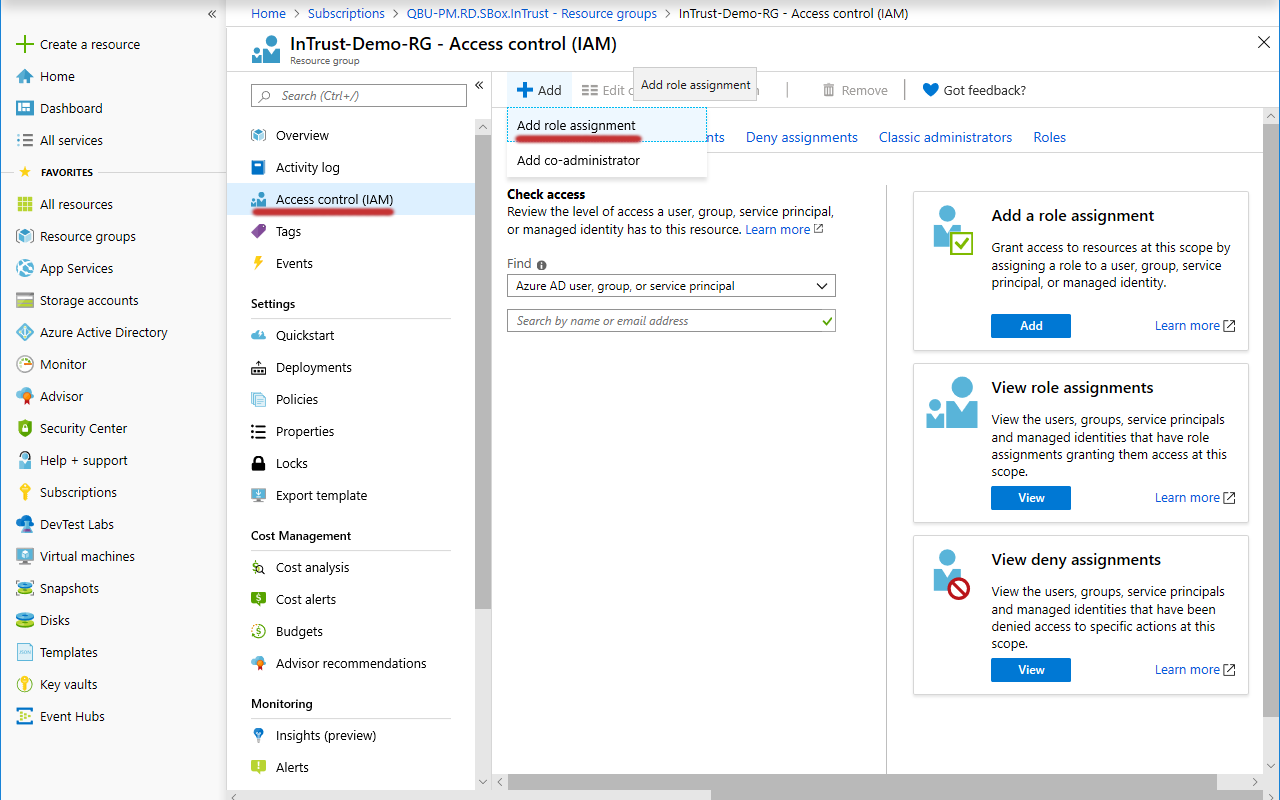
- In the menu pane for the resource group, click Access control (IAM).
- Click Add | Add Role Assignment.
- Under Add Role Assignment, find the necessary application, select the Contributor role for it and click Save to apply it.
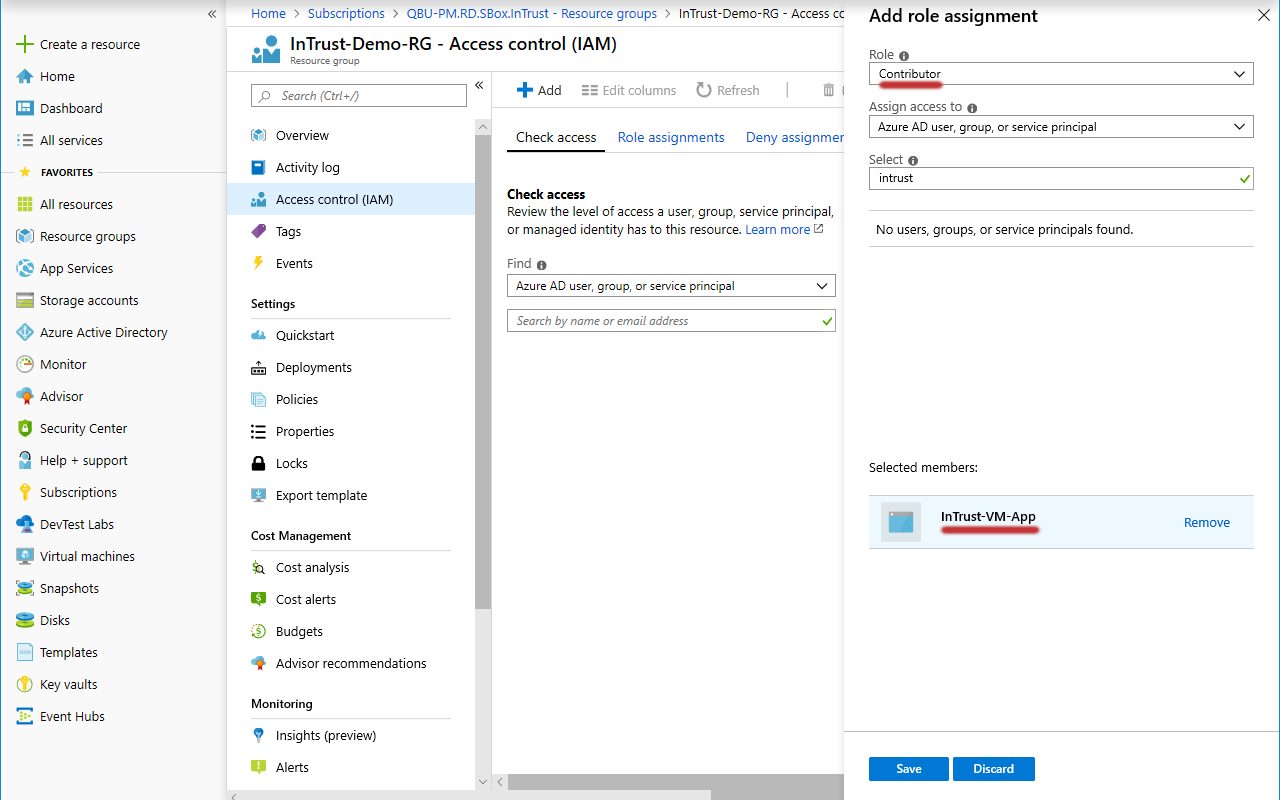
- Likewise, add the Virtual Machine Contributor role to the same application.
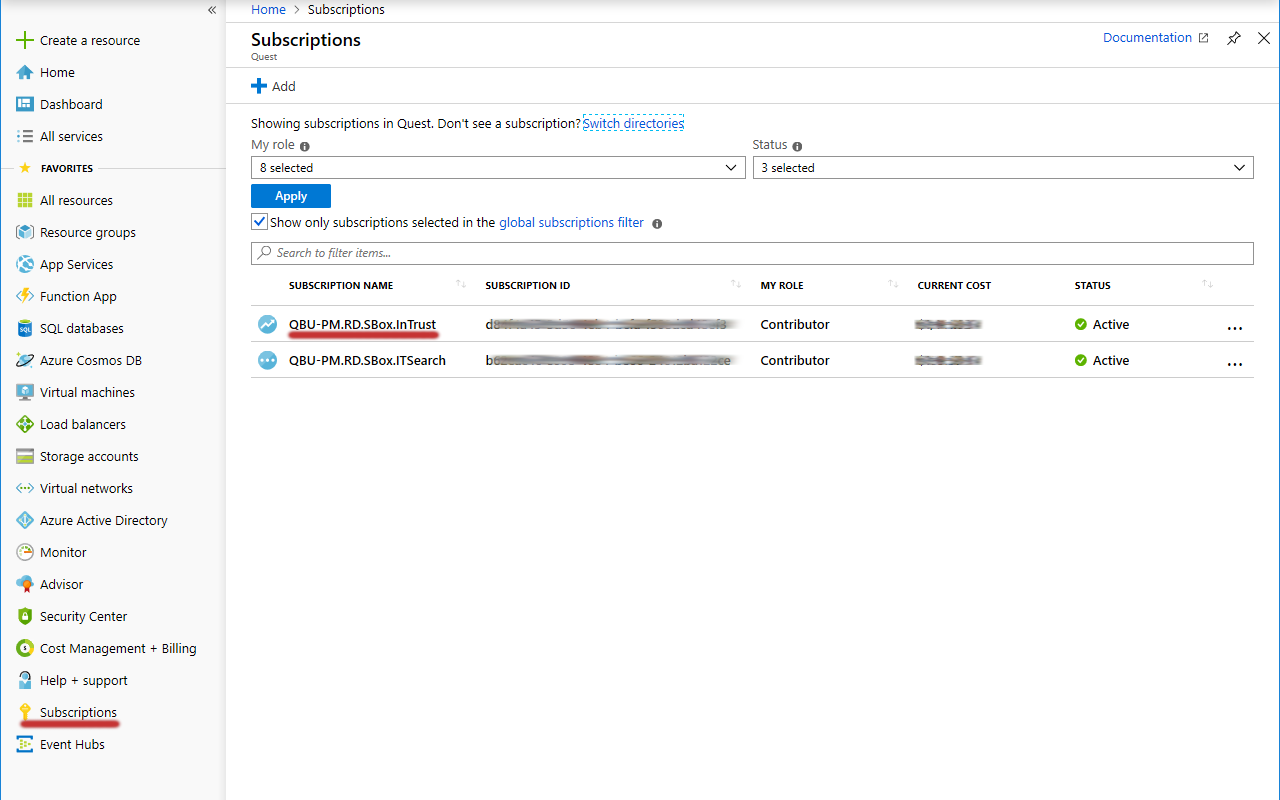
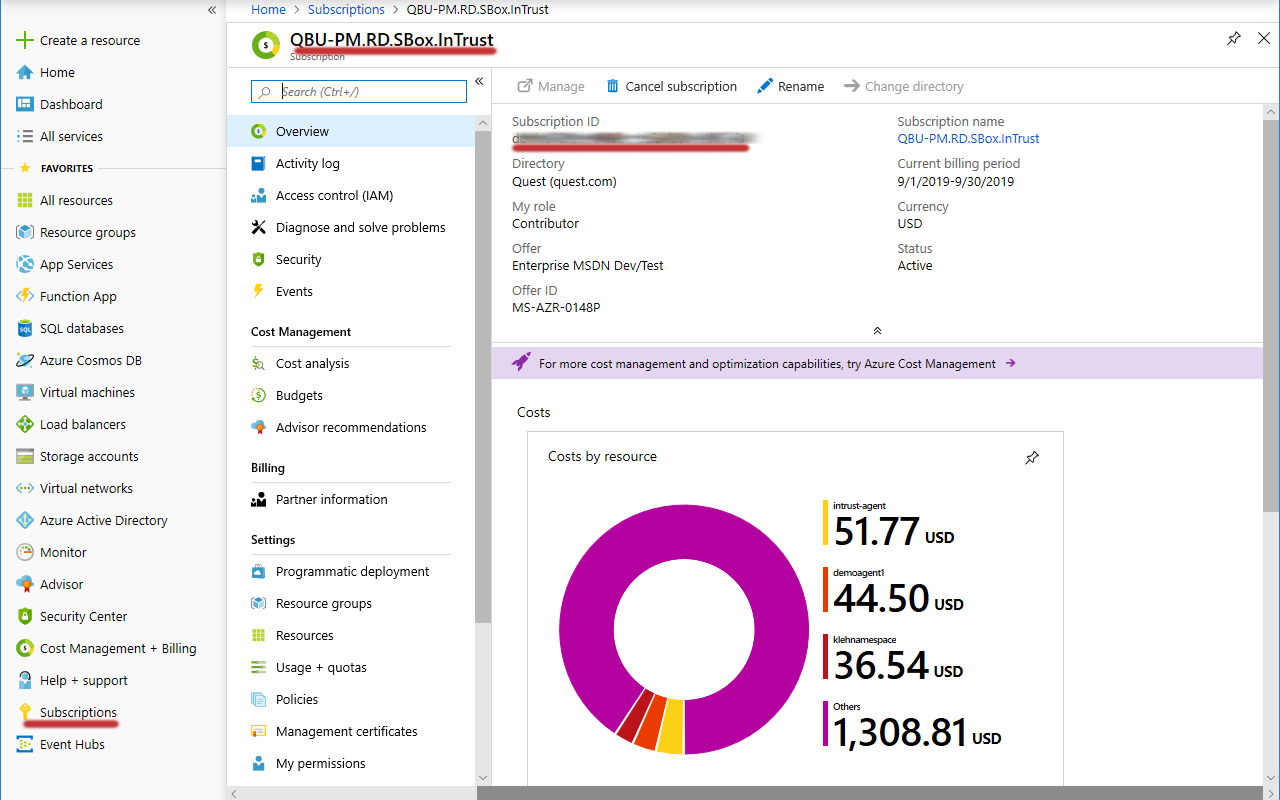
Look Up the Subscription ID
- In the Favorites list, click Subscriptions.
- In the list of subscriptions that opens, locate the subscription you need.
- Copy the value in the Subscription ID column of the table and save it for later use.
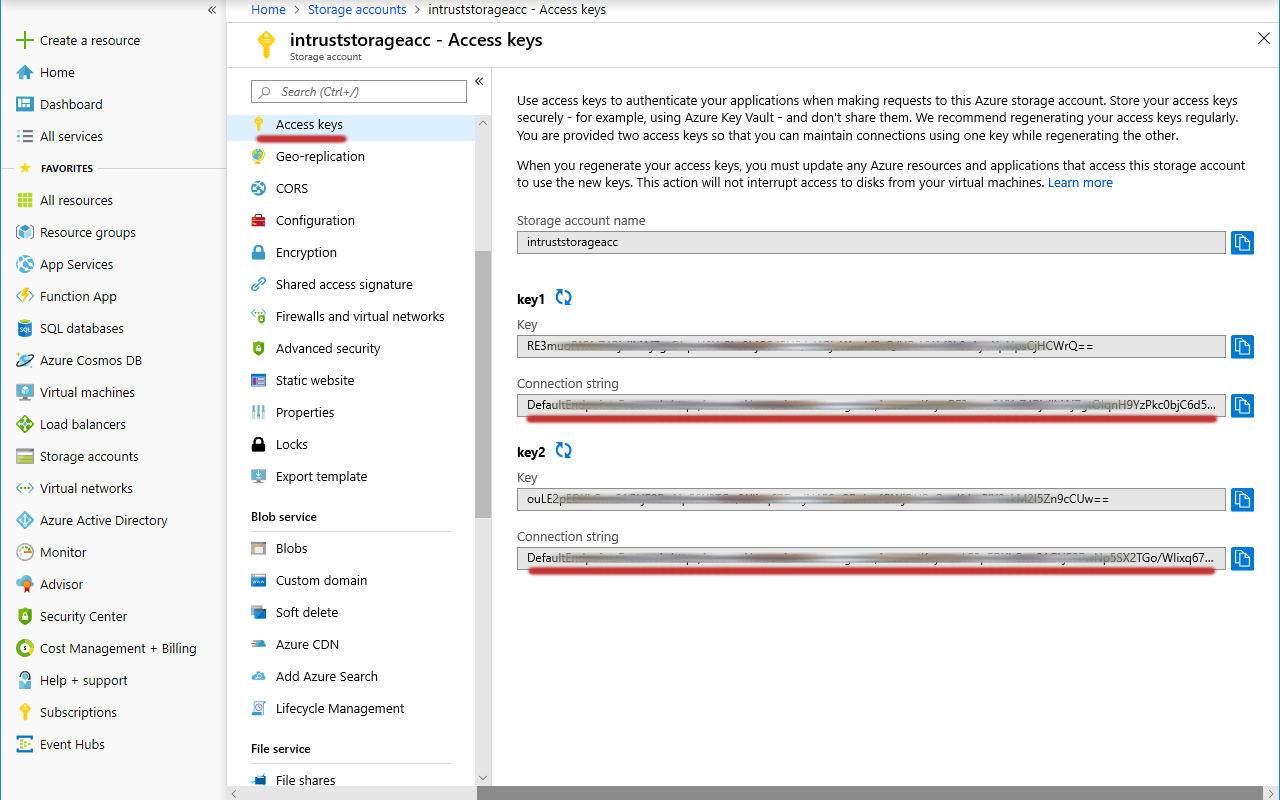
Look Up the Storage Account Connection String
- In the Favorites list, click Storage accounts.
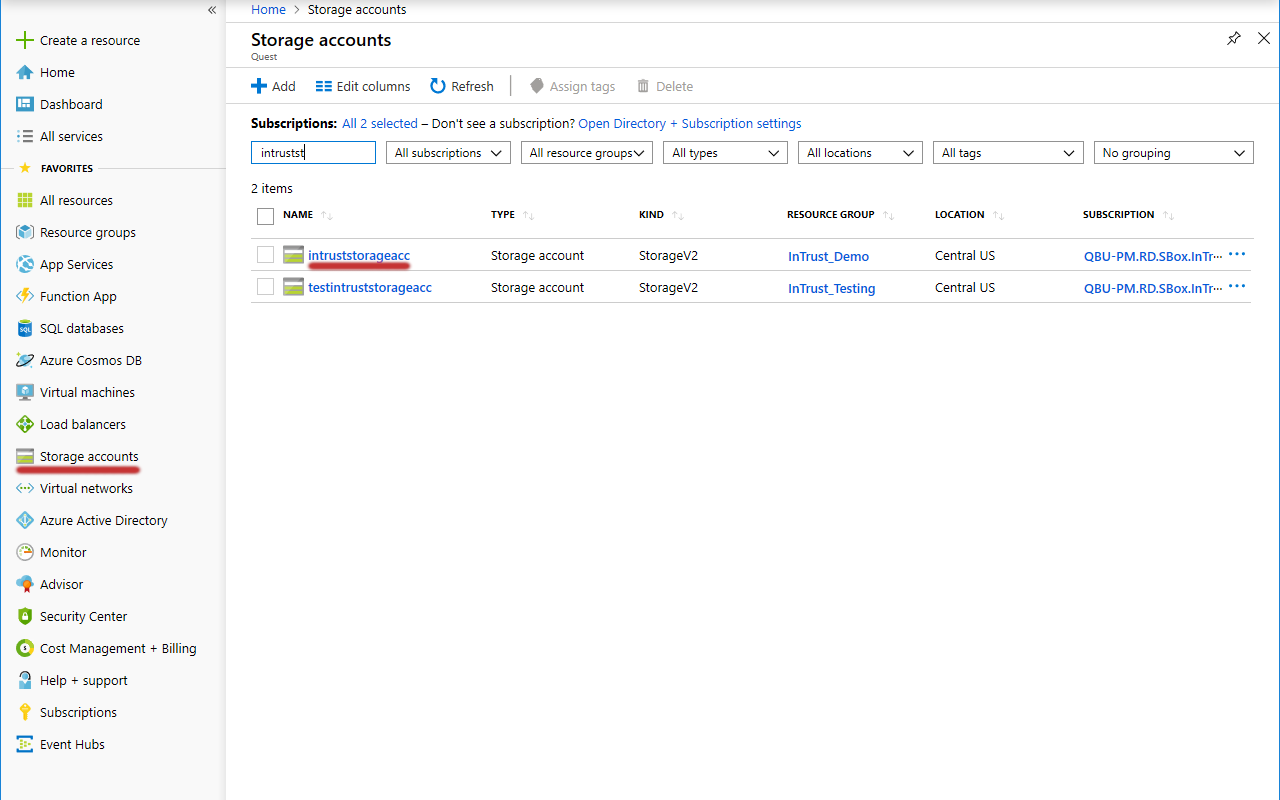
- In the list of storage accounts that appears, select the one you need. Choose an account where:
- Resource group is set to the resource group you need.
- Account kind is set to an appropriate option:
- For virtual machine auditing, select a kind that supports both blob storage and file storage; for example, StorageV2 (general purpose v2).
- For event hub auditing, it is sufficient to use a kind that supports only blob storage.
If such an account does not exist, create it by clicking Add.

- In the menu pane for the specified storage account, switch to Access keys.
- Copy the values in the Connection string text boxes and save them for later use.
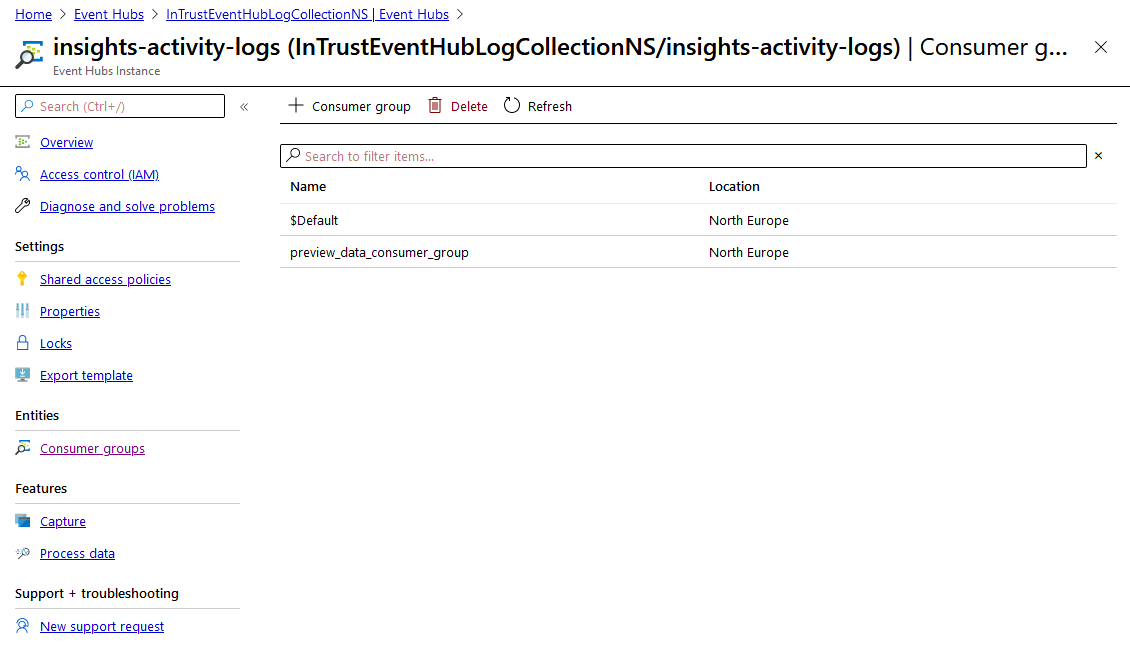
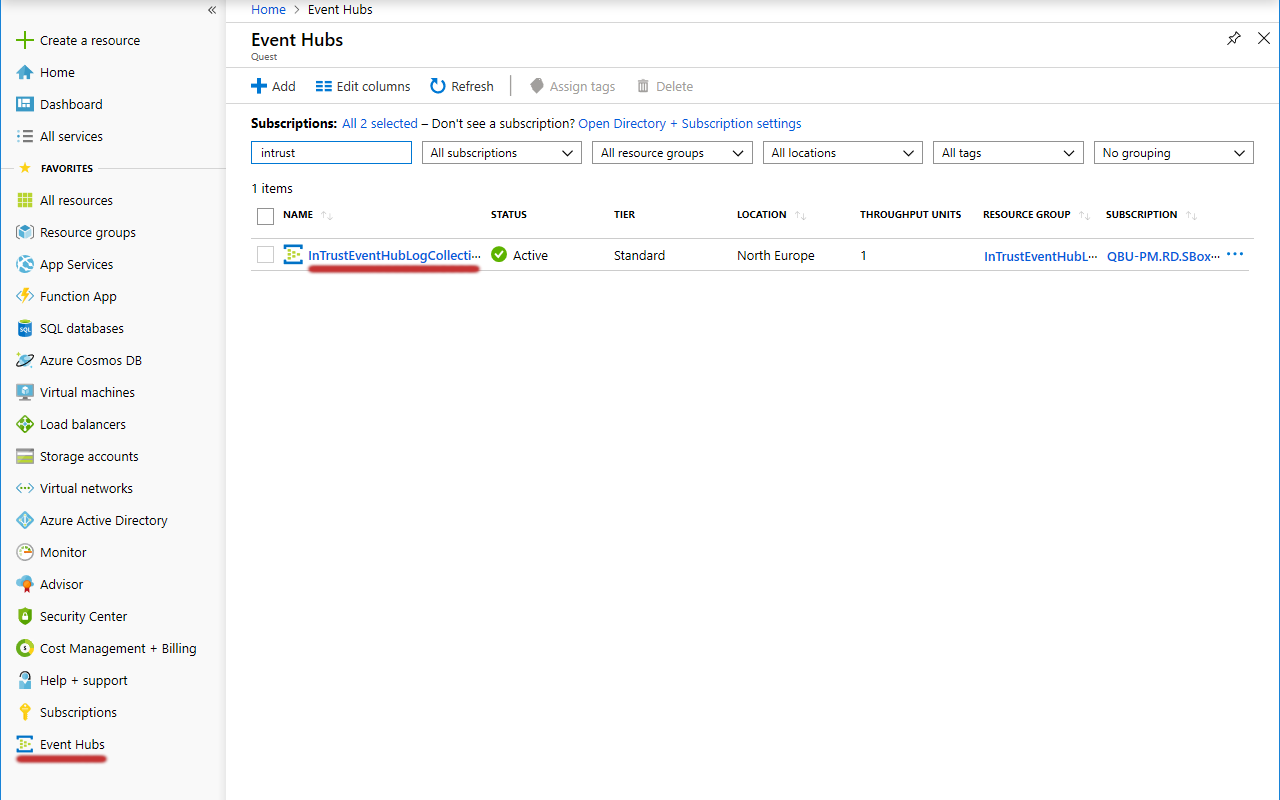
Look Up the Event Hub Connection Strings and Consumer Group
- In the Favorites list, click Event Hubs.
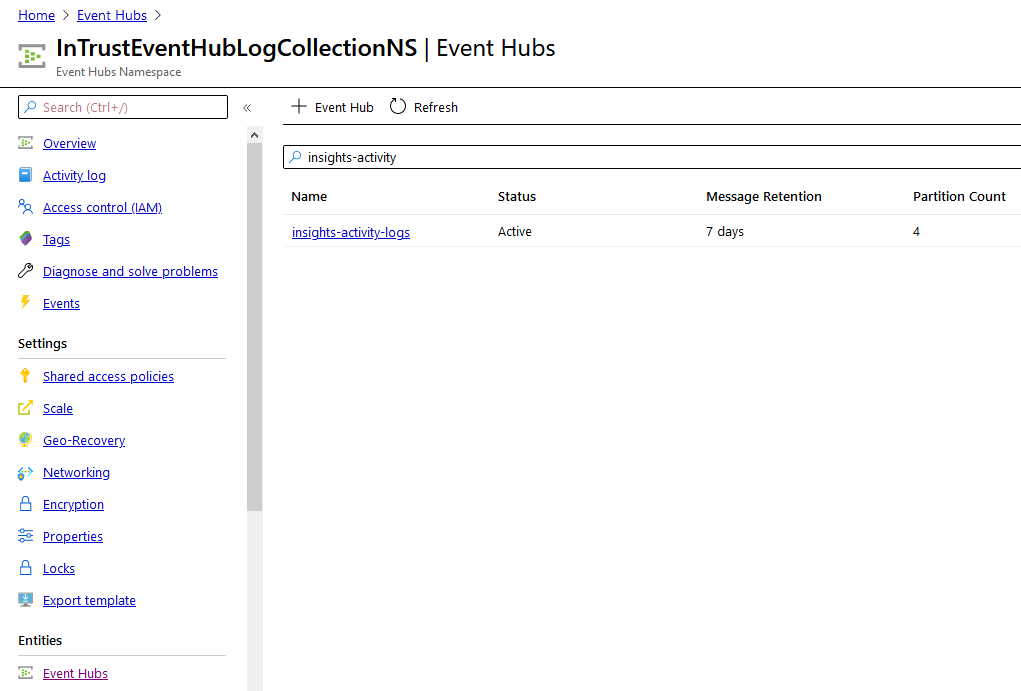
- In the list of event hubs namespaces that appears, select the one you need.
- In the menu pane for the specified event hubs namespace, click Event Hubs (under Entities).
- In the list of event hubs that appears, select the one you need.
- In the menu pane for the specified event hub, switch to Shared access policies.
- In the list of policies that appears, select the one you need. The properties of the policy are displayed.
- Copy the values in the Connection string–primary key and Connection string–secondary key text boxes and save them for later use.
- In the menu pane, switch to Consumer groups (under Entities).
- Copy the name of the consumer group you need and save it for later use.