Chat now with support
Chat with Support

Foglight for Microsoft DOT NET 5.9.13 - Installation and Configuration Guide

Installing and Configuring Foglight for Microsoft .NET Managing .NET Agent Configurations

Understanding the Nexus and agent-Nexus connections for .NET agents

Foglight for Microsoft .NET includes the Nexus, a central analytical engine that correlates data sent from multiple agents, restores and preserves the temporal order of events across all servers, and provides other basic analysis of the data. The Nexus is essential to the data management facilities of Foglight for Microsoft .NET.

Foglight creates a default Nexus as part of the installation process for Foglight for Microsoft .NET. The default Nexus controls all agent data correlation and submission unless you create another Nexus and assign agents to it instead.

TIP: For more information about the Nexus, see the topic Understanding the Nexus in the Foglight for Application Servers Administration and Configuration Guide.

The Nexus connection is the communication link between the .NET Agent and the Nexus. It defines how the agent communicates with the Nexus and controls settings such as retry intervals and timeouts. The agent-Nexus connection is created as part of the cartridge installation process. You can also create connections, or edit existing ones, and change which agents are using a connection by switching the agent’s Nexus connection.

Managing .NET agent Nexus connections

During the process of creating a .NET Agent, you assign it to an existing Nexus, and an agent-Nexus connection is created. You can also change the connection between an agent and a Nexus, or create a connection and assign it to different agents after they have been created.

The process for creating an agent-Nexus connection and the process for editing an existing one are similar. The following procedure describes both options and any differences between them.

1
On the navigation panel, under Dashboards, click Application Servers > Administration.
3
On the .NET view, click the Integration Configurations tab.
Click Add Nexus location and select a Nexus from the list.
TIP: Use the Add custom option to define a Nexus location by listen address and port.
8
Click the Advanced tab.
11
Click Save.

Updating the Nexus connection for a target application server

If you changed the Nexus Connection (see Managing .NET agent Nexus connections for details), you can update any target application servers that are using that Nexus connection through the Integration Configurations tab of the .NET Administration dashboard.

1
On the navigation panel, under Dashboards, click Application Servers> Administration.
3
On the .NET view, click the Integration Configurations tab.
4
In the Name and Targets list, expand the configuration group that contains the target by clicking the ‘+’ sign.
6
In the menu that opens, click Update Nexus connection.

Switching a Nexus connection

You can change the Nexus connection between an agent and a Nexus after it has been created. For example, you might switch the connection for performance reasons (divide up the agents) or to organize your environment (all agents monitoring a particular application use the same Nexus). Switching the Nexus connection affects all of the agents on that the target (host).

1
On the navigation panel, under Dashboards, click Application Servers > Administration.
3
On the Java view, click the Integration Configurations tab.
4
In the Configuration Name and Targets list, expand the configuration group by clicking the ‘+’ sign.
6
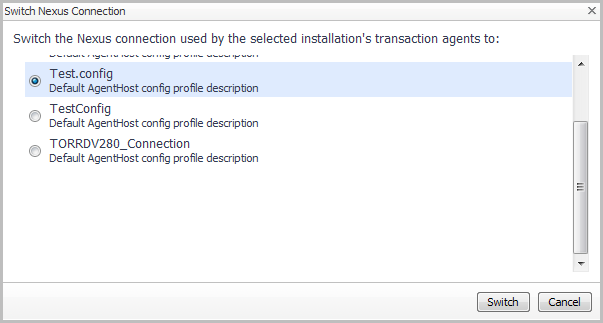
In the list that opens, select Switch Nexus Connection.
8
Click Switch to save your changes.

All of the agents on that host now use this Nexus connection to communicate with the Nexus.

Related Documents

The document was helpful.

Select Rating

I easily found the information I needed.

Select Rating