Introduction
The Validate Repository tool has existed as part of erwin Evolve Suite for some time and helps in maintaining the integrity of the erwin Evolve Suite database.
With the erwin Evolve Web Platform also using this database, Validate Repository tool has been extended in this release (2022.0.0) to allow validation of the Global Search Re-indexing feature that exists in the erwin Evolve Web Platform. This validation of the global search re-index helps delete the complete data from the global search and re-index the entire erwin Evolve Suite database from scratch into a global search database.
Running the Validation
To run the global search re-index validation, additional options have been added to the command line. The Validate repository will check whether the erwin Evolve web platform’s global search re-indexing is installed before running these options.
To run global search re-indexing:
1.Ensure that you are an Administrator of the CW repository and have db_owner or administrator permissions on the SQL/Oracle database.
2.Press Windows + R keys and type CMD. Then, click OK.
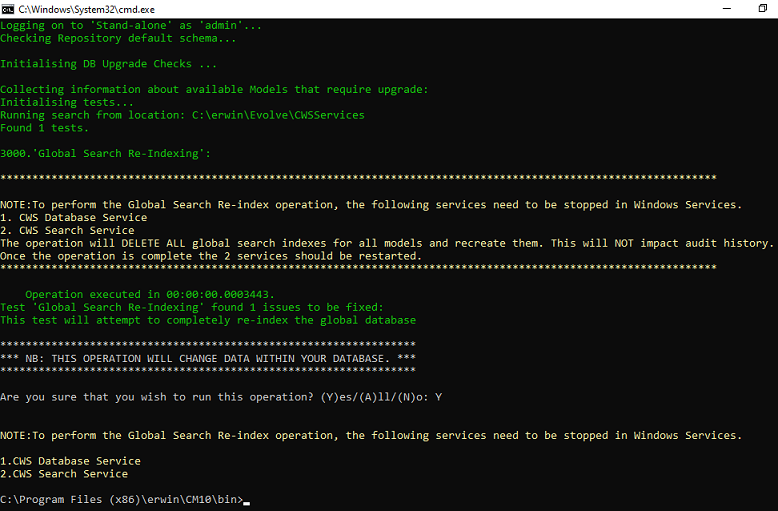
3.Run the Validate Repository tool with the following command:
C:\Program Files (x86)\erwin\CM10\bin>ValidateRepository.exe -username:admin -applyfixes:gsreindex
The following screen appears.
4.Open Services.
5.Stop CWS Database Service and CWS Search Service.
6.Return to the already open Command Prompt and enter ‘Y’.
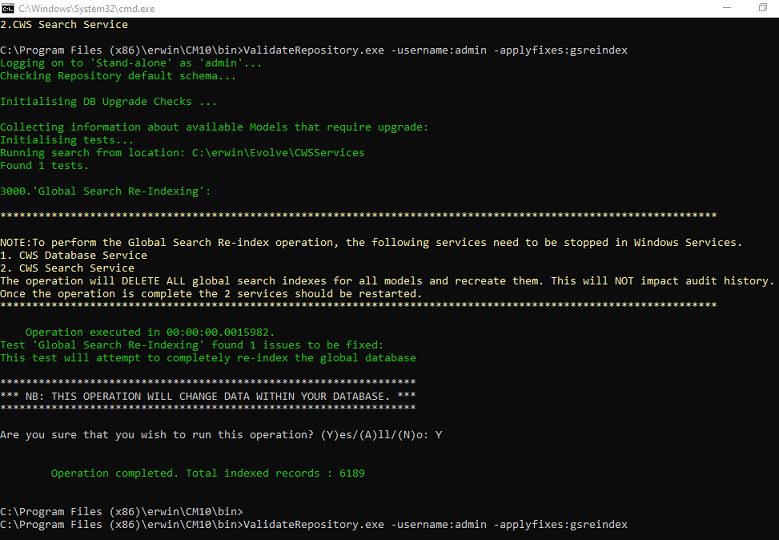
The following output appears.
Global Search Re-indexing is done.
Global Search
Enabling Global Search
1.In CWSuite, ensure that the model’s auditing option is enabled. See image, on the right to find the location of this setting.
|
|
If you do not see the option to 'Enable Object Revision History' in the Model Properties dialog. Ensure you have turned auditing on in the Repository. See details here. |
2.Before deploying a Dynamic Site from Evolve Designer, ensure Enable Global Search is selected by navigating to Site -> Deployments -> [DeploymentMachine] -> Site Name and checking the Enable Global Search checkbox.
3.Also check the location of the temporary search index delta files. This folder will buffer changes from the database, to the search service. It is entirely temporary and should the content be erased, it will automatically be recreated.
This directory should be server-local (a suitable location is selected by default, however if you need more disc space, this can be placed anywhere else on the server).
If this server is Primary, the search content will appear at this location first, before being copied to a "Shared Location", for use by the slave servers.
If this server is a Slave (not Primary), then this location will not be used, as the data is sourced from the "Shared Location". Slave servers must have the "Shared Location" set to the same folder as the Primary Server's "Shared Folder"
|
|
New settings in Evolve 2018.1.0 and above. These control the temporary file location for search index change. |
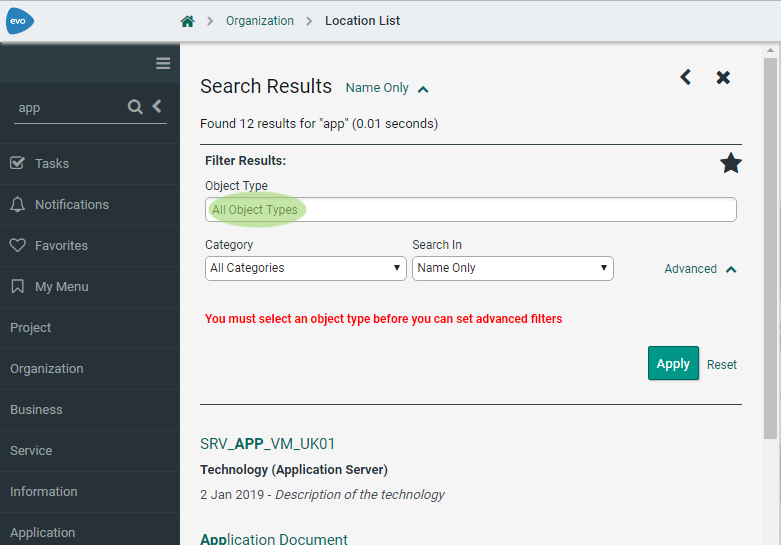
Searching for Objects
Finding objects is as simple as entering text into the search field and clicking the search icon or pressing enter.
Filtering Search Results
Filtering by Object Type
Search results can be filtered to only show objects that are a specific object type.
Filtering by Category
Search results can be filtered to only show objects that fall under a specific category.
Restricting Search
By default Global Searches are performed on object Names and Descriptions. If this is yielding too many unwanted results you can specify to search based on object names or descriptions separately.
Related Topics
Global Search - Advanced Filters [2018.0.2+]
Before you start
Ensure Global Search is enabled.
Accessing the Advanced Filters
Access the search window by typing your search text in the left hand pane and clicking the search icon or pressing enter.
This will give an initial result set using the current filter settings. Clicking the down twisty 'v' will show the standard filters.
Just above the apply button there is an Advanced twisty 'v', this will give access to the advanced filters section.
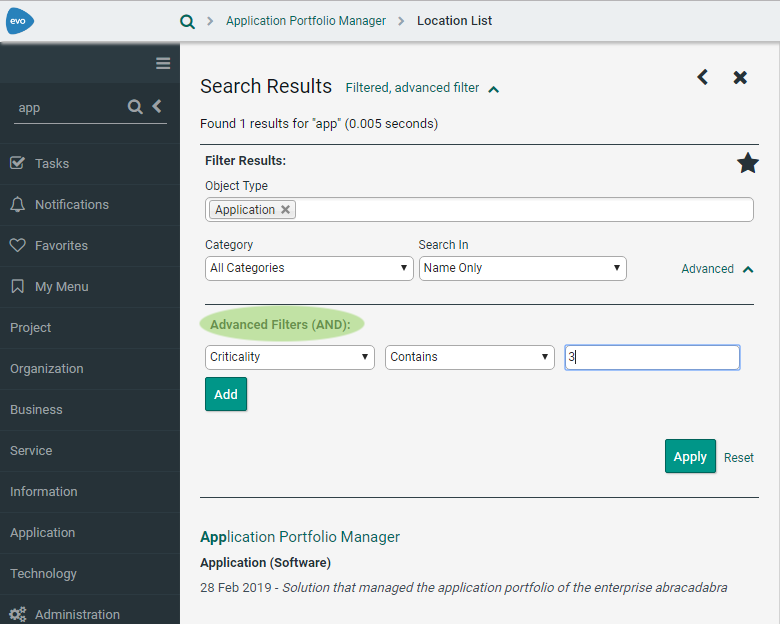
In order to add an advanced filter you must first select one or more object types.
|
Fig. Advanced button |
Fig. Object Type Selection |
Using the Advanced Filters
Click the "Add" button to add a filter.
Drop down a property (note: if multiple object types are selected, only the intersected set of properties will be available).
Choose your condition from the second drop-down (e.g. Contains).
Type the text you wish to use with the condition.
Press 'Apply' to apply a filter and 'Reset' to remove the filters.
Note that all filters are "AND"ed together, with the standard filter content.
Fig. Advanced Filters
Related Topics