
Configure Firewall - Remote Agent Install
In order to install remote agents through the Benchmark Factory console, you need to turn off the firewall or configure the firewall to allow traffic between the console machine and the agent machine. To allow traffic thru the firewall, enable Windows Management Instrumentation (WMI) and open TCP port 135 on the agent machine.
In addition, after the remote agent is installed, the Benchmark Factory console and the remote agent also communicate through port 4568 (by default). To enable this communication, configure an inbound rule on the console machine and an outbound rule on the agent machine.
Note: The console and remote agent communicate through port 4568 by default. You can change this port number in Edit | Settings | General. Check this setting to ensure you use the specified port number when creating inbound/outbound rules.
Enable WMI on Agent Machine
Enable Windows Management Instrumentation (WMI) to allow communication between the Benchmark Factory console and the remote agent. The following instructions are applicable to Windows 7. For more information, see http://msdn.microsoft.com/en-us/library/aa822854(v=vs.85).aspx.
To enable WMI (Windows 7)
- Select Control Panel | System and Security | Windows Firewall.
- Click Allow a program or feature through Windows Firewall.
- Select the checkbox to the left of Windows Management Instrumentation (WMI).
- Click OK.
Set Inbound and Outbound Rules
The Benchmark Factory console uses TCP port 135 to start agents remotely, and port 4568 is used by the console and the agent machine for communication. Create inbound and outbound rules to allow port 135 and port 4568 traffic through the Windows Firewall.
Create Inbound Rule on console machine
- Select Control Panel | System and Security | Windows Firewall.
- Click Advanced Settings. The Windows Firewall and Advanced Security dialog opens.
- Click Inbound Rules (left panel).
- Click New Rule under Actions (right panel).
- Select Port in the New Inbound Rule Wizard. Click Next.
- Select TCP and Specific local ports.
- In the Specific local ports text box, enter "4568" to add these ports. Click Next.
- Select Allow this connection. Click Next.
- Select Domain, Private, and Public. Click Next.
- Give your new rule a name and a description. Then click Finish to add the rule.
- Your new rule appears in the Inbound Rules list.
Create Inbound Rule on agent machine
- On the agent machine, repeat the steps listed above for creating an inbound rule. However, in the Specific local ports text box, enter "135".
Create Outbound Rule on agent machine (if outbound connections are blocked)
- Select Control Panel | System and Security | Windows Firewall.
- Click Advanced Settings. The Windows Firewall and Advanced Security dialog opens.
- If outbound connections are blocked, then continue to create a new outbound rule.
-
If outbound connections are allowed, then no action is required.
Note: In Windows Firewall, outbound connections are set to “Allow” by default.
- If outbound connections are blocked, click Outbound Rules (left panel).
- Click New Rule under Actions (right panel).
- Select Port in the New Outbound Rule Wizard. Click Next.
- Select TCP and Specific local ports.
- In the Specific remote ports text box, enter "4568" to add this ports. Click Next.
- Select Allow this connection. Click Next.
- Select Domain, Private, and Public. Click Next.
- Give your new rule a name and a description. Then click Finish to add the rule.
- Your new rule appears in the Outbound Rules list.
Troubleshooting
After enabling WMI and configuring inbound/outbound rules, if you encounter an error while attempting to install a remote agent because you are denied access, try the following.
Enable access using the command line (Windows Vista)
-
Open a Command window and enter the following:
netsh firewall set service RemoteAdmin enable
Add a Registry key (Windows Vista, Windows 7, Windows 8)
-
Open the Registry Editor (regedit.exe).
Caution: Editing your Registry incorrectly can cause serious, system-wide problems. It is advised that you back up your Registry before modifying it.
- Navigate to HKEY_LOCAL_MACHINE\SOFTWARE\Microsoft\Windows\CurrentVersion\Policies\System.
- Add a new DWORD (32-bit) Value.
- Rename the key to "LocalAccountTokenFilterPolicy".
- Give it a value of "1".
- Close the Registry Editor.
Connections
About Connections
Benchmark Factory allows you to create the following connections:
Adding BFScript to the Connection Dialog
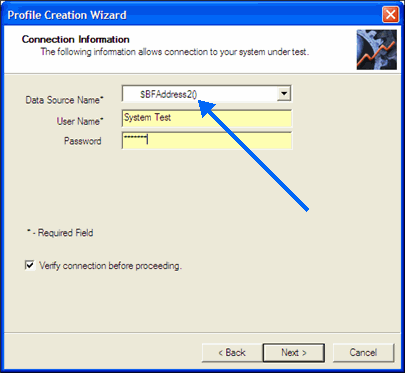
You can add BFScripts to the Benchmark Factory Data Source Names, allowing you to have individual agents test against a different server. BFScripts have been enabled on the User name and Password fields.
To add BFScripts to the Data Source Name
- Click inside Data Source Name.
- Type the desired script name.
Create Oracle Connection
Benchmark Factory allows you to create an Oracle connection using an Oracle client, direct connecton, or ODBC.
To create an Oracle connection
- Click
in the main toolbar. The New Connection dialog opens.
- Select Oracle from the drop-down list.
-
Enter the connection information. Review the following for additional information:
Note: BFScripts have been enabled on the User Name and Password fields.
Native tab User/Schema
Schema to which you want connect. Password
Password for schema to which you want connect. TNS or Direct tab
TNS—Allows you to connect to a database using your TNS names file.
- Databases—Allows you to connect to a database using your TNS names file. Select a database from the list.
Direct—Allows you to connect to a database using Host, Port, Server name or SID.
Connect as
Type of connection you connect to the database with: Normal, SYSDBA, or SYSOPER. Connect Using
Select the Oracle Client to use for this connection. Make this the BMF default home
Selecting this checkbox sets this as the default client for Benchmark Factory. Connection Name
Enter a name to use to identify the connection in the My Connections pane. ODBC tab Data Source Name
Select a data source from the drop-down list.
Click Add DSN to create a new data source.
User Name
Enter the user name to use for this connection. Password
Enter the password to use for this connection. Reconnect Options
Click link to specify timeout and reconnect options. See Connection Timeout and Reconnect Options. - Click Create Connection to save the connection information and connect.
- After creating a new Oracle connection, you can collect database and host server information using the Edit Connection dialog. See Environment Information for more information.
Performance Counters
Benchmark Factory allows you to add additional performance counters to a connection. See Performance Counters Tab for more information.
Clustering
See Oracle Clustering Tab (Connections) for more information.
Statistics
See Oracle Statistics Tab (Connections) for more information.
Note: To review or modify a connection, click Edit Connections in the main toolbar. Select a connection and click 