
Copying Users as a Separate Action
|
Navigation: Copying SharePoint Objects as a Separate Action > Copying Users Groups, and Permissions as a Separate Action > Copying Users as a Separate Action |
In order for users to be migrated the must exist on the target side Active Directory (AD), so that SharePoint can authenticate them. A good rule of thumb is if the user can't be manually authenticated in the target SharePoint instance, then Metalogix Content Matrix will not be able to add them either.

To copy users as a separate action:
1.In Explorer View, select the site from which you want to copy users.
2.Right-click, and choose Copy Site.
3.Select the target location, right-click and choose Paste Site Objects > Users.
The Copy Users dialog displays with all of the domains and, when expanded, all of the users within those domains, that have been detected by Metalogix Content Matrix for the selected site.
4.Check the users that you want to copy. (If you check a domain, all of the users within that domain will be copied.)
Metalogix Content Matrix can copy users that have been deleted from AD. This option involves writing the users to the content database, and is not supported by Microsoft. For information about how to enable this feature please contact Quest Support.
Now you can save or run the action.
When the action starts, a Job log will be created. The logs can be viewed (in progress or after the action is finished) by clicking [Details>>]. After the action has completed a note will be displayed in the bottom left corner of the dialog stating the number of completions, as well as any warnings or errors that may have been encountered (if there were any).
Copying SharePoint Groups as a Separate Action
|
Navigation: Copying SharePoint Objects as a Separate Action > Copying Users Groups, and Permissions as a Separate Action > Copying SharePoint Groups as a Separate Action |
During a part of any normal migration action, SharePoint groups will be copied automatically to the target side whenever they are referenced in the data that is being migrated. For example, if a group is referenced within some document's metadata, that group will be migrated to the target. Or if permissions are being migrated, and the groups is referenced, it will be copied.
Groups can also be migrated separately, however, at the site level or higher.
NOTE: SharePoint groups are scoped at the site collection level.
To copy SharePoint groups as a separate action:
1.In the Explorer View, select the site that you want to copy groups from.
2.Right-click, and choose Copy Site.
3.Select target location to which you want to copy the groups.
4.Right-click and choose Paste Site Objects > Groups.
The Configure Group Copying Options dialog displays, with a list of all available SharePoint groups from the source and when expanded, the membership of those groups.
5.Complete the Group Options tab as follows:
a)Check the groups that you want to copy to the target. (By default, all groups and members are selected.)
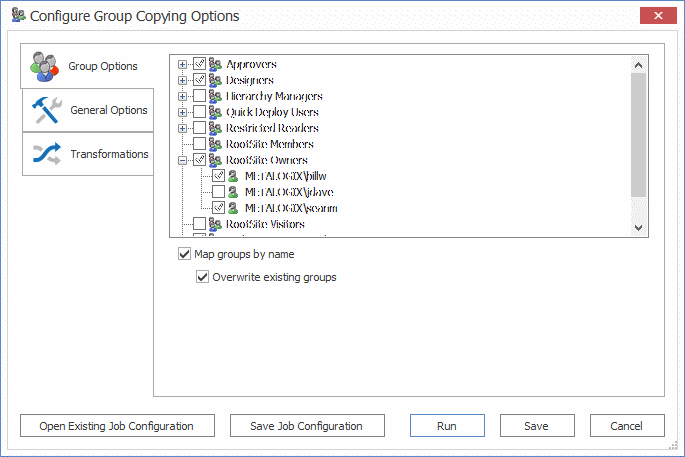
6.If you want to migrate groups from the source to the target and map the groups by name instead of membership check the Map groups by name box.
7.If you checked Map groups by name and you also want to overwrite any groups on the target, or will append users into existing groups check the Overwrite existing groups box.
You can now save or run the action.
Copying Permissions as a Separate Action
|
Navigation: Copying SharePoint Objects as a Separate Action > Copying Users Groups, and Permissions as a Separate Action > Copying Permissions as a Separate Action |
Metalogix Content Matrix can copy permissions using the context (right-click) menu. Copying permissions using this method is different from copying them as part of a full migration in that th this method will only copy permissions to the selected target node.
NOTE: You would not use this method for pasting permissions if you wanted to paste permissions recursively in a selected node.
EXAMPLE 1:
If you want to copy the site level permissions for a source site, and paste them to a target site without copying any of the list, folder, or item level permissions for that site, this is the method use.
EXAMPLE 2:
If you want to paste permissions for a specific list or item, you can select the target node for that list/item and paste the permissions. Then the permissions would only be migrated to the list/item permissions for the selected target node would have the permissions pasted to it, and no other permissions under the selected node would be migrated.
To copy permissions as a separate action:
1.In Explorer View, select the object whose permissions you want to copy.
2.Right-click and choose Copy [Object].
3.Select the target object to which you want to copy the permissions.
4.Right-click and choose Paste Site Objects > Permissions.
5.Complete the Configure Permissions Copying Options - Permissions Options tab as you would if you were performing a full migration.
Copying Permissions Levels as a Separate Action
|
Navigation: Copying SharePoint Objects as a Separate Action > Copying Users Groups, and Permissions as a Separate Action > Copying Permissions Levels as a Separate Action |
REMINDER: Permission levels can only be copied at the site or site collection level.
To copy permissions levels as a separate action:
1.In the Explorer View, select the site from which you want to copy permissions levels.
2.Right-click, and choose Copy Site.
3.Select the target location, right-click and choose Paste Site Objects > Permissions.
4.If you want to Copy Permissions Levels recursively down through the site structure, check this box.
NOTE: If you leave this box unchecked, permissions levels will be copied to the selected site only.
You can now save or run the action.