Manual import
Manual import of Microsoft Outlook data files is a three-step process:
Optionally, you can review and configure each PST file with the following features:
Loading a PST file
To load a PST file follow these steps:
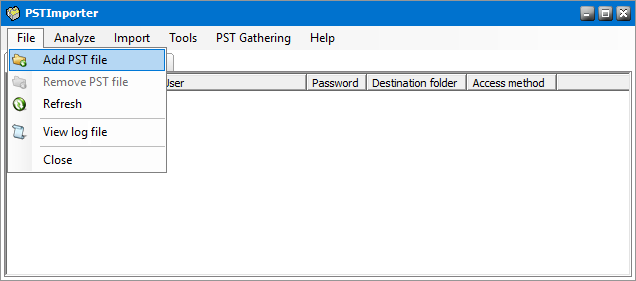
1.Open PST Importer.
2.From the File menu click Add PST file.
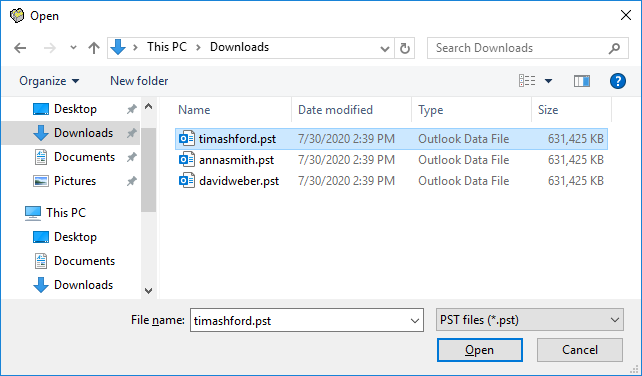
3.In the Open window locate the PST file and then click Open.
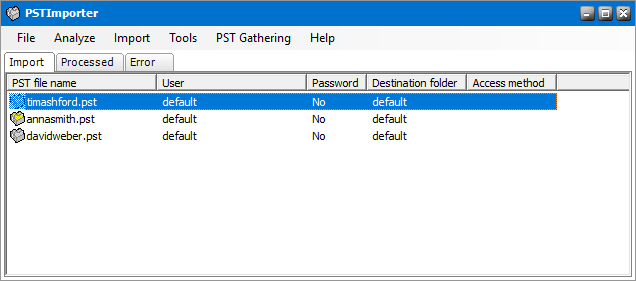
4.The file will appear on the Import tab. The PST file is stored in the Import folder as specified in the Folders tab under Tools > Options.
|
|
NOTE: To successfully load the PST file, it cannot be used by another program on the clients computer. To remove a PST file from the list, select the file. Then right-click and select Remove PST file from the context menu. |

Preparing a PST file
When a PST file is loaded, it is automatically assigned the default owner and the default destination folder. These defaults reference the default settings of the PST Importer.
To set a specific owner and specific destination folder for a PST file, follow the steps described below:
1.Right-click the PST file and select Settings from the context menu or double-click the desired PST file.
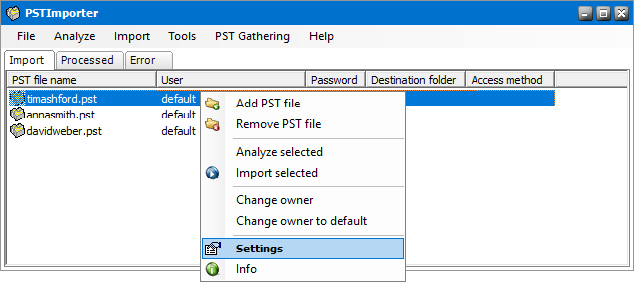
2.In the PST Properties window click the Settings tab. The PST Properties window opens.
3.Specify the property values as described below:
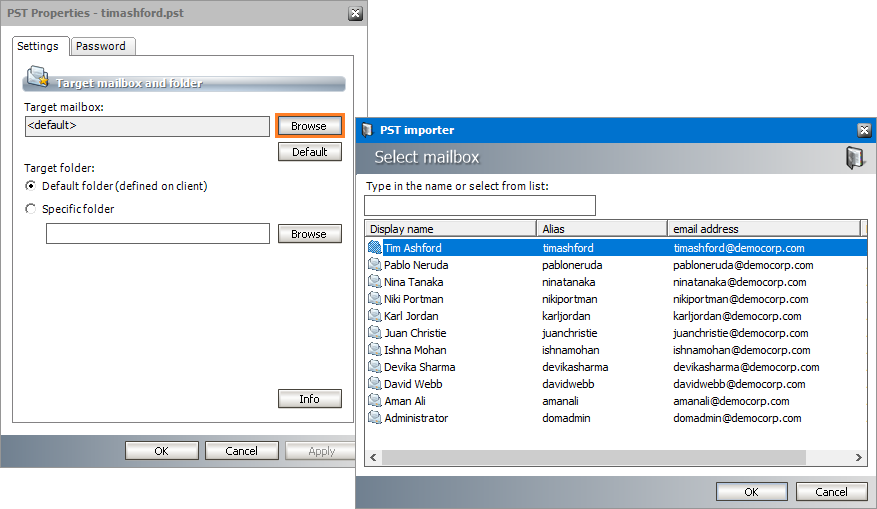
4.Target mailbox - click Browse to open the Select mailbox window and choose the new owner mailbox.. You can also right-click the PST files and select the Change owner from the context menu. Click Default on the Settings tab, to revert the Target Mailbox to the default owner. You can also right-click the PST files and select the Change owner to default from the context menu .
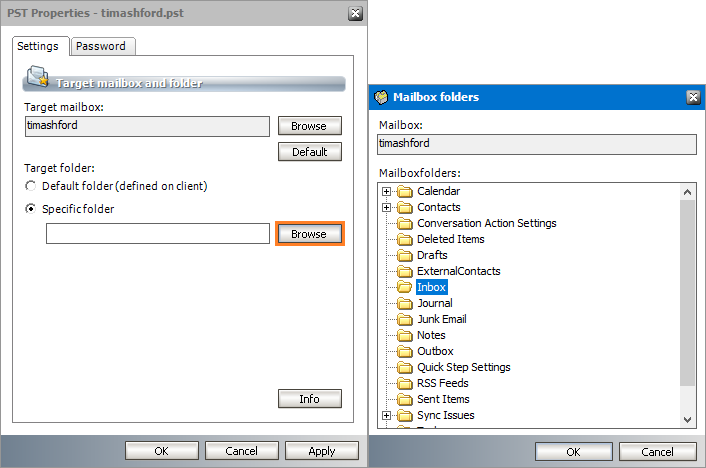
5.Specific folder - either type the mailbox folder name in the text box or use the Browse button to select a mailbox folder.
|
|
NOTE: If you intend to import more than one PST file to the same target mailbox, you can create unique root folders for each PST file by entering the special tags described below: a.%PSTNAME% - the folder name is the display name of the PST file. b.%PSTFILENAME% - the folder name is the file name (without extension) of the PST file For example, if Maya-2019.pst is the file name of the PST folder being imported and you enter PST Archive/%PSTFILENAME% in the Destination folder, then a folder hierarchy will be created under the destination mailbox root as PST Archive > Maya-2019. |
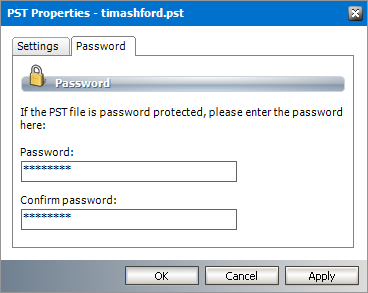
6.If the PST file was password protected, click the Password tab. Then enter the password in the Password field and re-enter the password in the Confirm password field.
7.Click Apply to save and continue or click OK to save and exit the PST Properties window. Click Cancel to exit the window without saving any changes.
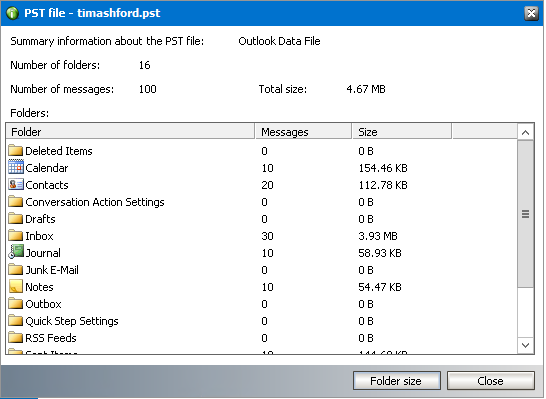
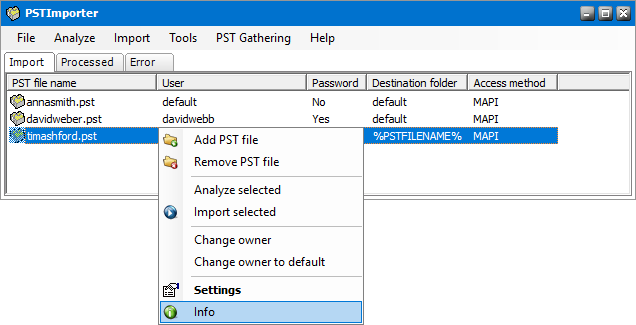
Viewing a PST file summary
The PST file summary provides an overview of the PST file that includes its structure, folder size and number of items in each folder. To view the summary follow the steps below:
1.Right-click a PST file and select Info from the context menu. If the PST file is password protected, you must specify the password in the Password tab of the PST properties window.
2.The summary info displays only the size and structure of the PST file by default.

3.To view the Size of the folders click Folder size.