
Overview
Metalogix Archive Manager for Files is a robust solution for archiving and retrieving files from cost effective file storage systems. When files are archived, they are replaced with a shortcut that saves a huge amount of space. The shortcuts ensure that archived files are available to users whenever they are needed and this solution preserves the existing structure of the file system that is used on a daily basis. Archived files can be also retrieved even if the original files are deleted including previous versions of the same file. The integrated search engine provides the ability to search through the archives by applying various search criteria.
Metalogix Archive Manager for Files uses advanced file management techniques like retention categories and file access frequency settings to enhance the file access times for end-users. As a result, you can achieve the same file access efficiencies from slower and less expensive file storage systems as you would expect from more expensive and faster file storage systems.
Metalogix Archive Manager for Files can archive files stored on remote servers as well. You can install Metalogix Archive Manager for Files on several machines. These machines can be standalone file servers or part of a cluster that uses the Hierarchical Storage Manager (HSM) server to manage file storage systems. These remote servers can be administered from a single client using the Archive Manager for Files Administration Center (AMAC).
Archive Manager for Files Administration Center (AMAC)
The AMAC is the administrative component of Metalogix Archive Manager for Files. With AMAC, administrators can set many global and useful criteria for automated file archiving from file servers. Along with administrators, even end-users can archive their documents manually, provided they have been given such rights.
Steps to open the AMAC
1.Login to the Archive Manager for Files server that you use as the administration client.
2.Go to Start > Programs > Metalogix and click Archive Manager for Files.
-or-
Open the AMAC directly from C:\Program Files (x86)\Metalogix\Archive Manager for Files\FilePamManager.exe
3.The Home tab displays the Archive Manager for Files server where the software was installed. A default server tab (AMFSERVER) for the local machine is also created. Every server that you add will be available as a tab.
4.Click the default server tab. The Workspace for the server opens.
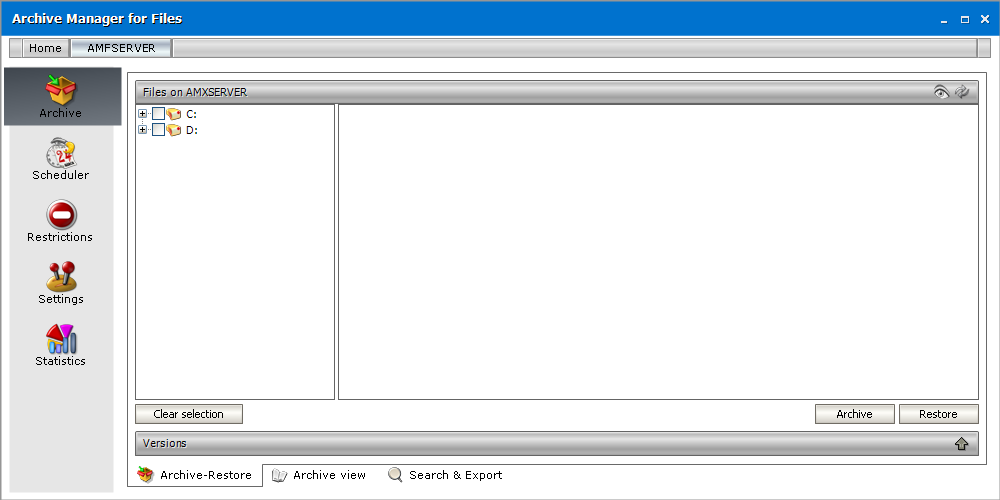
About the AMAC Workspace
Each server workspace has the following parts:
Navigation pane - The left-hand panel that allows you to switch between the following administrative section: Archive, Scheduler, Restrictions, Settings and Statistics.
View pane - The right-hand panel that allows you to work with each administrative section. Each administrative section has one or more sub-sections that are accessible as tabs at the bottom of the View pane.
License Activation
In this topic
·Steps to activate your license online
·Steps to activate your license offline
Steps to activate your license Online
1.In the Activate License window, enter the license key.
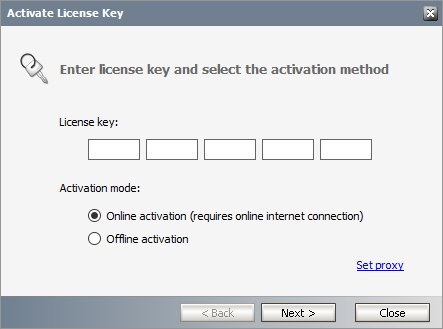
2.If you want to activate the license online, select Online Activation , and then click Next.
|
|
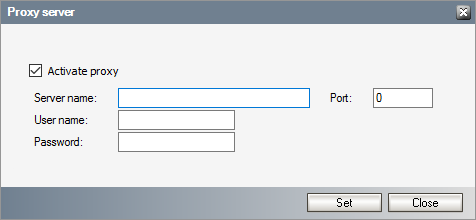
NOTE: If your computer is behind a firewall, click the Set Proxy link. The Proxy Setup dialog appears. a.Select Activate Proxy and specify the proxy information as described below: b.Server Name - enter the name of your proxy server. c.Port - enter the port number of the proxy server. d.User name and Password - Specify the credentials of the user who is authorized to access the proxy server. e.Click Set to save the information, or click Close to return to the License Key Information dialog. |

3.If the license key is validated successfully, the confirmation message appears along with the license details. Click Finish to close the dialog.
Steps to activate your license Offline
If your computer cannot access the internet, this option lets you access the Quest offline activation web site from an alternate computer that has a working internet connection.
1.In the Activate License window, enter the license key.
2.select Offline Activation. The License Key Information window displays additional steps that are required.
3.Step 1: Collect the activation data to the clipboard or to a file
a.Select from the two options described below:
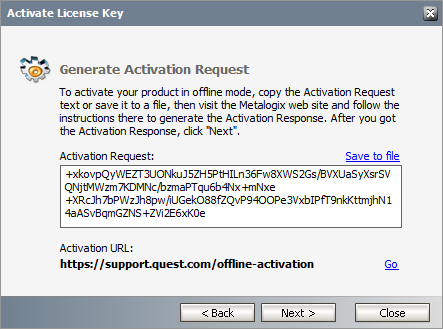
Option 1: Copy Activation Data to Clipboard. The activation data is saved to memory. Use this option if you plan to follow through with the subsequent steps immediately.
Option 2: Click Save to File. The Windows File dialog appears. Specify a file name for the activation data file and click Save to save the file to a location of your choice. Use this option if you plan to activate the license at a later date.
4.Step 2: Submit collected data
a.Click Go. The Metalogix License Activation web page appears.
b.Follow the instructions to get the Activation Key file (with the file extension DAT) is made available for download. Save this file to a location of your choice.
5.Step 3: Paste Activation Response
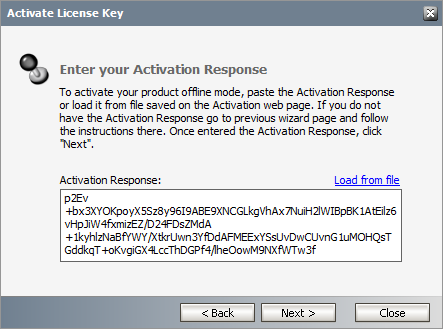
a.Click Load from File. The Windows file dialog appears.
b.Locate the activation key file and click Open. The text appears in the Activation Key File field.
6.Step 4: Activate offline
a.Click Next to complete the activation process.
7.If the license key is validated successfully, the confirmation message appears along with the license details. Click Finish to close the dialog.
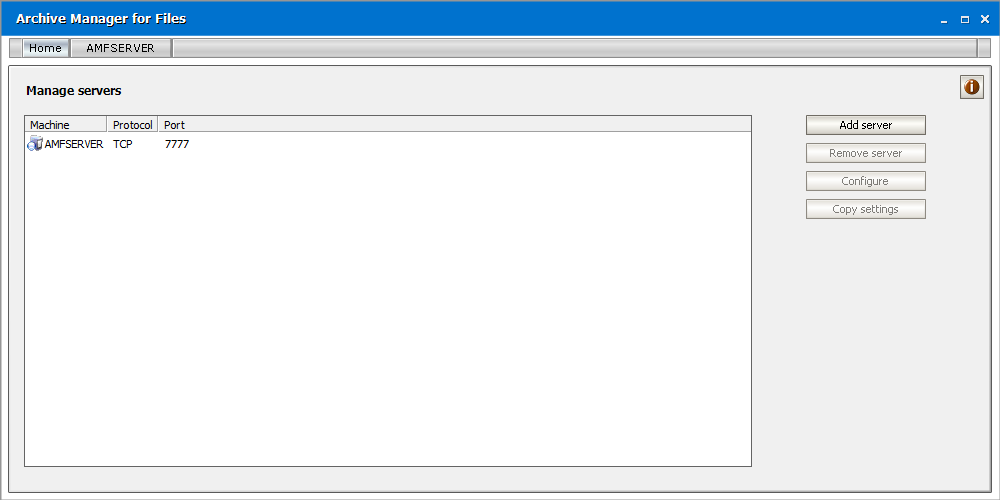
Adding servers
More Archive Manager for Files servers in the local network can be managed from one Archive Manager for Files. They just need to be added first.
|
|
NOTE: In case you want to add file servers to the Manager console as described below, there must be the Archive Manager for Files installed on such servers. However, to archive from file servers, Archive Manager for Files does not need to be installed on them. Just add these servers as Generic File server to the Archive Manager (see the Generic File Server section). |
1.In the Archive Manager for Files window, click on the Home tab.
2.Click on the Add server... button.
3.Upon clicking the Add server... button, the Select Computers window appears.
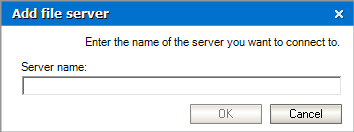
4.Enter the name of the desired computer (Archive Manager server) in the text box. Then confirm by clicking OK.
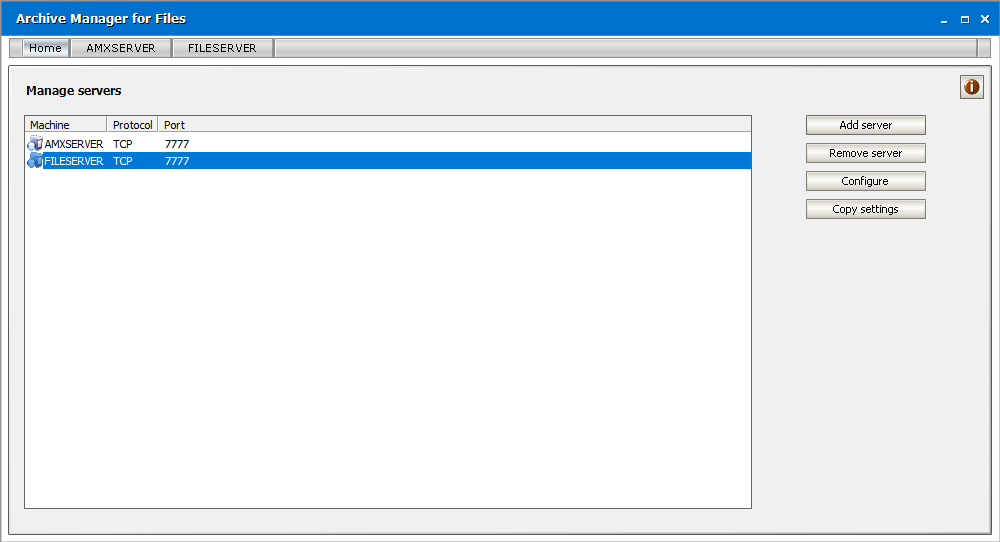
5.The respective Archive Manager server appears in the list in the Archive Manager for Files window, as shown below. Moreover, a tab with the respective file server name appears on the upper bar.
Now you are ready to configure connectivity settings for the respective file server.
|
|
NOTE: The upper bar in the Archive Manager for Files window serves as a switcher between different file servers. To manage a desired file server, simply click on its tab.. |
How to copy server settings
You can use the Copy settings button on the right-hand side to copy settings of one Archive Manager server to another.
Select the server which settings you want to copy. This will be the source. After clicking the Copy settings button, the wizard opens offering the following options:
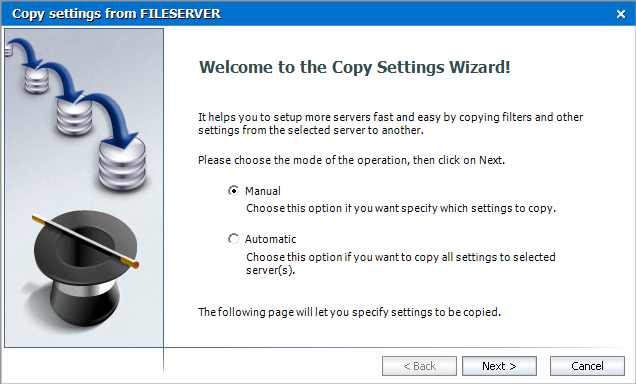
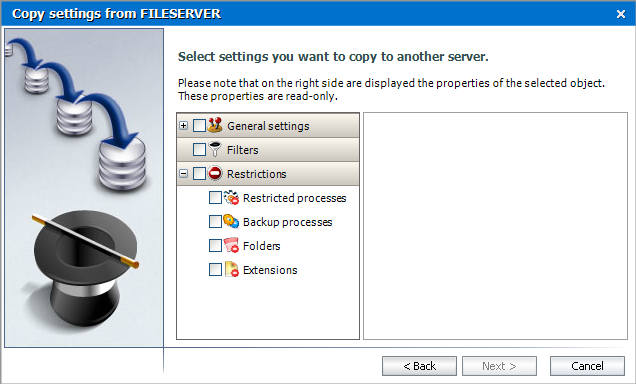
·Manual this mode of the operation allows you to copy specific settings of the source
Click Next to select settings which you want to copy, e.g. file compression settings as you can see on the screenshot below.
·Automatic this mode of the operation will copy all settings of the source to the servers selected in the next dialog
On the following dialog select the destination servers and click Next.
When the process is finished, you can choose to save the log of the operation by clicking the respective button. Finally click Close.