
Reports
Reports are the results of a scan across one or more files that is initiated from the Reports page.
In this chapter
·Working with the Report Details page
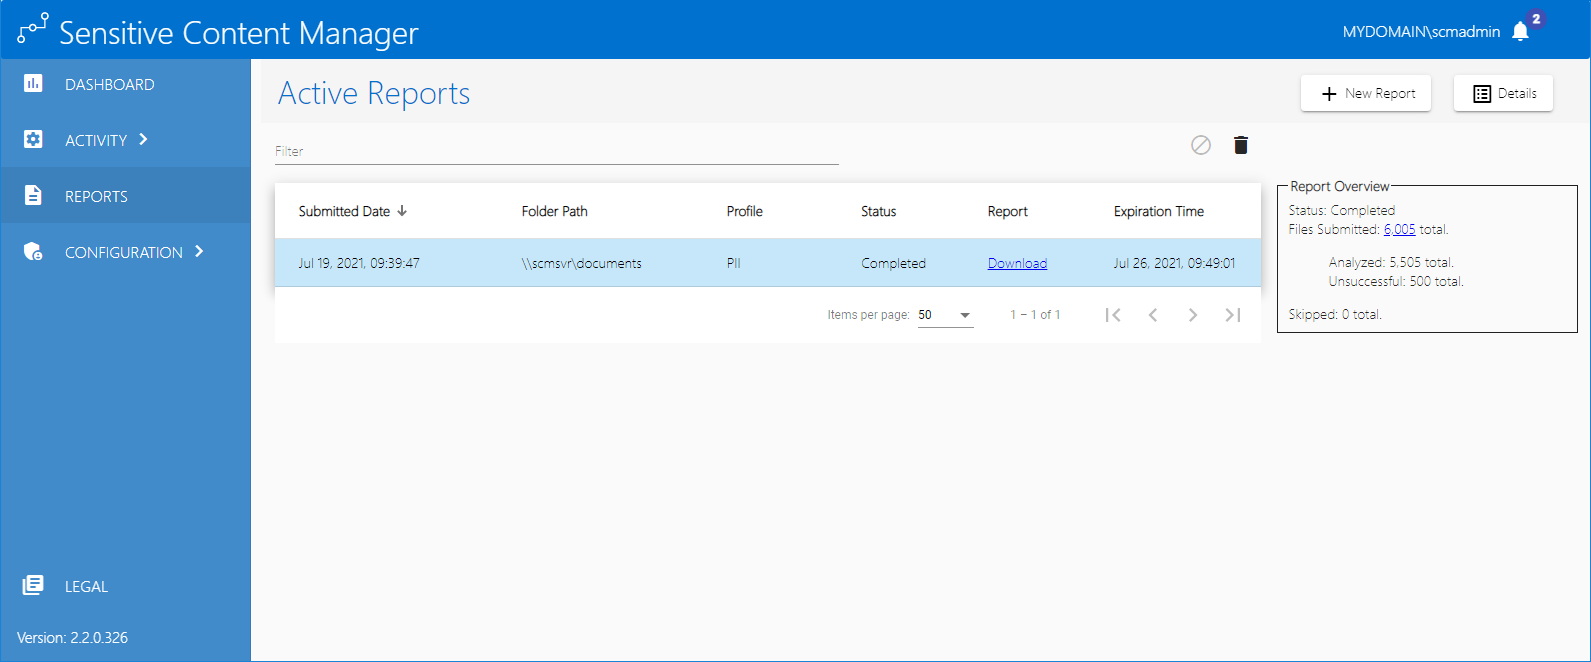
1.From the navigation panel on the left, click REPORTS. The Active Reports page opens.
The Active Reports page lists both in-progress and completed scans with a high-level overview of the scans. For scans that are in-progress, this overview provides information about the current progress. For completed scans, this overview provides information about the result of the scan. The scan reports are retained in the system with links to download the associated report for scans that were completed.
Common scan management actions like creating, canceling or deleting a scan are available from this page.
This page also provides links to interactive scan details for each file for a selected scan report.
·To customize the number of items displayed on the page, click the Items per page drop down below the list and choose the number of items you wish to display. If there are more scan reports than the list can display, you can use the navigation links below the list to browse through more scan reports.
·Enter a word in the Filter field above the list to filter the set of scan reports by the word entered.
The columns in the list are as follows:
a.Submitted Date - date and time when the scan was submitted.
b.Folder Path - the UNC location of the root folder that contains one or files or folders to be analyzed.
c.Profile - Name of the profile used in the scan.
d.Status - indicates the state of the scan. Valid values are In Progress, Canceling, Canceled and Completed.
e.Report - link to download the report. If the report status indicated In Progress or Canceled, the link does not appear because the report does not exist.
f.Expiration Time - the date and time until when the report will be active. This date and time depend on the retention period that you selected when the scan was created.
Report Overview
a.Status - indicates the state of the scan. Valid values are In Progress, Canceling, Canceled and Completed.
b.Files Submitted - the number of files that could be analyzed and have been submitted for analysis by the system. When the Status indicates In Progress, this value will be incremented every time a file is submitted for analysis. When the Status indicates Completed, this value will indicate the total number of files that were submitted for analysis.
c.Analyzed - indicates the subset of the Files Submitted that were successfully analyzed. When the Status indicates In Progress, this value will be incremented every time a file is successfully analyzed. When the Status indicates Completed, this value will indicate the total number of files that were successfully analyzed.
d.Unsuccessful - indicates the subset of the Files Submitted that could not be analyzed. When the Status indicates In Progress, this value will be incremented every time a file could not be analyzed. When the Status indicates Completed, this value will indicate the total number of files that could not be analyzed.
e.Skipped - the number of files that could not be submitted and were not processed any further. There could be several reasons why files are skipped. For example, files may be skipped because there was a problem reading the contents of the file or due to low disk space on the server, or the file upload service was unavailable.
|
|
NOTE: The information presented can be used to verify the scan in the following ways: a.Submitted + Skipped should equal the number of files on the target share unless the scan service was denied accessing in one or more sub-folders due to permissions set on those sub-folders. b.Analyzed + Unsuccessful should equal the File Submitted count. |

2.Click the Download link of a report to export the details in a CSV file or click Details to view the information about the scan.
1.From the navigation panel on the left, click REPORTS. The Active Reports page opens.
2.Click New Report. The New Report page opens. This page presents the information that is necessary to create the scan necessary for the report.
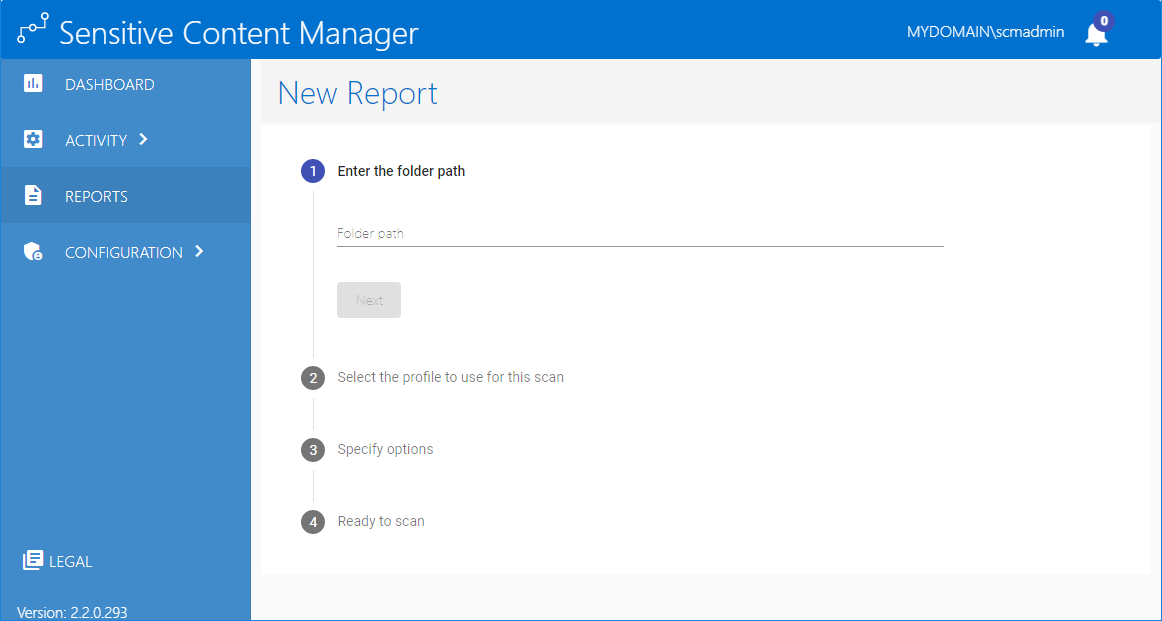
Specify the information for the scan as described below:
a.Enter the folder path - enter the UNC path to the root folder that contains the documents or sub-folders with documents that must be scanned. Then click Next.
b.Select the profile to use for this scan - click the drop down to select from a list of standard or custom profiles that will be used for the scan. Then click Next.
c.Specify options - select a retention period which is the number of days that the report will be retained. Then click Next.
d.Ready to scan - click Scan Now to begin the scan.
|
|
NOTE: You can review or revise your settings by clicking the edit icon for any of the previous settings. |
3.The Active Reports page that opens will display the status of the scan.
1.From the navigation panel on the left, click REPORTS. The Active Reports page opens.
2.Select a report where the status indicates In Progress. You cannot cancel a report with any other status.
3.Click Cancel Scan 
4.Click Yes to confirm or No to prevent the cancellation. If you click Yes, the status will briefly change to Canceling and then to Canceled.
1.From the navigation panel on the left, click REPORTS. The Active Reports page opens.
2.Select a report where the status indicates Canceled or Completed. You cannot delete a report with any other status.
3.Click Delete Scan 
5.Click Yes to confirm or No to prevent the deletion. If you click Yes, the report will be deleted.
1.From the navigation panel on the left, click REPORTS. The Active Reports page opens.
2.Select a report and click Details to view the information about the scan. The Report Details page opens.

The information displayed on this page is described below:
Report Summary
a.Submitted - date and time when the scan was submitted.
b.Folder Path - the UNC location of the root folder that contains one or files or folders to be analyzed.
c.Profile - name of the profile used in the scan
d.Submitted By - identity of the user who submitted this report in the format domain\username
e.Completed - date and time when the scan was completed.
f.Duration - the time taken to complete the scan.
Report Overview
a.Status - indicates the state of the job. Valid values are In Progress, Canceling, Canceled and Completed.
b.Files Submitted - the number of files that could be analyzed and have been submitted for analysis by the system. When the Status indicates In Progress, this value will be incremented every time a file is submitted for analysis. When the Status indicates Completed, this value will indicate the total number of files that were submitted for analysis.
c.Analyzed - indicates the subset of the Files Submitted that were successfully analyzed. When the Status indicates In Progress, this value will be incremented every time a file is successfully analyzed. When the Status indicates Completed, this value will indicate the total number of files that were successfully analyzed.
d.Unsuccessful - indicates the subset of the Files Submitted that could not be analyzed. When the Status indicates In Progress, this value will be incremented every time a file could not be analyzed. When the Status indicates Completed, this value will indicate the total number of files that could not be analyzed.
e.Skipped - the number of files that could not be submitted and were not processed any further.
List of analyzed files
a.Parent File Path - the UNC path of the file that has been submitted for analysis.
b.File Name - name of the file that has been submitted for analysis.
c.Status - the result of the analysis. Valid values are Successful and Unsuccessful.
d.Terms Detected - a semi-colon delimited list of the terms detected.
Working with the Report Details page
Managing items per page
To customize the number of items displayed on the page, click the Items per page drop down below the list and choose the number of items you wish to display. If there are more report detail records than the list can display, you can use the navigation links below the list to browse through more search terms.
|
|
NOTE: A maximum of 10,000 detail records can be viewed across all pages. If the number of files in the scan exceed 10,000 you can download the full or filtered list as a CSV file and use Excel or a similar desktop tool to view the results. |
Filtering scan results
Enter a word in the Filter field above the list to filter the set of report detail records by the word entered.
Updating scan results
Click Refresh to retrieve and display the most recent set of file results from the SCM repository.
Downloading scan results
1.Click Download. The Download Report Details dialog opens.

2.Expand the Filter section to download a subset of the scan results if needed. Then enter the information as described below:
a.Format - Choose an export format from the following option: Default or Metalogix Essentials
b.Parent Folder Path - enter the folder path which contains the files to download. All sub-folders in the specified folder will be part of the filter criteria.
c.File Name - enter a file name to download.
d.Status - Choose from one of the following status values: Any, Error, Successful or Warning. For example, if you choose Error as the status, then the scan results where the status indicates an Error will be included in the filter criteria.
e.Search Term - Select the search term from the drop down list that appears that you want to include in the filter. For example, if you enter Government Identification Number as the search term, then the scan results where the Government Identification Number was detected will be included in the filter criteria. You can also include a custom search term manually. For example, Medical ID could be custom search term. Custom search terms may be listed in the search terms list if they are part of a current profile. Custom search terms will not be listed if you removed the term from a profile and you must enter it manually.
3.Click Download to export the scan results to a CSV file with the specified export Format. Click Reset to clear the filter or Close to confirm and exit the dialog.
Configuration
This section describes the components and properties that control the functionality of SCM. The following topics are described in this section:
Profiles
A profile is a named collection of content search and analysis specifications. Each profile is made up of search terms and regular expressions that can detect sensitive content in English, German, Spanish, Italian, French and Portuguese. SCM ships with 4 default profiles:
·General Data Protection Regulation (GDPR)
·Personally Identifiable Information (PII)
·Protected Health Information (PHI)
·Payment Card Information (PCI)
The file search and analyAVION Medical Numbersis criteria requirements for your organization may differ from the system profiles that are available. For example, you may want to create a custom profile to group a different subset of the predefined search terms, add custom search terms for sensitive data types, or analyze data that falls outside common definitions of PII, PHI or financial data. Custom profiles created with the SCM profile wizard can be made available to both SCM and ControlPoint users.
With the standard or custom profiles, SCM allows you to analyze the following file types -
·Compressed files (ZIP, 7z, TAR, RAR etc.)
·Comma Separated Values (CSV)
·Log Files
·Microsoft Excel
·Microsoft Excel 2007
·Microsoft Outlook Express Mail Message
·Microsoft Outlook Message
·Microsoft PowerPoint Presentation
·Microsoft PowerPoint Presentation 2007
·Microsoft PowerPoint Show
·Microsoft PowerPoint Show 2007
·Microsoft Word Document
·Microsoft Word Document 2007
·Open Document Text
·Portable Document Format (PDF)
·Rich Text Format (RTF)
·Text Document
In this topic
Steps to customize a system profile
1.From the navigation panel, click CONFIGURATION and then click PROFILES. The Profiles page opens.
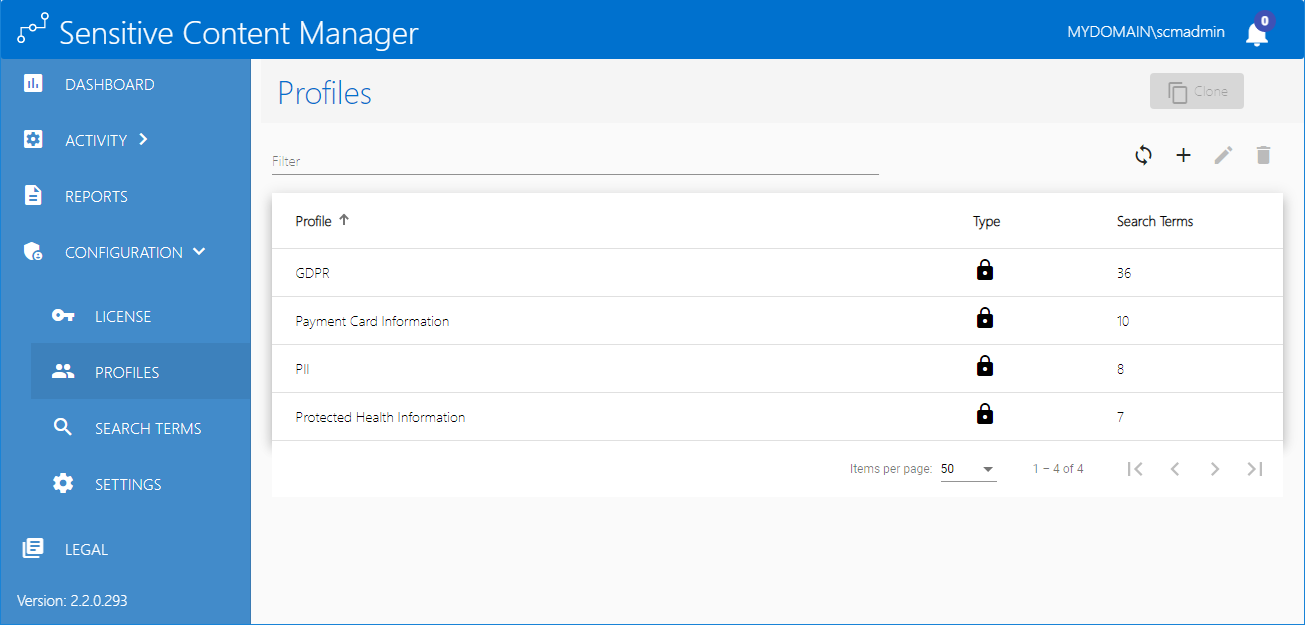
The columns in the list are as follows:
a.Profile - a named set of search terms
b.Type - indicates whether the profile is a system profile 

c.Search Term - indicates the number of search terms in the profile.
·To customize the number of items displayed on the page, click the Items per page drop down below the list and choose the number of items you wish to display. If there are more profiles than the list can display, you can use the navigation links below the list to browse through more profiles.
·Enter a keyword in the Filter field above the list to filter the set of profiles by the keyword entered.
·Click Refresh to retrieve and display a fresh set of profiles from the SCM repository.
2.Click a profile link to view the profile details. The Profile - Summary page opens.

3.Click Close to return to the Profiles page.
1.From the navigation panel on the left, click CONFIGURATION and then click PROFILES. The Profiles page opens.
2.Click Create 
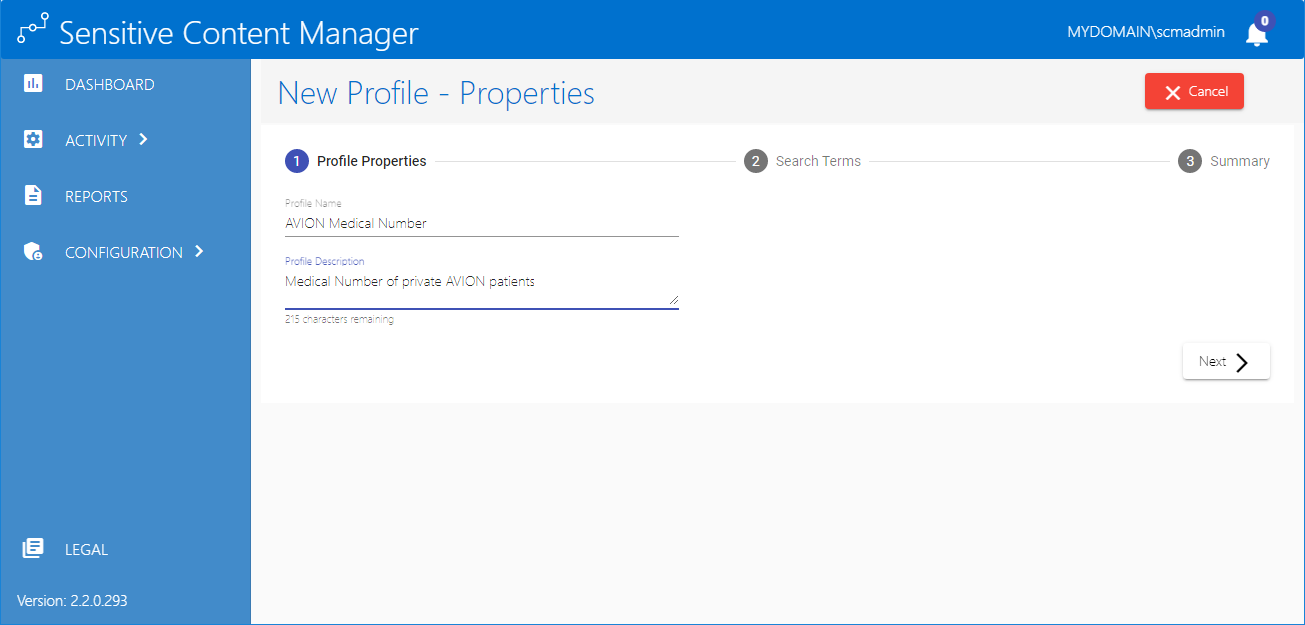
Specify the property values as described below:
a.Profile Name - enter a unique profile name. The profile name cannot exceed 100 characters.
b.Profile Description - enter a description of the profile. The description text should not exceed 256 characters.
3.Click Next. The New Profile - Search Terms page opens.
4.From the Available Search Terms list, select one or more check boxes to choose the search terms for the profile. You can filter the list by entering a key word in the Filter field of the Available Search Terms list. If the key word exists in the name or the description of the search term, you will see the result set in the list. To include custom search terms in the list, see Search Terms.
5.Click 
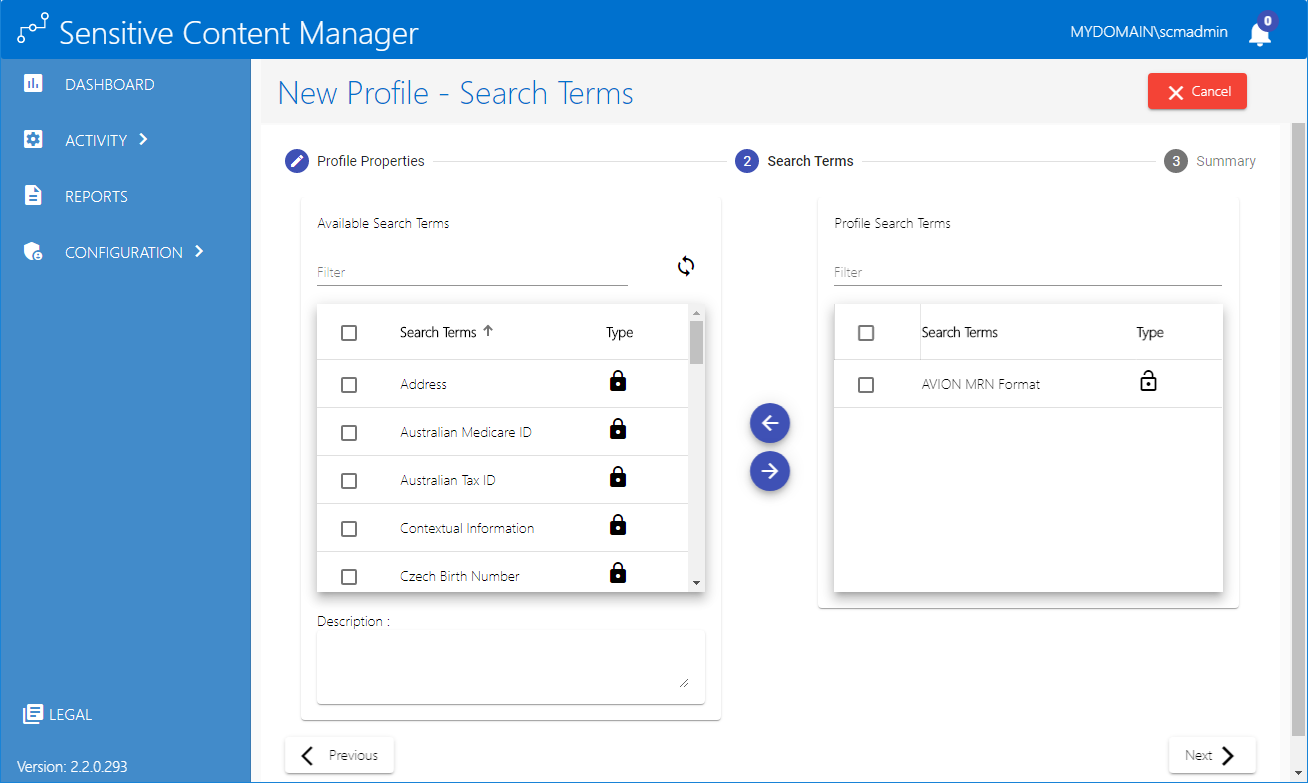
6.To remove a search term from the Profile Search Terms list, select one or more check boxes in the Profile Search Terms list. You can filter the list by entering a key word in the Filter field of the Profile Search Terms list. If the key word exists in the name or the description of the search term, you will see the result set in the list.
7.Click 
8.When you complete the selection of search terms as displayed in the Profile Search Terms list, click Next. The New Profile - Summary page opens.
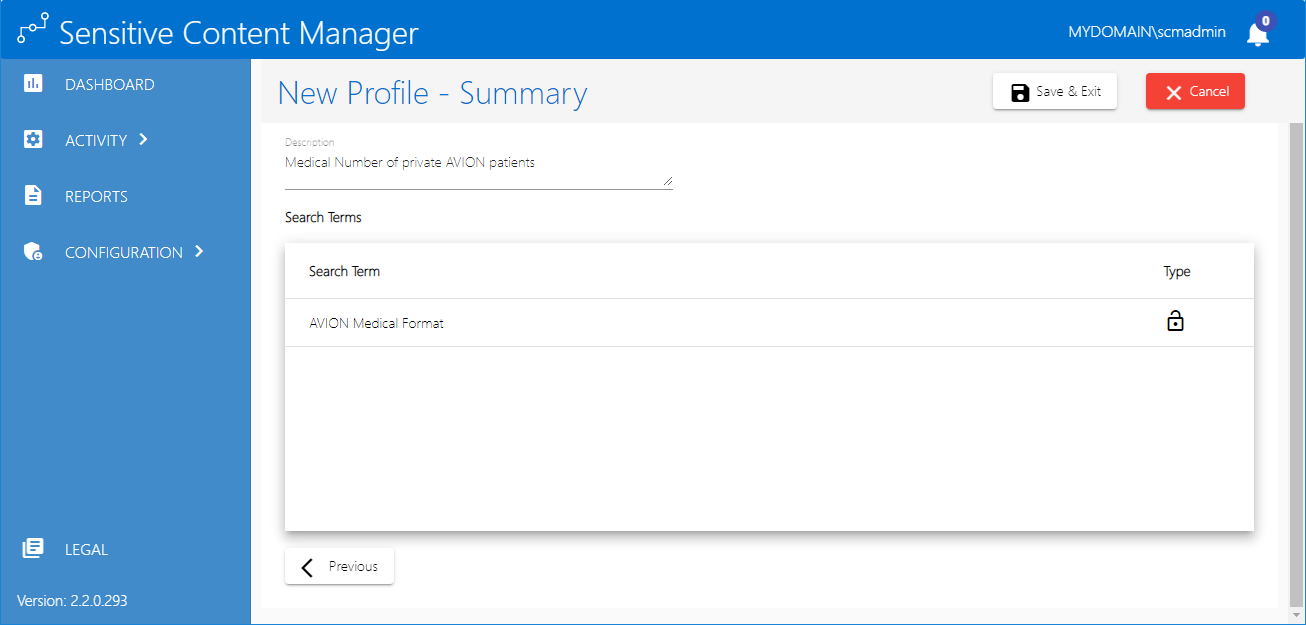
9.Verify the new profile properties and search terms, and then click Save & Exit. You can click Cancel to exit the wizard or click Previous to revise the profile.
Steps to edit an existing profile
1.From the navigation panel on the left, click CONFIGURATION and then click PROFILES. The Profiles page opens.
2.Select a custom profile that you want to edit. You cannot edit a system profile.

3.Click Edit 
4.Review and revise the properties as needed.
5.Click Next. The Edit Profile - Search Terms page opens.
6.From the Available Search Terms list, select one or more check boxes to choose the search terms for the profile. You can filter the list by entering a key word in the Filter field of the Available Search Terms list. If the key word exists in the name or the description of the search term, you will see the result set in the list.
7.Click
8.To remove a search term from the Profile Search Terms list, select one or more check boxes in the Profile Search Terms list. You can filter the list by entering a key word in the Filter field of the Profile Search Terms list. If the key word exists in the name or the description of the search term, you will see the result set in the list.
9.Click
10.When you complete the revision of search terms as displayed in the Profile Search Terms list, click Next. The Edit Profile - Summary page opens.
11.Verify the revised profile properties and search terms, and then click Save & Exit. You can click Cancel to exit the wizard or click Previous to revise the profile.
|
|
CAUTION: If a profile is modified while files are being scanned with the same profile, the scan will continue. All remaining files that are scanned will use the revised profile. |

Steps to delete an existing profile
1.From the navigation panel on the left, click CONFIGURATION and then click PROFILES. The Profiles page opens.
2.Select a custom profile that you want to delete. You cannot delete a system profile.
3.Click Delete
|
|
CAUTION: If a profile is modified while files are being scanned with the same profile, the scan will continue. All remaining files that are scanned after the profile is deleted, will produce a failed result and include no term matches. |
Steps to customize a system profile
1.From the navigation panel on the left, click CONFIGURATION and then click PROFILES. The Profiles page opens.
2.Select a system profile.
3.Click Clone to open the new profile wizard. The Clone Profile - Properties page opens.

Change the property values as described below:
a.Profile Name - enter a unique profile name. The profile name cannot exceed 100 characters.
b.Profile Description - change the description of the profile. The description text should not exceed 256 characters.
4.Click Next. The Clone Profile - Search Terms page opens in edit mode with the same search terms as in the original profile.

5.From the Available Search Terms list, select one or more check boxes to choose additional search terms for the custom profile. You can filter the list by entering a key word in the Filter field of the Available Search Terms list. if the key word exists in the name or the description of the search term, you will see the result set in the list.
6.Click
7.To remove a search term from the Profile Search Terms list, select one or more check boxes in the Profile Search Terms list. You can filter the list by entering a key word in the Filter field of the Profile Search Terms list. If the key word exists in the name or the description of the search term, you will see the result set in the list.
8.Click
9.When you complete the selection of search terms as displayed in the Profile Search Terms list, click Next. The Clone Profile - Summary page opens.

10.Verify the new profile properties and search terms, and then click Save & Exit. Click Previous to revise the profile. Click Cancel and then click Yes in the confirmation dialog to exit the wizard.
Search Terms
A search term is a named entity for a regular expression that is used in a profile to scan files for matching patterns.
In this topic
Steps to create a new search term
1.From the navigation panel on the left, click CONFIGURATION and then click SEARCH TERMS. The Search Terms page opens.

The columns in the list are as follows:
a.Search Term - name of the search term
b.Type - indicates whether the search term is a standard search term
c.Description - explanation of the search term.
d.Used in Profiles - integer value that indicates the number of profiles that use the search term.
·The list can be customized to display more or less items on the page. Click the Items per page drop down below the list and choose the number of items you wish to display. If there are more search terms than the list can display, you can use the navigation links below the list to browse through more search terms.
·Enter a keyword in the Filter field above the list to filter the set of search terms by the keyword entered.
·Click Refresh to retrieve and display a fresh set of search terms from the SCM repository.
2.Click a search term to view its details.
Steps to create a new search term
1.From the navigation panel on the left, click CONFIGURATION and then click SEARCH TERMS. The Search Terms page opens.
2.Click Create
Specify the property values as described below:
a.Name - enter a unique search term name. The profile name cannot exceed 100 characters.
b.Description - enter a description of the search term. The description text should not exceed 256 characters.
c.Expression - enter a regular expression to match a text pattern in a file.
d.Sample Text - enter any text that contains the pattern you want to match.
3.Click Test. If a pattern match occurs in the Sample Text field, the matching pattern will be highlighted.
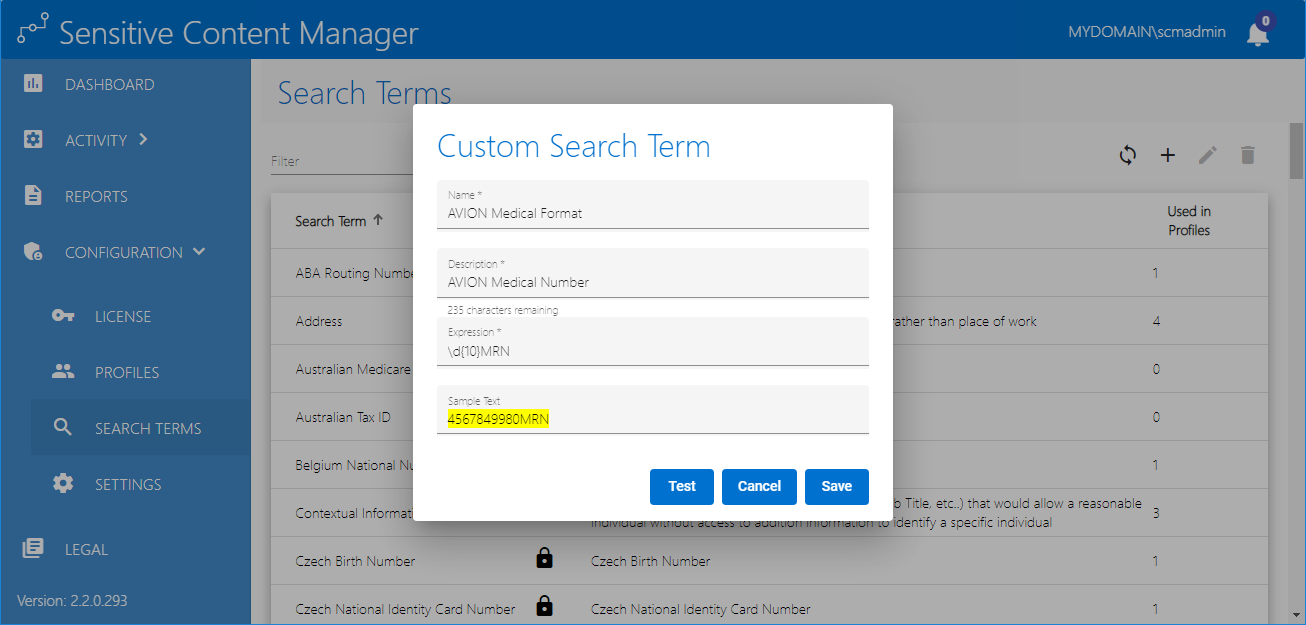
4.Click Save to save the new search term. Verify that it is listed in the Search Terms list. You can click Cancel to exit the window.
Steps to edit an existing search term
1.From the navigation panel on the left, click CONFIGURATION and then click SEARCH TERMS. The Search Terms list page opens.
2.Select a custom search term that you want to edit. You cannot edit a standard search term.
3.Click Edit
4.Review and revise the properties as needed.
5.If you revise the regular expression it is recommended that you enter some appropriate text in the Sample Text field and click Test to verify the regular expression.
6.Click Save to save the new search term. You can click Cancel to exit the window.
|
|
CAUTION: If a search term is modified while files are being scanned with a profile that contains the same search term, the scan will continue and all remaining files that are scanned will use the revised search term. |
Steps to delete an existing search term
1.From the navigation panel on the left, click CONFIGURATION and then click SEARCH TERMS. The Search Terms list page opens.
2.Select a custom search term that you want to delete. You cannot delete a standard search term.
3.Click Delete
|
|
CAUTION: If a search term is deleted while files are being scanned with a profile that contains the same search term, the scan will continue but none of the remaining files will be checked for patterns that match the deleted search term. |