Configuring ControlPoint Services
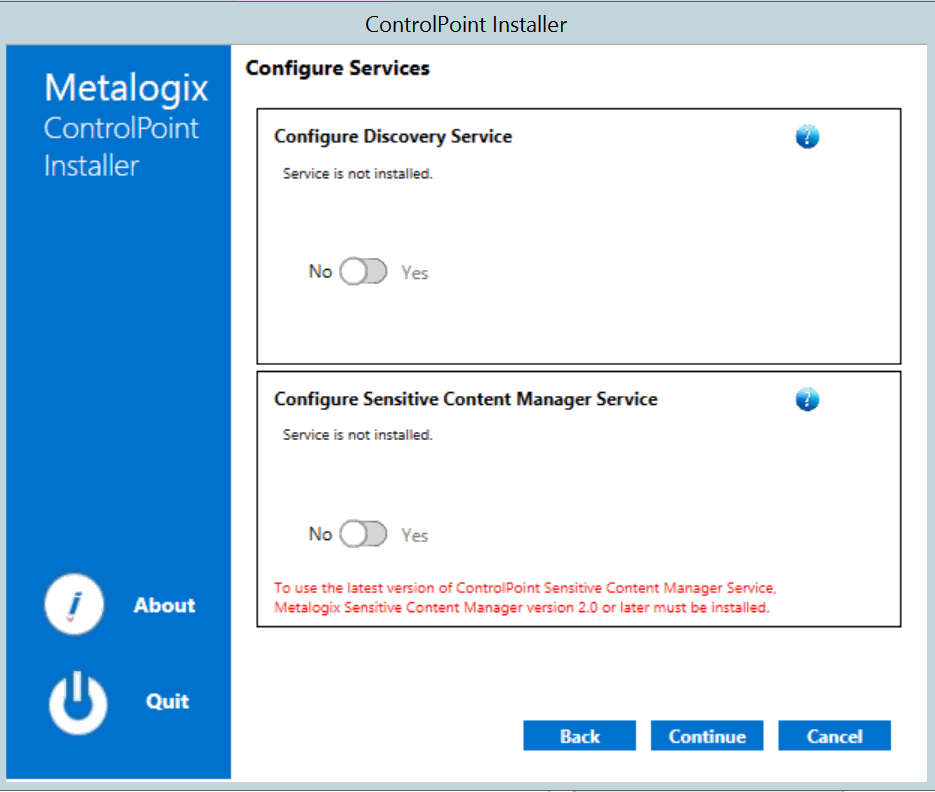
Toward the end of ControlPoint configuration process you have the option to configure the following Windows service(s):
·The ControlPoint Discovery Service is an alternative to the (default) ControlPoint Full Discovery timer job, which runs from SharePoint Central Administration. The ControlPoint Discovery Service runs as a Windows Service, and is especially suited to very large SharePoint environments as it can significantly reduce Discovery run time.
AND/OR
·If Sensitive Content Manager is installed in your environment, ControlPoint Sensitive Content Manager (SCM) Services will allow you to use it within ControlPoint:
§as a means of checking for:
oContent Analysis (CA) jobs ready to be uploaded from ControlPoint to Sensitive Content Manager for scanning.
AND
oScan results ready to be downloaded from Sensitive Content Manager to ControlPoint for further action.
AND
§Because they support multi-threading, SCM Services are especially suited to very large content analysis jobs.
NOTE: If you want to configure services at a later time, you can do so by launching the Configuration Wizard from the server on which ControlPoint is installed (using the same login account used to install the ControlPoint application). After you have verified the Wizard has finished checking installed components, select Configure Services.
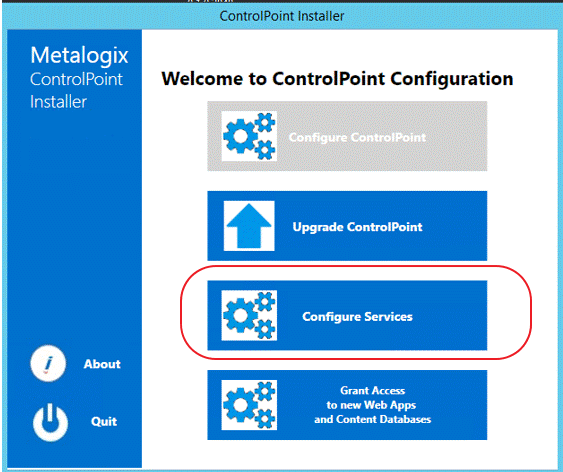
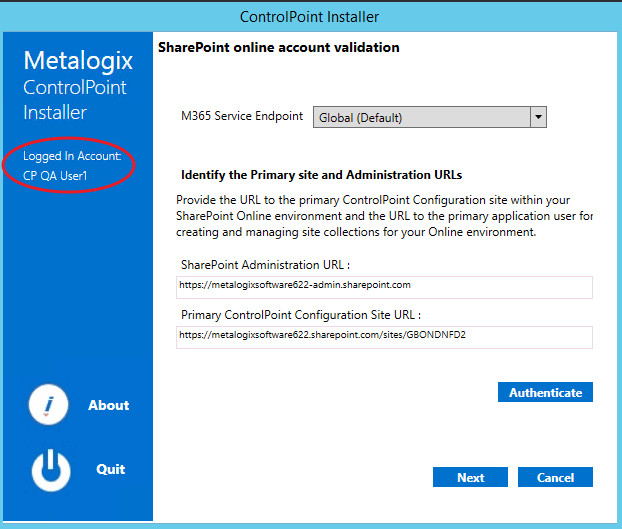
If you do choose to perform this action at later time, you will be prompted to complete the SharePoint online account validation dialog and authenticate using the Office 365 account used at the time ControlPoint was installed (which must be a Global Administrator for the tenant).
To configure ControlPoint Services:
1On the Configure Services dialog, select the service(s) you want to configure.
IMPORTANT:
§The Service Account must meet all of the requirements of the ControlPoint Service Account, as well as permission to Run as a Service.
§Keep in mind that the latest version of ControlPoint Sensitive Content Manager Service will only work with version 2.0 or later of Metalogix Sensitive Content Manager.
2Select the service(s) you want to configure.
3Click [Continue].
4Click [Start Deployment].
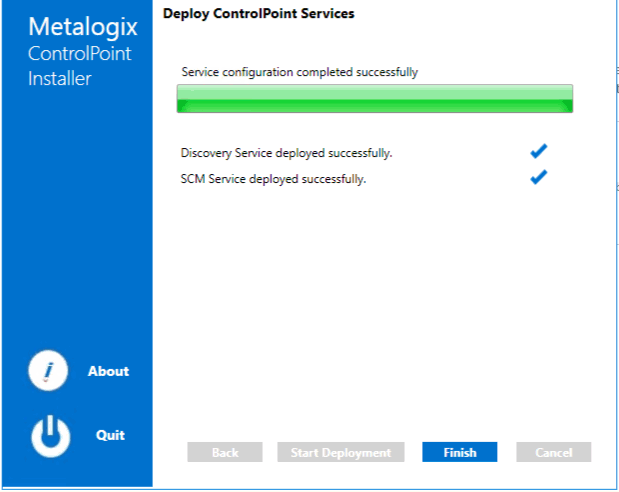
The installer deploys the selected Windows service(s).
5When the services have been successfully deployed, click [Finish].
Additional Setup Requirement for the ControlPoint Discovery Service
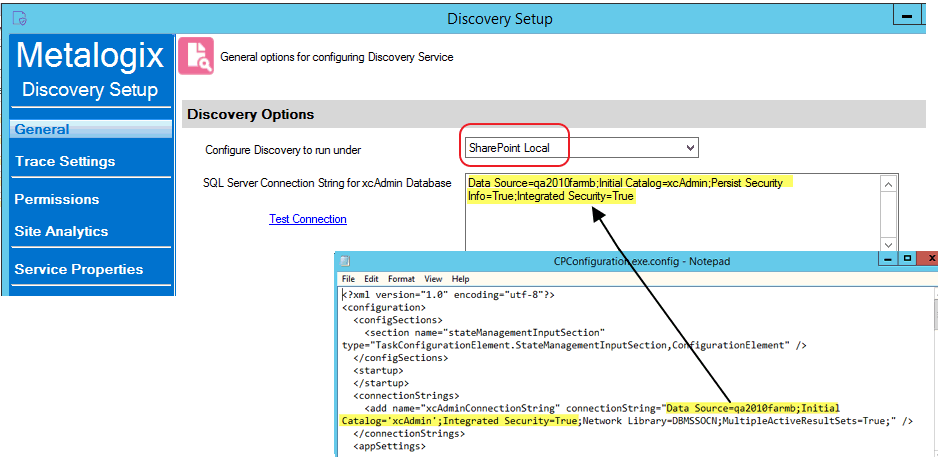
Before you can use the ControlPoint Discovery Service for the first time, you must also perform the following configuration tasks on the General tab of the Discovery Setup application (located, by default, in the folder C:\Program Files\Metalogix\ControlPoint\ControlPointFeatures\Services\Discovery):
·For Configure Discovery to run under, select SharePoint Local, and
·Add the SQL Server Connection String for xcAdmin Database.
NOTE: You can copy the Connection String from the file CPConfiguration.exe.config, located, by default, in the folder C:\Program Files\Metalogix\ControlPoint\ControlPointFeatures. Use the portion of the string that starts with the words Data Source and ends with Integrated Security = <value>.
The ControlPoint Configuration Site
The ControlPoint Configuration site is a SharePoint site that is integral to your ControlPoint installation.
This site is used primarily for managing ControlPoint users and permissions and menus that display in the ControlPoint left navigation pane. To manage groups you either need direct rights to manage the groups or be a site collection administrator.
If you are a site collection administrator for the ControlPoint Configuration site collection, you can access the site's administration pages and ControlPoint value-added features from the Hierarchy panel. See ControlPoint Security in the ControlPoint User's Guide for more detail.
If you have sufficient permissions (regardless of whether you are the site collection administrator), you can access the site's home page:
·from the SharePoint Hierarchy tree, by right clicking the ControlPoint Configuration Site - Root Site and choosing Open Site.
·from the Manage section, by choosing ControlPoint Configuration Site.
Managing Your Farm List
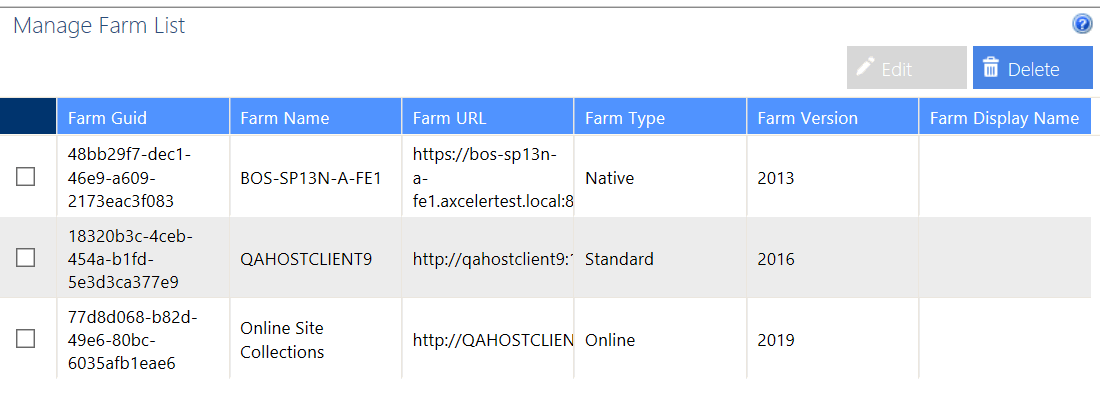
If you have permissions to manage the ControlPoint farm list, you can:
·edit one of the following attributes:
§the name that displays in the SharePoint Hierarchy and selection trees, and/or
§in a multi-farm environment, the url used when switching farms from the ControlPoint application header.
·delete farms that you have decommissioned or no longer manage through ControlPoint.
Note that when you choose the delete a farm from the list, you can also choose whether or not to delete farm-related data (log files and cached data).
To Manage Your Farm List:
1From the Manage ControlPoint panel, choose Manage Farm List.
2Use the information in the following table to determine the appropriate action to take.
|
If you want to ... |
Then ... |
|---|---|
|
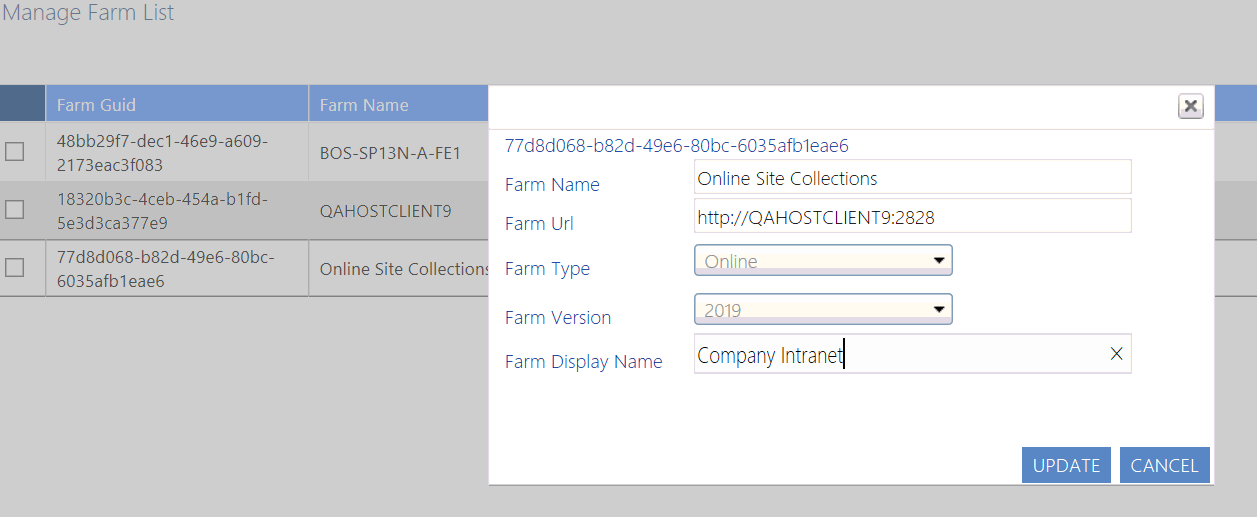
change the Farm Display Name and/or url |
·Check the box to the left of the farm you want to edit, then click [Edit]. ·Update the applicable field(s). ·Click [Update]. NOTE: If the Farm Display Name is left blank, ControlPoint will use the server name. |
|
delete the farm |
·Click [Delete]. A pop-up dialog displays, asking you to delete the farm. To delete the farm, click [Yes]. A second pop-up dialog displays, asking whether you want delete farm-related data from the ControlPoint database. ·Click the appropriate option. |
Changes will be visible the next time the browser is refreshed.
Managing Your ControlPoint License
If your ControlPoint license key begins with the digits 726, the product is licensed according to the number of SharePoint users in your farm and/or SPO tenancy.
If the first three digits are 723 (which is a "legacy" license issued prior to version 8.2), it is licensed according to both the number of SharePoint users and the number of farms and/or SPO tenancies being managed with ControlPoint.

