To monitor a Unix system with Spotlight, ensure the Unix system is configured as follows.
Unix servers and versions.
Spotlight supports the following server operating systems:
Unix programs.
Ensure the following Unix programs are accessible to the Unix login (through Spotlight):
|
|
For HP-UX, additionally
|
|
For AIX, additionally
|
|
For Solaris, additionally
|
|
Unix User Permissions and Installation Settings
Remote Connectivity: SSH or REXEC
Spotlight on Unix will require you to select the connection type: SSH or REXEC. Information on SSH and REXEC is freely available on the Internet. We recommend SSH as password data is transmitted encrypted. REXEC does not encrypt password data.
Notes:
Notes (Specific to SSH):
Public-key encryption is supported under SSH2 only. DSA and RSA are supported.
Note (Specific to REXEC): When Spotlight is monitoring a Unix operating system via REXEC with a valid user ID and password, remote commands may not work on the Unix host unless that user ID is added to the /etc/hosts.equiv file on the host.
Troubleshooting Spotlight on Unix
Select the machine to connect to. If the Unix machine is not listed then follow the instructions to add a new connection.

Note: Ensure the Unix system is configured before you connect to it. Configure the Unix System
Click File | Connect

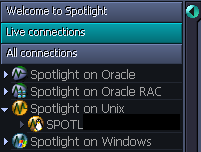
Select Spotlight on Unix on the Connections menu.

Double-click Add new connection.

Fill in the Details page of the Properties window:
| Field | Description |
|---|---|
| Connection name |
Enter the preferred display name for the Unix machine. Note: If left blank, the Connection name field resets to the value of the Address field. |
Server Connection Details
| Field | Description |
|---|---|
| Address |
Enter the hostname or IP address to the Unix machine. |
| User |
Enter the user name to login to the Unix machine. Note: The root user is not allowed. Remote login as "root" has been disallowed for security reasons. |
| Password |
Enter the password to login to the Unix machine. Note: Not applicable when Use SSH Public / Private Keys is selected. Applicable when Save password details (for this connection) is selected. |
| Connection Type |
Select according to the Unix system's configuration. The options are: REXEC and SSH. Configure the Unix System |
| Port Number |
Enter the port number for SSH (secure shell) connection to the Unix machine. The default value is 22. Note: Applicable when the Connection Type is SSH. |
SSH Key Authentication
Note: Applicable when the Connection Type is SSH.
| Field | Description |
|---|---|
| Use SSH Public / Private Keys |
Select according to the Unix machine's configuration. |
| SSH Key Type |
Choose the type of key to use when making the Spotlight connection: RSA or DSA. Configure the Unix System |
| SSH Private key Filename |
Locate the file that contains the private key for the Spotlight connection. Either click
or type the filename and location. |
| SSH Passphrase |
Type the passphrase used to decrypt the private key. Note: Applicable when Save password details (for this connection) is selected. |
Select Save password details (for this connection) to save all entered password details.
Close the dialog.
| Click | Description |
|---|---|
| Connect |
Save changes and open the connection in Spotlight. Note: If you experience problems connecting there may be an issue with the Unix configuration. Configure the Unix System |
| OK | Save changes. Do not open the connection in Spotlight. |
| Cancel | Do not save changes. |
Spotlight is powerful diagnostic and problem-resolution tool for Unix and Linux operating systems. Its unique user interface provides you with an intuitive, visual representation of the activity on your host machine.
For information on Spotlight on Unix, see these sections
| Section |
Description |
|---|---|
| Background Information |
Introductory material to Spotlight on Unix. |
| Connect to a Unix System | Create / Modify / Delete connections to Unix systems. |
| Home Page | The Spotlight home page shows the flow of information and commands between various sub-components and the size and status of internal resources such as processes, disk files and memory structures. |
| Alarms |
Spotlight alerts you to problems with your system by issuing an alarm. You can configure Spotlight in the level of severity that constitutes an alarm, to disable an alarm, and the actions Spotlight takes on raising the alarm. |
| Drilldowns | When you have isolated a problem, you can display a drilldown page, whose charts and tables provide a detailed breakdown of the underlying statistics. |
| View | Options | Customize Spotlight. |
| Troubleshooting | Solve problems using Spotlight. |
For information on using Spotlight applications See
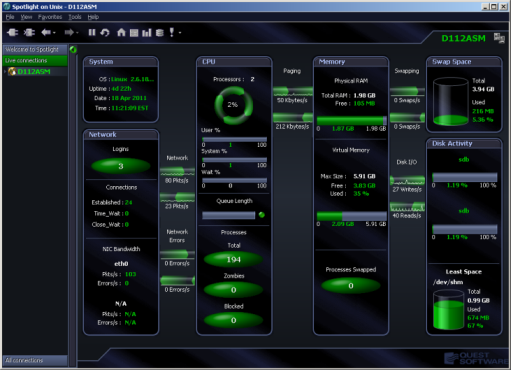
The Spotlight home page shows the flow of information and commands between various sub-components and the size and status of internal resources such as processes, disk files and memory structures.
Related operating system statistics are grouped together on panels that are connected by a series of graphical flows and icons. Spotlight updates these flows in real time so you can see how quickly data is moving through the system. The icons change color as Spotlight alarms are raised, upgraded, downgraded and canceled.
To see the Spotlight on Unix Home Page
 .
. 