Step six. In an Analyze Impact session, the specified change may or may not impact the SQL workload.
To review impact analysis results - No Impact
Select the Impacts tab.
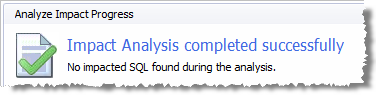
If the analysis completed and no impacted SQL were found, you will notice the following:
The Log displays this statement "No impacted SQL found during the analysis."
 to re-run the analysis without modifying any criteria.
To modify the SQL workload or the Change criteria and then re-run the analysis within the same session, select the SQL or Change Details tab. Then click Edit criteria.
Caution: If you click Edit Criteria, the analysis results for the current session will be lost, as well as the SQL workload or the Change criteria for the current session.
To review impact analysis results - Impacts
Click Open a saved Impact Session to open a completed Analyze Impact session.
Tip: The Open SQL Workload window displays a summary of results for each completed session. Select an Analyze Impact session in the list to display the summary in the lower pane.
The Impacts page displays the details of the impact analysis. Review the following for additional information:
| Pane / Option | Description | |||
|---|---|---|---|---|
| <change type> Changes | Displays a summary of the specified changes. | |||
|
Projected Workload by Timeslots |
(left side)—Displays a summary of the SQL workload improvements for the specified change. (right side)—Use this pane to investigate how the SQL workload was impacted by the specified change. Use the cursor to hover over a timeslot to display a summary of the impact to that timeslot’s SQL. Note: Only workloads collected from snapshots display Timeslots. | |||
|
View |
Displays one of two different impact evaluations for the Projected Workload:
| |||
|
Number of <category> SQL |
Displayed below the Estimated Improvement chart are data for the number of SQL statements in several different categories.
Note: Once on the SQL list page, use the breadcrumb drop-down menu to navigate to other SQL lists. Click | |||
|
Publish Report |
Click this link to view the Analyze Impact report which you can customize, save to file, print, and email. See Generate an Analyze Impact Report for more information. | |||
|
Analyze Again |
Click to re-run the analysis without modifying any criteria. | |||
|
View Process Log |
Click to display the log of the analysis process. Click | |||
|
Selected timeslots |
Displays the number of timeslots selected. Click the link to select timeslots, or click a timeslot in the graph to select it. Note: This action also filters the SQL statements displayed in the Impacted SQL pane. Only SQL for the selected timeslots are displayed. | |||
|
Chart Options |
Click this link to select which charts/statistics to display. | |||
| Impacted SQL |
Use this pane to review the impacted SQL statements Note: Only SQL statements for the selected timeslots are displayed in the Impacted SQL pane. | |||
|
SQL Name |
Click a SQL name to display SQL statement details, including a comparison of the original and the recommended execution plans. Click |
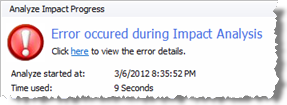
Impact Analysis - Error
| » | If the analysis results in an error, you can view the error details by clicking the link on the error page. Then modify your analysis criteria, if necessary. |
Tip: Use 

After running an impact analysis of additional indexes, SQL Optimizer allows you to easily create a script that you can use to generate the indexes in your database environment.
To create an index generation script
The Index Script page opens with the scripts created. Use this page to modify scripts and index names. Review the following for additional information:
| Pane / Option | Description |
|---|---|
| Naming Convention | |
|
Prefix, Name, Suffix |
Create a naming convention for SQL Optimizer to use to give the index a name in the script. You can include a prefix and a suffix. The naming convention is applied to all the indexes in this session. |
| n Recommended Indexes | |
|
Modify Tablespace |
Click to select a tablespace for the selected index or indexes. |
|
Modify Schema |
Click to select a schema for the selected index or indexes. |
| Generated Index Scripts |
SQL Optimizer automatically creates the index generating scripts. You can use this text editor to modify the scripts. Tip: Use the right-click menu or buttons at the bottom of the window to copy or to print the scripts. |
Tip: Use
You can generate a report of the impact analysis results and export the report (or save to file) to one of a number of different formats. You can also easily email the report with one click.
To generate an Analyze Impact report
Use the report window to customize the layout and the information displayed in the report, and to select publishing options. Use the following Report toolbar buttons.
| Toolbar Button | Description |
|---|---|
 |
Current Settings. Click to specify the information to include in your report. |
 |
Page Setup. Click to modify margins and select page orientation. |
 |
Scale. Click to adjust the scale of the printed output. |
 |
Watermark. Click to add a watermark to the report.
|
 |
Color. Click to change the report background color. |
 |
Export Document. Click to save the report to file using the default format. Click the arrow to select from several file format options (or to change the default setting). You can select from several different file formats, including PDF, HTML, and Excel. |
 |
Send via Email. Click to save the report to file using the default format and to also attached the file to an email. Click the arrow to select from several file format options (or to change the default setting). |
To publish an Analyze Impact report as a PDF
On the report page, select File | Export Document | PDF File, or click
Tip: You can select from several different file formats for the exported (published) report, including HTML and Excel.
Tip: Use
