Use the following worksheet to prepare for your Desktop Authority installation. It will help you gather all of the information required by the install prior to getting started.
Desktop Authority can install a local instance of MS SQL Server Express Edition or can use an existing SQL Server Instance. On Windows Server 2008, Microsoft SQl Server 2008 R2 Express will used. On all other supported operating systems, Microsoft SQL Server 2014 R2 Express will be used. Select the appropriate option in the dialog.
If you plan to install a local instance of MS SQL Server Express, Desktop Authority will install the necessary software. You will be prompted for an SA password.
| MS SQL Server Express Credentials | |
|---|---|
| SA Password | |
If you will be using an existing SQL Server Instance (2008, 2008 R2, 2012, 2014, 2016, 2017), you will need to know the server name and optionally the instance name. It must be entered in the form of SERVERNAME\INSTANCE.
| MS SQL Server Credentials | |
|---|---|
| SEVERNAME\[INSTANCE] | |
| MS SQL Server Authentication | |
|---|---|
| SA Username | |
The Desktop Authority Master services are comprised of the Operations and Manager services and are background services that are used to push data through the system. The Operations and Manager services can be configured using the same user account.
The Operations service is a background service that is used to manage and configure Desktop Authority's plugins. The ETLProcessor and ReportScheduler plugins are used to manage collected data and execute scheduled reports. The Operations service requires a user account that is a local administrator of the Operations Master server.
The Operations service uses port 8017, by default, for communications. If this port is in use, choose another available port to use for this service.
| Operations Service Credentials | |
|---|---|
| Username (Domain\username) | |
| Password | |
| Port | |
The Manager service is used to manage the Web based Manager, replication, and connectivity and communication between the Manager and the database. It requires a user account that is a local administrator of the Operations Master server and any other servers that will run Desktop Authority services. This service account is also used when browsing out to Active Directory objects, files and folders and for GPO deployment unless the system preference option, 'Use current user rights for browsing resources' is selected.
The Manager service uses port 8085, by default, for communications. If this port is in use, choose another available port to use for this service.
| Manager Service Credentials | |
|---|---|
| Username (Domain\username) | |
| Password | |
| Port | |
During the install you will be prompted to select a user or group who will be given Super User status and will therefore have access to all features of Desktop Authority.
| Super User Group or User Account | |
|---|---|
| Super User/Group (Domain\username) |
Desktop Authority’s web based Console uses IIS to host the application. The IIS Application pool identity is used to allow IIS to host web applications/virtual folders as standalone processes to avoid application crashes. IIS requires access to port 443. Domain user credentials are required so it can log information to the database. If Windows Authentication is chosen for the SQL database authentication, the account selected for the IIS Application pool will need to have login access to the database.
| IIS Application Identity Pool | |
|---|---|
| Username (Domain\username) | |
| Password |
The Desktop Authority installation requires administrative rights. If you are not logged on as an administrator, please log on as an administrator before beginning the installation.
Are you upgrading your current version of Desktop Authority? Desktop Authority 11.1 supports upgrades from Desktop Authority 9.3 or later. If you have an earlier version of Desktop Authority, you must upgrade to 9.3 first.
The Desktop Authority installation wizard will walk you through a series of dialogs prompting for information that is needed to install and configure Desktop Authority for your organization. Follow the wizard by entering the requested information and clicking Next to advance to the following page. Click Back to go to the prior page. Click Cancel to abort the install.
|
|
Note: If the installation is aborted, all configurations previously entered during the installation process are saved and used the next time the installation is run. |
|
|
NOTE: Some Anti-Virus programs have been known to interfere with Desktop Authority processes. This version of Desktop Authority uses a new folder structure on all desktop computers. Be sure to update your Anti-Virus folder exceptions to include scanning of the following folders:
|
|
|
TIP: In the event there is no Internet connection, .NET 4.6 can be downloaded from http://webservices.scriptlogic.com/links/?DADownloads=dotnetfx35&Ver=11.0 and installed prior to continuing with the installation. |
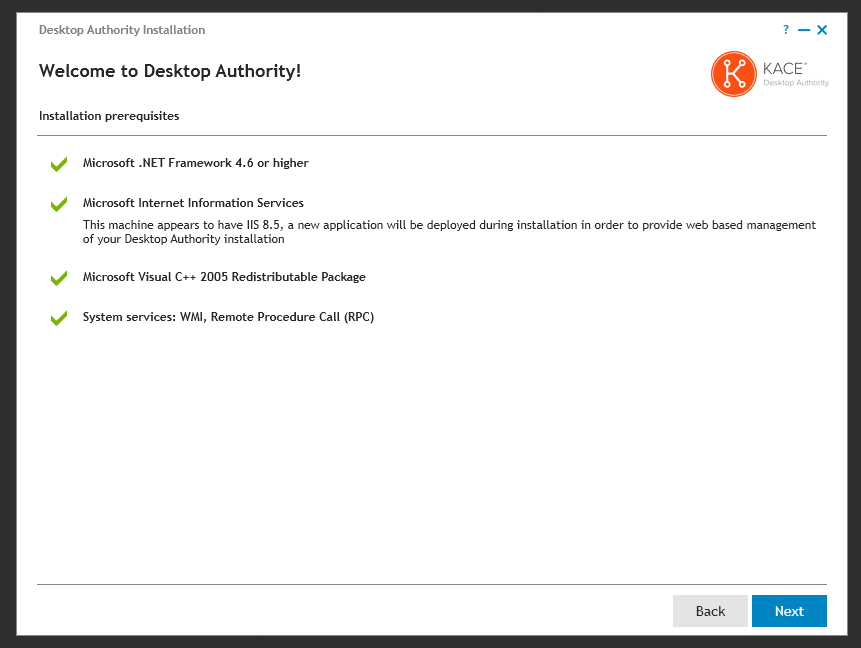
The prerequisite components include:
- Microsoft .NET Framework 4.6
http://webservices.scriptlogic.com/links/?DADownloads=dotnetfx46&Ver=11.0
- Microsoft IIS 7, 7.5, 8, 8.5 or 10 depending upon the Operating System of the server
- IIS 7 will be installed to 2008 servers
- IIS 7.5 will be installed to 2008 R2 servers
- IIS 8.0 will be installed to 2012 servers
- IIS 8.5 will be installed to 2012 R2 servers
- IIS 10 will be installed to 2016 and 2019 servers
The default installation of IIS does not install a few components that are required by Desktop Authority. If these components are missing, the Desktop Authority install will allow you to install the missing components by pressing the Add Features button.
These extra IIS components include the following:
HTTP Errors, Application Development, ASP.NET, .NET Extensibility, ISAPI Extensions, ISAPI Filters, Tracing, Windows Authentication, Dynamic Content Compression, IIS Management Scripts and Tools and Management Services.
- Microsoft SQL Server 2008 R2 Express Edition (only required if this is the selected database during the install)http://webservices.scriptlogic.com/links/?DADownloads=SQLExpressx64&Ver=11.0 x64 versionhttp://webservices.scriptlogic.com/links/?DADownloads=SQLExpressx86&Ver=11.0 x86 version
- Microsoft Visual C++ 2005 Redistributable Package
http://webservices.scriptlogic.com/links/?DADownloads=vcredistx86&Ver=11.0 x86 version
http://webservices.scriptlogic.com/links/?DADownloads=vcredistx64&Ver=11.0 x64 versionIn addition, the installer will configure the following:
- Windows Firewall Exceptions (This will enable an exception for the File and Printer Sharing service)
WMI and Remote Procedure Call (RPC) system services are used to install and configure Desktop Authority services remotely. They will be turned on during installation.

Note: If there is no Internet connection available on the machine where Desktop Authority is being installed to, the prerequisite components can be downloaded prior to starting the installation and placed in a folder of your choice. During the install, you will be prompted to choose the file path.
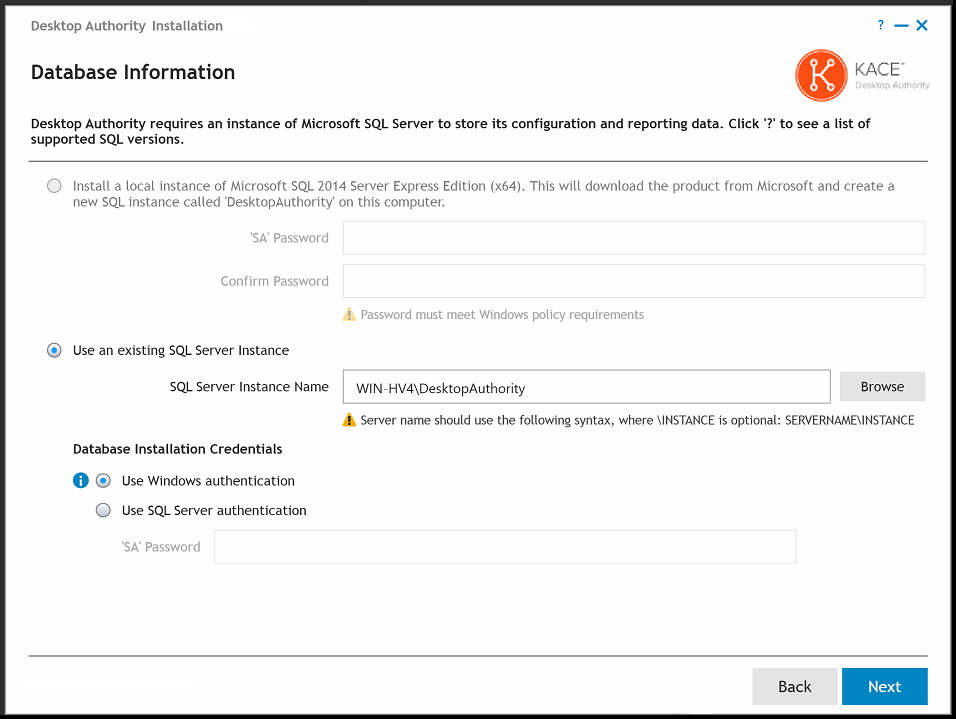
Desktop Authority requires an instance of either Microsoft SQL Server 2008, 2008 R2, 2012, 2014, 2016, 2017, 2019 or Microsoft SQL Server 2008, 2008 R2, 2012, 2014, 2016, 2017, 2019 Express Edition. The database is used to store all configurations as well as a data collection repository for reporting. Desktop Authority can install a new instance of SQL Server Express or use an existing SQL Server instance. On Windows Server 2008, Microsoft SQl Server 2008 R2 Express will used. On all other supported operating systems, Microsoft SQL Server 2014 R2 Express will be used. Select the appropriate option in the dialog.
When selecting to have Desktop Authority install a local instance of SQL Express, you must supply an 'SA' password. The new instance will be installed using Mixed Mode authentication (uses both Windows Authentication and SQL Server Authentication) which requires an 'SA' account. This password is required and must meet the password complexity policies set for the domain.
When selecting to use an existing SQL Server instance, type in the SERVERNAME\INSTANCE or press the Browse button to select an existing instance. During an upgrade, the SQL Server Instance Name will automatically be entered for you. After choosing an existing SQL Server instance, select an authentication method for it. Select either Windows or SQL Server authentication.
|
|
Note: To use Windows Authentication for an existing instance of Microsoft SQL Server, you must ensure that the user ID that you are currently logged into Windows with is assigned to the SQL Server 'System Administrators' server role. |
If Microsoft SQL 2008 R2 Server Express Edition (x86/x64) is being used, it will be downloaded at this point, if necessary.
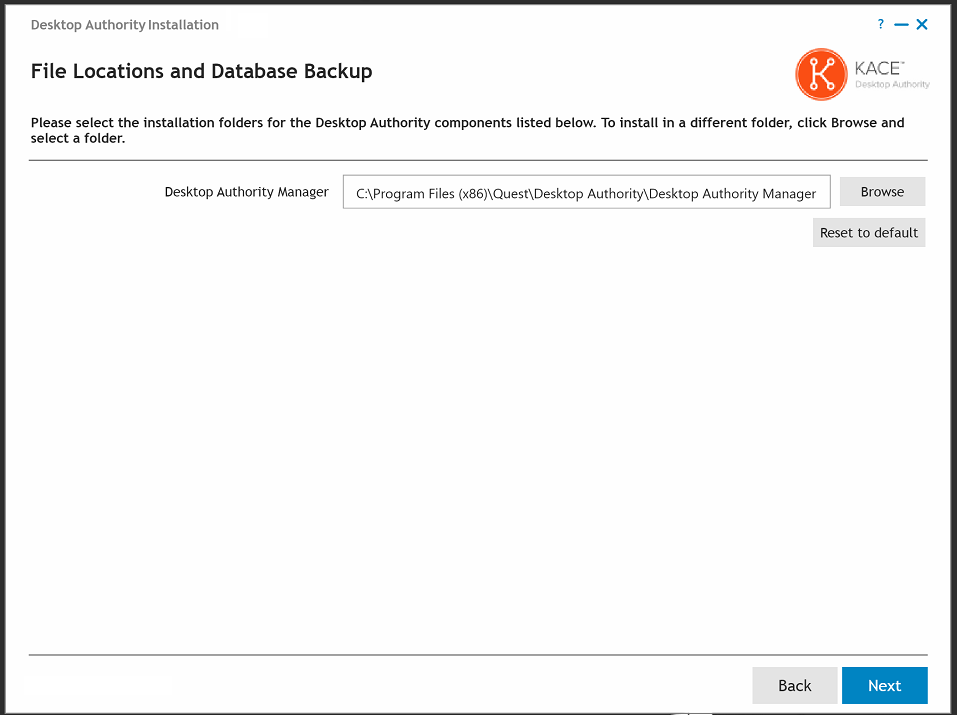
Select a path and destination folder for the SQL Server Express Database (if selected) and the Desktop Authority Manager. Please reference the File Paths table in the appendices for default path locations. Press the Browse button next to the desired component to select a different path. Once the file locations are set, click Next to continue.
|
|
Note: The SQL Server Express Database installation folder option will only be available when Desktop Authority is installing a local instance of Microsoft SQL Server Express Edition. |
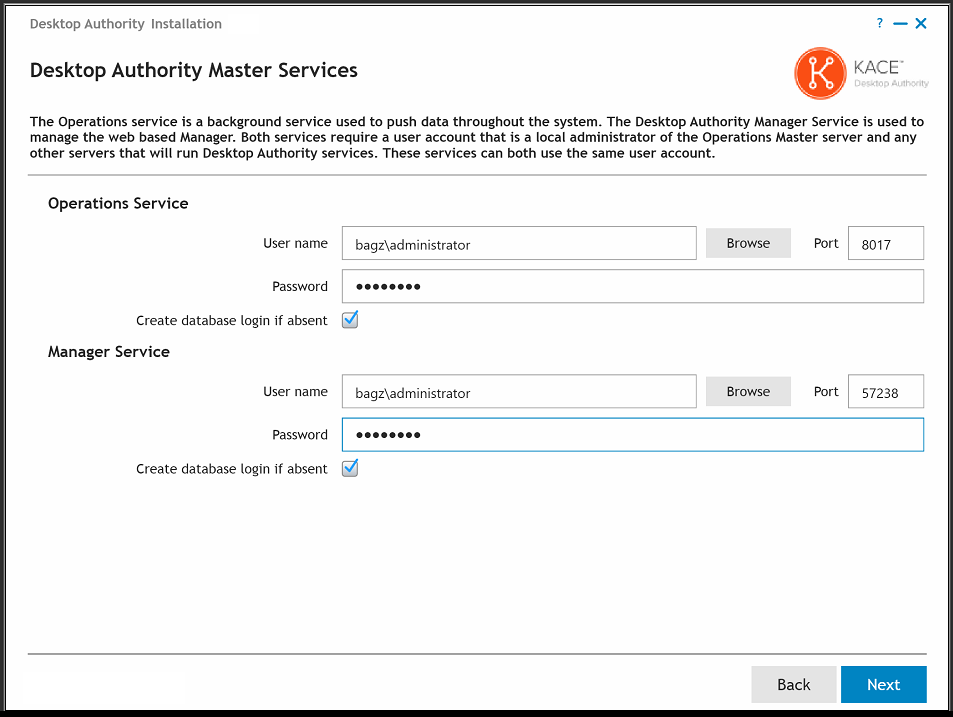
The Desktop Authority Master services are composed of the Operations and Manager services and are background services that are used to push data through the system. The Operations and Manager services can be configured using a single user account.
The Operations service (formerly known as the Master service) is a background service that is used to manage and configure Desktop Authority's plugins. It will reach out to each server on the network where the Desktop Authority Administrative service is installed (SLETL$ share). The user account used to configure this service must have appropriate permissions to access the share. The ETLProcessor and ReportScheduler plugins are used to manage collected data and execute scheduled reports. The Operations service requires a user account that is a local administrator of the Operations Master server.
The Desktop Authority Manager service (formerly known as the OpsMaster service) is used to manage the Web-based Manager, replication, assign scripts, and connectivity and communication between the Manager and the database. It requires a user account that is a local administrator of the Operations Master server and any other servers that will run Desktop Authority services. This service account is also used when browsing out to Active Directory objects, files and folders and for GPO deployment, unless the system preference option, 'Use current user rights for browsing resources' is selected. This option can be changed in the Desktop Authority Setup Tool on the Global System Settings tab.
The default ports for these services are 8017 and 57238. If either of these ports are being used, a new port must be selected. The installer will check each port for usage and will notify you if they are currently in use. However, if you know that some other application uses either of these ports (but is not currently running) be sure to change them on this dialog. These ports may be changed at a later point in time using the Desktop Authority Setup tool.
Click the Browse button to select an appropriate user account and enter the credentials for each service. Check the box to create a database login if necessary.
Modify the default ports if necessary.
|
|
Note: If Windows Authentication is chosen for the SQL database installation credentials, the accounts selected for the Operations and Manager services should have login access to the database. Select the Create database login if absent checkbox to allow the installer to create a SQL login for these accounts. Otherwise, they should be created manually. This option is only available when Windows Authentication is chosen for SQL. |
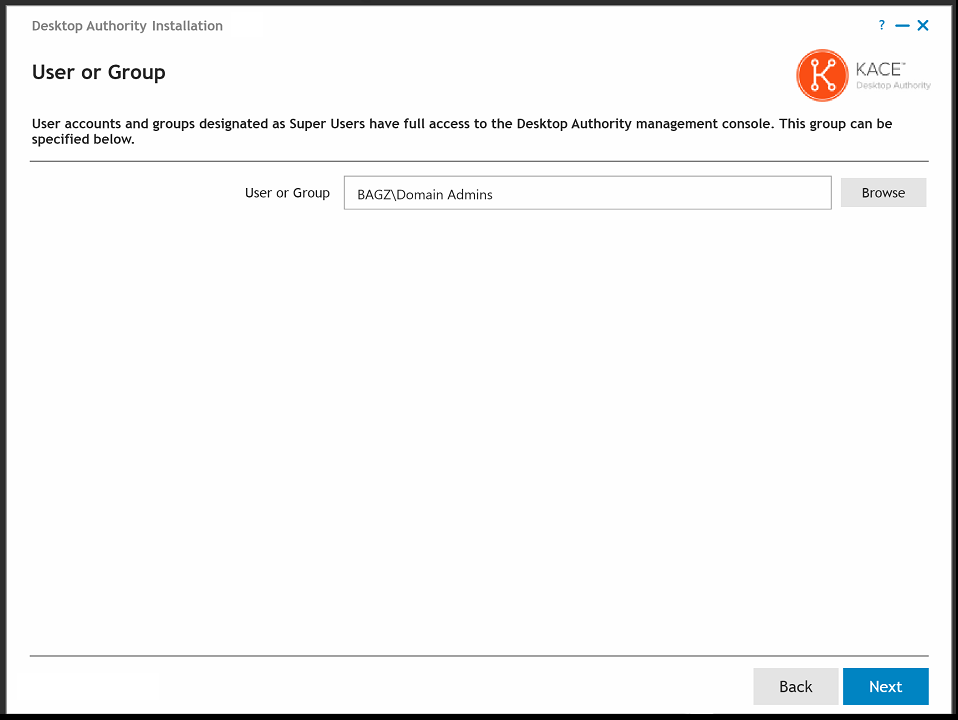
The User or Group dialog gives you the opportunity to designate a User or Group as the Super User(s). Any user (or users within a group) designated as a Super User will be given full control in the Desktop Authority Manager. Click the Browse button to select the appropriate User or Group.
|
|
Note: The user account of the person installing Desktop Authority will automatically be added as a Super User. |
|
|
Note: The IIS Application pool identity section is available when using SQL Windows Authentication only. |
The IIS Application pool identity is used to allow IIS to host web applications/virtual folders as standalone processes to avoid application crashes. Select a Domain User account for the IIS Application pool to use. This account will automatically be granted the necessary permissions if needed.
If Windows Authentication is chosen for the SQL database installation credentials, the account selected for the IIS Application pool will need to have login access to the database. Select the Create database login if absent checkbox to allow the installer to create a SQL login for these accounts. Otherwise, they should be created manually.
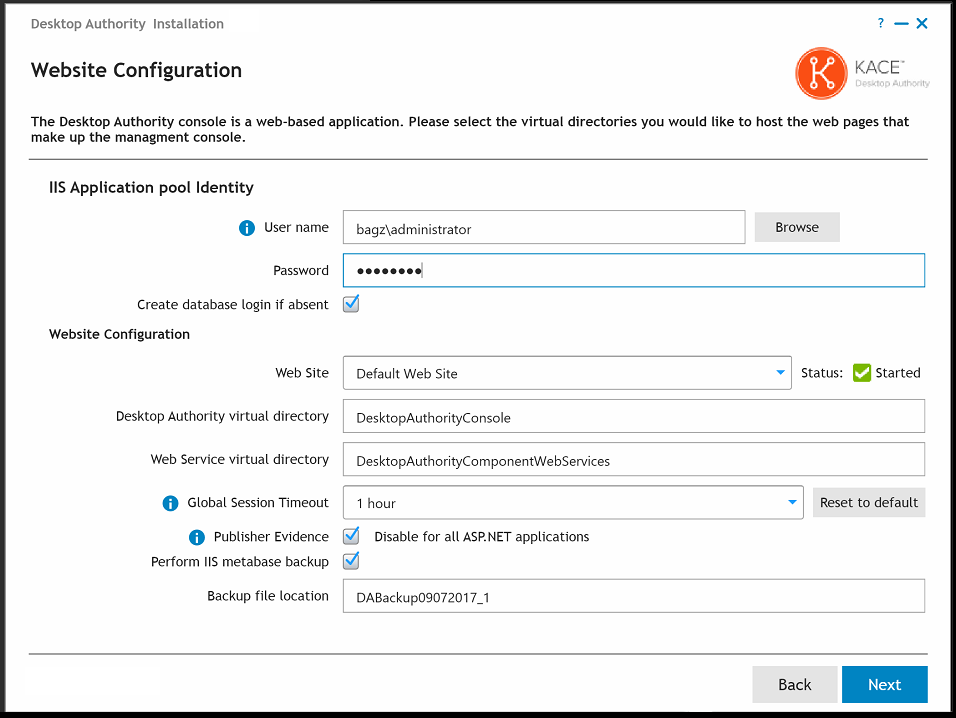
The Website Configuration dialog is used to configure the Web based console (Manager). These configurations are made in Internet Information Services (IIS).
The Web Site selection allows you to configure Desktop Authority to use a site other than the default site in IIS. If you choose to use a site other than the default, it must be created prior to getting to this part of the installation. The selected site must have an HTTP port binding defined for it.
Specify Desktop Authority and Web Service virtual directories. Please reference the File Paths table in the appendices for default path locations. IIS Virtual directories are mapped to these folders.
The Global Session Timeout value is the maximum amount of time the Desktop Authority Console can sit idle before logging the user out due to inactivity. This timeout value can be overwritten for individual users in the Desktop Authority Console Preferences dialog.
Publisher Evidence will disable for all ASP.NET applications to disable .NETs automatic validity checking of Authenticode signed signatures at startup. If publisher evidence is not disabled, some services may fail to start correctly at boot time due to lengthy delays imposed by the verification process.
Since Desktop Authority updates IIS, you have the option of performing a backup of IIS before any changes are made. It is recommended to always perform this backup of IIS since there is a possibility that other applications on the same site may conflict with each other. If there are any IIS problems following the install, the backup can be restored. Select the IIS metabase Backup option to enable the backup. The backup file created in the %systemroot%\system32\inetsrv\MetaBack folder. The default file name is created using a date, time format.
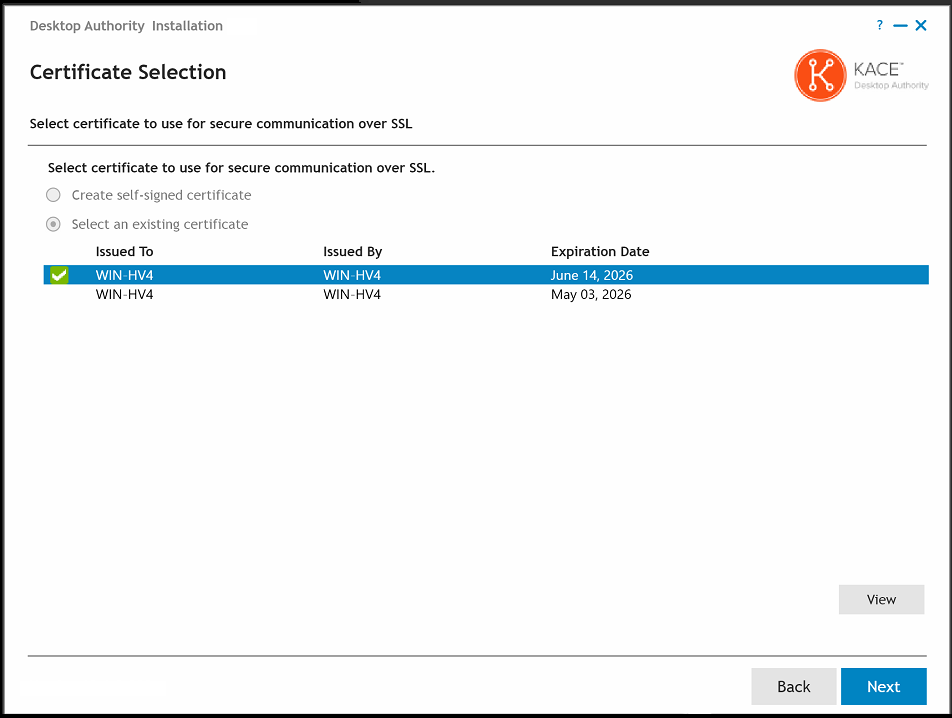
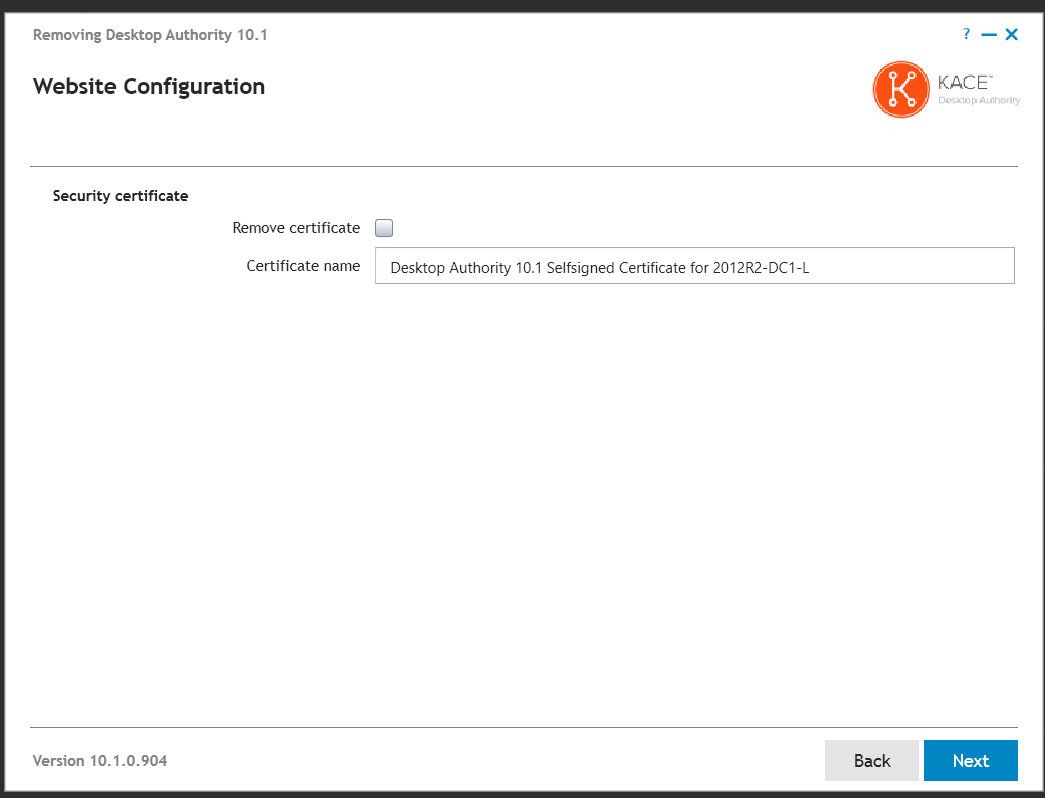
Security certificates are used to ensure secure communication traffic.
If there are no certificates available on the server, select the Create self-signed certificate option and a new self-signed certificate will be created automatically for use with Desktop Authority.
However, if there are installed certificates on the server and none with the Desktop Authority name, choose either to create a new self-signed certificate or select an existing certificate to use. If a previous Desktop Authority certificate is found, it will be selected from the list of existing certificates.

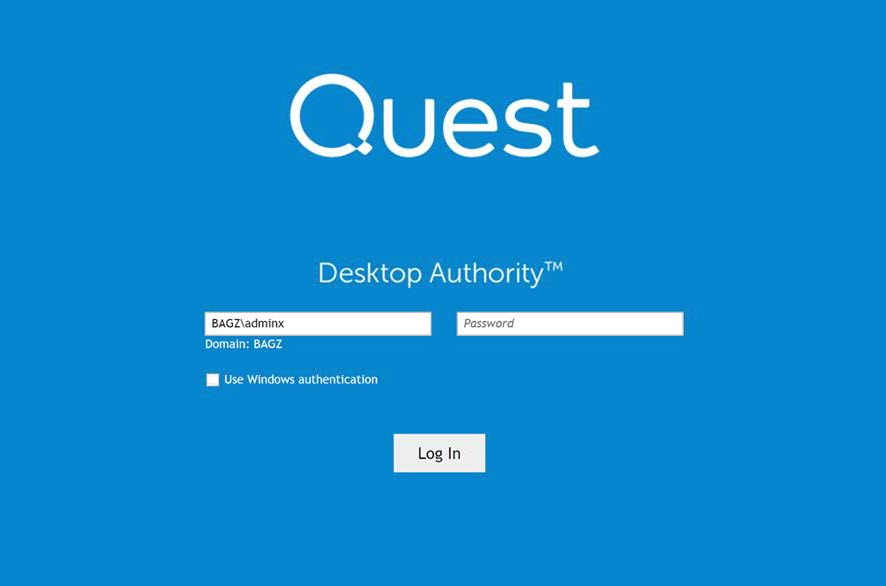
Once the installation is complete, click the Finish button. If you previously chose to load Desktop Authority following the installation, the Desktop Authority web console will be loaded in your default browser. You will be presented with a login dialog.
The Desktop Authority Installation will detect your current version of Desktop Authority. If this version of Desktop Authority is prior to Desktop Authority 9, you will be prompted with a dialog to remove it. ALL data will be saved during the removal process; however you should always perform a backup before installing any product upgrade.
|
|
Note: The upgrade process will check all MS Office element settings. Any element with a selected version of MS Office that is no longer supported (anything prior to Office 2010) will be automatically changed to the auto-detect version of the Application/suite. A notification will appear during the installation if this occurs. |
|
|
NOTE: All settings from the prior version of Desktop Authority User Management Internet Explorer object will be automatically integrated into the new User Management Web Browser object. |
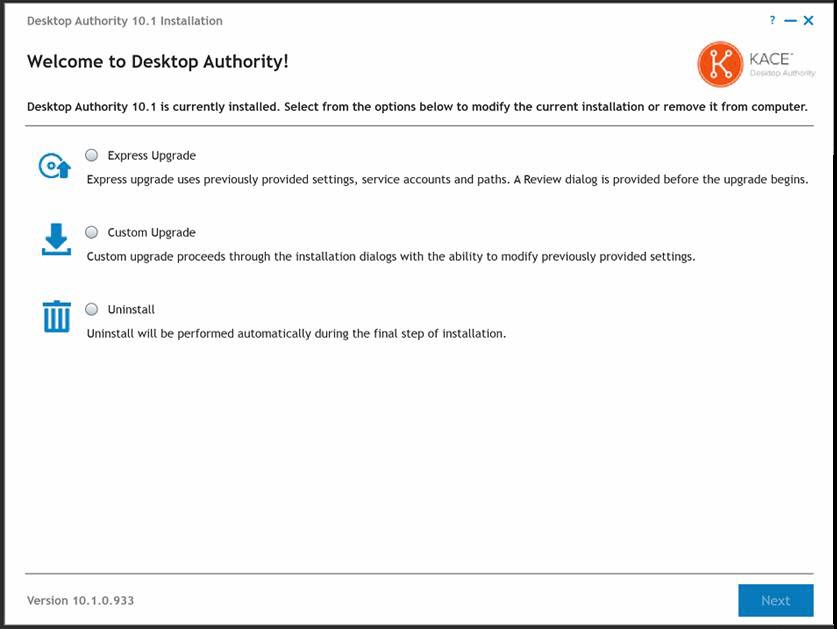
Express upgrade
Choosing Express upgrade will skip the typical installation dialogs, confirm prerequisites and go directly to the Review dialog. You will, however, be given the opportunity to back up the databases.
Click Next to continue the upgrade and install the new application.
|
|
NOTE: Prior to the Express Upgrade option being made available, the installer first confirms the existing certificate meets all requirements of the newer version of Desktop Authority being installed. If a certificate requirement has not been met (e.g. existing certificate does not have a Subject Alternative Name), the Express Upgrade option will be disabled and the Custom Upgrade option must be used. |
Custom upgrade
- Choosing Custom upgrade option allows you to proceed through the installation dialogs with permission to modify existing settings.
The prerequisite components include:
- Microsoft .NET Framework 4.6
http://webservices.scriptlogic.com/links/?DADownloads=dotnetfx46&Ver=11.0
- Microsoft IIS 7, 7.5, 8, 8.5 or 10 depending upon the Operating System of the server
- IIS 7 will be installed to 2008 servers
- IIS 7.5 will be installed to 2008 R2 servers
- IIS 8.0 will be installed to 2012 servers
- IIS 8.5 will be installed to 2012 R2 servers
- IIS 10 will be installed to 2016 and 2019 servers
The default installation of IIS does not install a few components that are required by Desktop Authority. If these components are missing, the Desktop Authority install will allow you to install the missing components by pressing the Add Features button.
These extra IIS components include the following:
HTTP Errors, Application Development, ASP.NET, .NET Extensibility, ISAPI Extensions, ISAPI Filters, Tracing, Windows Authentication, Dynamic Content Compression, IIS Management Scripts and Tools and Management Services.
- Microsoft SQL Server 2008 R2 Express Edition (only required if this is the selected database during the install)http://webservices.scriptlogic.com/links/?DADownloads=SQLExpressx64&Ver=11.0 x64 versionhttp://webservices.scriptlogic.com/links/?DADownloads=SQLExpressx86&Ver=11.0 x86 version
- Microsoft Visual C++ 2005 Redistributable Package
http://webservices.scriptlogic.com/links/?DADownloads=vcredistx86&Ver=11.0 x86 version
http://webservices.scriptlogic.com/links/?DADownloads=vcredistx64&Ver=11.0 x64 versionIn addition, the installer will configure the following:
- Windows Firewall Exceptions (This will enable an exception for the File and Printer Sharing service)
WMI and Remote Procedure Call (RPC) system services are used to install and configure Desktop Authority services remotely. They will be turned on during installation.
Note: If there is no Internet connection available on the machine where Desktop Authority is being installed to, the prerequisite components can be downloaded prior to starting the installation and placed in a folder of your choice. During the install, you will be prompted to choose the file path.
Once all of the prerequisites have been installed and confirmed on the Operations Master, the installation may continue. Click Next to continue.
- Upgrading Desktop Authority requires the credentials to be entered for the existing database instance. Enter the credentials for the database and click Next to continue.
- The file locations are displayed on the following dialog. No changes are necessary here. The Desktop Authority upgrade will be installed on top of the existing version.
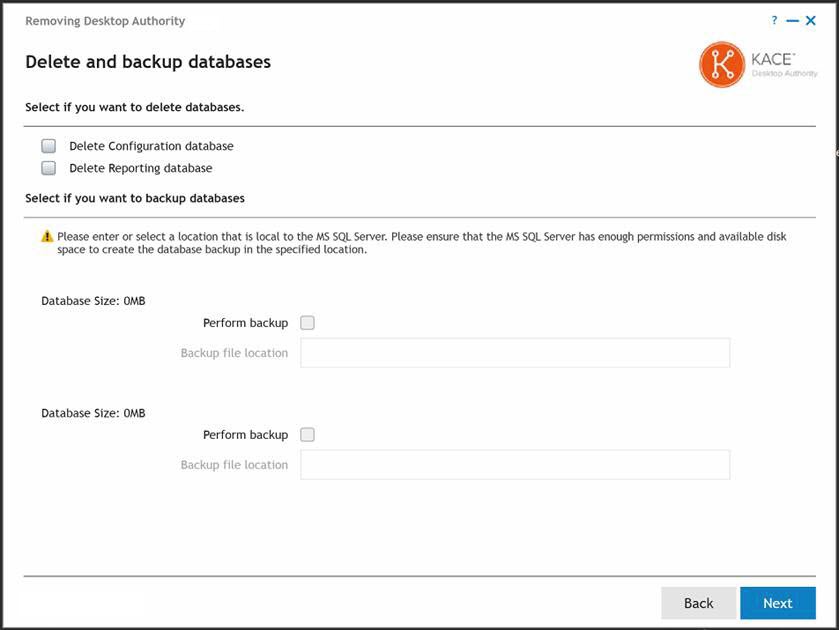
At this point, the database files can be backed up. If you do not have a safe backup of your files already, select the check box next to each database and specify the location of the backup file.
Click Next to continue.
The Desktop Authority Master services are composed of the Operations and Manager services and are background services that are used to push data through the system. The Operations and Manager services can be configured using a single user account.
The Operations service (formerly known as the Master service) is a background service that is used to manage and configure Desktop Authority's plugins. It will reach out to each server on the network where the Desktop Authority Administrative service is installed (SLETL$ share). The user account used to configure this service must have appropriate permissions to access the share. The ETLProcessor and ReportScheduler plugins are used to manage collected data and execute scheduled reports. The Operations service requires a user account that is a local administrator of the Operations Master server.
The Desktop Authority Manager service (formerly known as the OpsMaster service) is used to manage the Web-based Manager, replication, assign scripts, and connectivity and communication between the Manager and the database. It requires a user account that is a local administrator of the Operations Master server and any other servers that will run Desktop Authority services. This service account is also used when browsing out to Active Directory objects, files and folders and for GPO deployment, unless the system preference option, 'Use current user rights for browsing resources' is selected. This option can be changed in the Desktop Authority Setup Tool on the Global System Settings tab.
The default ports for these services are 8017 and 57238. If either of these ports are being used, a new port must be selected. The installer will check each port for usage and will notify you if they are currently in use. However, if you know that some other application uses either of these ports (but is not currently running) be sure to change them on this dialog. These ports may be changed at a later point in time using the Desktop Authority Setup tool.
Click the Browse button to select an appropriate user account and enter the credentials for each service. Check the box to create a database login if necessary.
Modify the default ports if necessary.
Note: If Windows Authentication is chosen for the SQL database installation credentials, the accounts selected for the Operations and Manager services should have login access to the database. Select the Create database login if absent checkbox to allow the installer to create a SQL login for these accounts. Otherwise, they should be created manually. This option is only available when Windows Authentication is chosen for SQL.
The User or Group dialog gives you the opportunity to designate a User or Group as the Super User(s). Any user (or users within a group) designated as a Super User will be given full control in the Desktop Authority Manager. Click the Browse button to select the appropriate User or Group.
Note: The user account of the person installing Desktop Authority will automatically be added as a Super User.
IIS Application Pool
Note: The IIS Application pool identity section is available when using SQL Windows Authentication only.
The IIS Application pool identity is used to allow IIS to host web applications/virtual folders as standalone processes to avoid application crashes. Select a Domain User account for the IIS Application pool to use. This account will automatically be granted the necessary permissions if needed.
If Windows Authentication is chosen for the SQL database installation credentials, the account selected for the IIS Application pool will need to have login access to the database. Select the Create database login if absent checkbox to allow the installer to create a SQL login for these accounts. Otherwise, they should be created manually.Website Configuration
The Website Configuration dialog is used to configure the Web based console (Manager). These configurations are made in Internet Information Services (IIS).
The Web Site selection allows you to configure Desktop Authority to use a site other than the default site in IIS. If you choose to use a site other than the default, it must be created prior to getting to this part of the installation. The selected site must have an HTTP port binding defined for it.
Specify Desktop Authority and Web Service virtual directories. Please reference the File Paths table in the appendices for default path locations. IIS Virtual directories are mapped to these folders.
The Global Session Timeout value is the maximum amount of time the Desktop Authority Console can sit idle before logging the user out due to inactivity. This timeout value can be overwritten for individual users in the Desktop Authority Console Preferences dialog.
Publisher Evidence will disable for all ASP.NET applications to disable .NETs automatic validity checking of Authenticode signed signatures at startup. If publisher evidence is not disabled, some services may fail to start correctly at boot time due to lengthy delays imposed by the verification process.
Since Desktop Authority updates IIS, you have the option of performing a backup of IIS before any changes are made. It is recommended to always perform this backup of IIS since there is a possibility that other applications on the same site may conflict with each other. If there are any IIS problems following the install, the backup can be restored. Select the IIS metabase Backup option to enable the backup. The backup file created in the %systemroot%\system32\inetsrv\MetaBack folder. The default file name is created using a date, time format.
Click Next to continue.
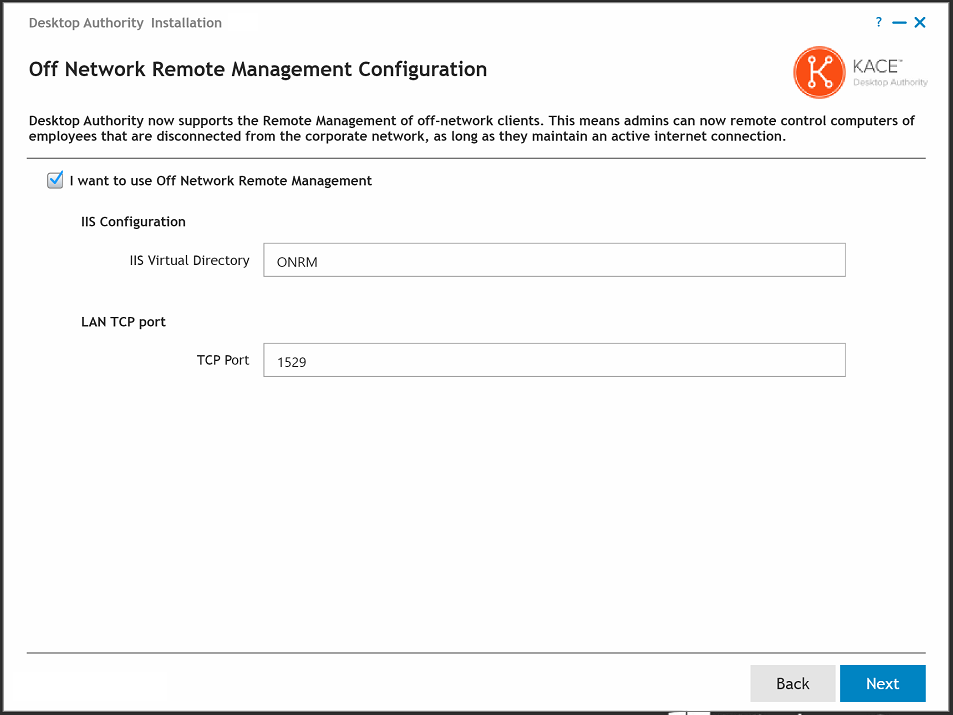
- In order to remotely manage a client that is off-network, you must configure the feature here during install (or later in the DA Setup tool). Turn on the feature by selecting the I want to use Off Network Remote Management check box. A defulat IIS Virtual Directory and LAN TPC Port will be used. These may be overwritten if necessary.
- In an upgrade situation, there will be a certificate that was created at an earlier time by Desktop Authority. This certificate will be automatically selected. If another certificate is to be used, select that one instead. Click View to look at the selected certificate details.
Click Next to continue.
The installation is about to begin. To run Desktop Authority following the installation of its files, click the Launch Desktop Authority Manager after installation checkbox. Click Install to proceed with the installation.
- Click install to complete the upgrade.
Once the upgrade has completed, login to the Desktop Authority console and navigate to the Service Management tab. From there, you will need to complete the mandatory process of upgrading all outdated Administrative and Update Services. You can see all outdated services in the list, notated by a yellow triangle warning icon. The upgrade of these services can be initiated via the right-click or drop-down menu options within the console.
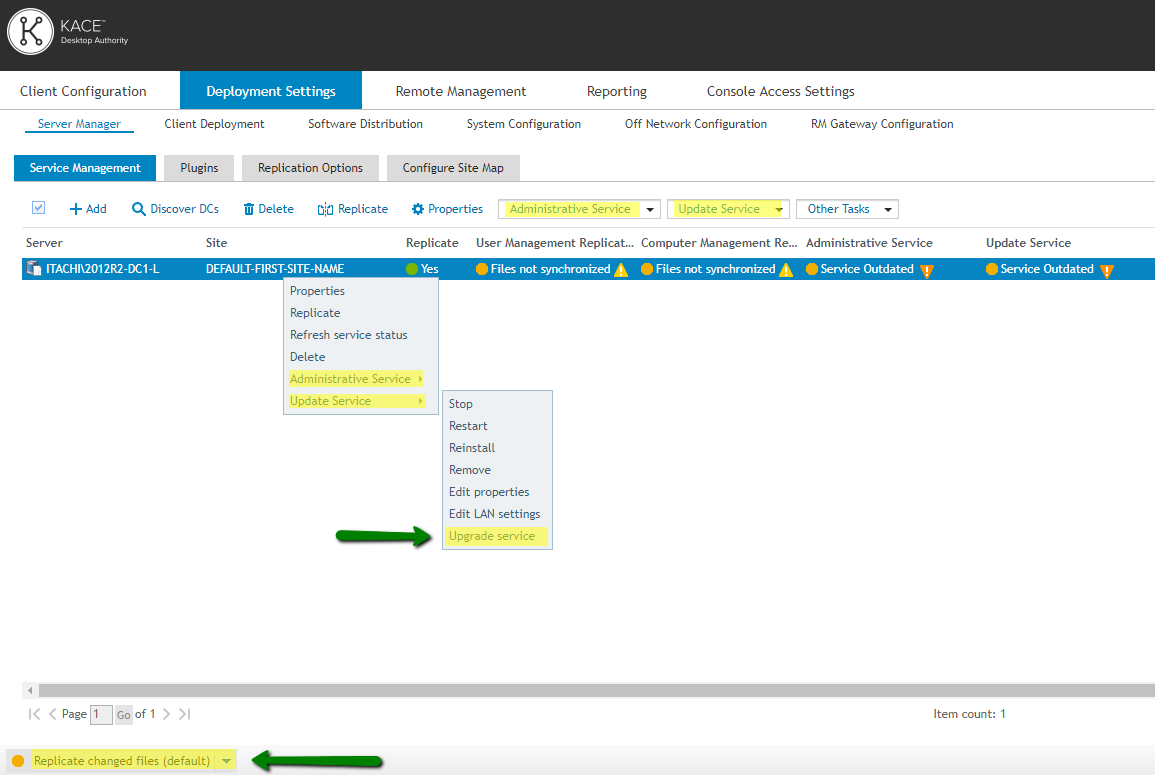
Once all services have been upgraded (showing a green status), a replication must be performed in order to fully complete the upgrade.
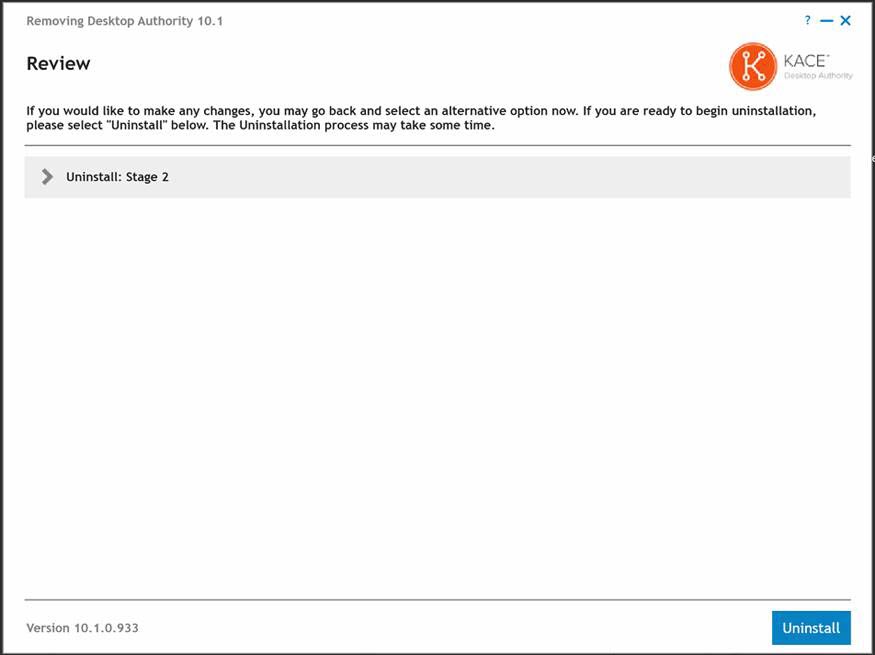
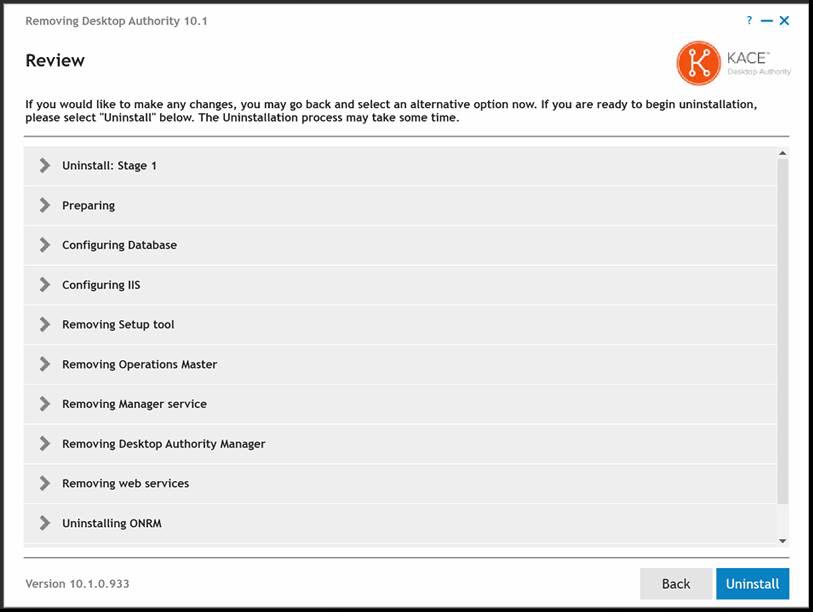
Uninstall
The Uninstall option is used to remove the currently installed version of Desktop Authority. When removing the prior version of Desktop Authority, the database will be left intact and be available for the new installation of Desktop Authority. See Uninstalling Desktop Authority for further details.
|
|
NOTE: Prior to starting the Desktop Authority uninstallation process, all instances of the Administrative and Update services should be removed, unless the intent is for Desktop Authority is to be reinstalled once the uninstallation has completed. This is done on the Service Management tab within the console. You must right-click on each server and select each service and Remove. This needs to be done for each service on each server. |
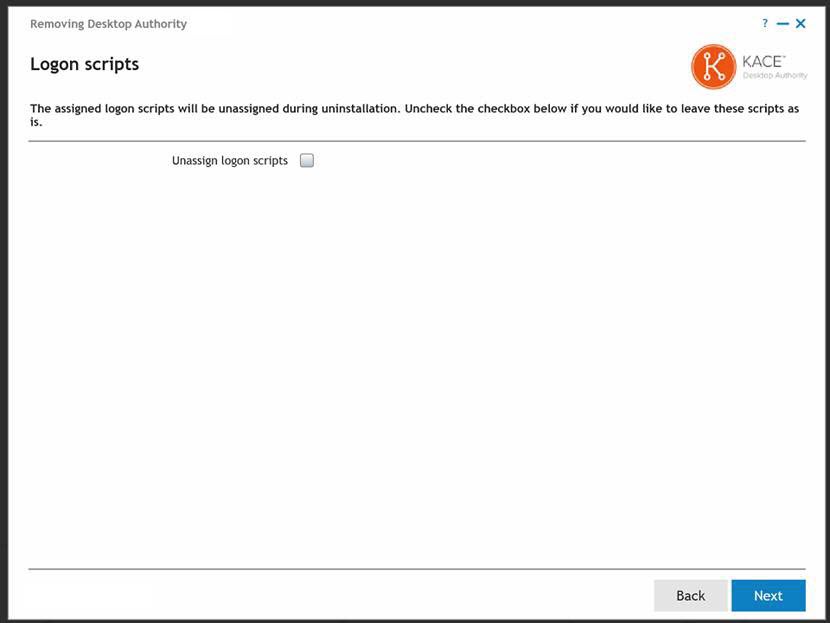
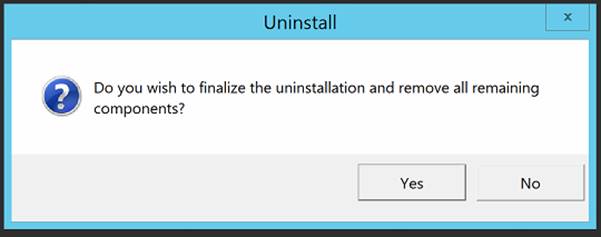
Once this uninstall process is complete you will be notified that the first part of the process is complete. This part of the process removes all of Desktop Authority from the necessary servers. This process also configures a GPO that will remove all client side services. Since not all computers are available at all times, the removal process via the GPO on client computers may take a few days to complete.
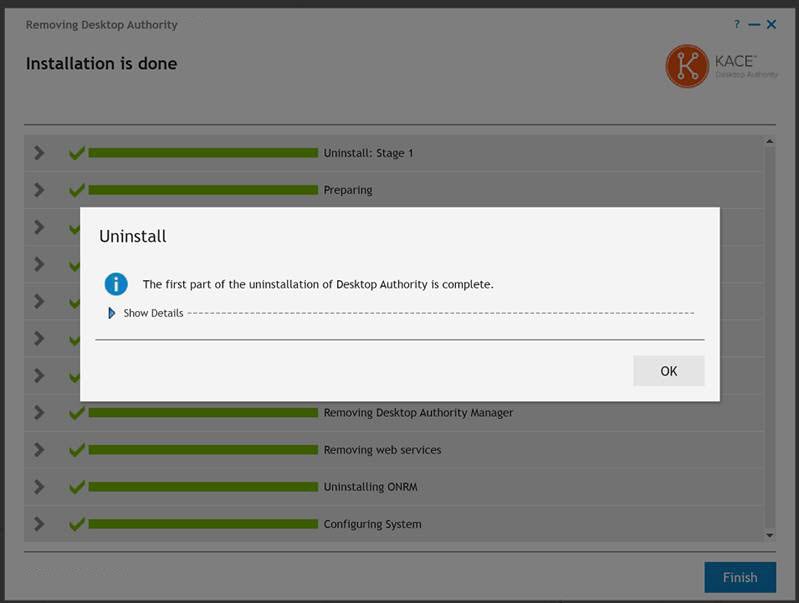
Click OK and then Finish to complete the first part of the uninstallation.