Alerts
Use the Alerts tab to set up automatic notification of job completion.
Note: Some email programs may prompt for send message confirmation. The job will not complete until confirmation is received.
To setup job notification
- In the New/Edit Job Wizard, select a test under Workload.
- Select the Job Setup tab.
-
Then select the Alerts tab.
-
Select one or more notification types. Review the following for additional information:
Operator E-mail Sends an email containing a file attachment summarizing the results of a job. Pager E-mail Sends notification of job completion. Net-Send Operator Sends a network message to a specific machine notifying that a job is complete.
Performance Counters
Performance counters keep track of statistics during test execution. By default the following performance counters are recorded when a job executes, even though they do not display in the Performance Counter tab for a connection or job.
- AVG_TIME
- BPS
- DEADLOCKS
- TOTAL_ERRORS
- MAX_TIME
- RPS
- TOTAL_BYTES
- TOTAL_ROWS
- TPS
- USERLOAD
You can add performance counters to a connection or a job.
To add performance counters to a connection
- In the New Connection dialog when creating a new connection (or the Connection dialog for an existing connection), select the Performance Counters tab.
- To add a new counter, click
.
- Select a computer from the drop-down list.
- To display counters, expand an object node by clicking the node's down-arrow.
- Select one or more counters and click Add.
- When you have finished adding counters, click Close to close the Browse Performance Counters dialog.
- To delete a counter, select the counter and click
.
Global Variables
From the global variable tab, you can add or delete the required variables.
To add a global variable
- Right-click to display the global variable dialog.

- Enter the name and value.

- Click Add.
The new global variable displays.

Replace Child Latencies
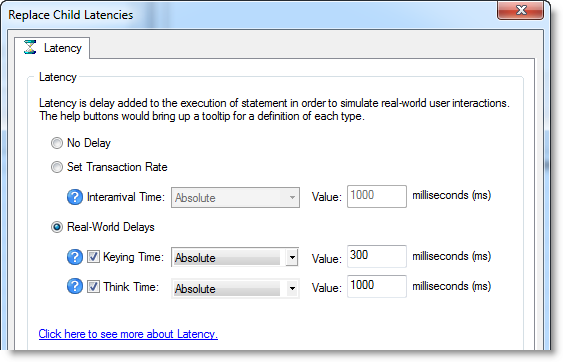
Latency is delay added to the execution of a transaction to control of how fast transactions are submitted to the system-under-test. You can use the Replace child latencies dialog to quickly modify latency for all the direct children of a test. For example, when an Oracle trace file is imported, the latencies are automatically set to replay the transactions at their original rate, but changing these to a set value can replay the transactions in a shorter period of time.
To replace child latencies at the test level
- Use one to the following methods to open the Replace Child Latencies dialog:
-
In the New/Edit Job Wizard, right-click a test and select Replace Child Latencies.
-
In the Jobs View pane, right-click a test and select Replace Child Latencies.
-
-
In the Replace Child Latencies dialog, modify latency options. See About Latency for more information.
- Click OK to save your changes and close the dialog. The changes are applied to all the child transactions of the transaction mix. The changes are not inherited by the grandchild transactions. For example, if the transaction mix contains a user scenario, the latency values for the individual transactions in the user scenario remain unchanged. To change the latency values for transactions in the user scenario, right-click the user scenario and select Replace Child Latencies.
To replace child latencies at the User Scenario level
- In the New/Edit Job wizard, select a transaction mix step and open the Transactions tab.
-
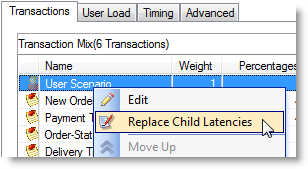
In the Transactions tab, right-click the user scenario and select Replace Child Latencies.
- In the Replace Child Latencies dialog, modify latency options. See About Latency for more information.


