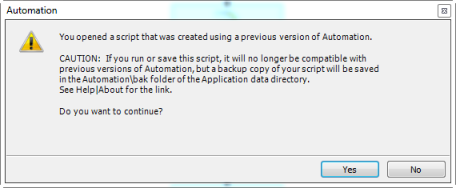
If you upgrade to a newer version of Toad, Automation scripts created in a previous version must be upgraded before you can open them in the newer version. Toad prompts you to automatically upgrade a script when you attempt to open it in a newer version.
In addition, scheduled scripts are scheduled to run using the version of Toad in which they were created. After upgrading Toad, those previously-created, scheduled scripts will not execute in the newer version until you migrate each script's scheduling task. Toad prompts you to migrate scheduling tasks when you initially launch the application after installation.
Note: If Toad was installed with the Prohibit saving passwords option selected, the Automation module is disabled and Toad does not prompt you to migrate scripts.
An automation script is compatible with the version of Toad in which the script was created. If you want to open and/or modify a script using a newer version of Toad, you must upgrade the script. Toad automatically prompts you to upgrade the script the first time you open it in the newer version.
To upgrade an Automation script
Open the script in Toad. Toad prompts you to upgrade the script.

To upgrade the script, select Yes.
Caution: If you upgrade an automation script, it will no longer be compatible with earlier versions of Toad.
If you selected Yes, Toad upgrades your script and saves a backup copy of the original script in the following location:
<application data directory>\Automation\bak\
Be sure the Toad Data Point version used for creating and publishing an automation script to TIC is the same version of Toad Data Point installed on the Toad Intelligence Central Server machine where the created automation script will be run.
Each scheduled Automation script uses a Windows scheduling task. The scheduling task specifies which version of Toad to use by specifying the version's application path. Toad provides you with two easy ways to migrate your scheduled scripts' scheduling tasks when you upgrade Toad. First, Toad prompts you to migrate scheduling tasks upon initial launch of the application after installation. Next, you can migrate scheduling tasks at any time using the Job Manager.
Notes:
To migrate scheduling tasks upon initial launch
To migrate scheduling tasks using the Job Manager
 on the Job Manager toolbar.
Select the scheduled tasks to migrate and click OK.
Note: Only currently-scheduled tasks (enabled or disabled) are listed in the Migrate Scheduled Tasks dialog.
On occasion you may need to modify the application path in a Windows scheduling task. You can do this by manually editing the scheduling task using the following procedure.
To manually edit a scheduling task