Upgrade is supported for the following InTrust versions:
|
|
Note: In-Place Upgrade will not support Server and AeCDSuiteLauncher (Extended Suite). |
This guide describes upgrading extended InTrust deployments.
|
|
Caution:
|
InTrust 11.6 now supports FIPS approved hashing algorithms and encryption algorithms. For a fresh installation, the FIPS compliant algorithms are enabled automatically. For an upgrade from older versions (11.6.0 or below), you need to run InTrustFIPSMigratorTool and adcorgpwd tools available in the SupportTools folder of installation folder and follow steps mentioned in Upgrade Guide. Once FIPS compliant algorithms are enabled, they will remain enabled and cannot be changed back to Non-FIPS algorithms. Please refer the Upgrade Guide for more details.
|
|
Note: Once enabled FIPS compliant algorithms on one Intrust server, make sure to enable it on all other Intrust servers in the Organization. |
Follow the below steps before performing an upgrade (11.6.1 version):
Run the InTrustFIPSMigrator Tool (refer page number 15 of this guide).
Uninstall the all the previous version InTrust components. Verify the folder C:\Program Files (x86)\Common Files\Quest\openssl to see if any binary/leftover files are present. If yes, delete the complete openssl folder as it may interfere with installation process.
Clean-up the temp folder & restart the machine
|
|
important: In case of an upgrade, cleaning up the temp folder and restarting the system is a mandatory step. |
Proceed with installation of 11.6.1 Version as below:
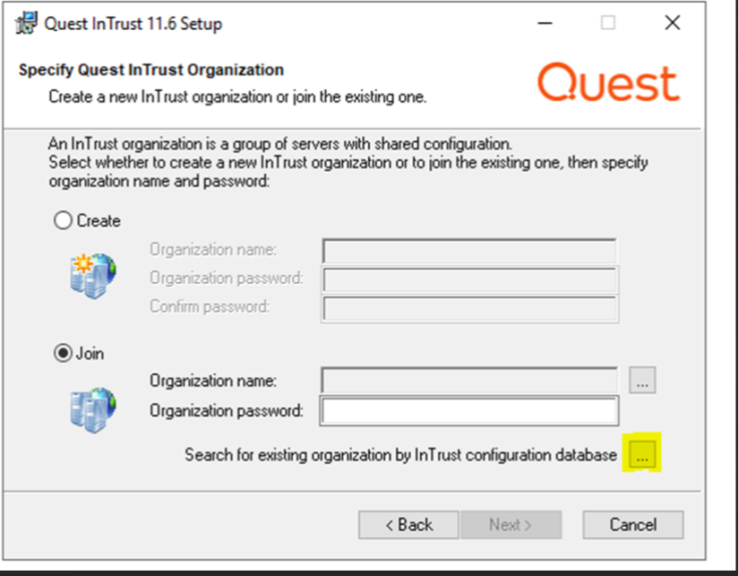
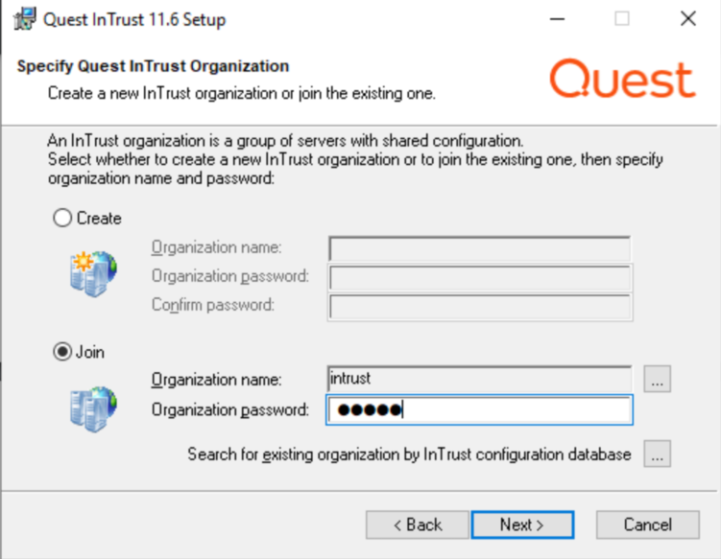
While Installing 11.6.1 full suite or Individual server msi, select “join” and click on “Search for existing organization by InTrust configuration database”
And then select old organization name, respective database for old organization and continue further.


To upgrade your installation of InTrust, you have to upgrade all InTrust servers in your organization using the InTrust suite setup. Below are several recommendations on the steps you should take before starting the upgrade procedure.
|
|
Note: While upgrading InTrust servers, do not perform any other operations (like creating a new repository or modifying an existing one, and creating gathering jobs) that might conflict with existing repositories and the upgrade process |
Note the following specifics, which you should be aware of throughout the upgrade process:
For predefined configuration objects (such as tasks, real-time monitoring rules and data sources), it is InTrust policy not to overwrite their existing versions with the updated versions during upgrade. This approach ensures that your configuration, which is most likely customized, keeps working without changes during and after the upgrade, but it also means that in the usual course of an upgrade, these changed objects do not end up in your InTrust infrastructure.
InTrust releases newer than your current version may include fixed or enhanced versions of out-of-the-box configuration objects. If an InTrust version introduces any significant changes to such objects, the details are described in the Release Notes for that version, in the Enhancements and Resolved Issues topics. Check these topics to find out what exactly has changed in the configuration objects.
If you want the newer versions of such objects and you find that the upgrade has not deployed them, contact Quest Support for recommendations on the procedure that will best suit you.
If you plan to work with InTrust accessing the databases under a dbo account, you can proceed to Step 2.
Otherwise (that is, if your InTrust databases were accessed using a non-dbo account or you plan to use such an account when working with InTrust), take the following steps:
|
|
Caution: These scripts are shipped with the distribution of your new InTrust version in the Scripts\Database Scripts folder. The scripts must be run using an account with the dbo role. |