If your organization uses Okta (www.okta.com) as an Identity provider, these instructions will help you to configure Single Sign On, between Evolve and your IdP.
Create new Application in Okta
Select Create new App
Platform = Web
Sign on Method = SAML2.0
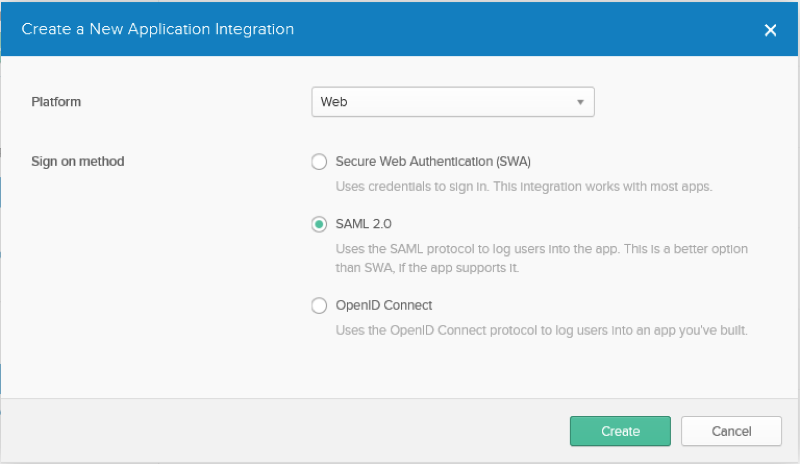
Click create
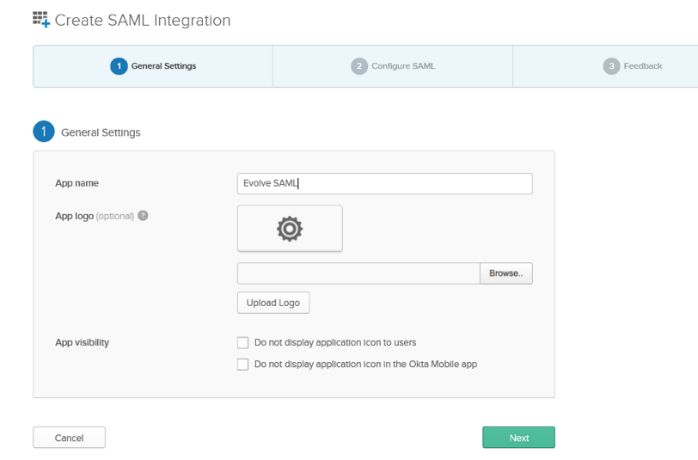
Configure the Application
Provide app name
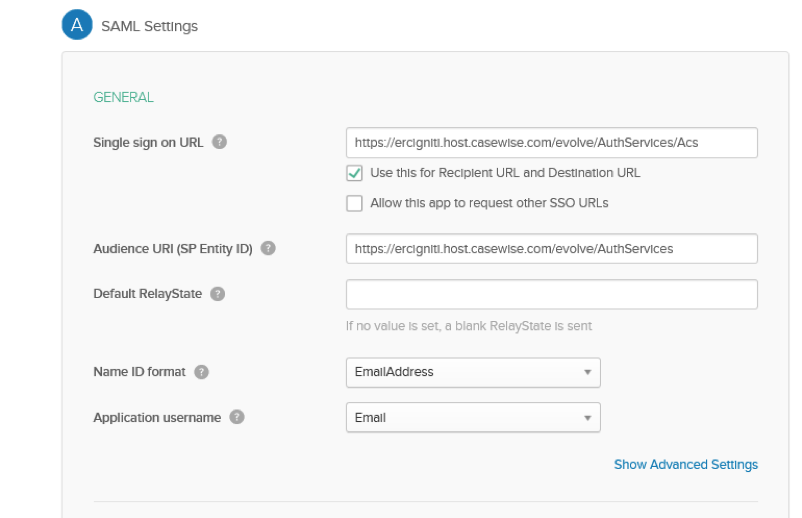
General
Single Sign on URL: Your Evolve URL followed by “/AuthServices/Acs”
Ensure “Use this for Recipient URL and Destination UR” is checked
Audience URI (SP Entity ID): Your Evolve URL followed by “/AuthServices”
Example https://EvolveTest/evolve/AuthServices
Name ID format: EmailAddress
Application username: Email
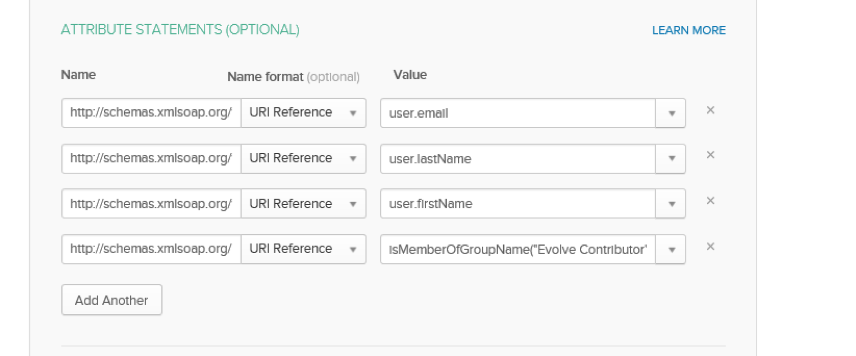
ATTRIBUTE STATEMENTS
Add 4 new Attributes
Name: http://schemas.xmlsoap.org/ws/2005/05/identity/claims/emailaddress
Name Format: URI Reference
Value: user.emailaddress
Name: http://schemas.xmlsoap.org/ws/2005/05/identity/claims/surname
Name Format: URI Reference
Value: user.surname
Name: http://schemas.xmlsoap.org/ws/2005/05/identity/claims/givenname
Name Format: URI Reference
Value: user.givenname
Name: http://schemas.xmlsoap.org/claims/Group
Name Format: URI Reference
Value: isMemberOfGroupName("Evolve Contributor") ? "Evolve Contributor" : (isMemberOfGroupName("Evolve Social") ? "Evolve Social" : "NO")
|
|
IMPORTANT NOTE: in the above value we have specified the name of the Okta Groups in this case the group names are “Evolve Contributor” and “Evolve Social”. These are the Group names you must specify in Evolve Designer. This States that any user that in in the Okta group “Evolve Contributor” will be passed as a Contributor user and any user in the Okta group “Evolve Social” will be passed as a Social user. Finally any user that is not a member of either Okta groups will be passed as “No” and will gain no access. |
|---|
Accept all other defaults
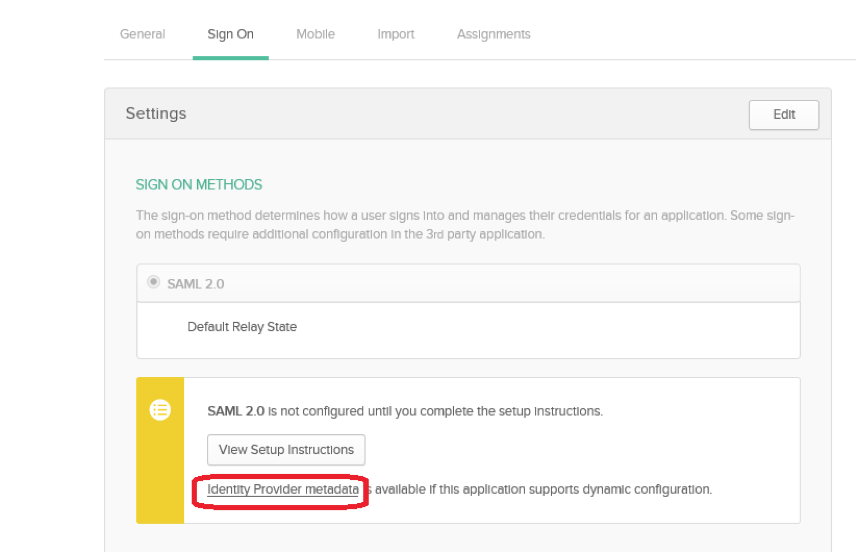
SAML Meta Data
In the Okta Admin Page under “Sign On” you will find the “Identity Provider metadata” link to download you’re the metadata.
Select this link and download it to your evolve server. (Saving the File as a XML file)
Place your metadata file on the Evolve server in the following location “C:\Casewise\Evolve\Site” (ensure it’s a XML file)
Now in Evolve Designer under server Configuration/Authentication tab
Select Authentication mode to “Saml2”
SAML2 Entity id = taken from your Metadata xml File
SAML2 Meta url = “~/NAME OF YOU METADATA FILE.xml”
Evolve’s url = YOUR EVOLVE URL
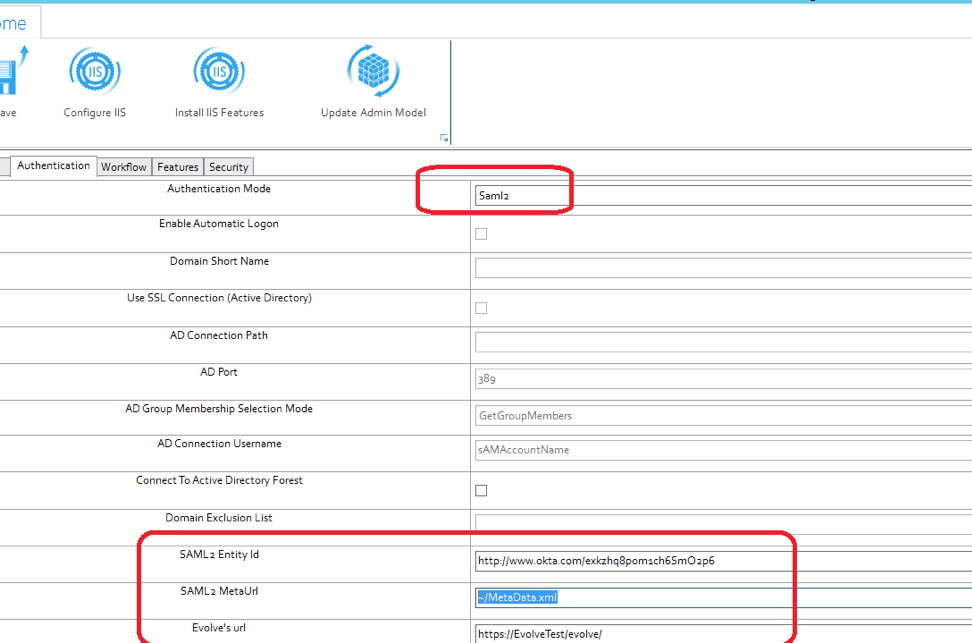
Save and Configure IIS
Publishing Evolve Site
For each model you publish under the deployment of the model you must specify the Okta group names in the “AD Group” Fields this must Match the Okta group Names you have set up along with the Values you specified in the attribute statement
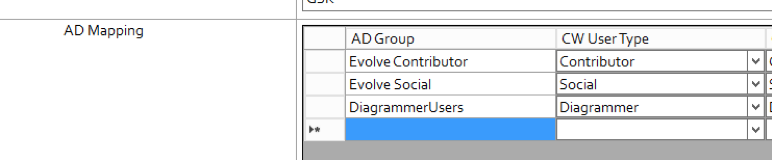
Once set you must save. Then deploy the full site.

