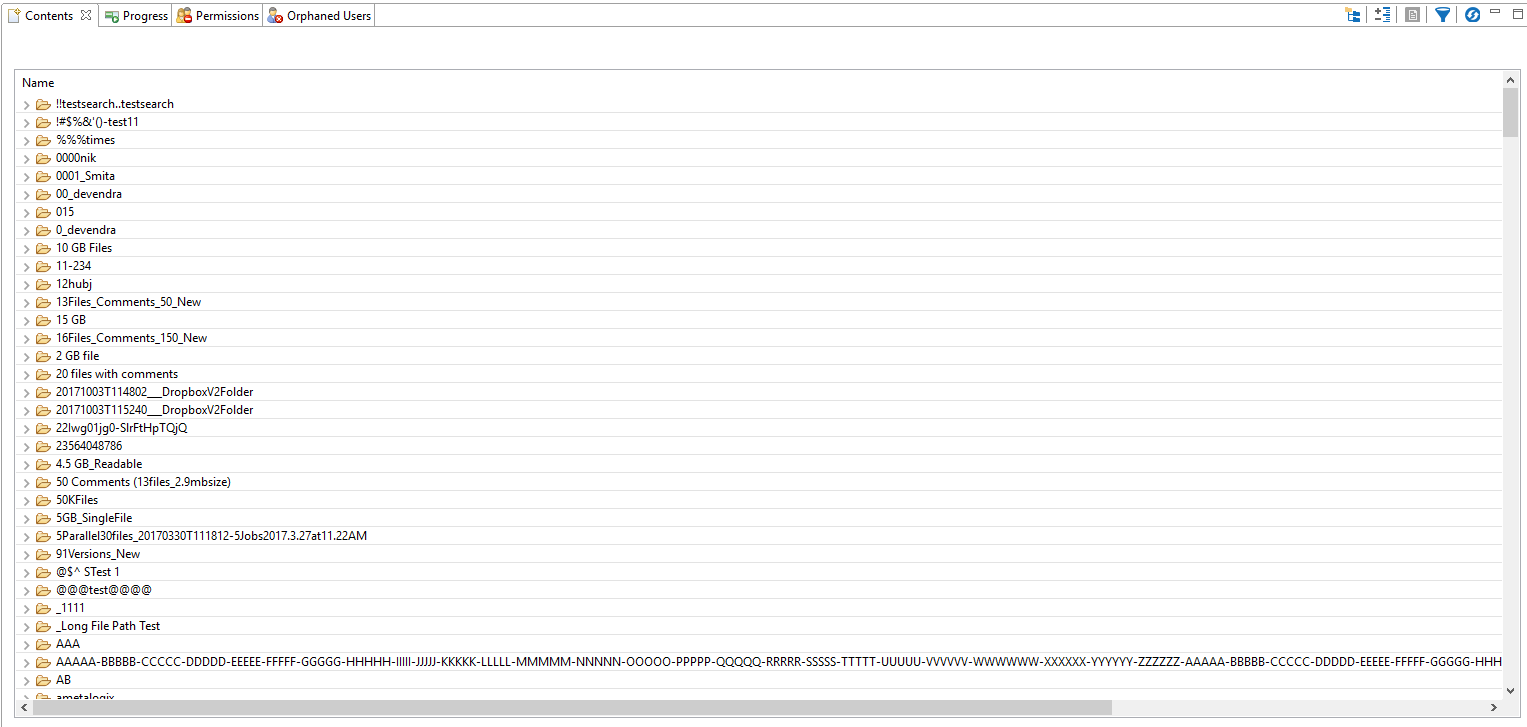
Navigator Pane
The objects displayed in the Navigator area are limited to Farms/Tenants, sites, sub-sites, lists and libraries. Double-clicking on any of the sites, lists or libraries will trigger the application to display the content for that object.
Contents Area
SELECT OBJECTS:
In order to select (or unselect) multiple items located directly below each other, click on the first item and then holding the SHIFT key, click on the last item. All the files located between the two items will be highlighted.
In order to select (or unselect) multiple items which are not located next to each other, hold down the CTRL key and select individual files.
OPERATIONS MENU:
Right-clicking on an item(s) will display a menu of available operations. These may also be available through buttons in the top right corner of the window. The list of available activities will depend on what is selected or not selected in the window.
BREADCRUMB TRAIL:
Located in the top left-hand corner is a breadcrumb pointer to the source of the content shown.
FUNCTION MENU:
Located in the top right-hand corner are a set of buttons that supply specific functionality for the contents of this area.
Reports and Analysis
Metalogix Essentials Security Manager for SharePoint is designed to analyze and manage permissions, groups/users and levels across multiple site collections and farms. It aims to both simplify cumbersome tasks and provide in-depth analysis of existing security rights from the convenience of your desktop and without installing anything on your SharePoint servers.
Metalogix Essentials Security Manager allows you to:
·Browse, add, edit and delete groups, users, permissions and permission levels in a visual hierarchical structure of site collections, sites, lists and individual items
·One easy to use interface for managing multiple server farms, domains and site collections.
·Copy groups, users, permissions and permission levels between server farms, site collections, sites, lists and individual items across user directories (LDAP, ADFS, RDBMS).
·Manage permissions for multiple objects at the same time
·Compare an objects permissions to better manage permission templates and identify where permissions do not match the templates
·Analyze a users or groups permissions for any site, list or item
·Analyze which users or groups have permissions for a specific object
·Discover and resolve potential security problems in multi-server farm environments such as sites with no permissions, deleted users with granted permissions, broken chain of permission inheritance, etc
·Transfer roles between users addressing issues such as employee turnover and new hires
·And much more
Permission Differences
Permission Differences is a real-time comparison between the selected object's permissions and those of it's (inherited) parent. This report is generated to highlight what is truly "unique" with the permissions compared to those above. The "parent" may be defined as the object immediately above this one or if that object inherits its permissions, then it may be a level or more higher (folder, list or site). This extended report is available on any object that has a unique set of permissions, with the exception of root site collections, and can be generated by clicking on the Permission Differences button located in the Permission report toolbar. Once generated, the results can then be exported to an Excel file (*.xlsx) for viewing or sharing outside of Essentials.
Permission Difference report button
Permission Difference report Export to Excel button
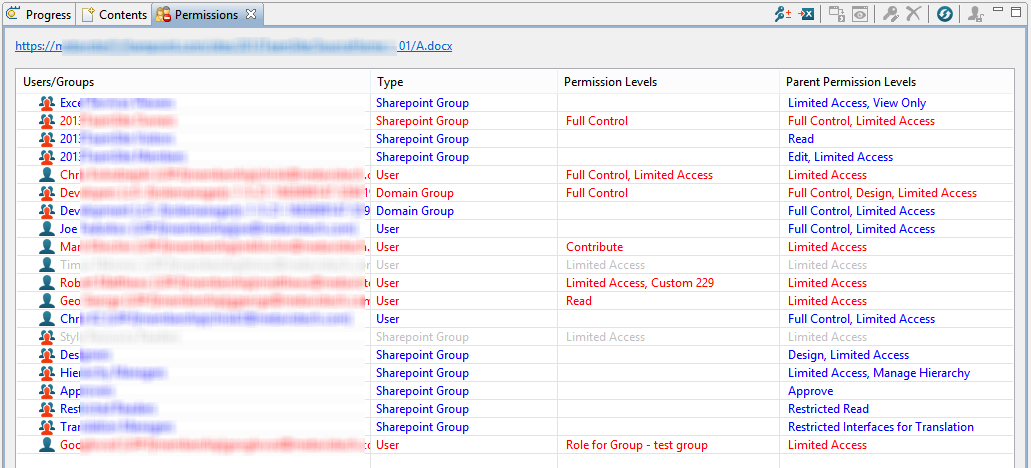
This report adds a forth column "Parent Permission Level" to display the permission level of this user or group to the parent object and highlights these differences using a series of colors for quick identification. The following colors are used:
Gray - no difference in permission level between this object and its parent
Red - the user or group has permissions to both, however the set of permission levels is different
Blue - the user or group only has permission to one of these objects, but not both
The screenshot below is an example of this report displaying a uniquely secured document compared to its parent.
Please note that SharePoint grants "Limited Access" to users and groups in certain scenarios and having Limited Access to an object will be handled as a permission difference; therefore this will be shown in Red as opposed to having no access which is shown in Blue. There are a few examples of this behavior in the screenshot above.


