
Upload Logs Result Codes
This table includes result codes for BT-UploadLogs PowerShell jobs.
| Result Code | Error | Rollback Possible |
|---|---|---|
| 32 | (zip folder) could not be created. | No |
| 64 | Failed to Zip log files on computer. | No |
| 128 | Upload failed to contact the server. Please verify the URL (url) is correct and BITS is enabled. | No |
SQL Repermission Tool
Use the SQL Repermission Tool to update a SQL Server’s Source AD Windows Authentication Group Login permissions and their associated database users for the Target domain to which the user and group objects have been migrated.
Prior to re-permissioning SQL servers, accounts must be migrated and Mapping Files created.
- Download the SQL Repermission.msi file from the Downloads screen.
- Run the installer on a machine that will have access to the SQL Server instance and databases to be re-permissioned.
-
The Welcome screen appears. Click Next to continue.
-
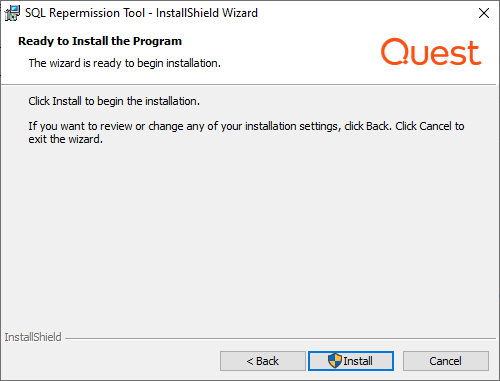
The "Ready to Install the Program" screen appears. Click Install to begin the installation.
-
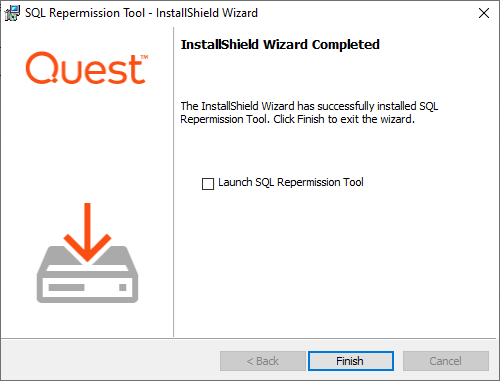
When the installation completes, the "InstallShield Wizard Completed" message appears. Click Finish to close the wizard.
- Copy the map.usr and map.gg files created to the SQL Repermission installation folder, default location is "C:\Program Files\Quest\SQL Repermission".
-
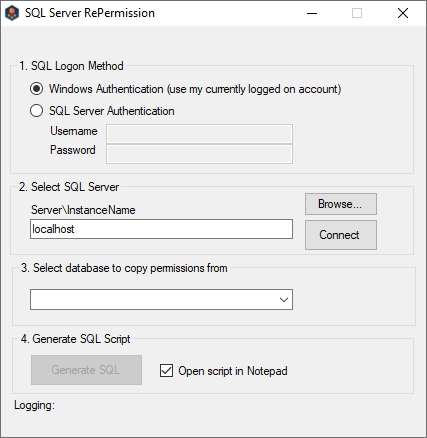
Launch the SQL Repermission tool from the Apps screen or the Start menu.
- Select the SQL Logon Method. If SQL Server Authentication is selected, enter the Username and Password. If Windows Authentication will be used, you must be logged onto the machine with an account that has access to the SQL Server instance and databases to be re-permissioned.
-
Click on Browse to select the SQL Server instance to be re-permissioned.
-
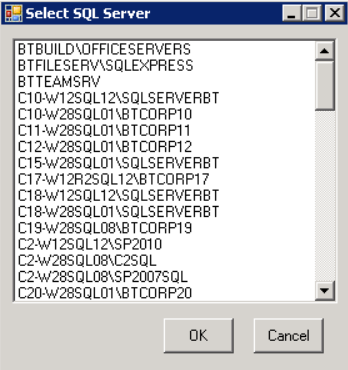
Select the SQL server instance from the list and click on OK.
-
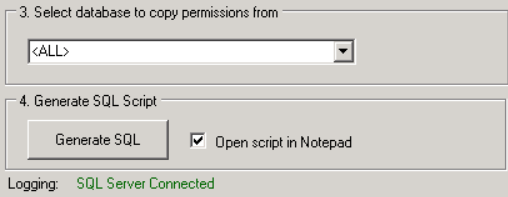
Click on the Connect button. If connection is successful, the Logging message should read “SQL Server Connected” and there should be databases available to pick from in the drop-down list.
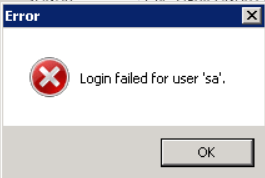
Note: If the login information is incorrect, the following error will be received. The credentials to connect to the SQL server instance should be corrected, and then the Connect should be retried.
-
Once successfully connected to the SQL Server instance, in the drop down select either <ALL> or a specific database that needs to be re-permissioned.
-
Click on the Generate SQL button. If the Open script in Notepad option is left checked, the results will be displayed when completed.
-
The Logging information will display the name of the SQL file created in the directory that the application is located.
Logging: C:\Program Files\Quest\SQL Repermission\SQLPermissions_20150820112148.sql
-
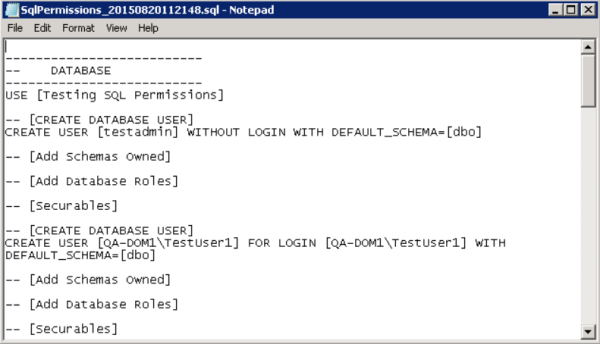
If the option to open the file in Notepad was not checked, navigate to where the file was saved and right-click and choose Open with Notepad.
-
The results of the process can be reviewed prior to actually executing it on the SQL Server instance.
-
When the SQL file has been reviewed, either open the file in SQL Server Management Studio or create a new Query in SQL Server Management Studio and copy/paste the contents of the file into the Query.
-
Execute the Query and the new target credentials will be created.

Domain Rewrite
Domain Rewrite
What is Domain Rewrite?
For mergers and acquisitions, email rewriting allows a company to present a unified email address to the outside world before and after the user’s mailbox has been migrated. Domain Rewrite is a key requirement for any organization utilizing more than one Microsoft 365 tenant to service their end-users.
Domain Rewrite substitutes the From, To, and Cc addresses in the outgoing and incoming emails with the addresses from the target or source tenant depending on the selected domain rewriting scenario. Emails are automatically redirected to the source or target mailbox, and you can specify the users processed by the service. For example, you can turn on the service for only Sales and Marketing team members.
Domain Rewrite will take all the necessary steps to create this coexistence space in the Exchange online environment, including creating and managing all the required connectors, mail flow rules, mail-enabled users, and groups in source and target environments.
Domain Rewrite supports the following scenarios:
Replace senders’ address with the target primary email address.
Replace senders’ address with the source primary email address.

This user guide covers the steps required to configure and enable Domain Rewrite. The Domain Rewrite Quick Start Guide summarizes these steps and addresses some frequently asked questions.
How do I enable domain rewrite service for users using Domain Rewrite?
If the Rewrite With Target Address mode is selected, their outbound email messages will be intercepted by Domain Rewrite. Domain Rewrite will rewrite the message header with the target tenant’s SMTP Accepted Domain information. To the outside world, it looks as if the sender was already using a mailbox in the target tenant.
This scenario commonly applies to users from the Source tenant that need to communicate with external recipients from the name of the Target organization. It usually happens when the mail migration is not yet finished, but you want to use the consistent branding.
Rewrite With Target Address
To enable a user for Rewrite with Target Address, select the matched user, click Email Rewrite from the action menu, and then click Apply Action. Select Rewrite With Target Address mode, select either the Prepare User(s) for Address Rewrite or Enable User(s) for Address Rewrite option, and then click Submit.
The Prepare User(s) for Address Rewrite option sets forwarding but does not enable rewrite. If an account is mailbox-enabled or a cloud-only MEU, forwarding is set on the tenant object. If an account is a hybrid MEU, forwarding is set on the AD object and the changes must replicate to the tenant via Entra Connect. This option is useful for confirming all permissions and access is working prior to enabling rewrite. Performing Prepare ahead of time reduces the steps and duration of enabling address rewrite later.
The Enable User(s) for Address Rewrite option sets forwarding, waits for Microsoft replication, and then begins the process to enable rewrite.
When the Skip Mail Forwarding Configuration option is checked, the rewrite enablement process begins without setting forwarding.
Rewrite With Source Address
If the Rewrite With Source Address mode is selected, any email sent from that user will appear as if they are still coming from the source mailbox’s primary SMTP address. During a merger or acquisition project, this allows a company to hide the migration process from the outside world, until all users have been migrated and the Accepted Domains can be migrated themselves.
This scenario commonly applies to migrated users in the Target tenant that still need to communicate with external recipients from the name of the Source organization. It usually happens when you need to keep the original brand while merging all accounts in the Target Tenant.
To enable a user for Rewrite with Target Address, select the matched user, click Email Rewrite from the action menu, and then click Apply Action. Select the Rewrite With Source Address mode, select either the Prepare User(s) for Address Rewrite or Enable User(s) for Address Rewrite option, and then click Submit.
The Prepare User(s) for Address Rewrite option sets forwarding but does not enable rewrite. If an account is mailbox-enabled or a cloud-only MEU, forwarding is set on the tenant object. If an account is a hybrid MEU, forwarding is set on the AD object and the changes must replicate to the tenant via Entra Connect. This option is useful for confirming all permissions and access is working prior to enabling rewrite. Performing Prepare ahead of time reduces the steps and duration of enabling address rewrite later.
The Enable User(s) for Address Rewrite option sets forwarding, waits for Microsoft replication, and then begins the process to enable rewrite.
When the Skip Mail Forwarding Configuration option is checked, the rewrite enablement process begins without setting forwarding.
Does Domain Rewrite rewrite the address when a “Send-on-Behalf” delegate sends a message for an enabled Domain Rewrite user’s mailbox?
Yes. Domain Rewrite supports rewriting the address of the mailbox owner and/or delegate. If Domain Rewrite is enabled for both, both addresses are rewritten. If Domain Rewrite is enabled for the mailbox owner, then only their address will be rewritten.