Archive Manager for Exchange has a global default retention category that is used if no specific retention category is chosen during archiving. The global default retention category is set in the Tools > Options > Archive settings > Retention tab. For more information see Archive settings.
The Retention assignment setting gives you the opportunity to customize retention categories for different groups or users. It is especially useful in case of Archive Manager Outlook AddIn. For each group or user you can specify the default retention category to use when archiving from Outlook.
To set a default retention category for groups or users:
These steps describe how to override the global default retention category and set a specific default retention category for a group or user mailbox:
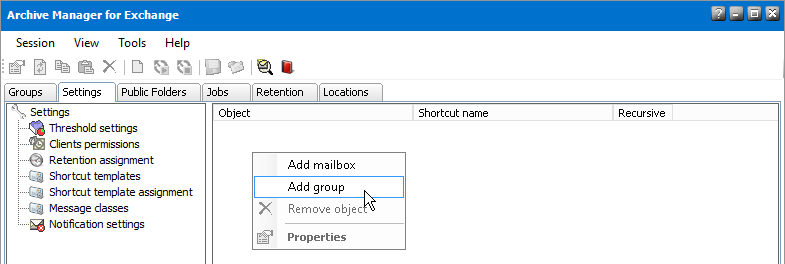
1.In Manager view, click on the Settings tab.
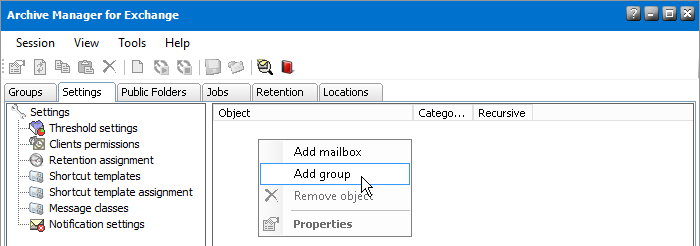
2.Click Retention assignment in the left pane.
3.Right-click inside the right pane and select Add group or Add mailbox from the context menu.
4.In the Select mailbox or group window enter the name of the mailbox or group name in the text box or select from the list. The click OK.
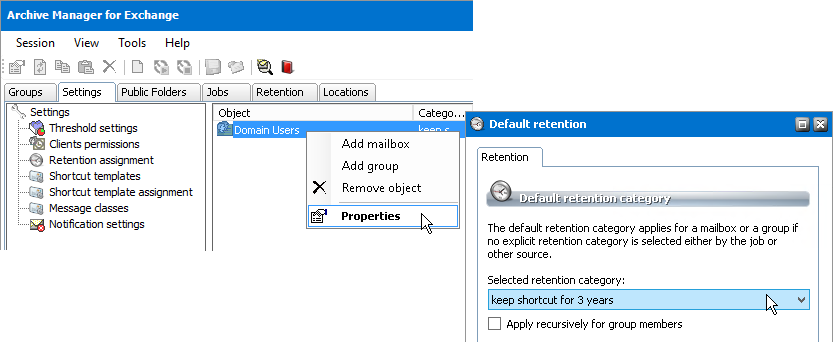
5.The respective mailbox or group will be added onto the Retention tab. Right-click it and select Properties from the context menu.
6.In its Default retention window select the retention category in the dropdown box.
For group: You may want to assign that retention category to subgroups as well. In that case select the Apply recursively for group members checkbox.
7.Click Apply, then OK.
|
|
NOTE: The default retention category assigned to the mailbox has higher priority than the default retention category assigned to the group. |
When an email is archived, usually (depending on settings) a shortcut is left behind in the Microsoft Exchange server. Administrator can configure shortcuts according to the company needs and define how the shortcuts must be displayed in the users Outlook preview.
Shortcut layout and type is specified through shortcut templates. There can be various shortcut templates defined for different users/groups. For instance, Mac users may need specific shortcuts.
This node is reserved for shortcut template creation. Different types of templates can be created. It is possible to configure maximal shortcut size, the format of the message body and create attachment links reachable from the preview pane of Outlook/OWA.
Shortcut templates created on this tab can then be assigned to groups or users on the Shortcut template assignment node, e.i. the user/groups archived emails will have the defined configuration.
|
|
NOTE: One of the shortcut templates can be selected as a global template in the Shortcut tab from Tools/Options/Archive Settings. This template will then be used in cases when no other template settings are applied. As default it is the Default template. |
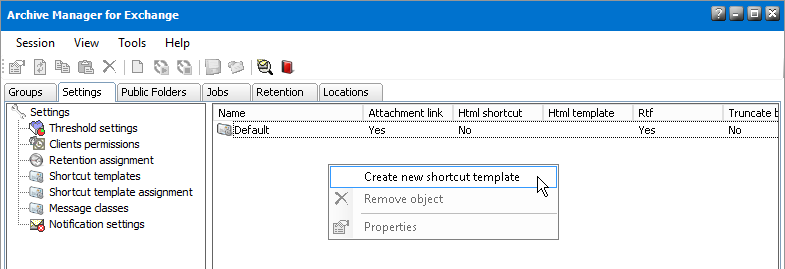
To create a new shortcut template select the Shortcut templates node. Then right-click inside the main pane and from the context menu select Create new shortcut template.
Before specifying settings for shortcuts it is important to think over how the shortcut (archived email) must look like. Consider your priorities and intentions as well as expectations of the users. For instance, if it is vital to keep the shortcuts small, you will want to truncate the body text and not to keep formatted body text. On the other hand, you may want users to be able to read the emails in the preview pane (no body-text truncating) and also to access attachments from the preview pane (e.g. Create links for attachments option) etc. - read further about possible options.
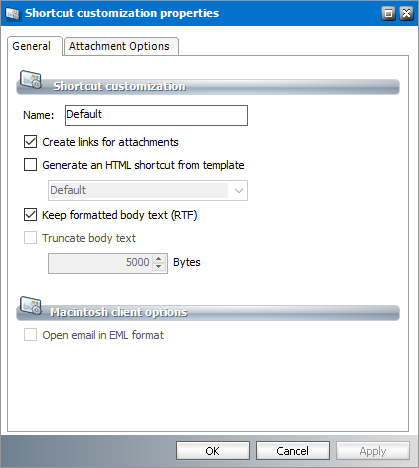
As default (i.e. when no settings are specified on this tab) the Archive Manager archiving processes replace the email on MS Microsoft Exchange with the shortcut that includes the header and the body of the archived email. Therefore, the Outlook Preview is able to display the archived items while the Attachments field is left empty. The attachment is included in the message when the email is retrieved from the archive by double-click.
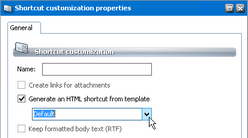
You can set the format of the shortcut as well. Check the Generate an HTML shortcut from template checkbox to create shortcuts in HTML format. The HTML shortcut includes also links for attachments, so there is no must activate Generate an HTML shortcut from template and Create links for attachments at the same time.
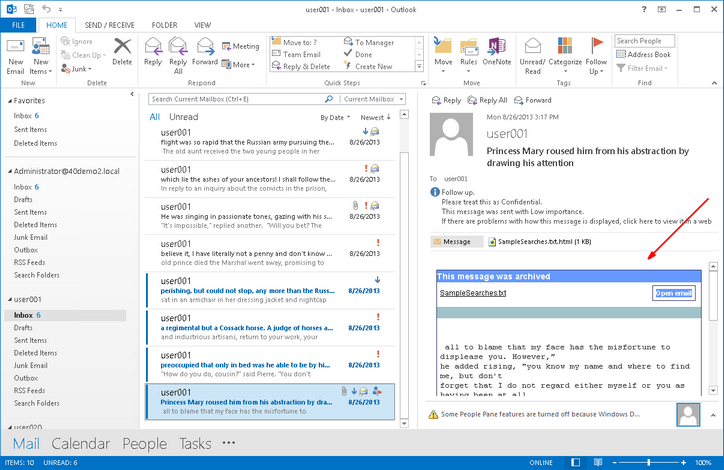
Fig. Default HTML shortcut in the Outlook preview pane
Choose your HTML shortcut template from the dropdown box under the Generate an HTML shortcut from template. If you have not created any template yet, a Default template is available. You can create your own templates to customize the HTML shortcuts design. For more information see How to create a customized HTML shortcut template .
When the message is archived, its header and body are kept in the MS Microsoft Exchange Server as default, no matter what size they are. Only attachments are removed. To allocate a fixed size for every archived email to save more space on the Microsoft Exchange Server, select the Truncate body text checkbox. In the Bytes text field enter the MAXIMAL size of the shortcut left on the MS Microsoft Exchange Server. The message body will be truncated, if it is bigger than the specified size.
|
|
NOTE: Remember that in the Preview pane of Outlook user can see only the shortcut left on the MS Microsoft Exchange Server and the Outlook Find feature can search also only in this shortcut |
If you check the Keep formatted body text (RTF) checkbox, the formatted text of shortcut will not be altered.
If the Keep formatted body text (RTF) is not checked, only the plain text message body will be kept.
|
|
NOTE: The Keep formatted body text (RTF) and the Truncate body text options are mutually exclusive. So are Keep formatted body text (RTF) and Generate an HTML shortcut from template. After changing settings on this tab, you may want to apply them not only to new shortcuts which will be created from now on, but also to shortcuts which were created previously. To do so, you have to run the Repair shortcut command on a group, mailbox or folder where these new settings must apply to previously created shortcuts. |
The settings under Entourage options apply for Entourage users as well as other email clients (e.g. mobile clients). Check the Open email in EML format so that users will be able to open archived emails from the preview pane.
Attachments
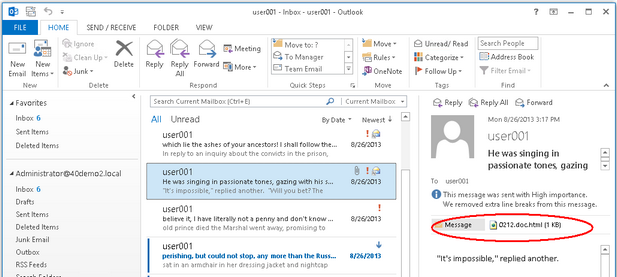
To make the attachment accessible from the Preview pane, check either the Create links for attachments or Generate an HTML shortcut from template checkbox and configure links creating on the Attachment Options tab as described further. The HTML link available in the Outlook/OWA Preview will be created. It will bear the name of the attachment with an .html extension as shown below.
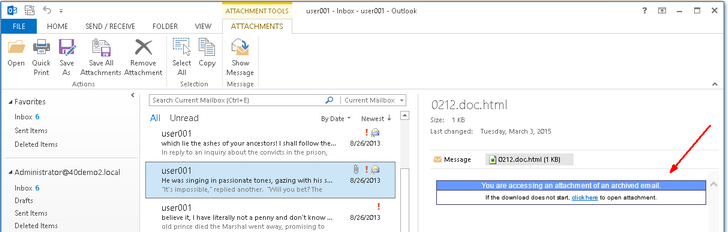
When clicked, the following info panel may be displayed. Click the link to download the attachment from the Archive Manager server.
If you plan to use attachment links in shortcuts you must configure the settings on the next tab (Attachment Options tab).
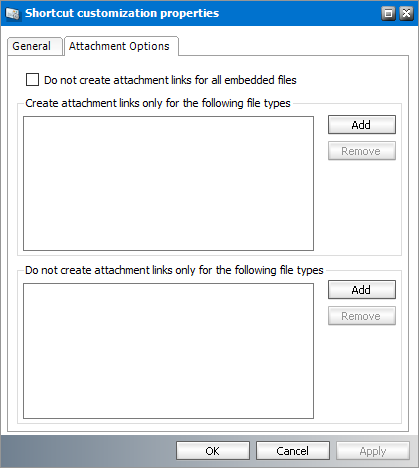
The settings are as follows:
·Do not create attachment links for all embedded files - Links will not be created on the shortcut for embedded files.
·Create attachment links only for the following file types: Click the Add button to add any file types to display its link on the shortcut.
·Do not create attachment links only for the following file types: Click the Add button to exclude file types from being displayed as links on the shortcut
|
|
NOTE: The Create links for attachments option must be selected in the General tab. You can use only one of the two options: Create attachment links only for the following file types or Do not create attachment links only for the following file types. If you use either one, the other option will be deactivated. |
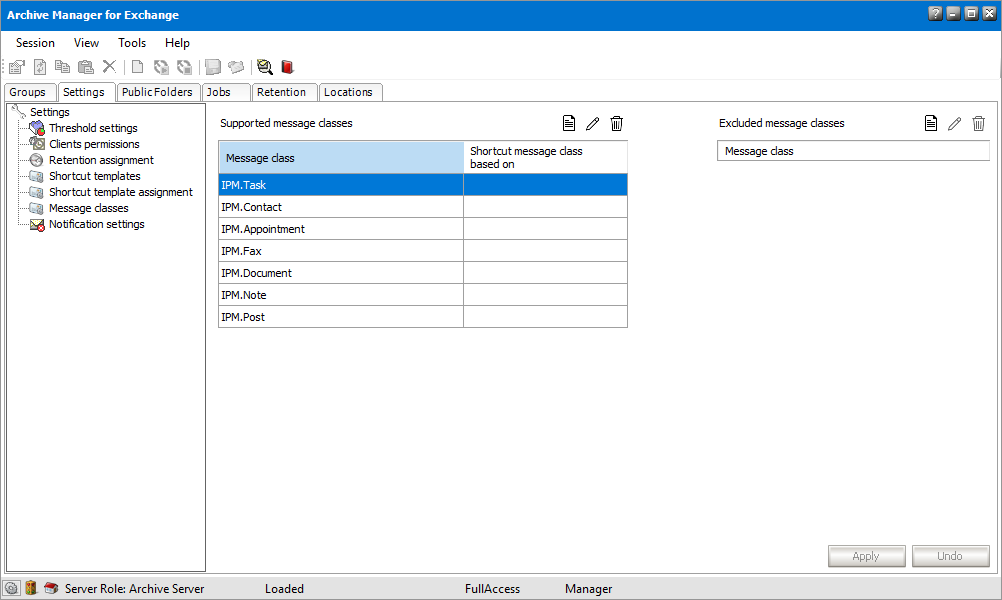
Supported message classes
Microsoft Exchange stores emails and other objects in its database. We are referring to these objects as items. Each item has its own message class, which defines the type of the item: message, post, appointment, etc. Since the handling of these items is different, different shortcuts are created for each item type. By default only some message classes are archived (IPM.Note, IPM.Post, IPM.Document etc.). Additional item types to be archived can be defined on this tab.
|
Message Class |
Description |
|
IPM.Note |
message |
|
IPM.Post |
message posted to a folder |
|
IPM.Fax |
a fax message |
|
IPM.Document |
a file added to the folder (the base class never appears, it always contains the file type, e.g. IPM.Note.Document.Word.8) |
|
IPM.Appointment |
calendar item; a recurring calendar item |
|
IPM.Task |
an Outlook task |
|
IPM.Contact |
an Outlook contact |
|
IPM.Activity |
an Outlook journal message |
|
IPM.StickyNote |
an Outlook sticky note |
|
REPORT.IPM.Schedule.Meeting.Request |
a meeting request |
For a complete list of message classes, see http://msdn.microsoft.com/en-us/library/aa204771.aspx
The following message classes and its subclasses are supported message classes by default, i.e. they can be archived by Archive Manager for Exchange:
·IPM.Note,
·IPM.Post,
·IPM.Document,
·IPM.Fax
·IPM.Appointment
·IPM.Task
·IPM.Contact
|
|
NOTE: Make sure they are not deactivated from the Deactivated message classes list, if you want to archive them. |
To add additional message classes that must be archived:
1.From the View menu click Manager.
2.Click the Settings tab and then click Message classes in the Settings pane.
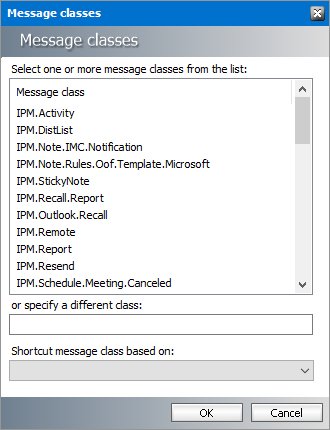
3.In the Supported message classes list click 
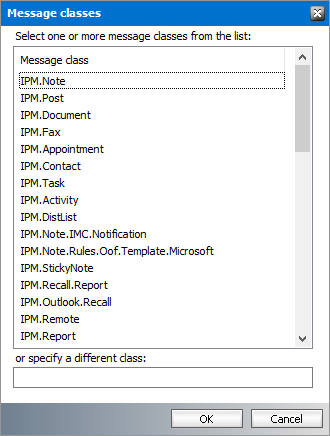
4.Select one or more message classes to archive or manually enter a message class in the text box below the list.
5.Leave the Shortcut message class based on field blank or choose an option from the dropdown list to define which type of shortcut will be created when the selected message class is archived. Specifying a new shortcut message class can have uneffects. To get more information about this option contact Quest Technical Support.
6.Click OK and verify tha the selected message classes are listed in the Supported message classes list.
Archiving calendar items (IPM.Appointment), contact items (IPM.Contact) and task items (IPM.Task) is supported with some limitations. When a shortcut is created from such an item, it becomes read-only and prevents further modification of the item. It can only be modified through the Archive Manager Outlook Addin. If these items change constantly, we recommend archiving these items with the Keep the original email or Delay shortcut creation options described in the Retention tab topic. Recurring appointments and tasks are not archived.
If you plan to archive appointments and tasks, you must deactivate archiving appointments or tasks which are unfinished.
To deactivate unfinished appointments and tasks:
1.Open Tools > Options > Archive settings > Advanced tab
2.Select Deactivate not finished appointment and task archivation option.
Excluded message classes
Message classes listed here will not be archived.
|
|
NOTE: If a message class is present in the Supported message classes list as well as on the Excluded message classes list, it will not be archived. |
To add message classes to the excluded message classes list:
1.From the View menu click Manager.
2.Click the Settings tab and then click Message classes in the Settings pane.
3.In the Excluded message classes list click
4.Select one or more message classes to archive or manually enter a message class in the text box below the list.
5.Click OK and verify that the selected message classes are listed in the Excluded message classes list.
When an email is archived, usually (depending on settings) a shortcut is left behind in the Microsoft Exchange server. Administrator can configure shortcuts according to the company needs and define how the shortcuts must be displayed in the users Outlook preview.
Shortcut layout and type is specified through shortcut templates. These templates are created under Shortcut templates node (see the previous section).
Different users/groups can have different shortcut templates assigned on this tab.
|
|
NOTE: Default shortcut template can be specified also on the Tools/Options/Archive settings/Shortcut tab. If the default shortcut template is changed here it is changed also on that tab and vice versa. |
To assign a group/user specific shortcut template:
1.Right-click inside the main pain. From the context menu select Add group/Add mailbox.
2.In the pop-up dialog select the group/user in the listview and click OK.
3.The group/user will be displayed in the listview with default settings specified. To adjust the settings right-click the group/user and from the context menu select Properties.
4.In the pop-up window select the template from the downdrop box. If applicable you can check the Apply recursively for group members checkbox to apply it also for possible subgroups. Then click Apply.