To recreate the EFI partition:
- Boot into a Windows setup disk and access the command prompt.
- From here please launch the disk and partition management utility.
- We will have to list the hard drives available in the system.
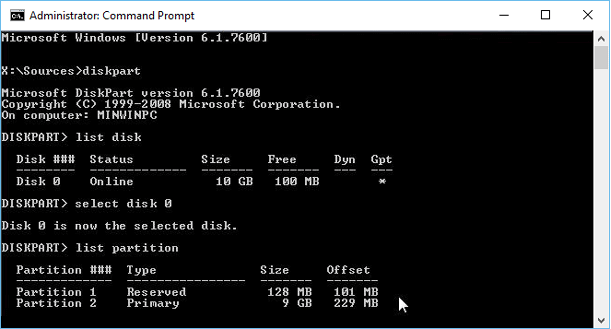
- In our example we will only see one disk listed. You might see something different depending on your setup. Now we can select the disk.
- Now we will take a look at list of partitions you have available.
- In our example there should be only 3 partitions in the system.
- MSR Partition
- Windows System partition
- EFI is absent and we should have it there.
We have to recreate the EFI and MSR partition to resolve the issue of booting the machine.
- We can list partition first.
- Now we will select partition that we are going to delete.
- Now we can delete the partition:
- "delete partition override"
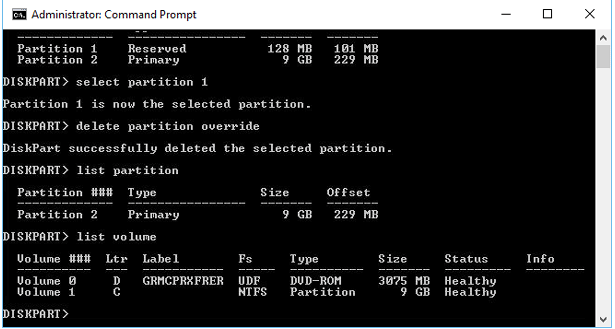
- At this point we do not have either MSR or EFI partition and will go through a process of recreating it. In order to do so, please perform the following commands in diskpart utility.
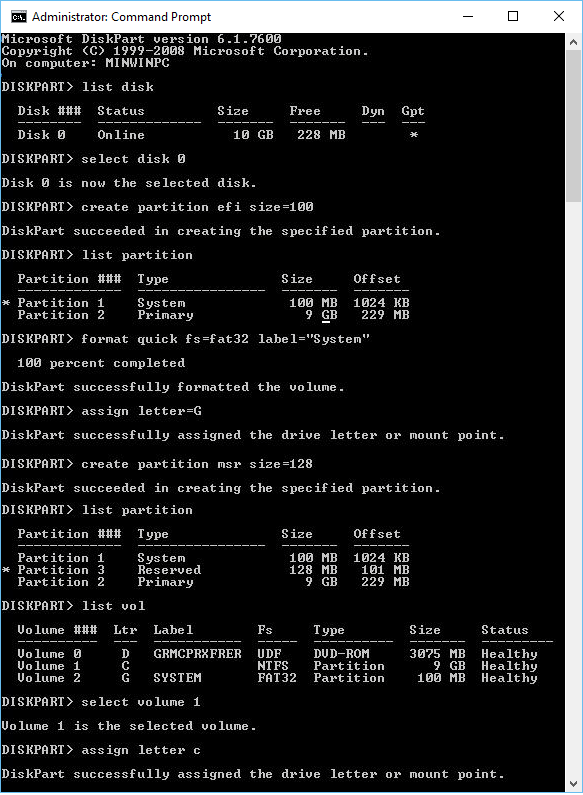
- "select disk 0"
- "create partition efi size=100"
- Please make sure that the 100 Mb partition is selected (asterisk) and proceed with these.
- "list partition"
- "select partition 1"
- "format quick fs=fat32 label="System""
- "assign letter=G"
- "create partition msr size="128""
- "list partition"
- "list vol"
- In our example, partition containing Windows already has C: assigned, but in case not you can follow the steps above to assign it.
- Now we will prepare the partition and copy files of the EFI environment from the directory where Windows is installed.
- "mkdir G:\EFI\Microsoft\Boot"
- "xcopy /s C:\Windows\Boot\EFI\*.* G:\EFI\Microsoft\Boot"
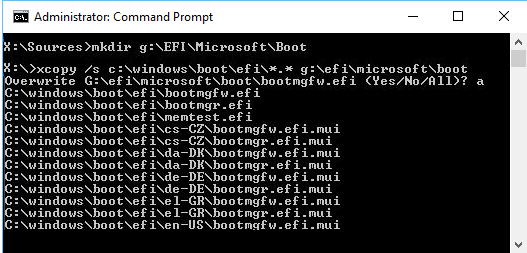
- We will now create the configuration of the Windows 10 boot loader:
- "g:"
- "cd EFI\Microsoft\Boot"
- "bcdedit /createstore BCD"
- "bcdedit /store BCD /create {bootmgr} /d “Windows Boot Manager"
- "bcdedit /store BCD /create /d “Windows 20XX” /application osloader”"
- Last command will return GUID of the created record, and in the following command this GUID should be inserted instead of [your_guid].
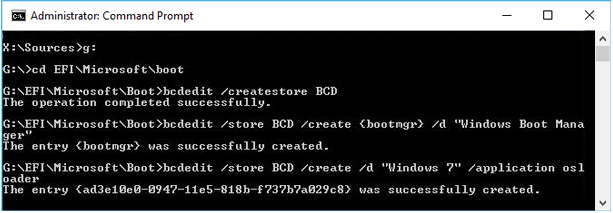
- Creating GUID.
- "bcdedit /store BCD /set {bootmgr} default {your_guid}”
- "bcdedit /store BCD /set {bootmgr} path \EFI\Microsoft\Boot\bootmgfw.efi"
- "bcdedit /store BCD /set {bootmgr} displayorder {default}"
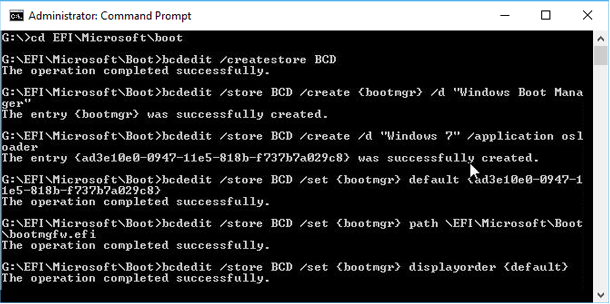
- Creating BCD.
- "bcdedit /store BCD /set {default} device partition=c:”
- "bcdedit /store BCD /set {default} osdevice partition=c:”
- "bcdedit /store BCD /set {default} path \Windows\System32\winload.efi”
- "bcdedit /store BCD /set {default} systemroot \Windows”
- "exit"

- Once all this is done you can eject the Windows .iso file and restart the machine. This should resolve the boot issue now.
If the VM still fails to boot you may need to add a new boot item into the menu by selecting the file “EFI\Microsoft\Boot\bootmgfw.efi” in the EFI partition.
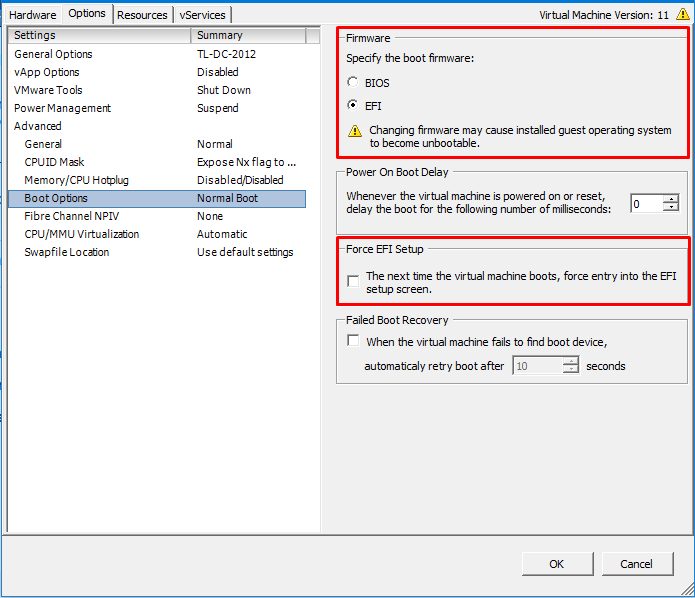
To force the VM to the EFI setup check the following box.
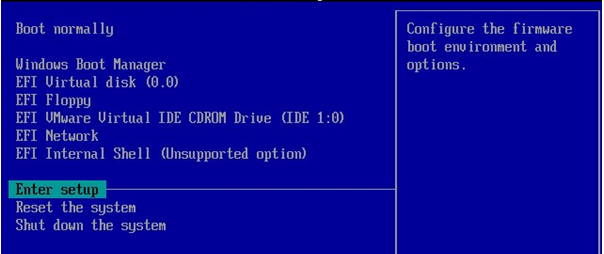
Once you have accessed the EFI setup you can configure the boot options

Enter setup
Add boot option

Browse to EFI\Microsoft\Boot\bootmgfw.efi
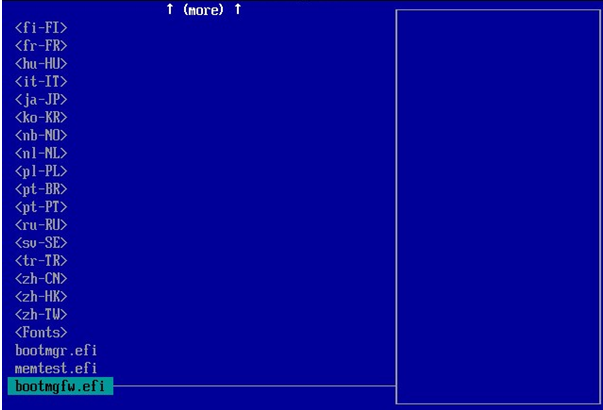
Apply and reboot. VM should now be booting correctly.


