Archive, Record and Hold Priority
Content may meet all or some conditions that would move it from its original endpoint to a second endpoint. When the content is analyzed by the Content Queue Migration job, the priority of which endpoint to select will be as follows:
1.Holds
2.Records
3.Archiving
oHolds will always take precedence.
oPutting an item in Hold will move the BLOB from a Records or Archiving endpoint when Content Queue Migrator is run.
oMarking an item as a Record will move a BLOB from an Archiving endpoint, but will not move it from a Hold endpoint.
oAn item marked as a Record, or in Hold, will not be migrated to an Archiving endpoint even if it meets archiving conditions.
For example, if a file is uploaded and migrated to the main profile endpoint, then meets archiving conditions, it will go to the archiving endpoint. If the item is then declared as a record, it will move to the records management endpoint when Content Queue Migrator is run. If the item is then put in Hold, it will be moved to the holds management endpoint.
Conversely, if a file is uploaded and moved to the main profile endpoint, but then put in hold, it will move to the holds management endpoint. If the file meets archiving conditions or is declared a record, it will not be moved to the archiving or records management endpoints, respectively.
Copying a Profile
A quick way to create profiles is to use the copy feature. This takes a snapshot of a profile, and except for the scope, copies all the configuration information into a new profile. This can save time in
·selecting endpoints,
·configuring timer jobs,
·setting up archiving, backup, and records management,
·and other configuration steps.
It is more comprehensive than relying on the Default Settings, and will likely be more customized to reflect settings already widely used for other parts of the SharePoint farm.
1.At the bottom of the profile page is a Copy button to copy the setup of an existing profile. Click Copy.
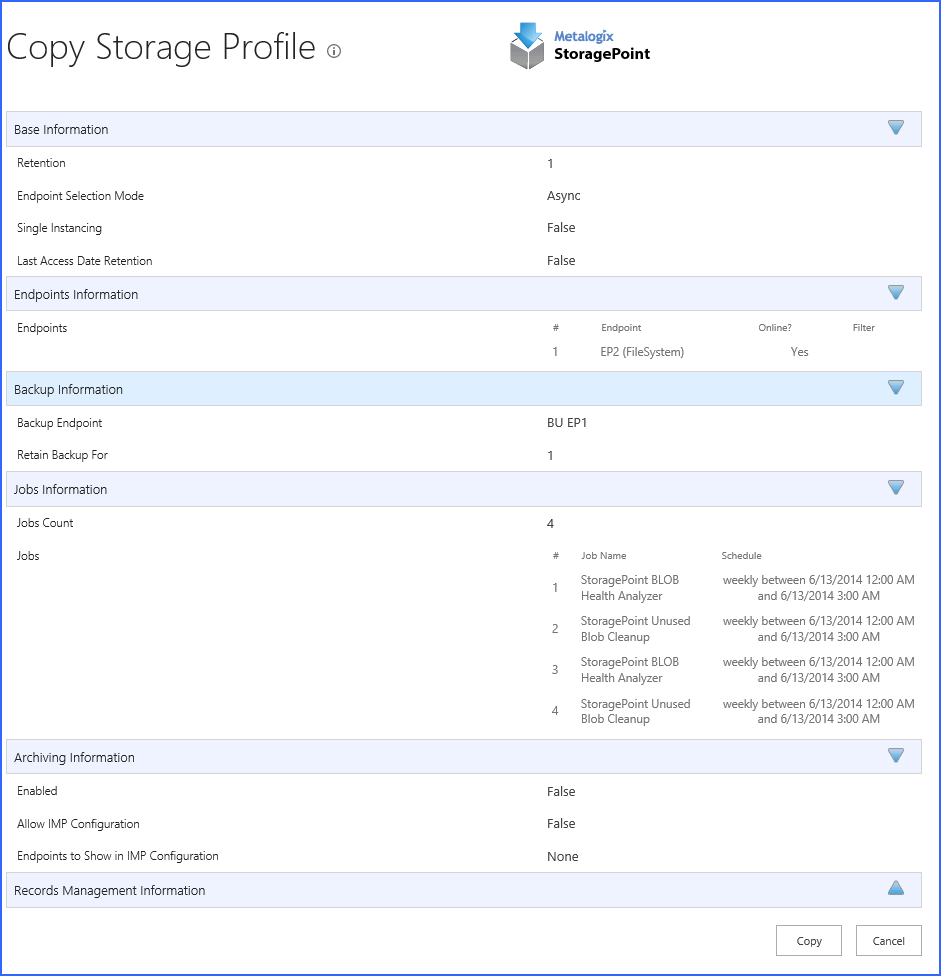
2.A summary will be displayed of the profile configuration. Click Copy to make a copy of this configuration.
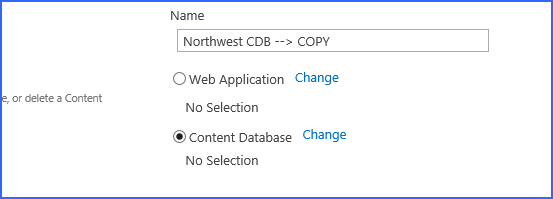
3.A new profile screen opens, and the Name indicates that it is a copy. Update the name, select the scope of this new profile, which has been cleared, and make any other changes to the profile before saving.
Items to make special note of:
·The Start folder of the endpoint, especially if this reflects the profiles name.
·Any filters for asynchronous profiles. Make sure they still apply to the content of the new scope. Metadata and hierarchical filters are not copied.
·Librarian endpoints are not copied.
·Anything that used a hierarchical scope (filtering, archiving) needs to be corrected.
·A profile reboot may be needed after saving to enable the links on the SharePoint content within the scope of the new profile. To do this, open the profile, disable externalization, save the profile, open and enable externalization on the profile, and save.
Delete an Existing Storage Profile
While safeguards are in place to prevent externalized content from becoming irretrievable, deleting a storage profiles is still an operation that should be carefully planned and completed.
|
|
NOTE: Deleting the profile will automatically schedule a Bulk Recall and an Unused BLOB Cleanup job for the profile. |
|
|
NOTE: Deleting a profile with a librarian configuration is not possible. A warning will be displayed to delete the Librarian configuration first. Perform a Bulk Recall job for the profile, BEFORE deleting the librarian configuration. This will prevent errors when the bulk recall is performed at the time of profile deletion. |
Delete Versus Disable
If there was a File Share Librarian configuration that was associated with the profile, the content on that endpoint is also pulled into the content database by the bulk recall job when the profile is deleted. In this case, just change the Externalize Content BLOBS to No, instead of deleting the profile. This will leave the librarian file share intact.
It is strongly recommended that an Unused BLOB Cleanup Timer Job be run so that there is no confusion as to why there may be some BLOBs remaining after the Recall Job is performed. Once the Storage Profile is gone, there is no access to the Unused BLOB Cleanup Timer Job.
1.Click the name of the storage profile to open it.
2.Click Delete at the bottom of the page.
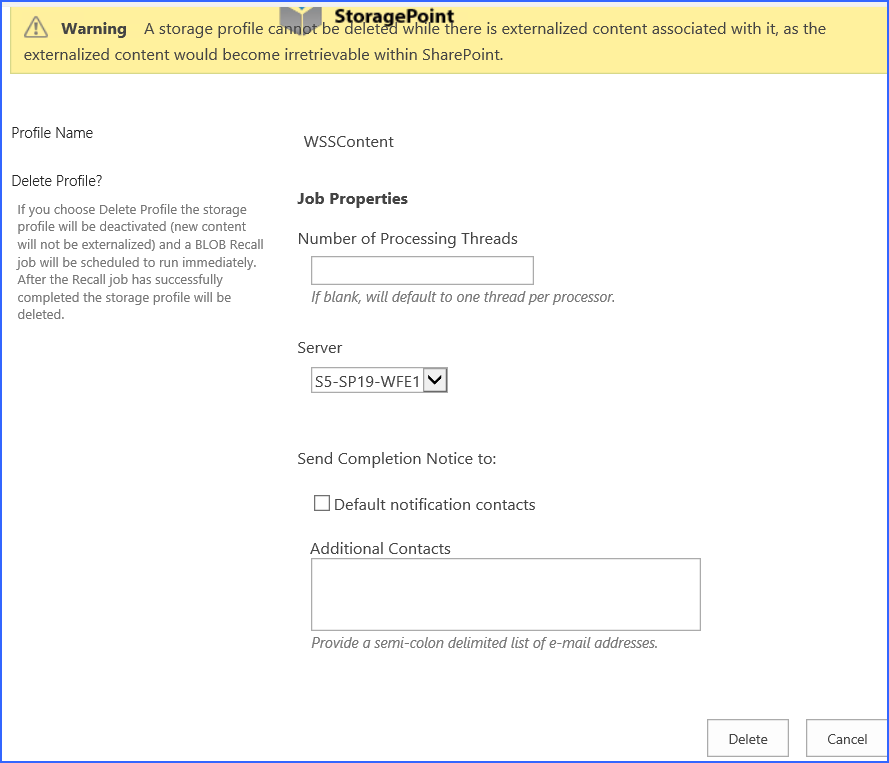
3.A deletion confirmation page is displayed.
4.Select the server on which to run the delete job.
5.Check the Default Notification Contacts checkbox, or enter other email addresses that should receive the completion notice.
6.Click Delete to continue with the deletion process or Cancel to return to the previous page.
A Recall job will be scheduled for the storage profile. Upon successful completion of that job the storage profile will be deleted. Until then, the storage profile will be in a deleting state and will not be editable. Additional timer jobs will also be unavailable for running or scheduling.


