Tchater maintenant avec le support
Tchattez avec un ingénieur du support

KACE Systems Management Appliance 14.0 Common Documents - KACE Service Desk Administrator Guide

About the KACE Service Desk Getting started
Configuring the appliance
Requirements and specifications Power-on the appliance and log in to the Administrator Console Access the Command Line Console Tracking configuration changes Configuring System-level and Admin-level General Settings Configure appliance date and time settings Managing user notifications Enable Two-Factor Authentication for all users Verifying port settings, NTP service, and website access Configuring network and security settings Configuring session timeout and auto-refresh settings Configuring locale settings Configuring the default theme Configure data sharing preferences About DIACAP compliance requirements Configuring Mobile Device Access Enable fast switching for organizations and linked appliances Linking Quest KACE appliances Configuring history settings Configuring Content Security Policy
Setting up and using labels to manage groups of items Configuring user accounts, LDAP authentication, and SSO Deploying the KACE Agent to managed devices Using Replication Shares Managing credentials Configuring assets
About the Asset Management component Using the Asset Management Dashboard About managing assets Adding and customizing Asset Types and maintaining asset information Managing Software assets Managing physical and logical assets Maintaining and using manual asset information Managing locations Managing contracts Managing licenses Managing purchase records
Setting up License Compliance Managing License Compliance Setting up Service Desk Configure the Cache Lifetime for Service Desk widgets Creating and managing organizations Importing and exporting appliance resources
Managing inventory
Using the Inventory Dashboard Using Device Discovery Managing device inventory
About managing devices Features available for each device management method About inventory information Tracking changes to inventory settings Managing inventory information Finding and managing devices Registering KACE Agent with the appliance Provisioning the KACE Agent Manually deploying the KACE Agent Using Agentless management Adding devices manually in the Administrator Console or by using the API Forcing inventory updates Managing MIA devices Obtaining Dell warranty information
Managing applications on the Software page Managing Software Catalog inventory
About the Software Catalog Viewing Software Catalog information Adding applications to the Software Catalog Managing License assets for Software Catalog applications Associate Managed Installations with Cataloged Software Using software metering Using Application Control Update or reinstall the Software Catalog
Managing process, startup program, and service inventory Writing custom inventory rules
Deploying packages to managed devices
Distributing software and using Wake-on-LAN Broadcasting alerts to managed devices Running scripts on managed devices Using Task Chains
Patching devices and maintaining security
Using the Security Dashboard About patch management Subscribing to and downloading patches Creating and managing patch schedules Managing patch inventory Managing Windows Feature Updates Managing Dell devices and updates Managing Linux package upgrades Manage quarantined file attachments
Using reports and scheduling notifications Monitoring devices
Getting started with monitoring Working with monitoring profiles Managing monitoring for devices Working with alerts
Using the Service Desk
Configuring Service Desk Using the Service Desk Dashboard Managing Service Desk tickets, processes, and reports
Overview of Service Desk ticket lifecycle Creating tickets from the Administrator Console and User Console Creating and managing tickets by email Viewing tickets and managing comments, work, and attachments Merging tickets Using the ticket escalation process Using Service Desk processes Using Ticket Rules Run Service Desk reports Archiving, restoring, and deleting tickets Managing ticket deletion
Managing Service Desk ticket queues About User Downloads and Knowledge Base articles Customizing Service Desk ticket settings Configuring SMTP email servers
Maintenance and troubleshooting
Maintaining the appliance Troubleshooting the appliance
Appendixes Glossary About us Legal notices

Configure appliance General Settings without the Organization component

Configure appliance General Settings without the Organization component

If the Organization component is not enabled on your appliance, all appliance General Settings are available at the Admin level.

If the Organization component is enabled on your appliance, see Configure Admin-level or organization-specific General Settings.

1.
Go to the Admin-level General Settings page:
a.
Log in to the appliance Administrator Console, https://appliance_hostname/admin.
b.
On the left navigation bar, click Settings, then click ControlPanel.
c.
On the ControlPanel, click Customize General Configurations link under the General Settings section to display the General Settings page.
2.
In the General Options section, provide the following information:

Option

Description

Last updated

Read-only: The date the information was changed and the name of the organization.

Company Name

Enter the name of your company.

Administrator Email

Enter the email address of the appliance administrator. System-related messages, including critical alerts, are sent to this address.

Company Email Suffix

Enter the domain from which your users send email. For example: example.com.

Enable mobile device access

Enable or disable Mobile Device Access to the appliance. Mobile device access enables you to interact with the appliance using the KACE GO app on iOS and Android smart phones and tablets. Administrators can use the app to access Service Desk, inventory, and application deployment features.

See Configuring Mobile Device Access.

Session Timeout

Set the number of inactive hours to allow before closing user sessions and requiring users to log in again. The default is 1. The User Console and Administrator Console have Timeout Session counters to alert users of this time limit. Only periods of inactivity are counted. The counter restarts when the user performs any action that causes the console to interact with the appliance server, such as refreshing a window, saving changes, and changing windows. When the counter reaches the limit, the user is logged out, unsaved changes are lost, and the login screen appears. The Timeout Session counter appears in the upper right of each console.

3.
In the Client Drop File Size Filter section, specify a file size.

Options

Description

Client Drop File Size Filter

A file-size filter for the organization's Client Drop location.

The Client Drop location is a storage area (Samba share) for the organization on the appliance. This storage area is used to upload large files, such as application installers and appliance backup files, to the appliance. Uploading files to the Client Drop location is an alternative to uploading files through the Administrator Console using the default HTTP mechanism, which can result in browser timeouts for large files.

The Client Drop Size filter determines whether files uploaded to the organization's Client Drop location are displayed on the Upload and Associate Client Drop File list on the Software Detail page. For example, if the Client Drop Size filter is set to 1 GB, the Upload and Associate Client Drop File list shows files that are 1 GB in size or larger. Files that are less than 1 GB in size are not displayed on the list.

Application files are moved from the organization's Client Drop location to the appropriate area when the file is selected on the Software Detail page and saved.

Appliance backup files that are placed in the Client Drop location are automatically identified as appliance backup files, and they become available for selection on the Backup Settings page within five minutes. See Copy files to the appliance Client Drop location.

4.
In the User Console section, specify customizations for the User Console text:

Option

Description

Title

The heading that appears on the User Console login page. The User Console is the web-based interface that makes applications available to users on a self-service basis. It also enables users to file Service Desk support tickets to request help or report issues. To access the User Console, go to http://<appliance_hostname>/user where <appliance_hostname> is the hostname of your appliance.

Welcome Message

A welcome note or description of the User Console. This text appears below the title on the User Console login page.

5.
In the Acceptable Use Policy section, select policy settings:

Option

Description

Enabled

Enable the appliance to display your policy, and require users to accept the terms of your policy, when they access the Administrator Console, User Console, or Command Line Console, or log in using SSH or FTP.

Title

The heading of the policy to be displayed on the login page of the User Console.

Message

Details of the policy, which are displayed below the Title on the login page. Users must agree to the terms of the policy before they can log in to the User Console.

6.
In the Log Retention section, select the number of days to retain log information. Log entries that are older than the selected number of days are automatically deleted from the log. See Access appliance logs to view Microsoft Exchange Server errors.
7.
In the User Notification Retention section, select the number of days to retain user notification. Any user notifications that are older than the selected number of days are automatically deleted from the Notifications pane. See Configure user notifications.
8.
In the Share With Us section, specify data sharing options.

Option

Description

Share summary usage data...

(Recommended) Share summary information with Quest. This information includes appliance status, uptime, and load averages, as well as the number of devices, Managed Installations, and applications being managed by the appliance. This option is recommended because it provides additional information to Quest Support if you need assistance. In addition, data shared with Quest is used when planning product enhancements.

Share detailed usage data...

(Recommended) Share detailed information with Quest and share anonymous information with ITNinja.com. This information includes Agent and appliance crash reports, user interface usage statistics, and inventory information, such as application titles. Quest uses this information to help improve the Software Catalog, and ITNinja uses anonymous data to identify relevant content on http://www.itninja.com for dynamic feeds to the appliance Administrator Console.

ITNinja.com is a community website where IT professionals can share information and research on a wide variety of systems management and deployment topics. The ITNinja feed is a feature that dynamically displays software deployment tips and other contextual information on relevant pages in the appliance Administrator Console. To enable the ITNinja feed, you need to select Share detailed Usage data.... This setting shares information anonymously with ITNinja. The ITNinja feed is available only if Share Summary Usage Data... is selected, and it is available only on pages related to software deployment, such as the software, Managed Installation, and File Synchronization detail pages. The feed is not available on the Software Catalog detail page.

Clear this option to prevent the appliance from sharing inventory data with the ITNinja community. However, clearing this option does not remove any information that has already been shared. For more information, contact Quest Support.

Share extended patch diagnostics

(Recommended) Share detailed patch diagnostics with Quest.

9.
In the Locale Settings section, specify locale preferences. These preferences determine the formats used for date and time information displayed in the Administrator Console.

Option

Description

Organization Locale

The locale to use for the organization’s Administrator Console and User Console.

Command Line Console Locale

The locale to use in the Command Line Console, which uses the konfig user account.

10.
In the Ignore Client IP Address Settings section, enter the IP address or addresses to ignore. Separate each address with a comma. Ignoring IP addresses is useful when multiple devices could report themselves with the same IP address, such as a proxy address.
11.
In the License Usage Warning Configurations section, select the percentage to use for the warning threshold and critical threshold for software license usage. If you have configured software License assets, threshold information is displayed on the license-related widgets on the Dashboard.
12.
In the Update Reporting User Password section, provide the password of the account required to run reports on the organization. You cannot change the Database Name or the Report Username.
13.
In the Data Retention section, select the options for retaining data on the appliance. You can retain this data for a specified number of months, Forever, or never save it (Disabled).

Option

Description

Retain Device Uptime Data

The amount of uptime data to save for devices. Device uptime data refers to the number of hours of each day that your managed devices are running. You can retain this data for a specified number of months, Forever, or never save it (Disabled).

Retain Metering Data

The number of months that metering data is retained in the appliance database.

Metering data is information about how applications are installed and used on the Windows and Mac devices that you manage. Metering data that is older than the selected number of months is deleted on the first day of every month. See About metering information.

Retain Uncataloged data in the Software Catalog

Whether or not to retain information about Uncataloged applications in the appliance database.

Uncataloged applications are executables that are in the appliance inventory but that do not appear in the Software Catalog, and the appliance retains information about those applications by default. For organizations with a large number of managed devices, however, retaining this data might greatly increase the size of the database. This could increase the time it takes to load pages in the Administrator Console and the time it takes to perform database backups.

Select this check box to retain data for Uncataloged software in the appliance database. Clear the check box to disable data retention.

If data retention for Uncataloged software is disabled:

14.
In the Device Actions section, click Add New Action, the select the scripted actions to enable.

Device Actions are scripted actions that can be performed on managed devices. There are several pre-programmed actions available. To add your own action, select Custom Action in the Action menu, then enter the command in the Command Line text box.

The following variables are available for device actions:

KACE_HOST_IP

KACE_HOST_NAME

KACE_CUSTOM_INVENTORY_*

When device actions run, the appliance replaces variables with their appropriate values.

For KACE_CUSTOM_INVENTORY_ * replace the asterisk (*) with the name of a software application associated with a custom inventory rule. When the device action runs, the name is replaced with the custom inventory rule value for the device. Enter the software application name in uppercase characters. The allowed characters are: [A-Z0-9.-]."

NOTE: Most actions in the Action drop-down list require you to install additional applications for them to function. For example, using DameWare requires you to install TightVNC on your device as well as on the device you want to access.

This feature is only supported on Windows devices. The Windows device you are running the device action from must have the KACE Agent version 9.0 or later agent installed and connected.

When you initiate device through the agent, the action executable must be placed in your %PATH%. The agent is 32-bit, so on 64-bit Windows devices, use %windir%/System32 as an alias to the %windir%/Wow64 directory. If you need to run a program that's located in the %windir%/System32 directory on a 64-bit Windows system, you must use the %windir%/SysNative virtual directory. You can either add %windir%/SysNative to your %PATH% environment variable or provide a fully-qualified path by prepending %windir%/SysNative to your executable when defining your machine action.

15.
To use custom Administrator Console, User Console, report, and KACE Agent alert logos and background colors, in the Login Screen Options sections, provide the following information.

Option

Description

Admin Console Login Background Color

User Console Login Background Color

You can access the appliance from the following levels:

Administrator Console shows organization-related features.
System Administration Console provides access to appliance-related features.
User Console makes applications available to users on a self-service basis. It also enables users to file Service Desk support tickets to request help or report issues. To access the User Console, go to http://<appliance_hostname>/user where <appliance_hostname> is the host name of your appliance.

When you select an organization in the Administrator Console, you can specify a different background color of the Administrator Console and User Console login screens. Any colors specified on the organization level override system-level settings. For information on how to configure system-level settings, see Configure appliance General Settings with the Organization component enabled.

Click and use the color chooser to specify the color that you want to appear in the background of the login screen. You can select the color using the mouse, or specify the RGB values, as needed. When you close the color chooser, the HTML Color Code field on the right displays the HTML code of the selected color. To undo your selection, click Reset and start over.

Admin Console Logo

User Console Logo

Report Logo

Agent Alert Logo

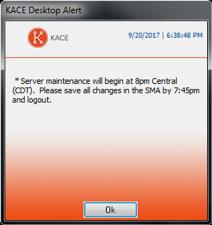
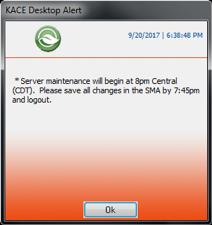
In each applicable section, click Choose File, and specify the graphic file that you want to use as the custom logo in the Administrator Console, User Console, system-generated reports, and in KACE Agent alert that appear on managed devices.

The supported graphic file formats are .bmp, .gif, .jpg, and .png with the exception of KACE Agent alerts that only support .bmp files. Any logos configured on the organization level override system-level settings.

To see default KACE Agent alerts and sample customized versions, refer to the following illustrations. For examples of default and custom logos in the Administrator Console, User Console, and system-level reports, see Configure appliance General Settings with the Organization component enabled.

The image shows an alert dialog with the Dell logo at the top left.

The image shows an alert dialog with a custom logo in place of the Dell logo at the top left.

16.
If you manage Lenovo devices, you can retrieve their warranty information. To do that, in the Manufacturer Warranty API Keys section, provide the Lenovo API keys to obtain the warranty data. Lenovo requires only a key. These values are stored encrypted in the database.
Important:
 
When configured, the device warranty information appears on the Device Details page in the Inventory Information group when you select an Lenovo device. For more information, see Groups and sections of items in device details.

Option

Description

Lenovo

Select this option if you want to obtain warranty information for your managed Lenovo devices. If this option is selected and you clear it, the Lenovo key is removed from the database.

Key

The API key for obtaining warranty information for managed Lenovo devices.

17.
Click Save and Restart Services.

Configure appliance date and time settings

Configure appliance date and time settings

Configure appliance date and time settings in the Settings section of the Administrator Console. If the Organization component is enabled on your appliance, date and time settings are available at the System level.

It is important to keep the appliance date and time settings accurate, because many calculations are based on these settings.

1.
Go to the appliance Control Panel:
If the Organization component is enabled on the appliance, log in to the appliance System Administration Console, https://appliance_hostname/system, or select System in the drop-down list in the top-right corner of the page, then select Settings > Control Panel.
2.
Click any of the following in the Date and Time Settings section:
The Date and Time Settings page appears.

Option

Description

Timezone

Select a timezone in the drop-down list.

Time Setting

Select an option:

Configure Network Time Protocol. Use an Internet time server. If you select this option, provide the server web address in the Server field.
Manually configure date and time. Set the appliance clock manually. Specify the time and date in the drop-down lists. The Hour drop-down list uses a 24-hour clock format.

Server

Use an Internet time server to set the appliance time. Enter the web address of the time server in the text box. For example: time.example.com.

4.
Click Save and Reboot.

Managing user notifications

Managing user notifications

User notifications on the appliance alert you about specific events that require your attention.

These alerts appear on the Notification pane, accessible by clicking the bell icon in the top-right corner of the screen. Administrators can review or edit notification configurations, as needed.

Review user notification alerts

Review user notification alerts

The appliance displays user notification alerts in the Administrator Console when it encounters certain predefined conditions.

The list of triggered user notifications can be accessed using the bell icon, located in the top-right corner of the screen. Use this icon to show or hide the Notification pane, as needed. An orange indicator appears on the bell icon when new notifications are reported. After reviewing all new notifications, the indicator disappears.

Each notification alert that appears in the list is triggered by the related notification configuration. For more details, see Configure user notifications.

The background color of an alert indicates the alert severity: info (blue), warning (yellow), warning (red). This is also determined in the notification configuration.

Notification items always include a time stamp, indicating when the alert occurred. They remain on the list for a configured amount of time, even if the appliance re-boots. You can edit the notification retention period on the General Settings page, as applicable. For more details, see Configure appliance General Settings with the Organization component enabled.

Some notifications include links that you can use to drill down to the object associated with the notification. For example, if you see a license expiration notice, the link in the notification takes you directly to the license instance that is about to expire.

If a notification applies to more than one item, such devices or licenses, in most cases multiple notification alerts appear, one for each applicable item. When the appliance runs a patch schedule against one or more devices, patch completion messages appear in the notification panel when ten percent of each target device is completed, for the first ten devices. For more information about patch schedules, see Configure patch schedules.

Also, when a notification configuration is associated with one or more users, the resulting notification alerts are displayed only to those users in the Administrator Console. When notification configurations are not linked to any users this way, all users with administrative permissions logged into the Administrator Console can see the related notifications. This mechanism does not apply to the System Administration Console which always shows all notifications to all users.

You can delete individual notifications by clicking the Delete icon in the top-right corner of each entry in the list. To clear the list of notifications, click Delete All.

Log in to the appliance Administrator Console, https://appliance_hostname/admin. Or, if Show organization menu in admin header is enabled in the appliance General Settings, select an organization in the drop-down list in the top-right corner of the page next to the login information.
Log in to the appliance System Administration Console, https://appliance_hostname/system, or select System from the drop-down list in the top-right corner of the page.
The Dashboard or System Dashboard page appears.
4.
Optional. You can delete individual notifications, or all of them, as applicable.
Documents connexes

The document was helpful.

Sélectionner une évaluation

I easily found the information I needed.

Sélectionner une évaluation