Adding a Legacy Calendar Collection
To create a new calendar collection for an existing legacy calendar synchronization job, right-click the job in the management tree and click Add Collection on the shortcut menu.
This will start the Add Calendar Collection Wizard that will help you to set up and configure a new collection for the legacy calendar synchronization job. Each step of the wizard is described below.
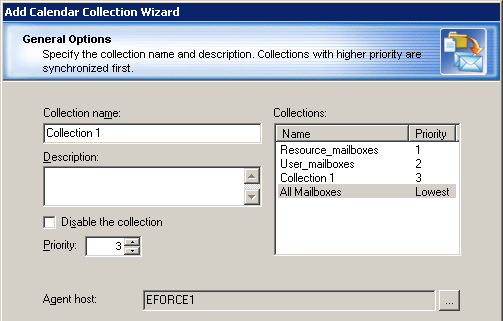
Step 1. General Options
First specify a name for the collection and set its priority. You can optionally provide a text description for the collection.
For load-balancing purposes, you have the option of selecting a specific registered agent host that will work with this collection.
You can also temporarily disable the collection, and it will not be involved in the synchronization process until you enable it.
Step 2. Select Mailbox Database
You can override the target mailbox settings configured for the legacy calendar synchronization job (see Step 2. Select Mailbox Database section of the Setting Up a New Legacy Calendar Synchronization Job topic for details).
|

|
NOTE: Do not change the mailbox database for a collection that is already running. |
Step 3. Workflow
Set the preferred start date for migrating the collection. By default, the option to Start as soon as possible is selected.

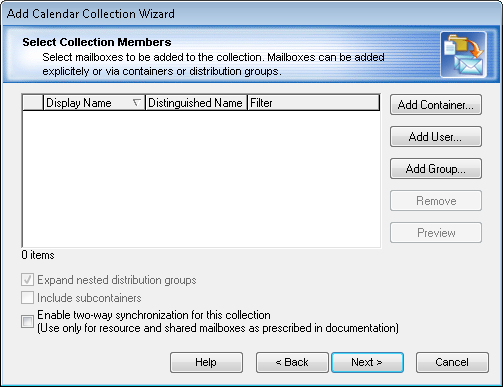
Step 4. Select Collection Members
You can add mailboxes to the collection in the following ways:
- Explicitly add mailboxes to the collection by clicking the Add User button and selecting mailboxes from the list.
- Implicitly add mailboxes located in the containers by clicking the Add Container button and selecting the appropriate container check box. To add the mailboxes from the subcontainers as well, select the Include subcontainers check box. Only mailboxes hosted on the source server are migrated.
You can create and apply a storage filter to either the mailboxes of the server or to the mailboxes of the selected mailbox store using the Storage and Advanced tabs.
- Implicitly add mailboxes listed in the groups. To add the mailboxes listed in the nested groups select the Expand nested distribution groups check box. Only mailboxes hosted on the source server are migrated.
|

|
Caution: For regular calendar synchronization, the Enable two-way synchronization for this collection option should stay cleared. Select it only if your calendar collection contains shared and/or resource mailboxes which will be used by source and target users at the same time during co-existence period. |
|
|
NOTE: Migration Manager for Exchange does not process groups nested in organizational units (OUs). |
To preview the list of mailboxes added to the collection, click the Preview button.
Step 5. Complete the Wizard and Commit Changes
After the new collection is created, the job is marked with an exclamation mark that means that you need to update the Calendar Synchronization Agent’s database. Right-click the job in the management tree and click Commit Changes on the shortcut menu to update the agent’s task list on the remote server.
Changing Calendar Collection Settings
All the options that you specify in the Add Calendar Synchronization Job Wizard and the Add Calendar Collection Wizard are later available in the calendar collection’s Properties dialog box, along with some additional options available only in that dialog. These options are described in the related topics. To view or modify any of a collection’s settings, right-click the collection in the management tree and click Properties on the shortcut menu.
In addition to the options you specify in the Add Calendar Collection Wizard, you can specify the target mailbox store for the mailboxes of the collection. If there will have been no target mailboxes corresponding to the mailboxes of the collection by the time the Calendar Synchronization Agent will start processing these mailboxes, it will create the mailboxes in the mailbox store you specify for the collection.
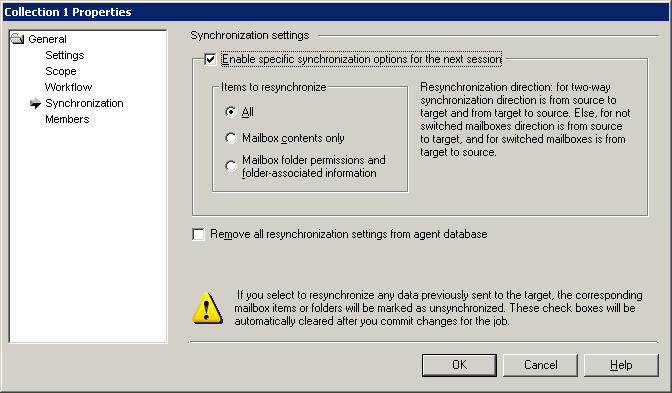
Synchronization
If any errors occurred during the mailbox synchronization and you need to fully or partially re-copy the data that has already been sent to the target server, select the appropriate resynchronization option. You can:
- Resynchronize all mailboxes previously copied to the target server, including mailbox items, mailbox folder permissions, etc.
- Resynchronize mailbox contents only.
- Resynchronize only mailbox folder permissions and folder-associated information.
You can also remove the synchronization settings directly from the agents’ databases if for some reasons the resynchronization settings were not cleared after the resynchronization was performed.
After you modify any of the collection’s settings, the job is marked with an exclamation mark that means that you need to update the mailbox synchronization agents’ databases. Right-click the job in the management tree and click the Commit Changes on the shortcut menu to update the agent’s task lists on the remote servers.
Changing Calendar Synchronization Agent’s Settings
To set the scheduling, logging, and other options for the Calendar Synchronization Agent, right-click the node of the server where the agent is installed under the Calendar Synchronization node, select Properties from the shortcut menu, and select the Agent node in the dialog box that appears.
It is strongly recommended that you set all the options before you start the migration.
General Options
The General page of the Calendar Synchronization Agent allows you to view and modify the following agent’s settings:
- The Calendar Synchronization Agent stores its configuration and statistics in a separate database file. You can specify how frequently the database should be compacted.
- Whether only the messages modified recently should be copied to the target.
|
|
Caution: If you change the value of the Copy message not older than option, the new value is applied only after the agent is restarted. In addition, if the new value is greater than the old value, you need to perform full resynchronization. If the new value is less, then resynchronization is not needed. |
- The account under which the agent will connect to the AD LDS or ADAM server and the AD LDS or ADAM replica. Since the domain migration and directory synchronization data is stored in AD LDS or ADAM partition, the agent needs access to the AD LDS or ADAM server and partition where the directory synchronization database is stored.
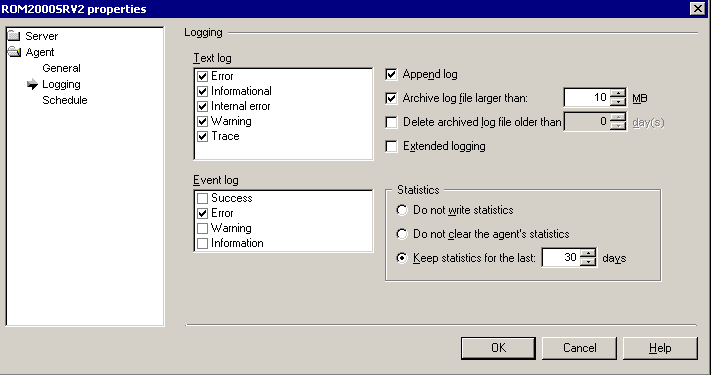
Logging
Every Migration Manager agent saves its logs on the server on which the agent is installed. For each agent you can specify whether the log file will be overwritten or appended during each session, and select which events will be written to the text log and Exchange server application log files.
Scheduling Options
For each server where the Calendar Synchronization Agent is installed, you can define when the agent is allowed to put additional stress on the Exchange servers and on the network. You can specify:
- The hours during which each agent is allowed to run. On the agent’s Schedule page of the Server Properties, click Synchronization Schedule. In the dialog box that appears, select the time frame during which the agent should perform synchronization jobs.
- Whether there should be a sleep period between the agent’s sessions and the duration of that period.
Calendar Synchronization from Target to Source
If some users with mailboxes are created on the target and you need these users to be visible on the source, perform the following steps:
- Add the target Exchange organization as a source Exchange organization in the Migration Manager console.
- Add the source Exchange organization as a target Exchange organization in the Migration Manager console.
- Specify the migration start date and time.
- Create a new calendar collection selecting the target Exchange organization as the source and the source Exchange organization as the target.
- Add the new target users to this collection.
The one-way synchronization is enough for this scenario. For more details about two-way synchronization for calendar items, refer the Adding a Calendar Collection section, Step 3. Select Collection Members of this guide.
