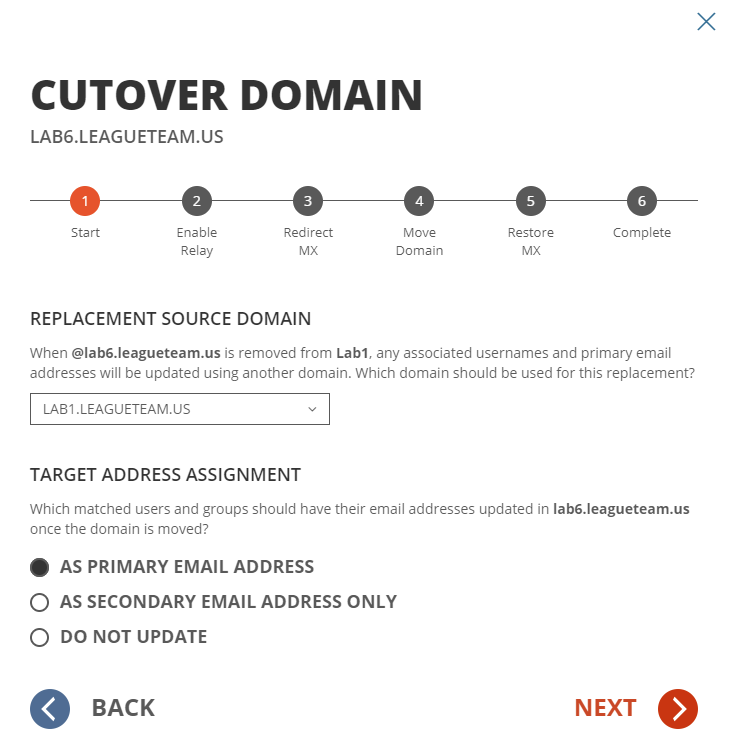
This chapter explains how to move a domain between two Microsoft tenants using On Demand Migration with the following steps:

Steps:
This chapter explains how to move a domain between two Microsoft tenants using On Demand Migration with the following steps:
Steps:
|
|
NOTE Do not install local agents on AD domain controllers in a production environment. |
|
|
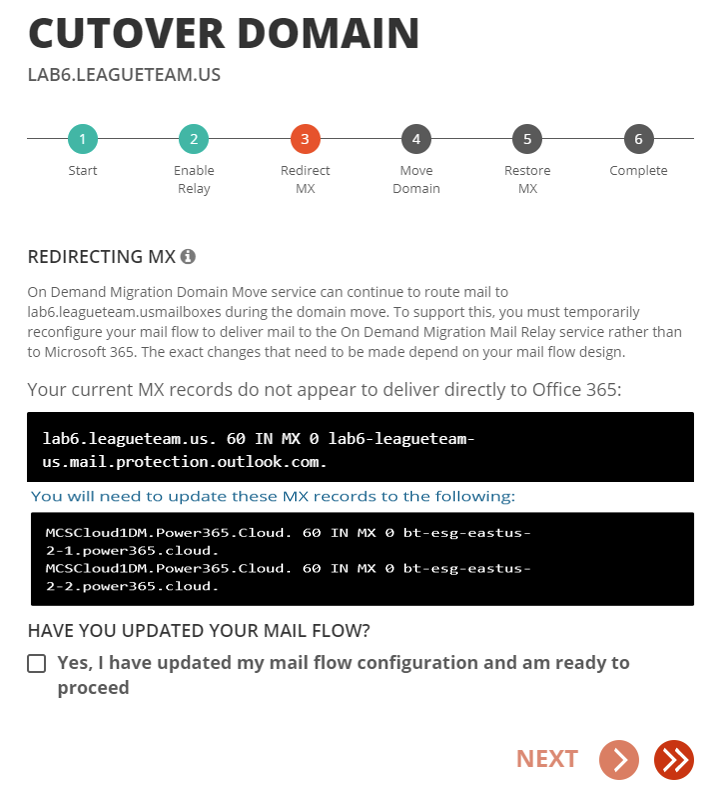
NOTE Once the MX record has been updated, external incoming email messages will be delivered to the Email Relay Service (ERS) first. Once the message is processed by ERS it will be sent to the target tenant for final delivery. |