6.3 Provisioning Rooms and Resources
6.3 Provisioning Rooms and Resources
Refer to the Provisioning View screenshot below and set up the Exchange mailbox databases in the following steps:
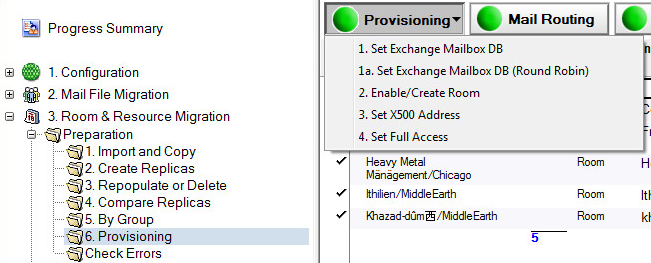
Provisioning View
-
Expand the Preparation | Provisioning view
-
Select the appropriate resource in the Data Pane
-
Click the Set Exchange Mailbox DB button to manually choose a database from a list
-
Select a database and then click OK to continue
-
Select Set Exchange Mailbox DB (Round Robin) to distribute the rooms across all available Exchange mailbox databases
|
|
|

Once complete, the Exchange mailbox database is visible in the Room & Resource Migration view
Select the Enable/Create Room view to enable rooms, set X500 addresses and set full access; the Set X500 Address button only displays if you selected “Yes to separate the set X500 action” on the User Provisioning Settings tab
To match the selected Rooms and Resources:
-
Click Match selected
-
The drop-down menu displays four menu options:
The following table describes each menu option:

|
Option |
Description |
|
Match selected entries using LDAP |
Matches selected Rooms and Resources with their corresponding entries in AD using LDAP |
|
Match Selected users on CAS server |
Matches selected Rooms and Resources with their corresponding entries in AD on the Exchange CAS server |
|
Match Selected entries using PowerShell |
Matches selected Rooms and Resources using PowerShell |
|
Match all entries using PowerShell |
Matches all Rooms and Resources using PowerShell |
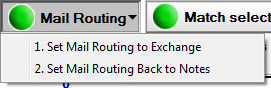
Once the migration is completed, you can update mail routing and update the AD primary and secondary SMTP.
-
Click the Mail Routing button to set mail routing to Exchange or update the AD primary and secondary SMTP; the Set Mail Routing Back to Notes option is for rolling back if needed:
6.4 Migrating Rooms and Resources to .PST
6.4 Migrating Rooms and Resources to .PST
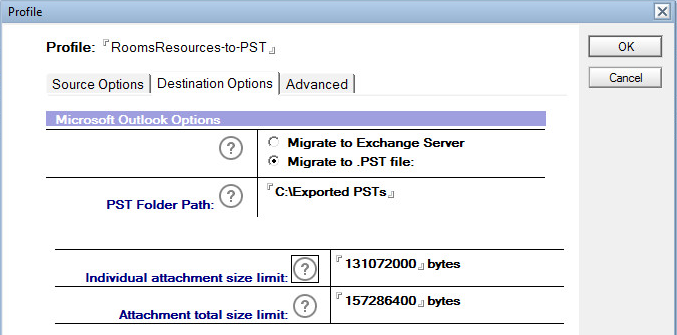
After you have exported Rooms & Resources databases information into the Migrator for Notes, create a migration profile for the rooms and resources to be migrated to a .pst file, and save it.
|
|
Be sure that room mailboxes have been created in Exchange for rooms and/or resources if the migrated .pst data is to be imported. |

-
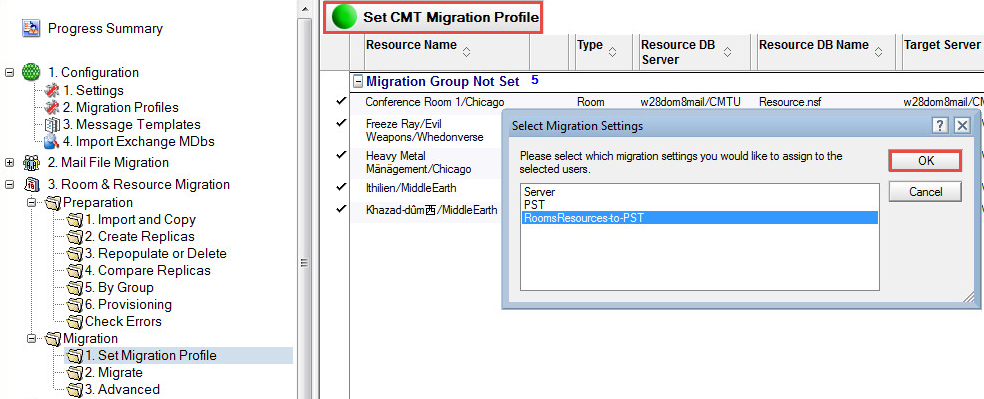
In the Navigation Pane, expand 3. Room & Resource Migration | Migration | 1. Set Migration Profile
-
Select the rooms and resources in the Data Pane and click the Set CMT Migration Profile button
-
Select the migration profile created earlier to migrate rooms and resources to a .pst file, and click OK:
Set CMT Migration Profile
-
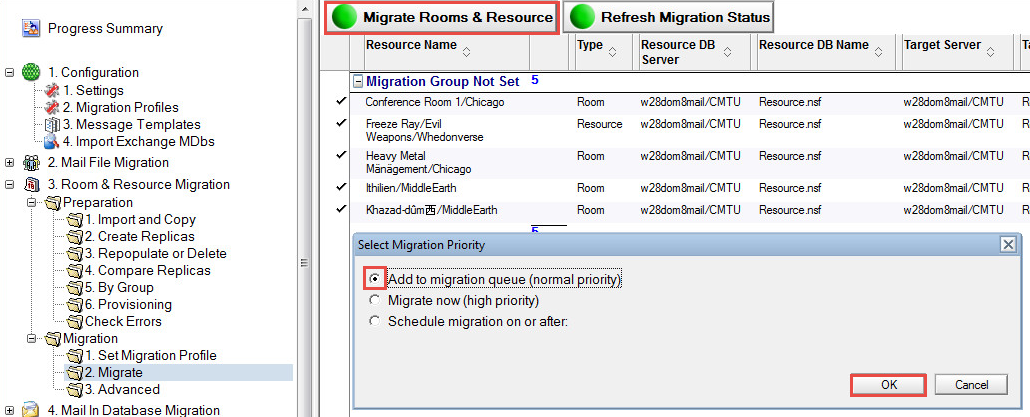
Click Migrate in the Navigation Pane
-
Select the room and resources in the Data Pane and click the Migrate Rooms & Resource button
-
The Add to migration queue option is selected; click OK
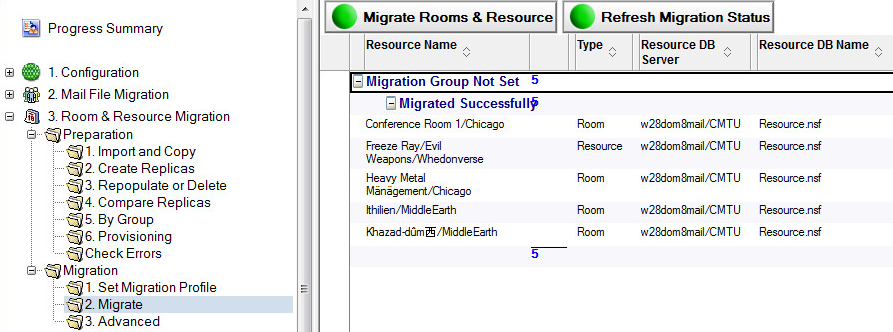
Rooms and resources are migrated successfully to the location specified in the migration profile, for example C:\Exported PSTs folder
-
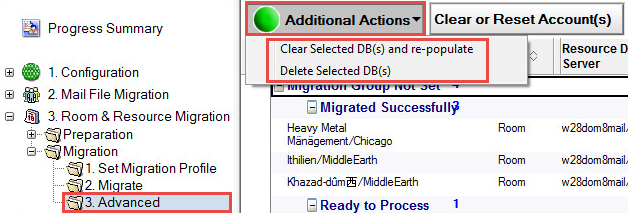
Before migrating, clear or delete any necessary databases; in the Advanced view, select the rooms and resources, click Additional Actions and select the appropriate drop-down menu item:
The following table describes the menu options:
|
Option |
Description |
|
Clear Selected DB(s) and re-populate |
Selected room or resource import database created by Migrator for Notes will be cleared and then repopulated to import the updated information. This does not impact on the source Domino resource application |
|
Delete Selected DB(s) |
Selected room or resource will be deleted from the Migrator for Notes database as well as the temporary database created by Migrator for Notes into which the rooms or resources schedule was exported |
6.5 Migrating Rooms and Resources to Exchange Server
6.5 Migrating Rooms and Resources to Exchange Server
After you have exported Rooms and Resources databases information into Migrator for Notes and matched them with their corresponding AD entries (using the Match selected button in the Import and Copy view), you can prepare the Rooms and Resources for migration.
|
|
Be sure that room mailboxes have been created in Microsoft Exchange for rooms and resources. |
-
Expand the Rooms & Resource Migration | Migration | Set Migration Profile view in the Navigation Pane
-
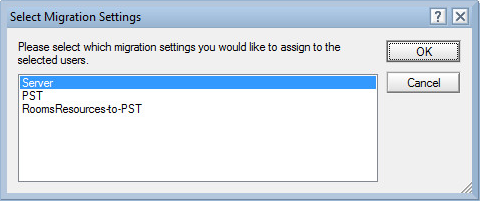
Select rooms and resources in the Data Pane and click the Set CMT Migration Profile button
-
Select the appropriate profile from the dialog box and click OK:
For information on manually setting migration statuses, see Appendix E: Migration Result Statuses.
Section 7. Mail-in Database Migration
7.1 Preparing for Mail-in Database Migration
If you have already added all names to the Translation Table in a previous step, Mail-in databases are already there. If not, add them now by going back to the Email Repliability view. You can match these entries in either view as needed.
A Mail-in database can be migrated either to a .pst file or to the Exchange server.
The first step in the migration of a mail in database is to import it into Migrator for Notes and prepare it for migration.
-
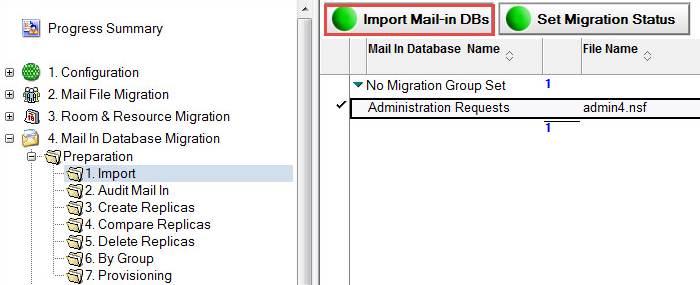
Expand Mail In Database Migration | Preparation | Import in the Navigation Pane:
Import Mail-in DBs button
-
Click the Import Mail-in DBs button
-
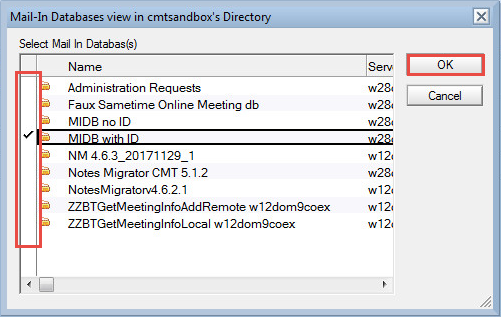
From the Mail-In Databases view in <Domino directory> dialog box, select the mail-in database that you want to migrate and click OK:
-
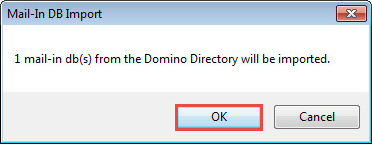
Click OK in the message box:
-
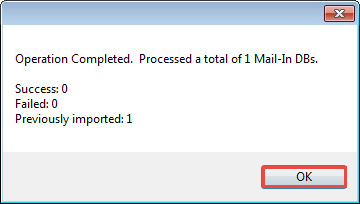
Click OK in the results box:
-
Expand the Migration | Advanced view in the Navigation Pane
-
Select the database in the Data Pane and set its migration status, group and workstation
-
Database appears under its assigned group and displays its current migration status.
-
Expand the Audit Mail In view; verify the database by selecting it and then clicking the Verify Mail-In Database button:
-
Click Yes in the confirmation box:
-
Click OK in the box that appears showing that the database has been audited; the database is audited and its status and group are set.